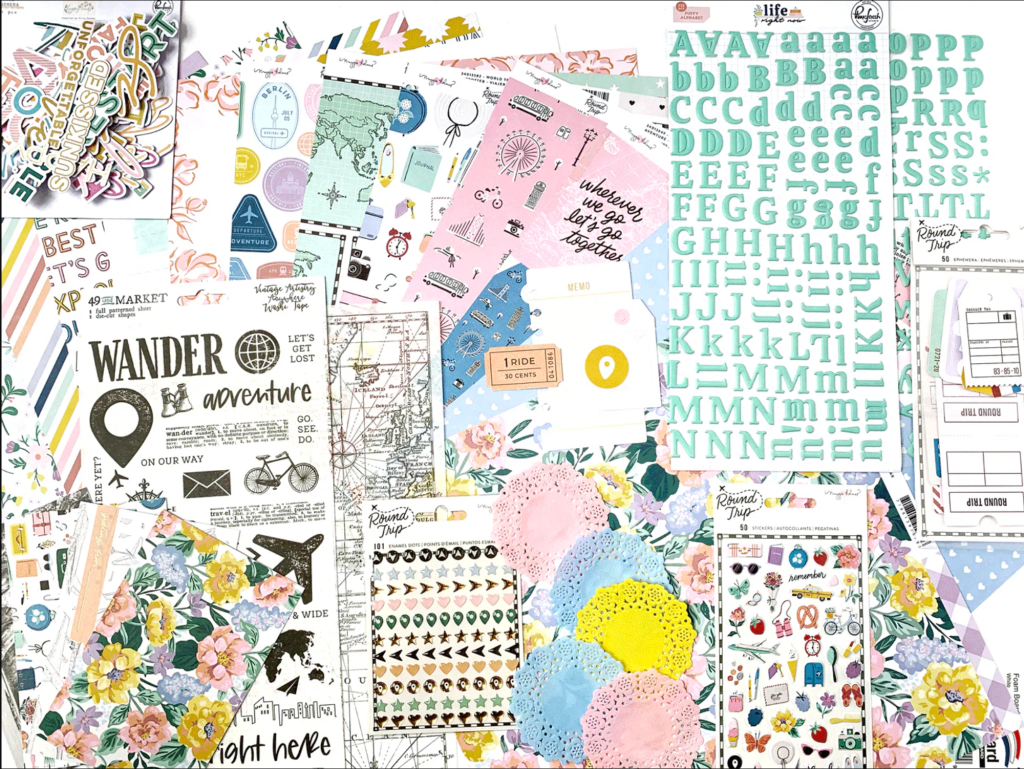
It is challenge time over on the Counterfeit Kit Challenge blog. Our hostess for the month, Tina was inspired by the travel theme of our kits, and the Beatles song “Day Tripper”. First off, let’s take a look at the whole kit from Citrus Twist Kit from March 2020 called Life Crafted, Weekender.
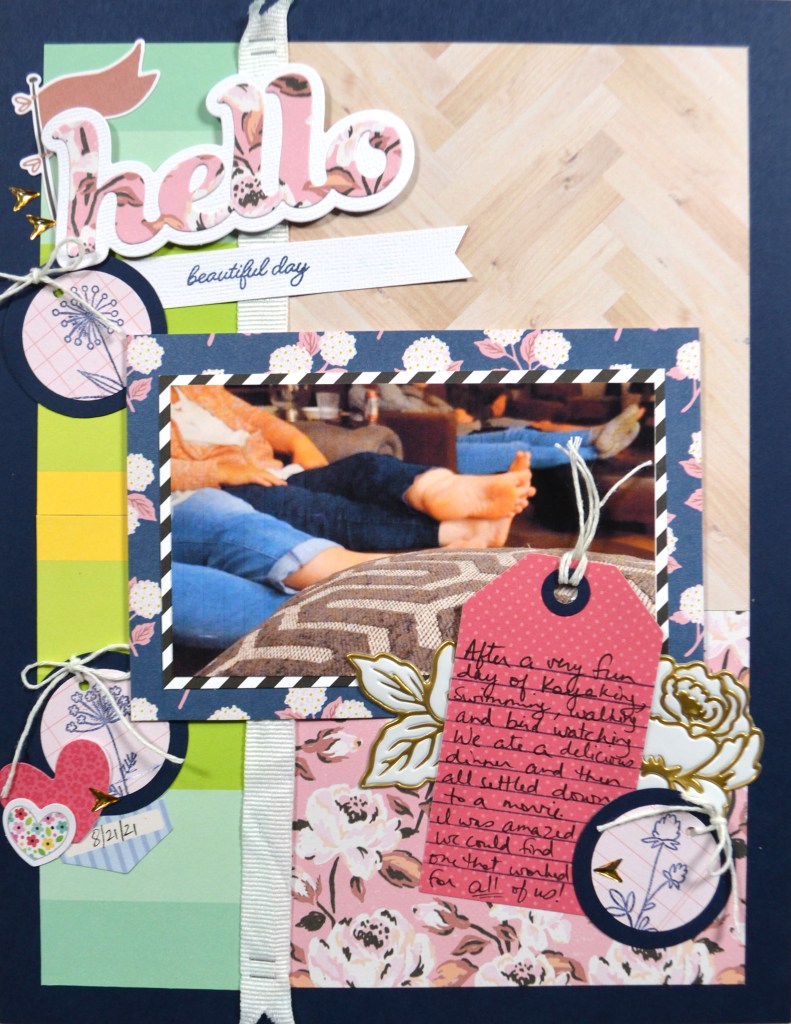
Documenting a trip is not in the cards for me right now. Our family is too cautious to risk the possibility of long covid. So we continue to try to find things around town to keep us busy. Surprisingly we keep finding small things that are new enough to be fun. This particular story involves a cross-town walking trail that we’ve only walked bits and pieces of. We finally walked the closest part of the trail! So that is our “Day Trip(per)”, or rather hours tripper.
I have a quick process video for this layout if you want to see more details.
I hope you can check out the other designers takes on this challenge! Don’t forget to show off your stuff over on the CKC Facebook group, or tag us on Instagram @counterfeitkitchallenge or use #counterfeitkitchallenge. We love to see your work!
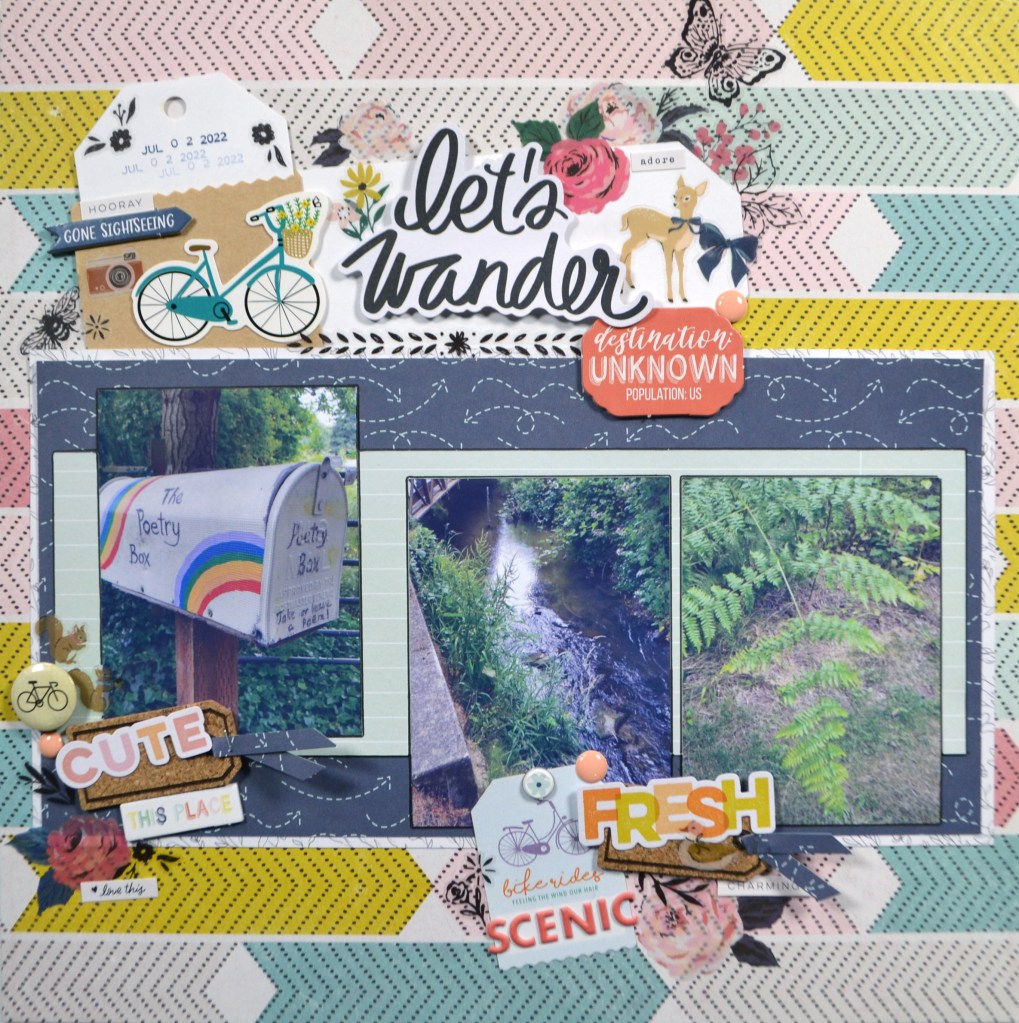
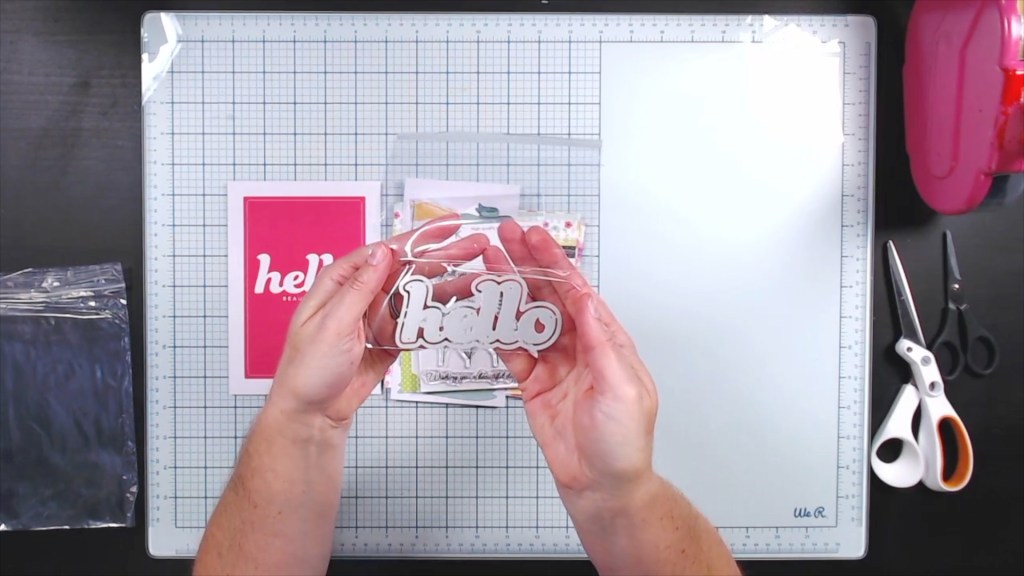
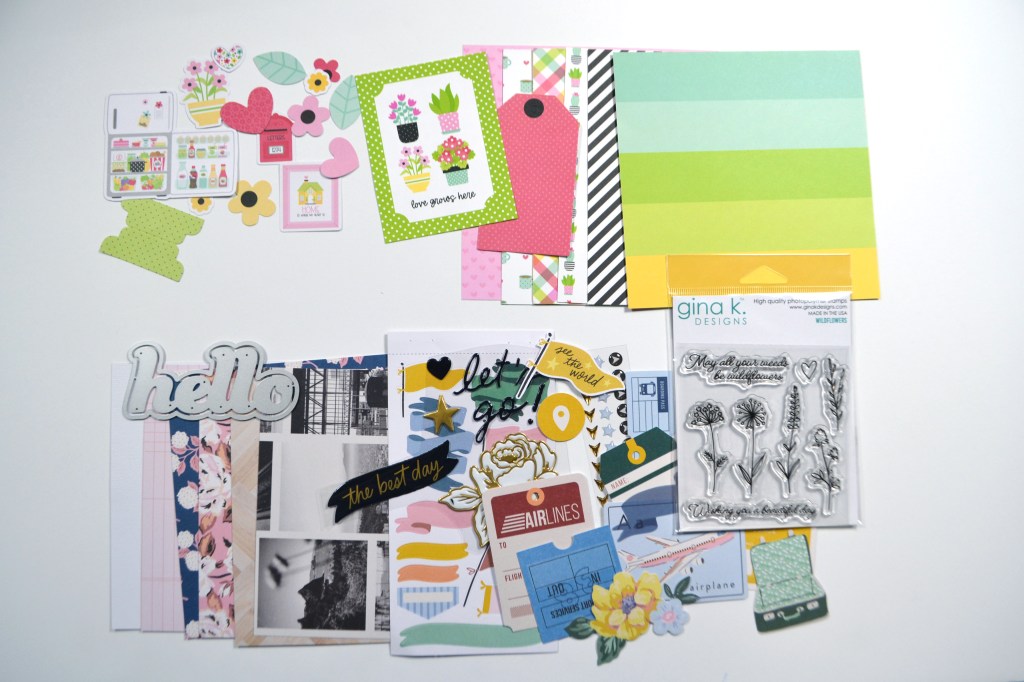
Getting my SCT Sampler kit in the mail each month is a bright spot. This small affordable package is just enough newness + surprise to keep me satisfied. This month the package contained products from Maggie Holmes, Doodlebug, and a stamp set from Gina K designs. We also have our word die cut from the SCT company.
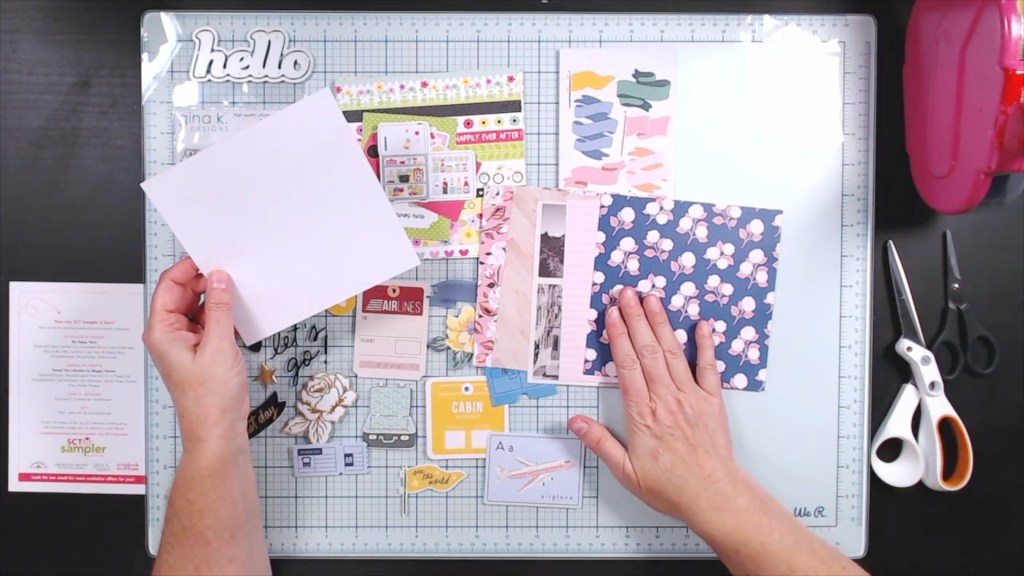
I wouldn’t want to leave you wondering just what to do with these supplies. So I almost always make a project as soon as my box arrives. That way I am sure to use it instead of just showing it off. This time around I made and 8.5 x 11 layout featuring a vacation photo. And when I create a project using my samplers I really try to pull at least one thing from each of the supply categories included in the kit: the die set, the reusable item and each of the two manufactures.
Of course if you want more information you can watch my YouTube video to get a better look at the kit products and my project.
I hope you enjoyed taking a look at what these little kits have to offer and seeing it put into action with a project. I’ll be back soon with more crafty goodness. Until then, have an artful day.
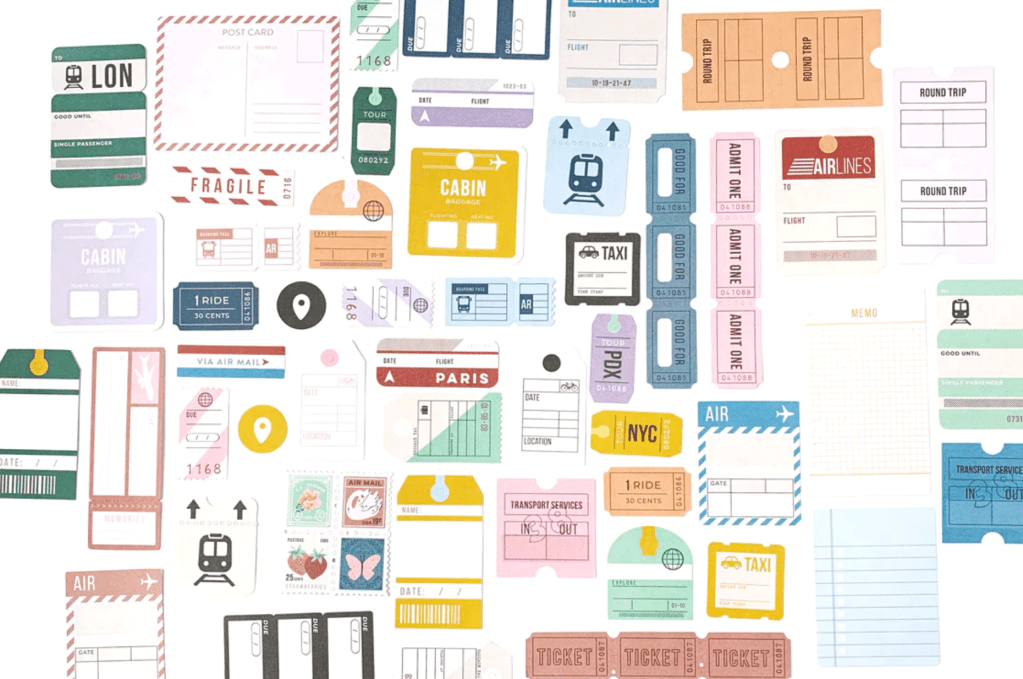
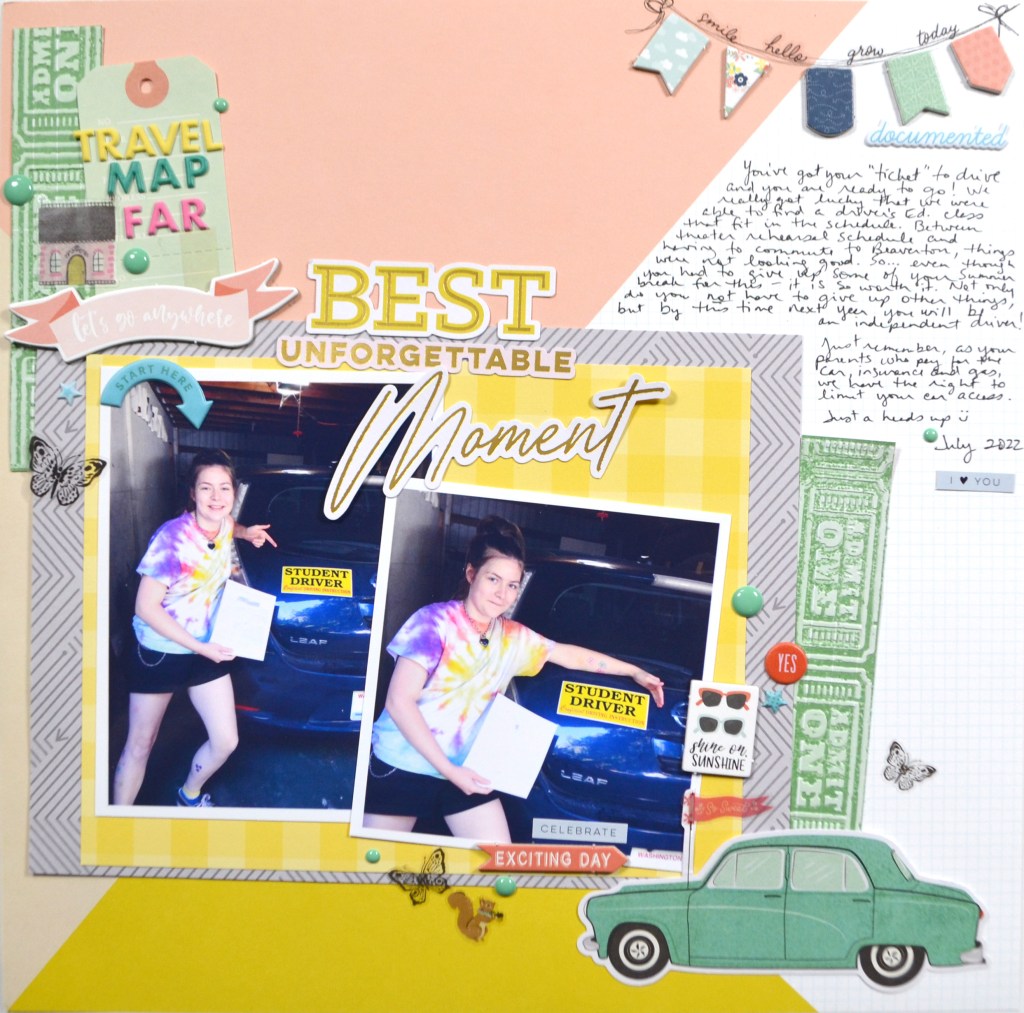
It is challenge time over on the Counterfeit Kit Challenge blog. Our hostess for the month, Tina was inspired by all the tickets in the inspiration kit, plus the song “Ticket to Ride” by the Beatles. First off, let’s take a look at the whole kit, which is the May Round Trip 12×12 add-on kit from Citrus Twist Kits. To the right of the main kit you’ll see all those ticket embellishments as inspiration!
With the inspiration of tickets… Go for it! Load up your project with tickets! Now that we have our inspiration, let’s dive into how I interpreted the challenge. Full details in the video below and of course the blog version follows.
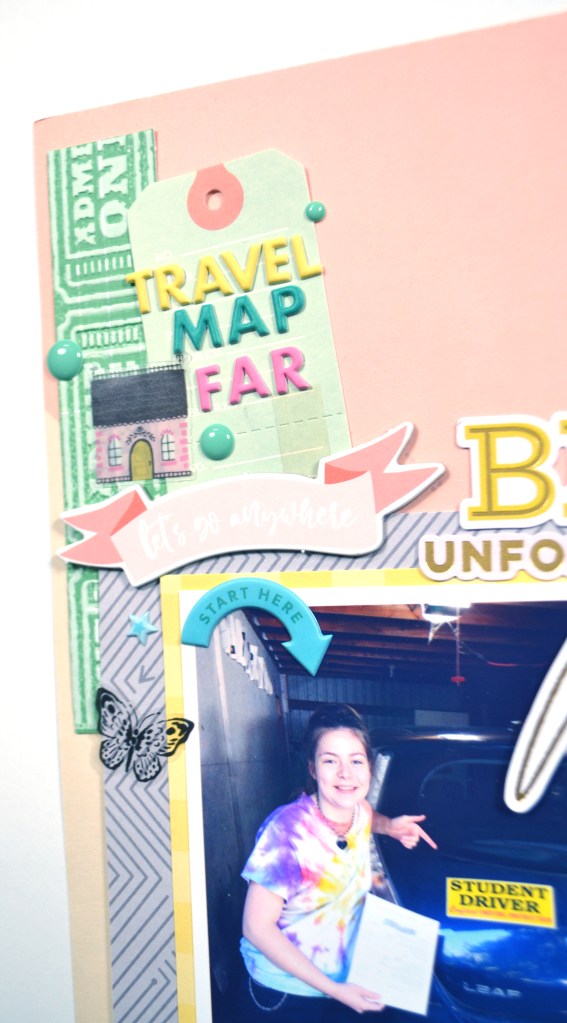
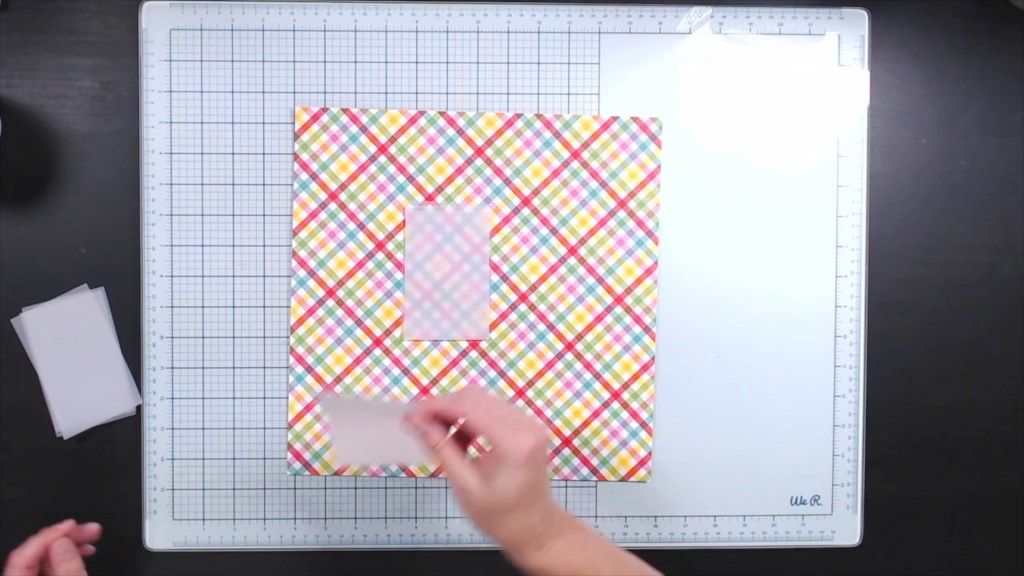
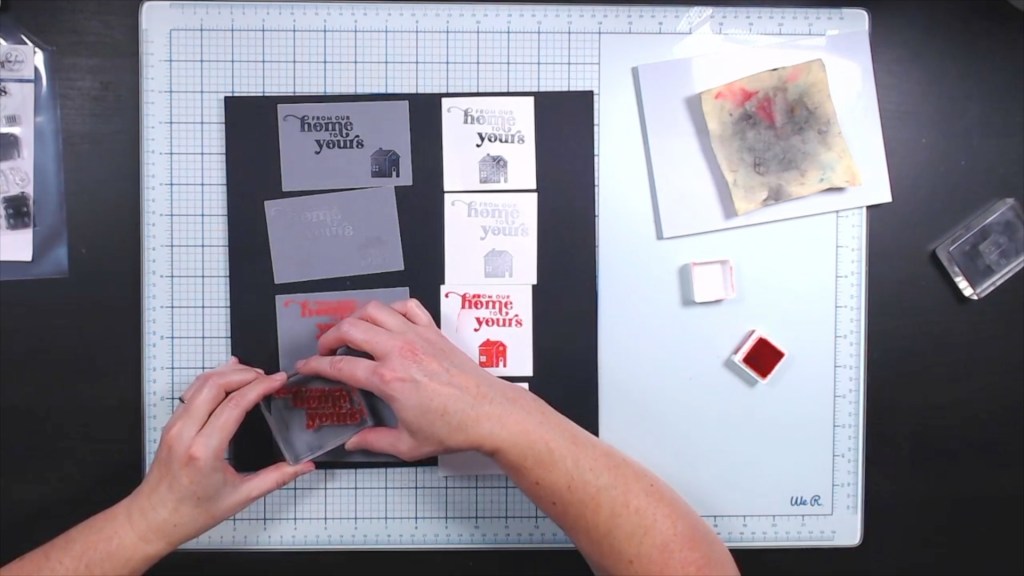
I didn’t “load up” my project with tickets, but I did highlight a fun faux letterpress technique to create some tickets. The letterpress process involves pressing an inked letter/word form into specialty thick paper to get a crisp depressed texture that also stamps with ink. We can do something similar with an embossing folder.
The simple instructions are to ink one side of your open embossing folder. Each side will give you a slightly different look. Experiment first! And just a note: folders with text need to be inked on the correct side to avoid backwards text. Ask me how I know. Ha ha.
Carefully place your paper onto the dry side of the folder and close gently to avoid slipping and ink smearing. Run through your die cutting machine with the correct sandwich to press that ink into your embossed paper. Done. It is that simple
Notice the tickets here? I created them with the letterpress technique and then cut them apart into ticket strips to embellish my layout.
So that is my take on the ticket challenge. I hope you can check out the other designers takes on this challenge! Don’t forget to show off your stuff over on the CKC Facebook group, or tag us on Instagram @counterfeitkitchallenge or use #counterfeitkitchallenge. We love to see your work!
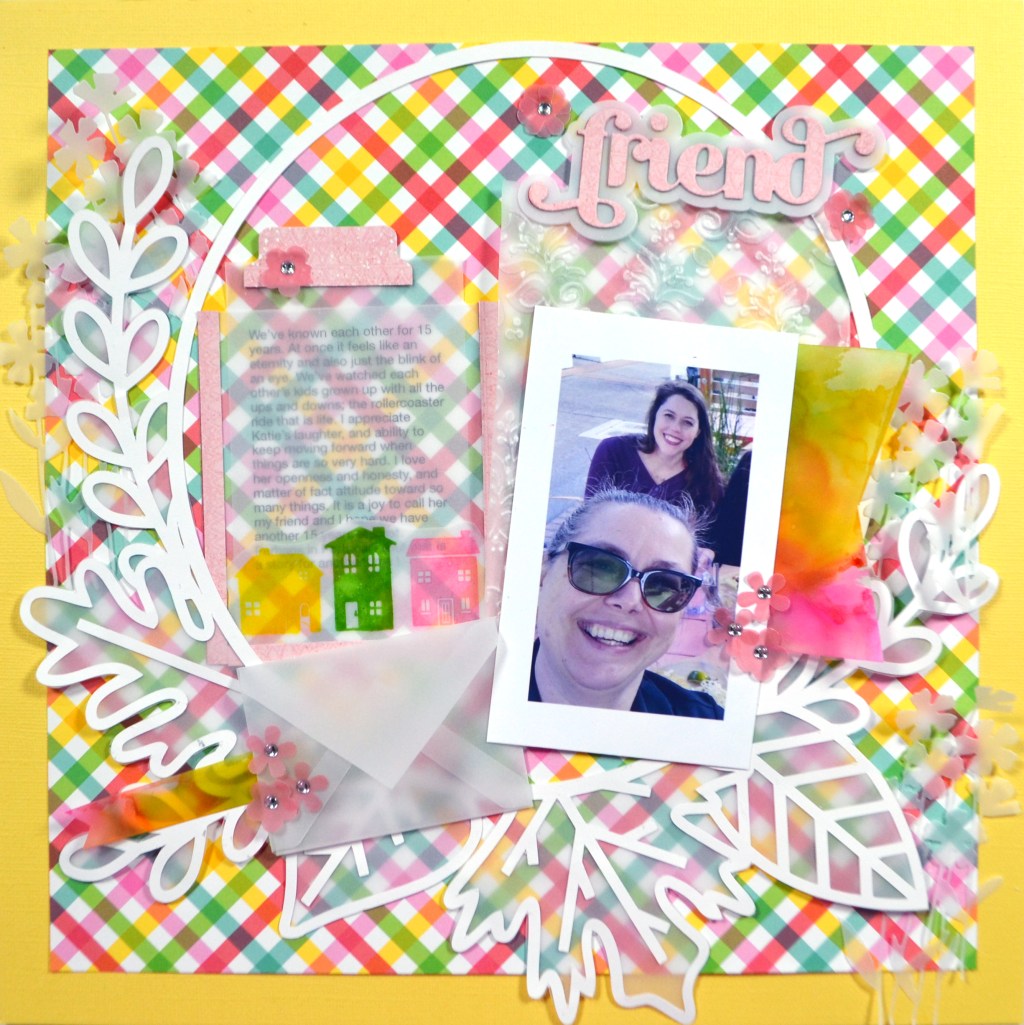
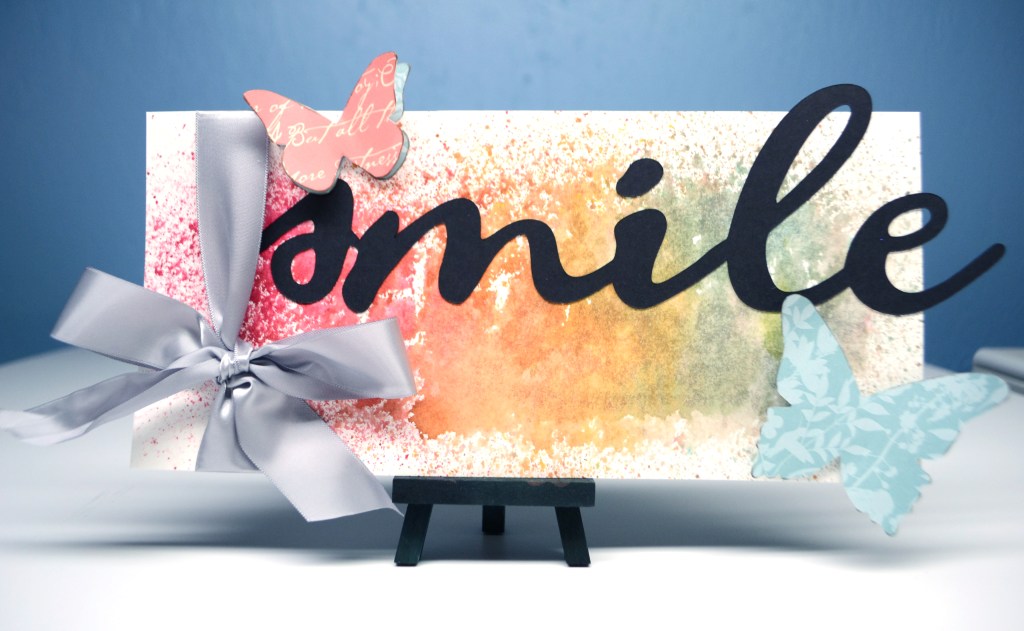
Vellum is a product that I love and try to keep a stock on hand at all times. I want to share my love of vellum with you with two videos. The first is all about ways you can use vellum and the second is putting together a layout using a handful of the items I created in the first video. Plus the second video has an additional little vellum technique that you may find handy. As always, if you want the blog version, please keep reading!
Vellum Techniques Video
Layout process video using vellum
So let’s take a gallery journey through the techniques I mentioned. While each photo is captioned, the gallery system’s captions are a bit hard to read, so let me list it out more clearly.
Layered Dimming
Pattern Making
Cluster Layering
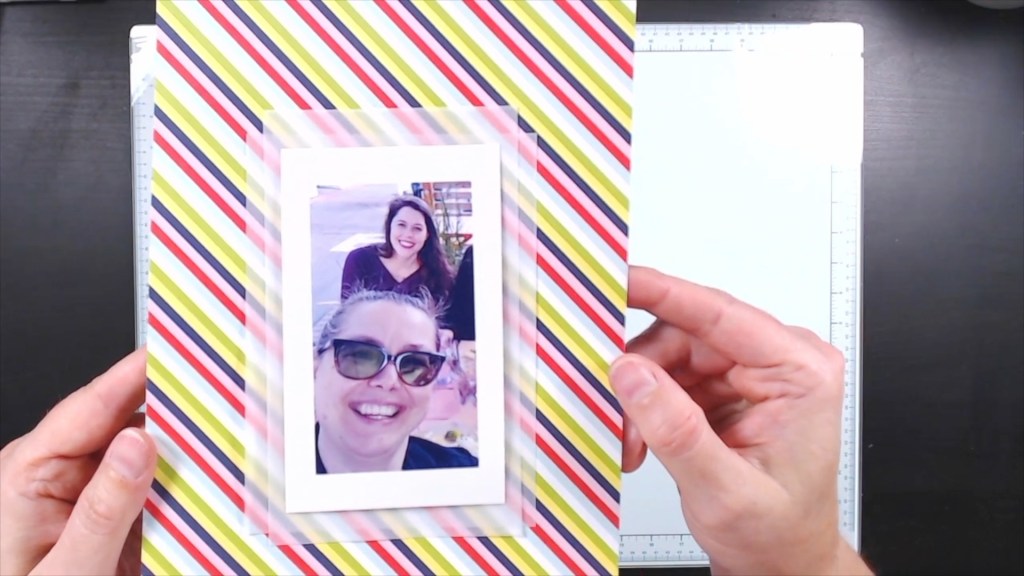
Photo Mats
Stamping
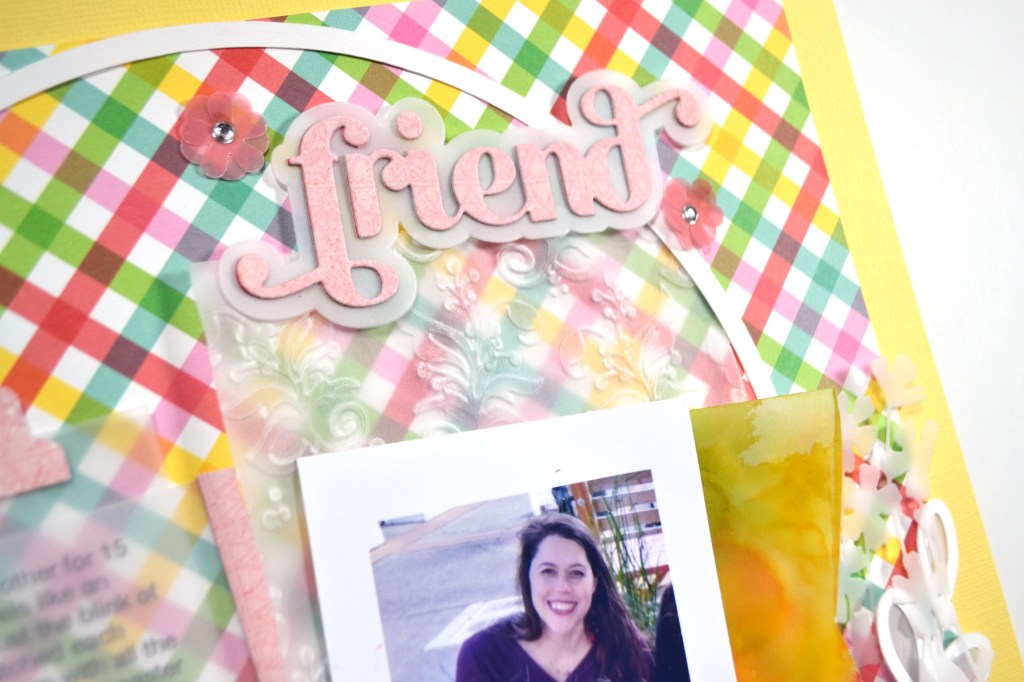
Heat Embossing
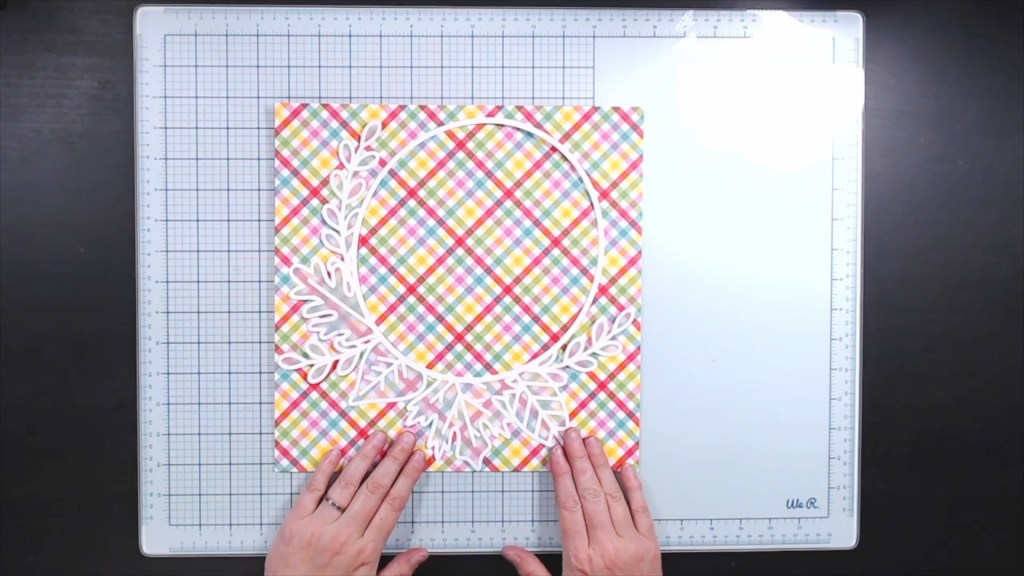
Backing Cutfiles
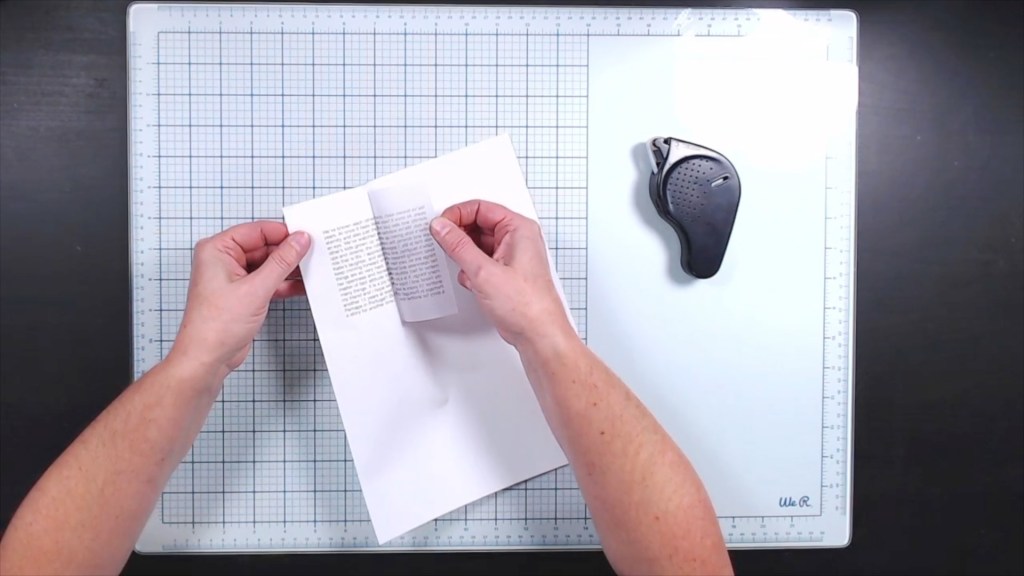
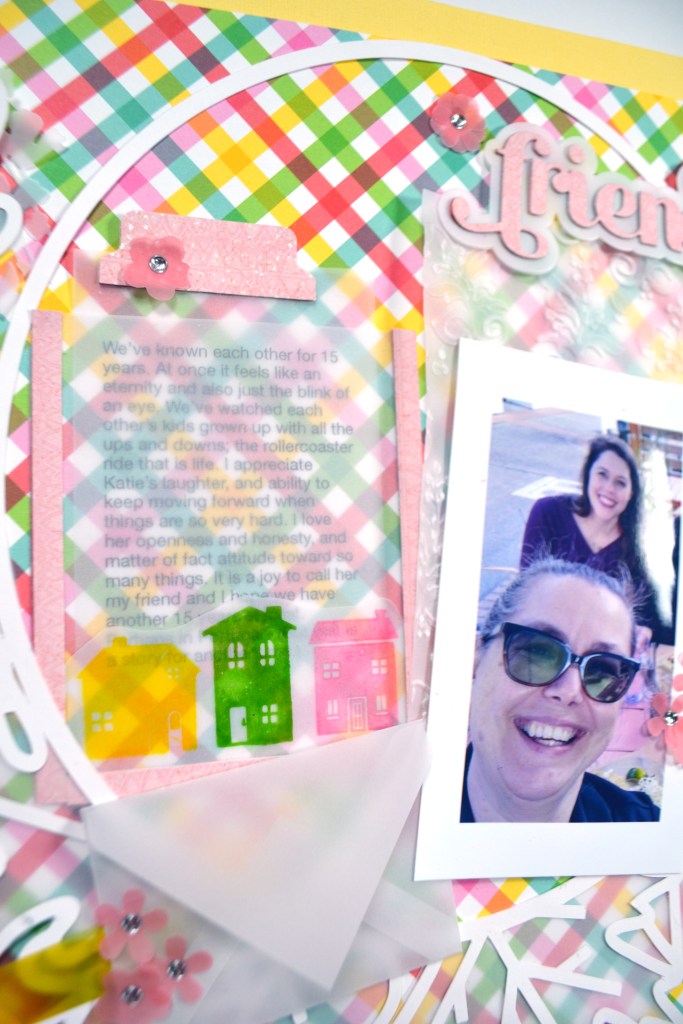
Printed journaling
Alcohol Ink (No expensive Yupo “paper” needed)
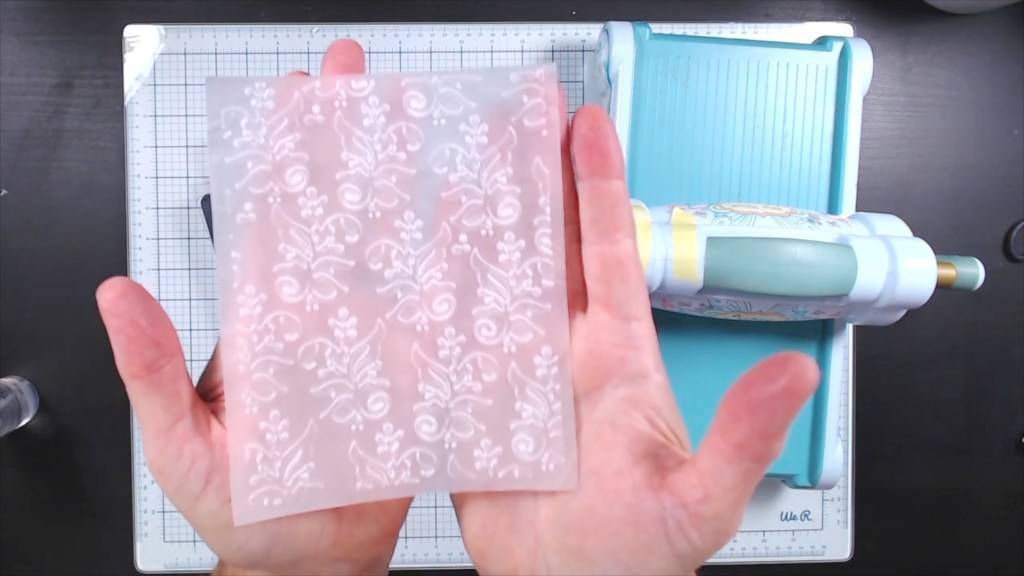
Embossing Folders
Pockets
Windows
Shakers
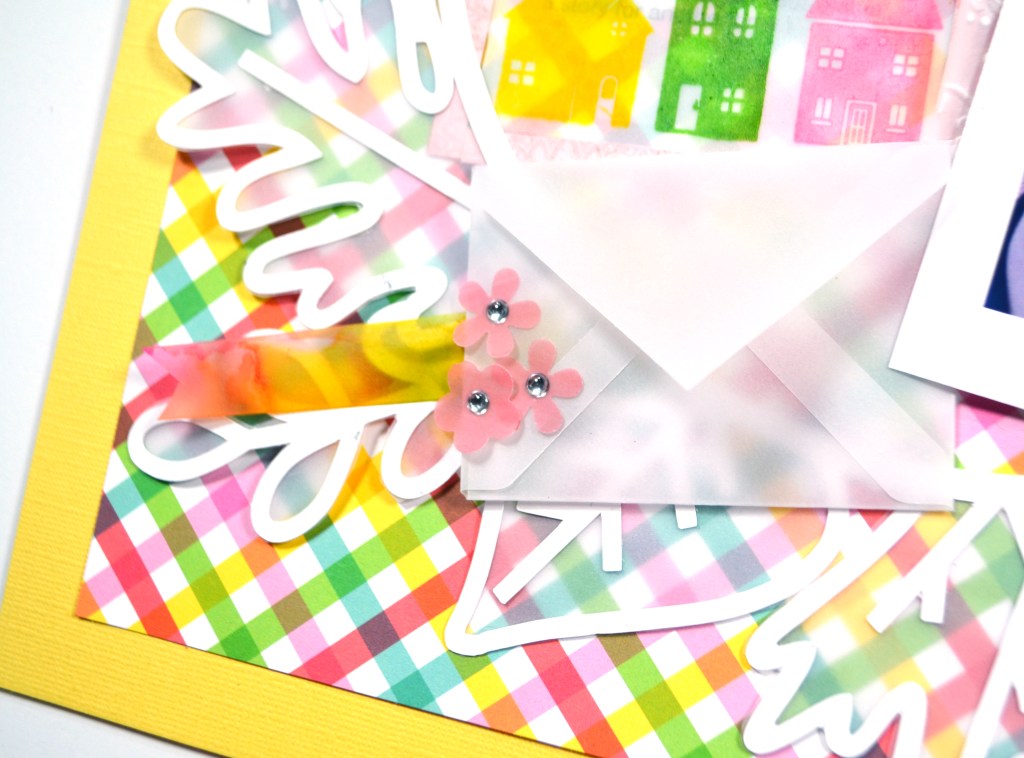
Envelopes
Home decor — Votive Holders
Home decor — Stained Glass Window technique + project
Layered DimmingPattern makingCluster LayersPhoto MatsStampingHeat EmbossingBacking CutfilesPrinted JournalingAlcohol InksEmbossing FoldersPocketsWindowsShakersEnvelopesVotive HoldersStained Glass TechniqueTechnique use for project
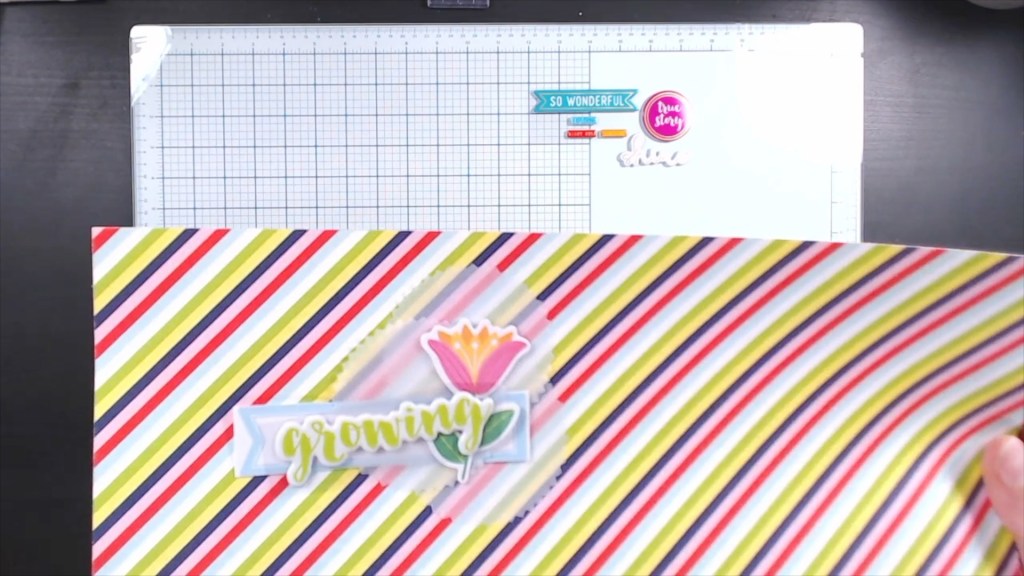
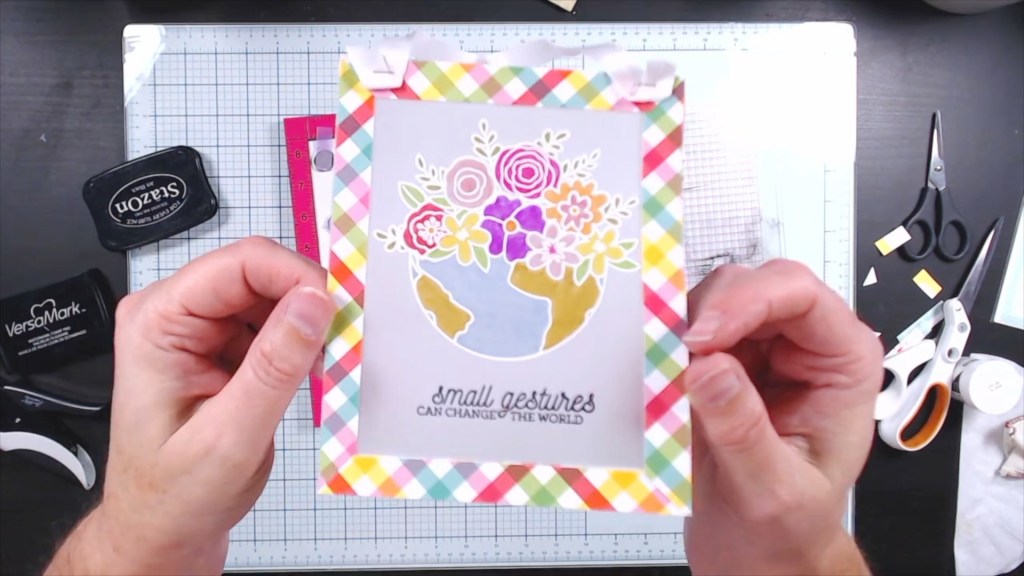
Once I had created a pile of goodies out of vellum I turned to creating a layout. If card making is your thing, these ideas totally work for that too! Now, not all the things I created are going to work on one project so the process of finding what will work, and especially giving up on what won’t work, is interesting. I tried really hard to get stamped flowers on my project and they just weren’t working. The flowers got lost in the amount of pattern shining through the vellum. In the end I colored vellum with a marker (that is your bonus technique!) and punched out solid colored flowers to sprinkle on my project.
Layout using vellum
Don’t forget that vellum can be tricky to attach since you can see the glue right through it! If you need ideas on how to overcome that, I’ve got you covered there too! This post shows off vellum attachment ideas. Of course you can take the short cut right to the source video.
I hope this post gave you lots of ideas for incorporating vellum into your paper crafting projects, and even some home decor. I’ll be back soon with more ideas. Until then, have a artful day.
I love kit building and I am on the design team for the Counterfeit Kit Challenge project. We take an inspiration kit each month and proceed to replicate it, or as we say, counterfeit it. This is a free, friendly group that helps inspire you to use up supplies you already own. We are not about needing to buy the latest and greatest thing (though we won’t stop you if you enjoy new crafty goodies😉 ).
June sure went by in a whirlwind and I can’t believe it is July already. So glad I got this post up in time! Here is the full video experience, or you can read on for the quick overview.
Our Inspiration kit this month is the May Round Trip 12×12 add-on kit from Citrus Twist Kits. Before we dive in too much further, let’s give a warm welcome to Clem Reid as our guest designer this month. You can find her take on this kit, as well as all the other team members from the hop links below. Now on with the show…
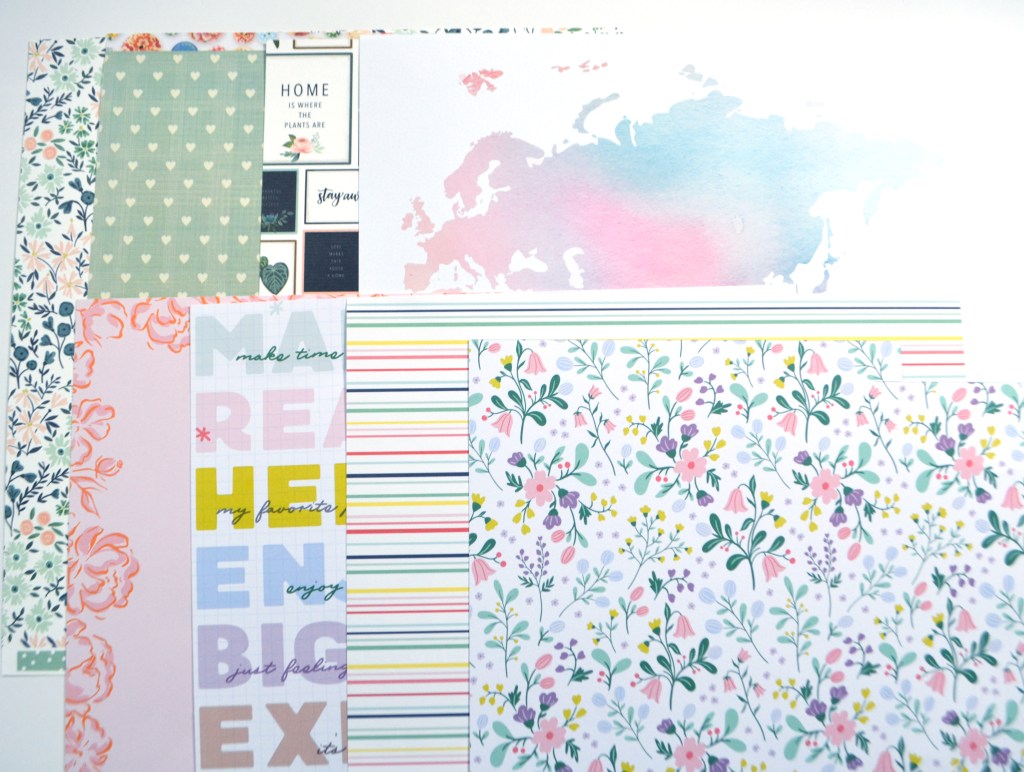
With this inspiration in mind I pulled a variety of stuff from my stash, organized it all, and then narrowed it down. Here are the three categories of papers I put in my kit: A side inspired, B side inspired, and “filler” papers.
“A” Side inspirationMy choices“B” side inspirationMy choices“Filler” papersThe overall paper view
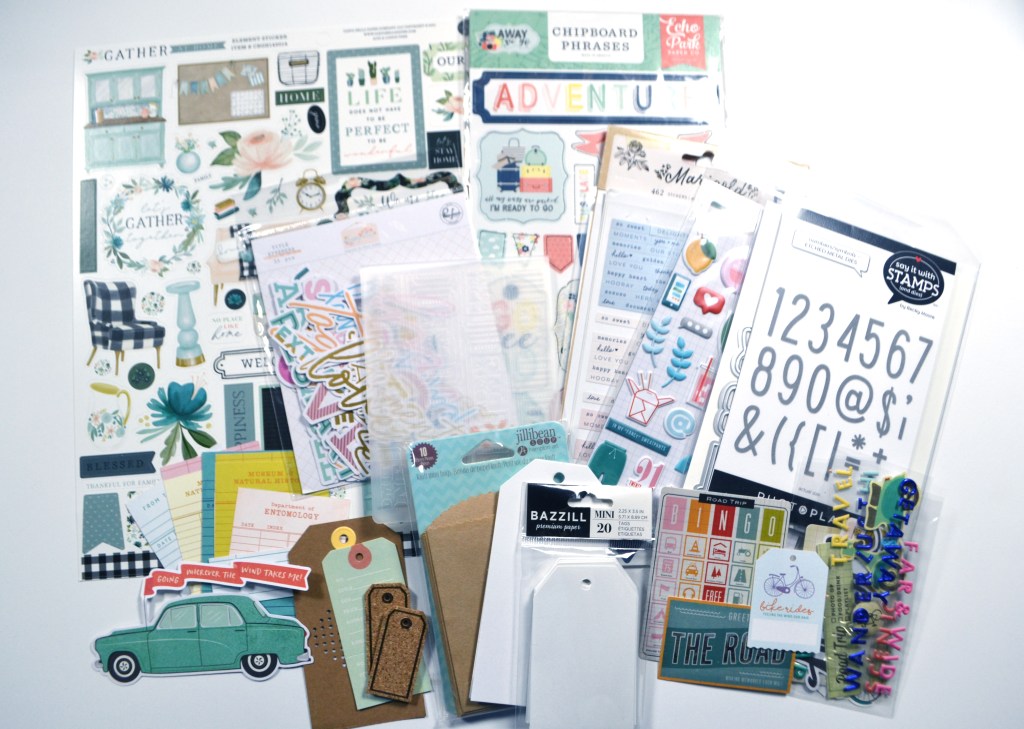
Moving on to embellishments… I had the Pink Fresh Titles ephemera directly from the inspiration kit. Then I just added other elements such as travel, homey icons, enamel dots and tags.
Embellishments
There is a tradition over at CKC of titling our kits just like companies do. So I’m calling mine StayCation for the mix of travel and homey icons.
I hope you can follow along with the other designers and see how they put together their kits.
Have fun kit building and don’t forget to show off your stuff over on the CKC Facebook group, or tag us on Instagram @counterfeitkitchallenge or use #counterfeitkitchallenge.
I hear this question a lot online. Today I set out to answer that question with as many options as I could think of. I certainly may have missed some ideas (in fact I had to film pickup segments as I realized I had missed some things!!). Here is the full video tutorial and idea gallery. Read on for the quick version.
Video tutorial on vellum
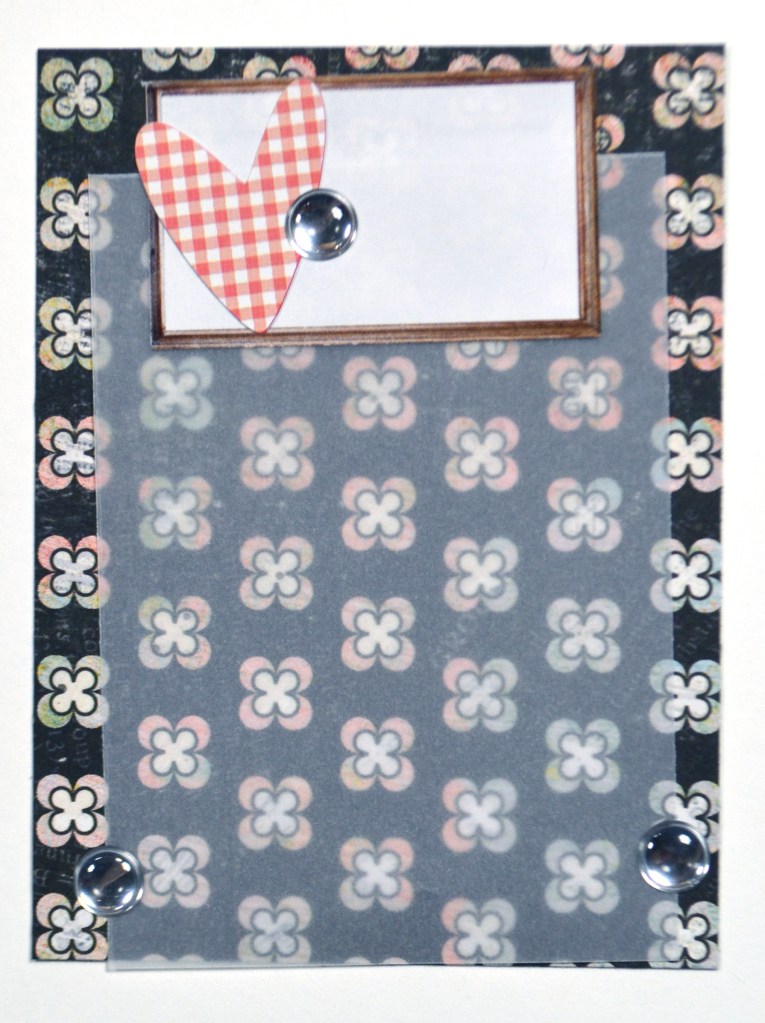
Vellum is a paper-like, translucent product that adds softness and a “dimming” effect to projects. But that very translucent quality means you can see any adhesive right through the vellum! What is a crafter to do? Let’s break it down with a gallery
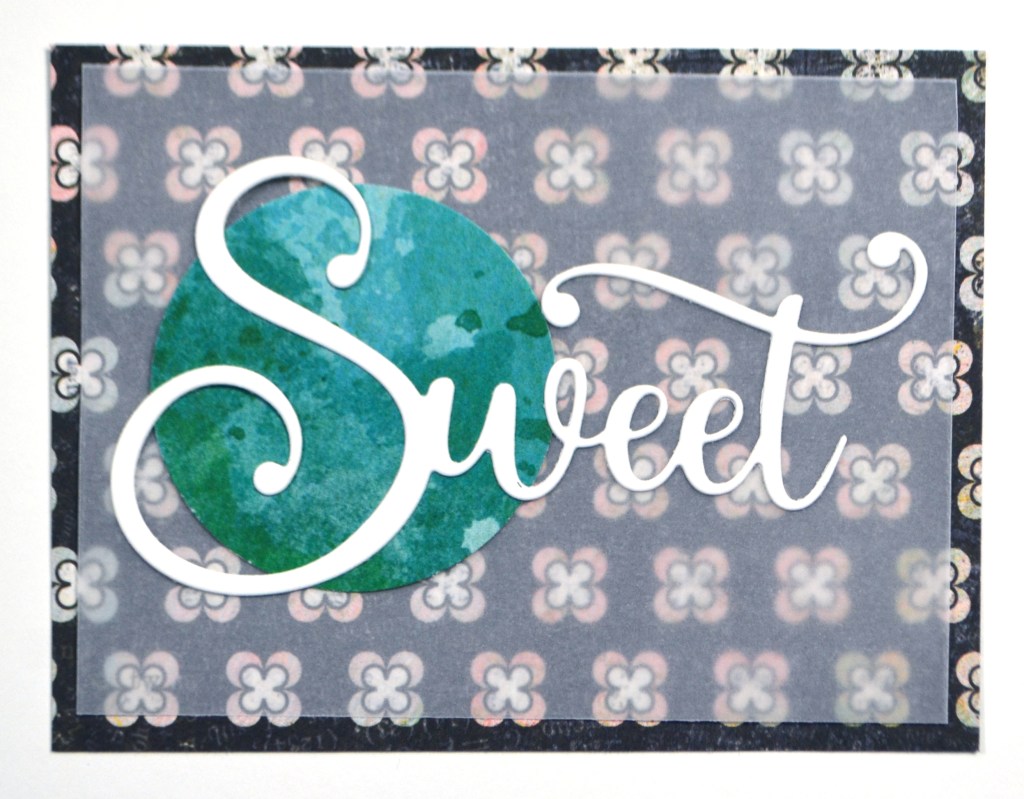
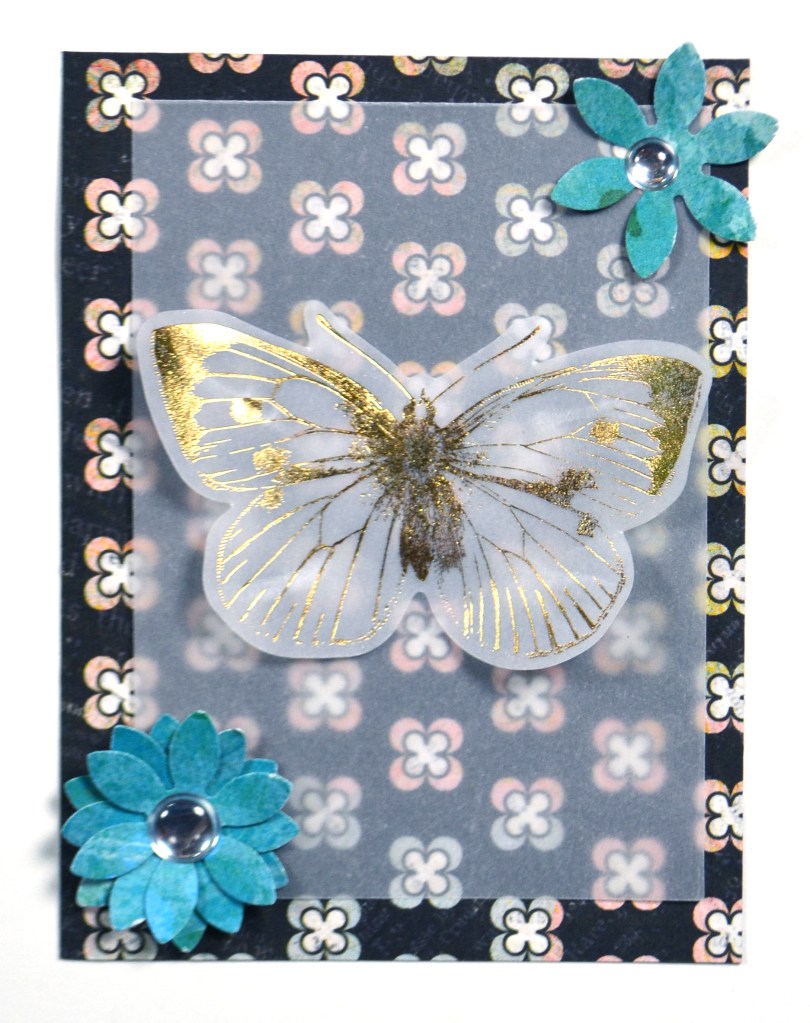
First up is the cover it up strategy. Glue your vellum down, then glue something on top. Here I used all papery elements to cover up the glue, but don’t forget other items like flair, cork and wood veneer will work too and add more charm to a project.
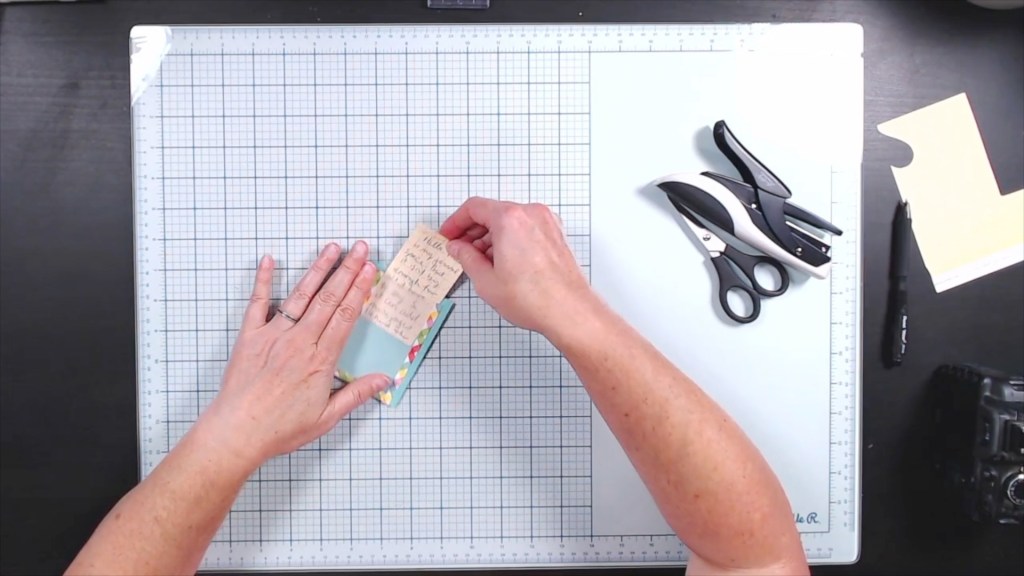
Similar to the cover it is the tuck it. I glued these tabs to the background just on the very edge. That way I could cut my vellum and slide it under the flaps of the tabs. The video is a far better demo of this one.
Next up is the staple it method. You can use staples as a stylistic choice so it doesn’t have to look utilitarian. Along the lines of staples, there is also the option of using paper clips (again, see video).
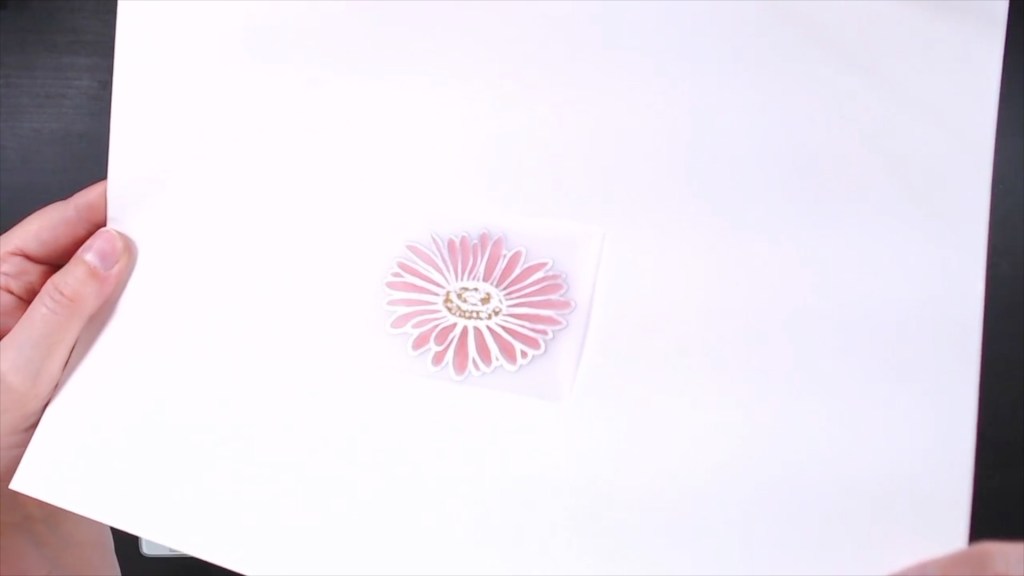
Using stickers is much like the cover it up method, just with items that have their own adhesive. Washi tape is another self adhesive “cover it” option. But there is one more idea in these two photos. Can you spot it? That’s right, it is enamel dots! They are self adhesive “cover it” items all by them selves!
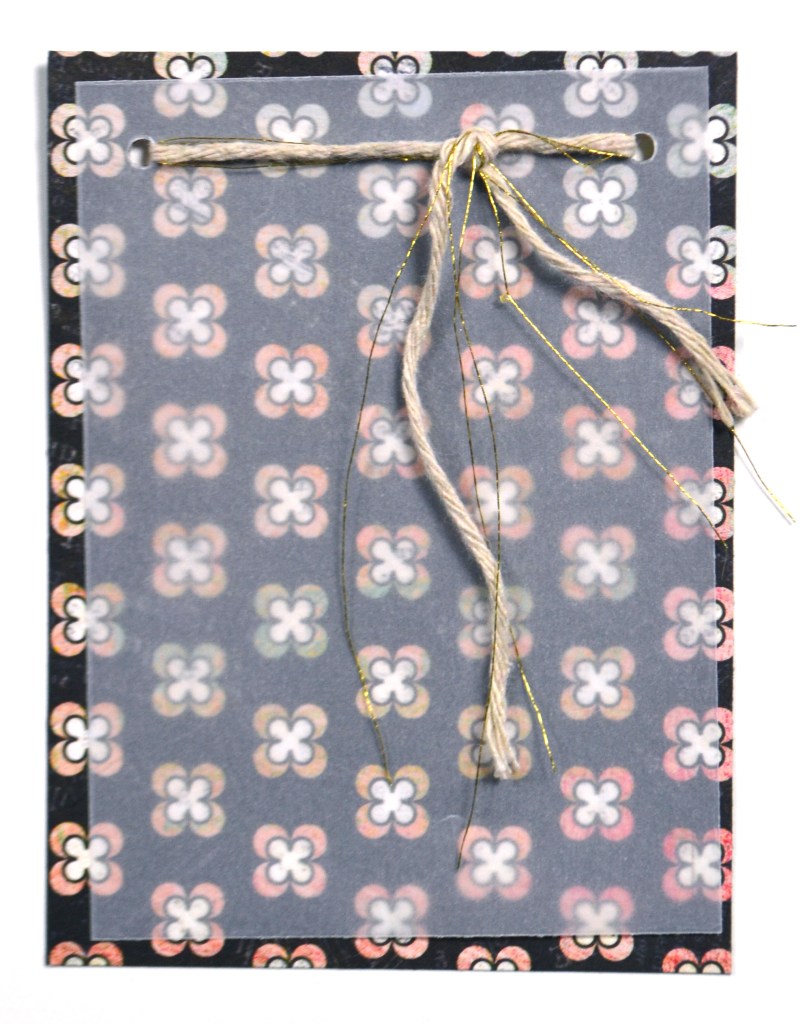
Fibers and stitching are a next level idea! On the left I used my sewing machine to add both zigzag and straight stitches, but you can add whatever you like. Click on the photo for the zoomed version to really see the stitching. Hand stitching is always an option if you don’t have a machine. Not interested in sewing? Then try punching holes and threading with twine or other fibers. Still too much? Then use some fun or funky fibers and just glue it down like in the cover up method! (Okay readers, for once YOU get the bonus info. I forgot to include the pom pom pic in my video!)
There were a few other ideas covered in the video like brads and specialty adhesives. So if you want the full list you’ll have to check that out.
That is it for today. I hope you found some inspiration here. And until next time… have an artful day.
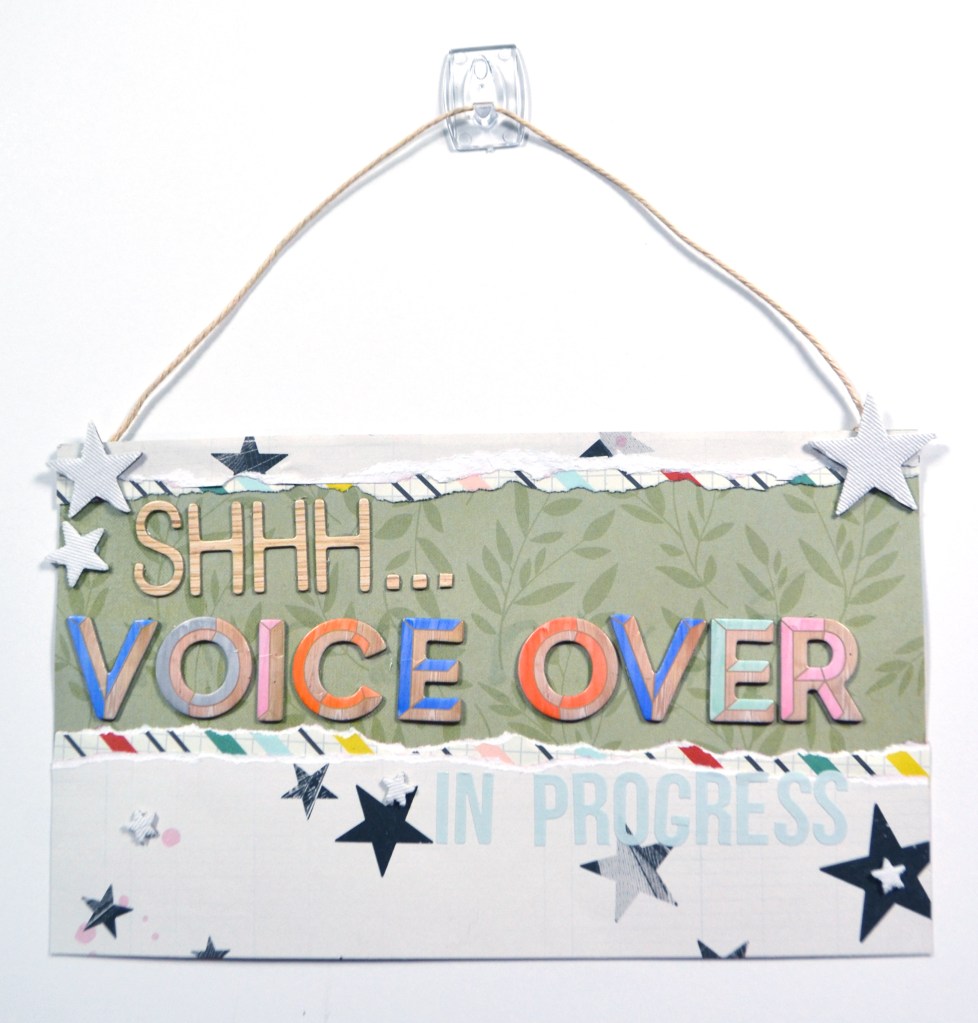
While scrapbooking, and to some extent card making, take up the majority of my crafty time, I also like to dabble in other crafty creations. Today I’d like to share some of those ideas with you, starting with my latest video on creating a door hanging sign. The good thing about the majority of those projects is that I use my paper crafting supplies and skills to bring them to life.
You can see a version of that sign in the video thumbnail above, but here is a better version.
I made this project as a challenge for the CKC group. While I was working on the project I started reminiscing about past projects. As I was pulling some of those photos to include in my YouTube video I really felt that blast from the past. Some of the projects I cringed at now, but some of them have been total favorites. I think that is how crafting goes in general, right?
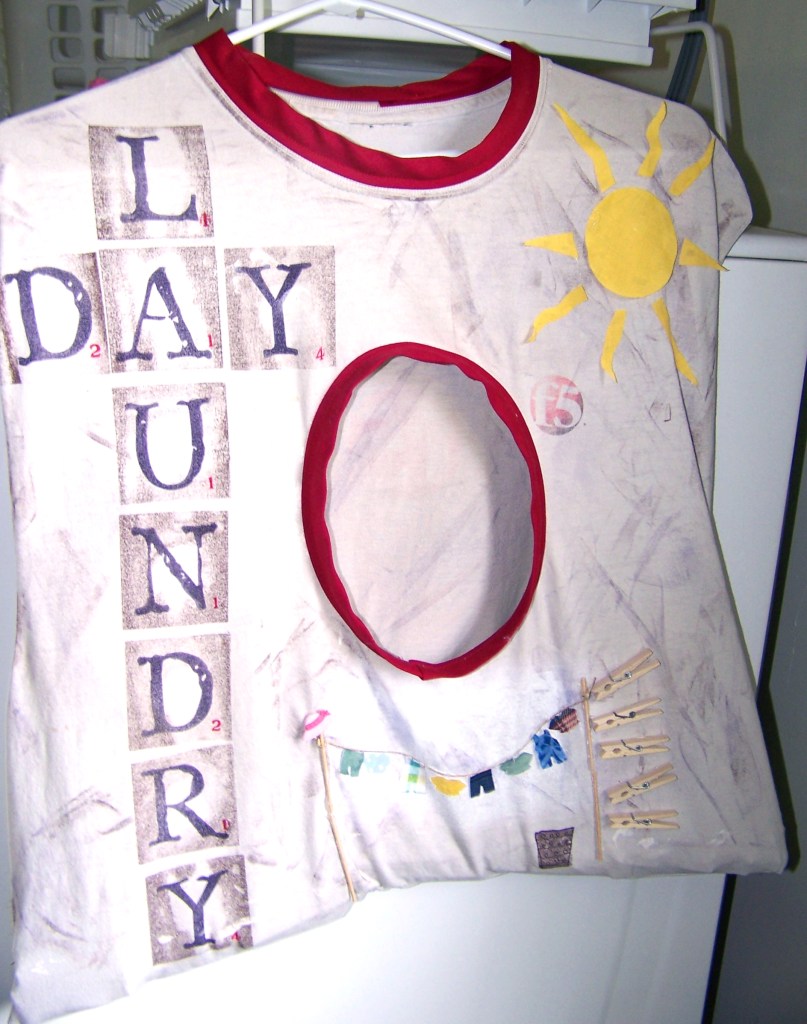
At any rate, here is a gallery of some of those older projects. I’ve captioned them so that you know what they are all about.
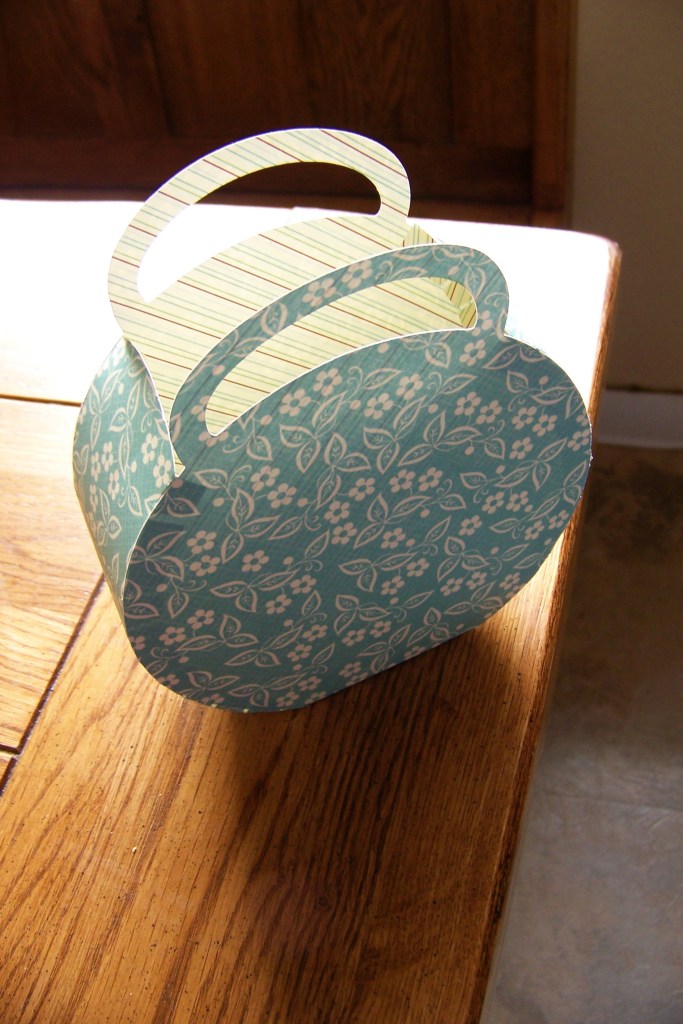
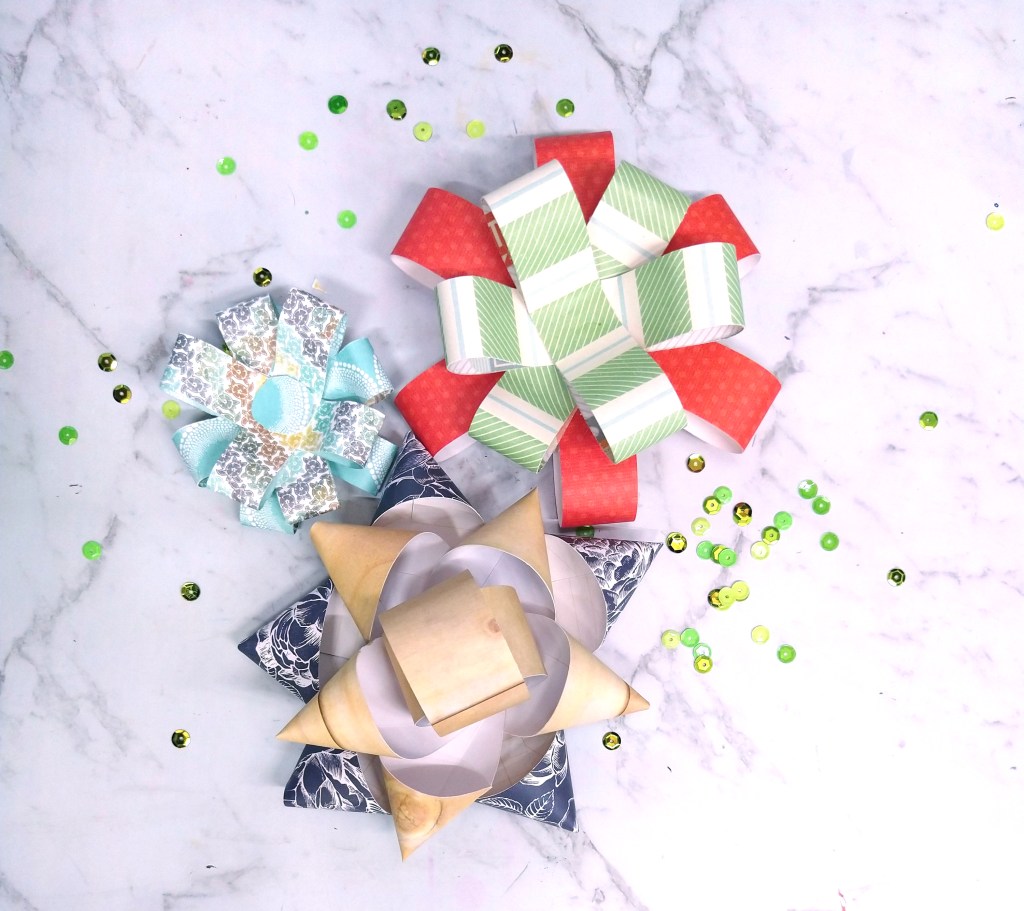
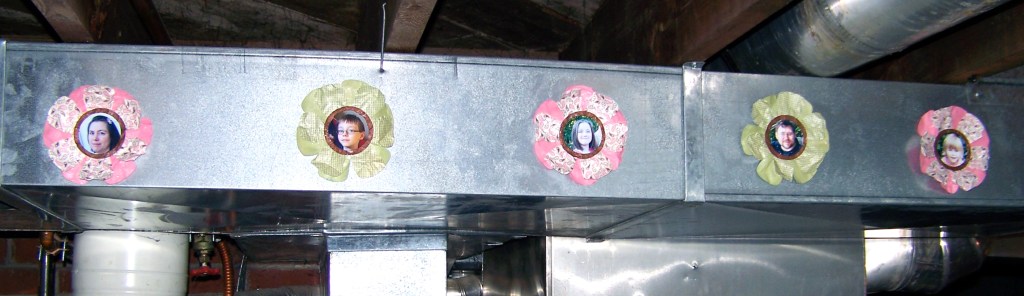
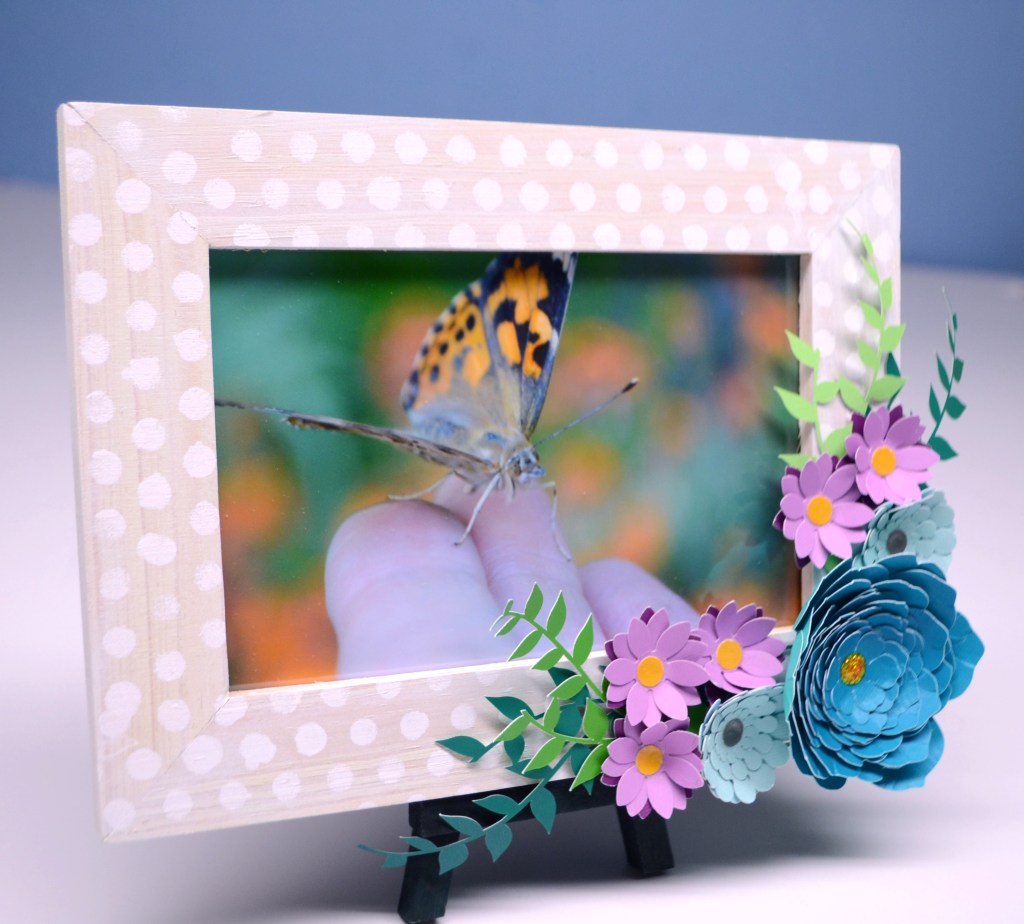
Upcycled t-shirt clothes pin holder decorated with scrapbook supplies.Accordion coupon book for my purse.Hair clip. Yeah, paper won’t last long, but it is so cheap & easy to replace.Holiday decor: Valentine’s (two heart shaped cardstock cut outs with a stick sandwiches between.)Holiday decor: Easter (two egg shaped cardstock cut outs with a hanging string sandwiches between.) Great for the kids to do!Velum votive decoration.Birthday party decor.And more party goodness.Gift bagGift boxes for fathers day.More party ideas.Photo frame for a Mother’s Day gift.The frame folds flat to send in the mail.Magnetic photo frames to spruce up and ugly view in my craft room.Using cut out letters as a cheaters guide to paint signs.Project designed for DCWV’s booth at Creativation!One of my all time favs. Just a cheerful bit of art.
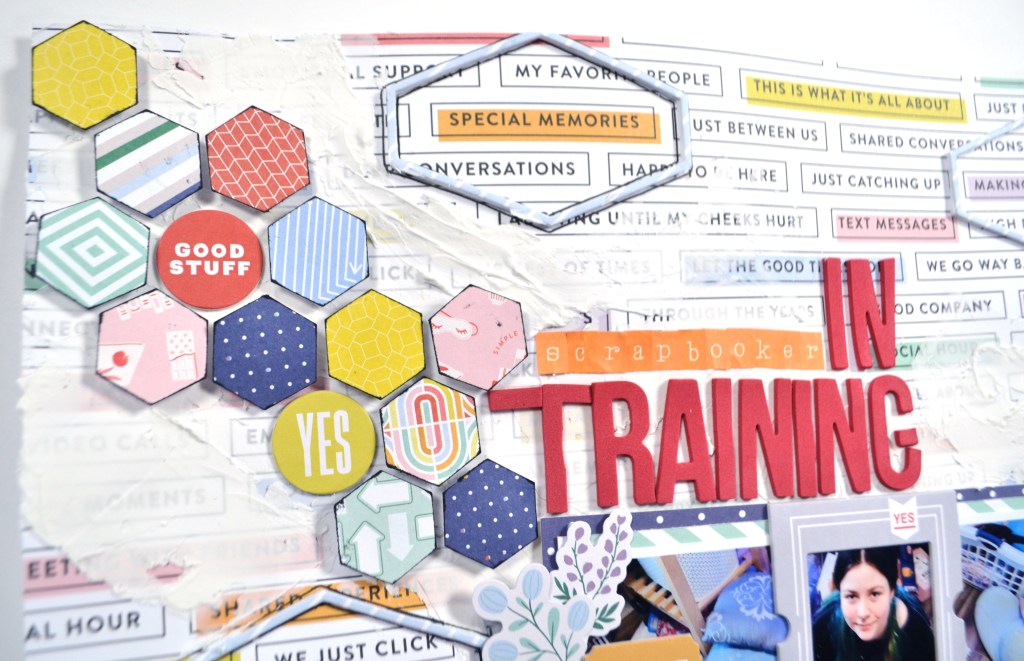
I used to begin every layout I made with a sketch. Often times it was my own sketch quickly drawn out on an index card. Pre-made sketches has always had a role in my crafting as well. These days I usually just go with the flow when I sit down to create. I still love me a good sketch though and that is what I am here to share today.
The original sketch and an alternative sketch choice.
You can check out all the details in the process video or keep reading for some quick notes on this project.
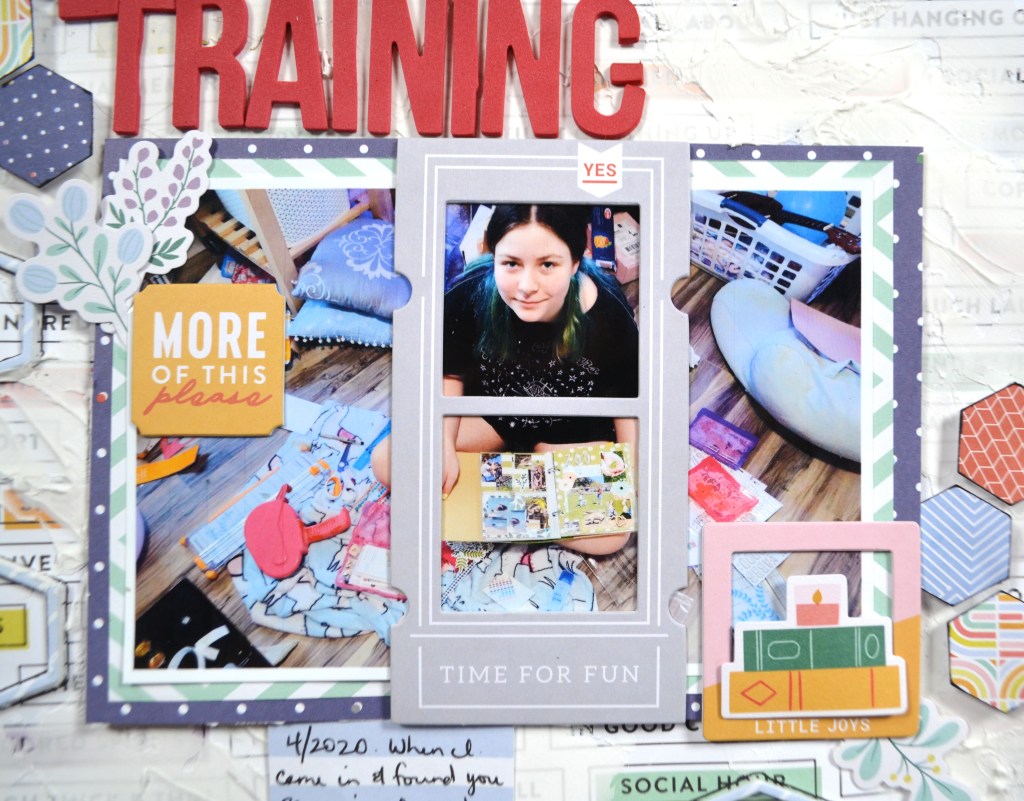
The original sketch featured a cascade of hexagons from left to right on the page. (You can see the sketch in more detail in the video.) I certainly captured that idea. I also added in more hexagon elements to highlight areas on my busy background paper.
I’ll leave you with a couple more closeups. I’ll be back soon with more crafty goodness. Until then, have an artful day.
As a design team member over at the Counterfeit Kit Challenge group I play along with as many of our monthly inspiration challenges as I can. The Forgery on the Fourth project is definitely one I enjoy! That is where we see a scrap product we like and set out to recreate it with supplies we already own. So let’s go ahead and dive in to what I have for you this month.
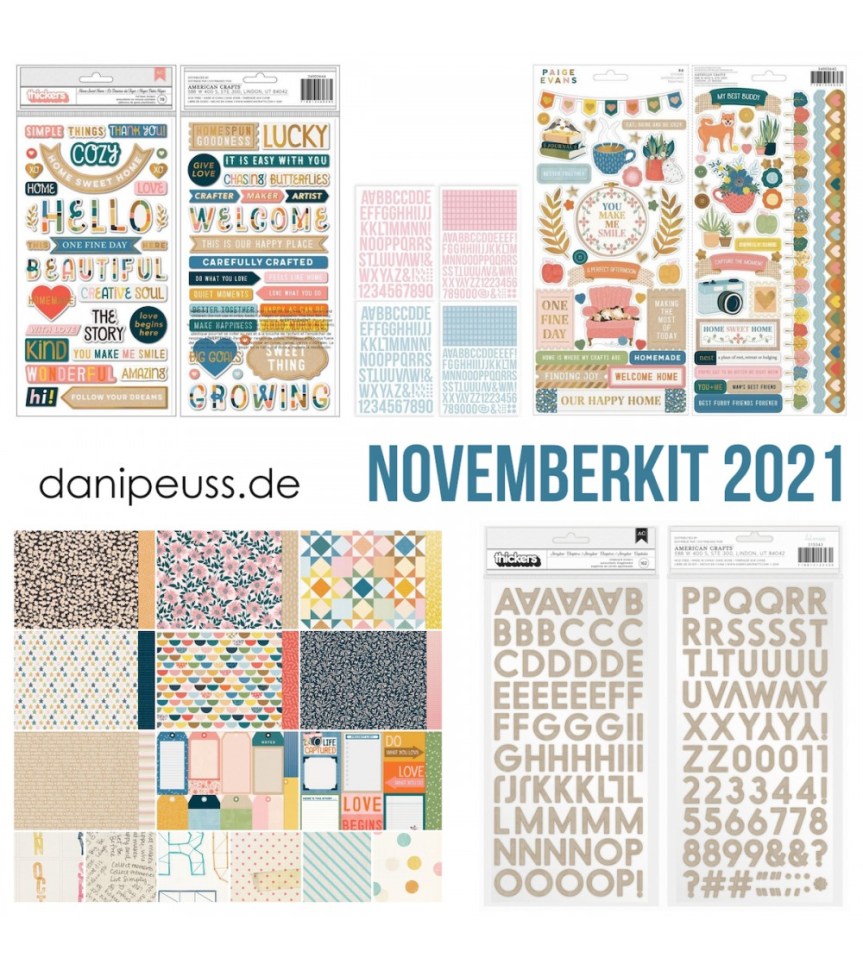
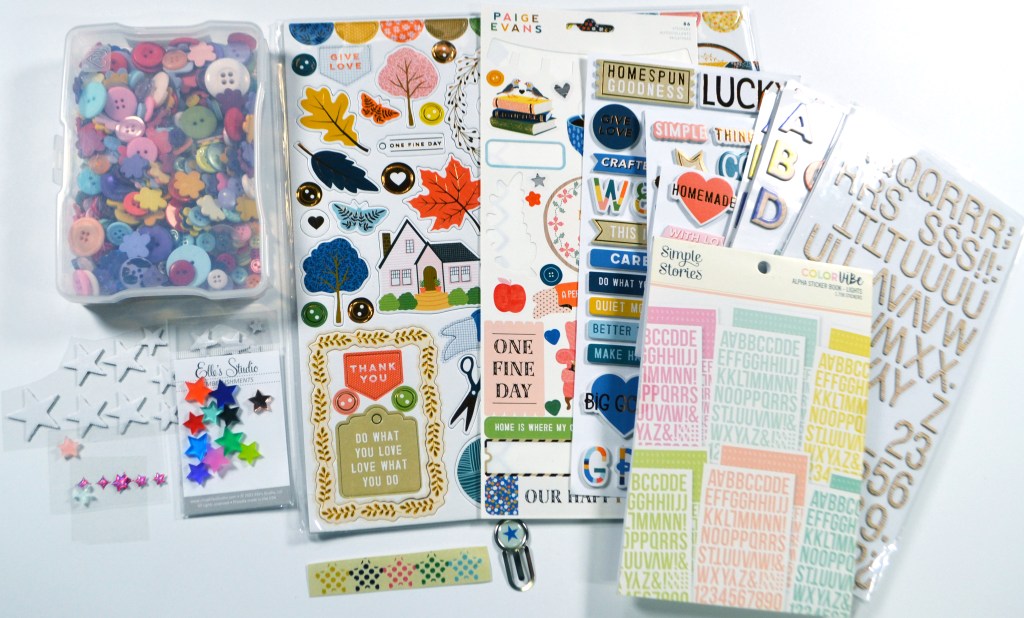
We are being inspired by this kit from from a German kit company, Danipeuss.de . Their November 2021 kit featuring Paige Evans brings us lots to be inspired by.
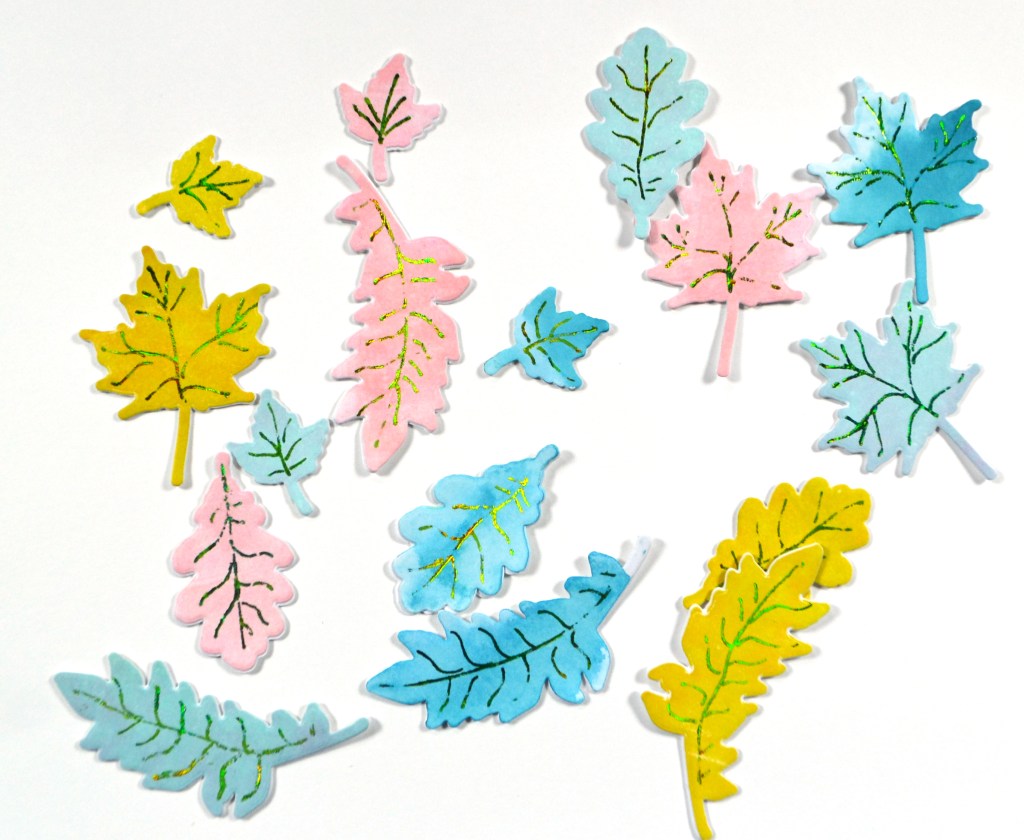
An additional embellishment pack in the Paige Evan’s line include chipboard pieces with these leaf motifs.
I wanted to recreate something similar in my own color palette.
All the details for this process are included in this video.
In addition to those leaves, I also made a sheet of patterned paper inspired by this kit sneak.
I’m not quite sure what I’m going to do with it yet, but I liked the string art style. Here is how my version turned out.
When I was done those projects, I kept going with creating more embellishments; this time I made layered stickers.
For more details and tips (at the end!) to consider when creating layered embellishments check out this video. The gist is that you should use at least three variations of sizes, shapes, and contrasting colors. I also like to create a mix of symmetrical and asymmetrical shapes.
Okay, that is the crafting I’ve been doing lately. I’ll be back next time with a layout process for you, using a completely different set of supplies 😉
For more creative ideas, the CKC blog has more forgery examples to check out. I hope this gave you some ideas on how you can recreate your favorite products with supplies you already have on hand. Don’t forget to show off your stuff over on the CKC Facebook group, or tag us on Instagram @counterfeitkitchallenge or use #counterfeitkitchallenge.
I love kit building and I am on the design team for the Counterfeit Kit Challenge project. We take an inspiration kit each month and proceed to replicate it, or as we say, counterfeit it. This is a free, friendly group that helps inspire you to use up supplies you already own. We are not about needing to buy the latest and greatest thing (though we won’t stop you if you enjoy new crafty goodies😉 ).
You can see my process video or keep reading for the blog version of the info.
This month we are working from a German kit company, Danipeuss.de . Their November 2021 kit featuring Paige Evans brings us lots to be inspired by.
The color palette was too autumnal for me, so I focused my choices on patterns in the kit and used colors that were more to my mood. You can see that direction in my paper choices here.
From there I pulled embellishments. I added in more stars, which was the first thing I was drawn to when building this kit. I also had several pieces from the inspiration kit itself. I know I won’t use all those pieces due to the color palette, but I can pick and choose what works for me.
There is a tradition over at CKC of titling our kits just like companies do. So I’m calling mine Star Struck.
I hope you can follow along with the other designers to see how they built their kits.
Have fun kit building and don’t forget to show off your stuff over on the CKC Facebook group, or tag us on Instagram @counterfeitkitchallenge or use #counterfeitkitchallenge.
One last thing before you go… I was also inspired by several things in this kit to create on my own. So join me next time when I show you some product “forgeries”! Until then, have an artful day.