As a design team member over at the Counterfeit Kit Challenge group I play along with as many of our monthly inspiration challenges as I can. The Forgery on the Fourth project is definitely one I enjoy! That is where we see a scrap product we like and set out to recreate it with supplies we already own. So let’s go ahead and dive in to what I have for you this month.
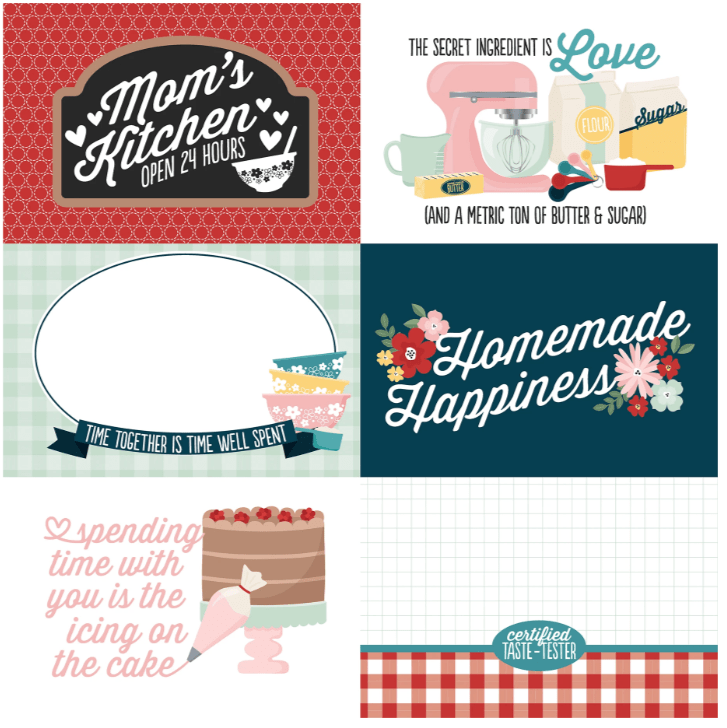
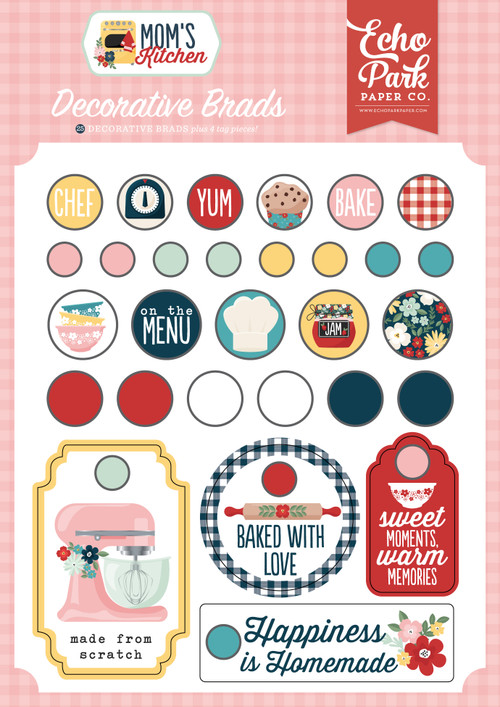
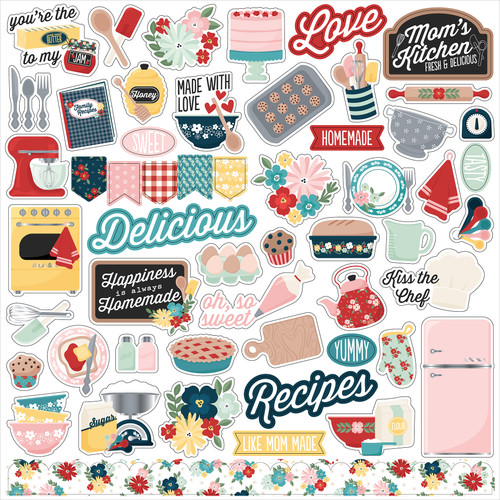
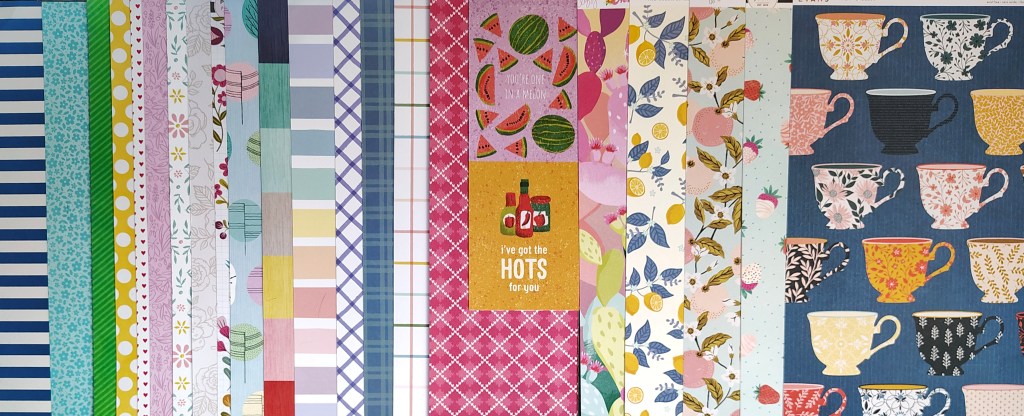
Since we always start our forgery projects with inspiration, here is the image we are working with this month. It is the cut-apart sheet from Echo Park’s Mon’s Kitchen collection.
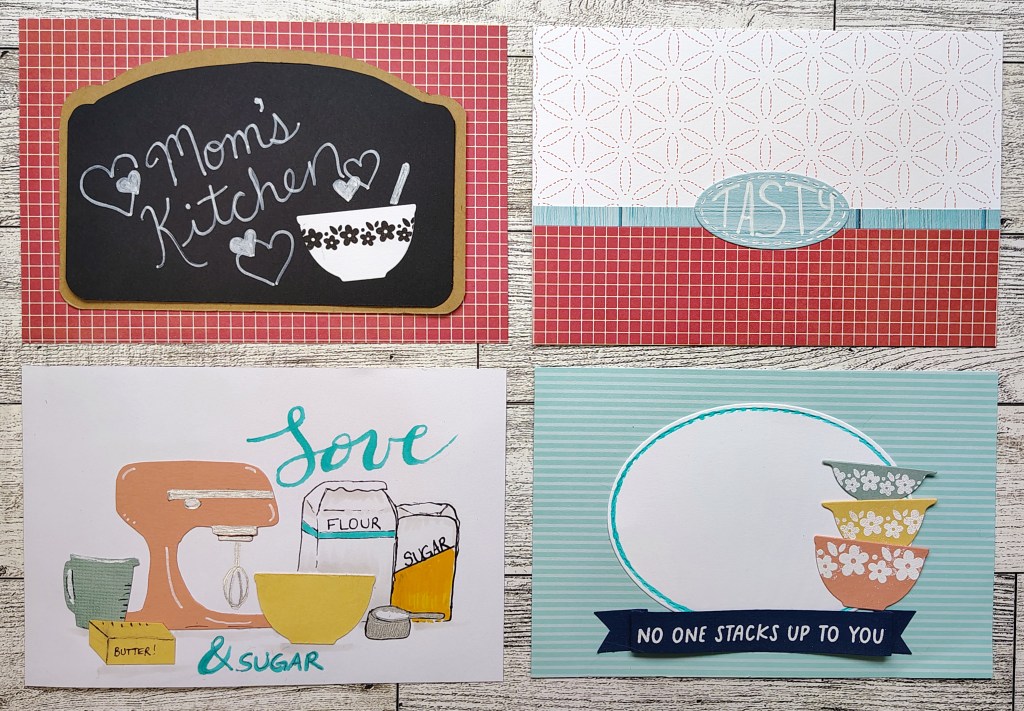
I thought I was only going to reproduce the chalkboard element as an independent embellishment. But once I started looking at all the cards I wanted to do more! I wanted to do them all, but I didn’t get quite that far. I did get four out of six, which is pretty goo.
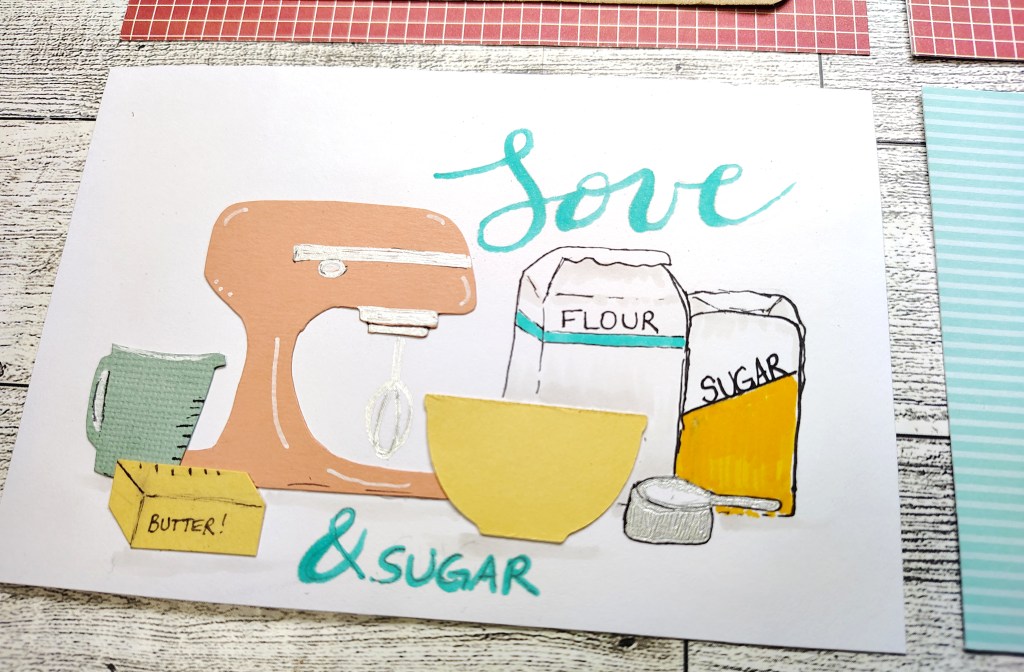
This one was by far my favorite. I drew and/or cut out all the imagery on this card (except the bowl). I had so much fun giving more artful skills a solid go. Yay!
If you want tips and tricks for each of these cards. I break down how I created that mixer as well from seeing and object, to seeing shapes.
For more creative ideas, the CKC blog has more forgery examples to check out. I hope this gave you some ideas on how you can recreate your favorite product ideas with supplies you may already have on hand. Don’t forget to show off your stuff over on the CKC Facebook group, or tag us on Instagram @counterfeitkitchallenge or use #counterfeitkitchallenge.
Welcome to a new month of kit building. I’m hosting the activities over at CKC this time around. And I have an announcement. This is my last month being on the team at CKC. I’ve had another opportunity come up and have decided to move on. More on that in a future post. For now I’m happy to share my final month of CKC team work with a final hosting lead.
I’ve invited my friend Debbie Barton to be our Guest Designer this month. She has energy and fun layouts to share so I know she’ll do great! Plus she said she has wanted to try this whole kit building project anyway! So welcome Debbie!
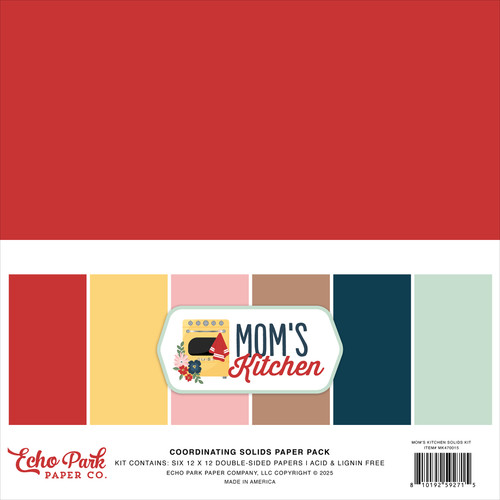
Now, the kit I chose got a little bit of side-eye from my team members. I just had to laugh because I do like to challenge people. I’m a bit of an imp that way. So, we are using the Mom’s Kitchen collection from Echo Park.
At first glance this kit is heavily themed. So many mixers, aprons, pies and so on. Don’t let that stop you though. If you don’t like the theme, you can pull other inspiration from this kit. In fact you’ll see that my own kit largely side steps the theme in favor of color and pattern.
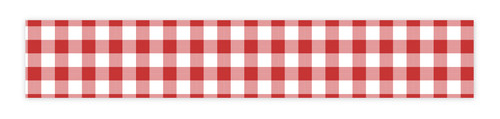
So these are the papers I came up with. I leaned into the checkered print with a selction of cheks/plaids and even some stripes in a variety of colors. I did pull in some fruit imagery as an adjacent theme. I have lots of supporting small scale prints to layer up with everything.
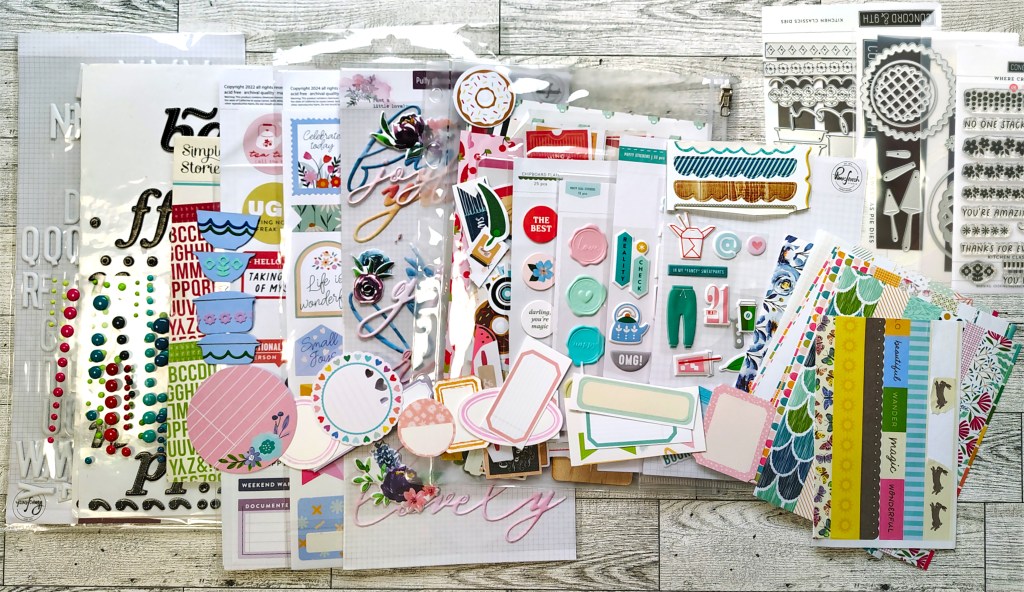
With the embellishments is where I brought in more of the theme. These can be left off if they just don’t fit the stories I’m telling. It is hard to see in the mix of everything, but I have some pots & bowl die cuts toward the left. I’ve got a pouch of “food” embellishments in the center (see that donut toward the top center?). Plus on the far right I have dies for creating pies as well as more bowls & pots.
It’s a nice big versatile kit this month since May is a typical heavy scrapping month for me!
Don’t forget that each month I also create my own elements to add into my kit. Of course these are inspired by the original kit, but often have a twist of their own. So don’t miss what I will make in just a couple of days. I’m loving my ideas this time.
There is a tradition over at CKC of titling our kits just like companies do. As my final kit going out with a food theme and I’m calling mine…
Farewell Fiesta!
If you want more details on my kit building thought process, check out my kit build video.
I hope you can follow along with the other designers and see how they interpreted their own kits.
I have a free download “worksheet” to help guide you through your own kit build process. It is a printable pdf and there are two worksheets per letter size page. Have fun kit building!
Don’t forget to show off your stuff over on the CKC Facebook group, or tag us on Instagram @counterfeitkitchallenge or use #counterfeitkitchallenge.
I’ll be back on the 4th, for our Product Forgeries. Until then, have an artful day!
I love kit building and that is why I am on the design team for the Counterfeit Kit Challenge project. We take an inspiration kit each month and proceed to replicate it, or as we say, counterfeit it. This is a free, friendly group that helps inspire you to use up supplies you already own. We are not about needing to buy the latest and greatest thing (though we won’t stop you if you enjoy new crafty goodies😉 ).
Welcome to a new month of kit building. Julene is our hostess this time. She chose a set of papers the and coordinating supplies from Citrus Twist Kits! Before we dive into the details of this kit, let’s give a warm welcome to our guest designer this month, Diana Vanderleist. She has been scrapbooking for more than three decades! What an amazing accomplishment.
So let’s move on with our kit. Here are a few looks at what we have in store this time around.
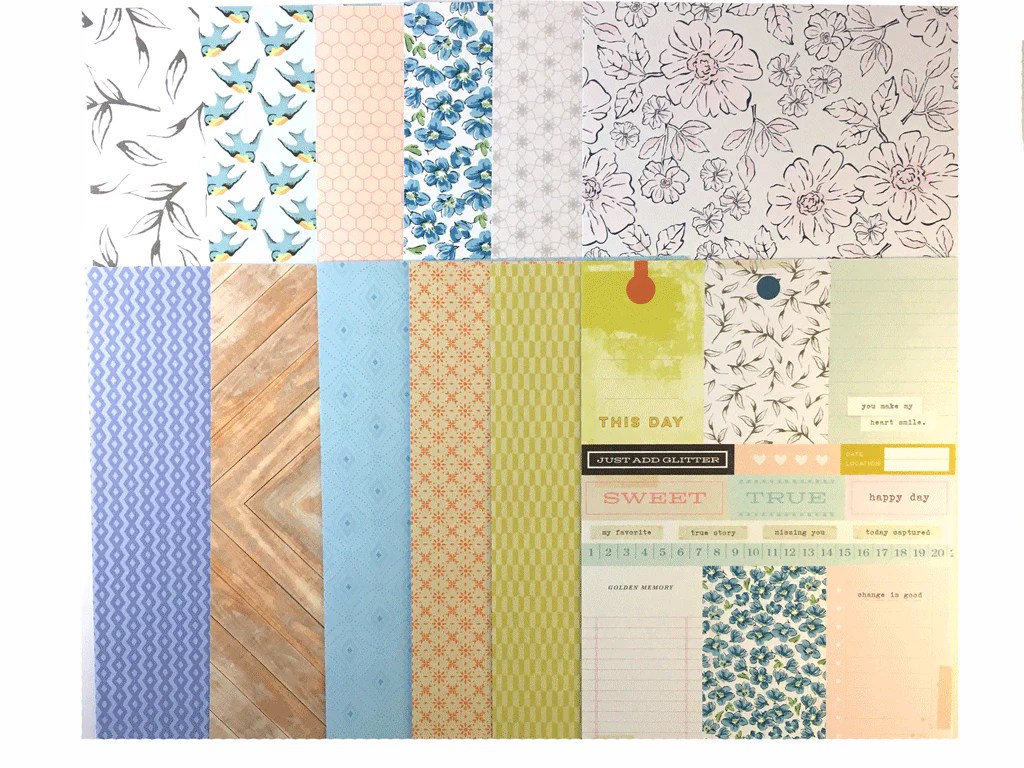
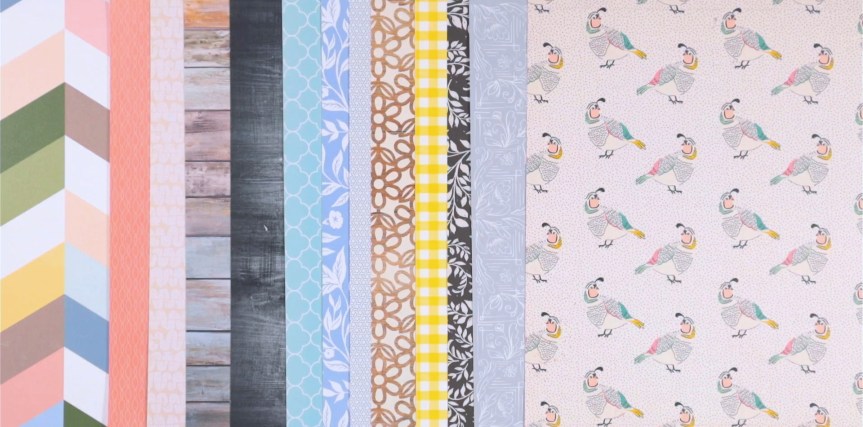
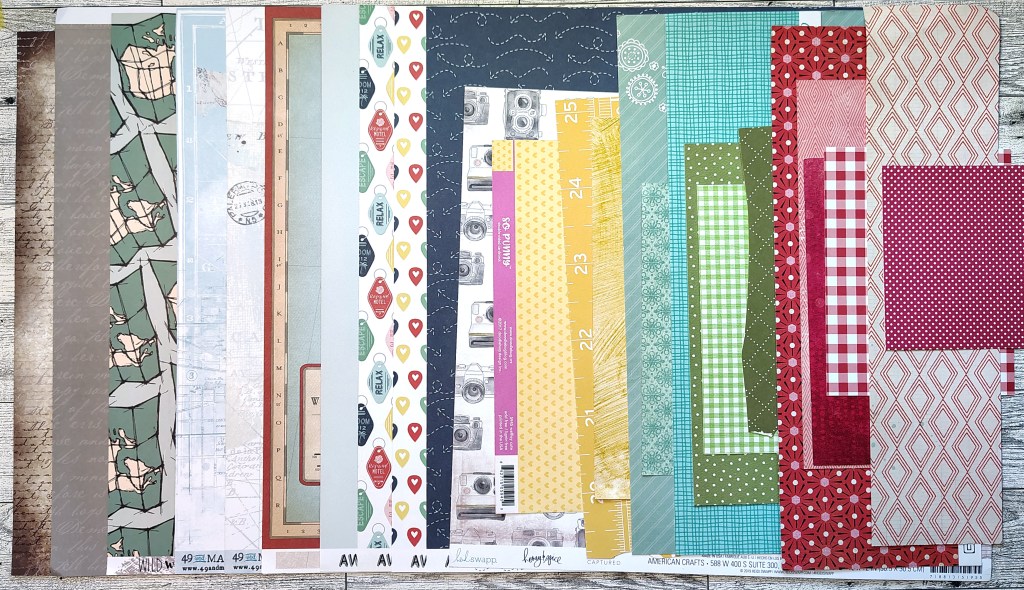
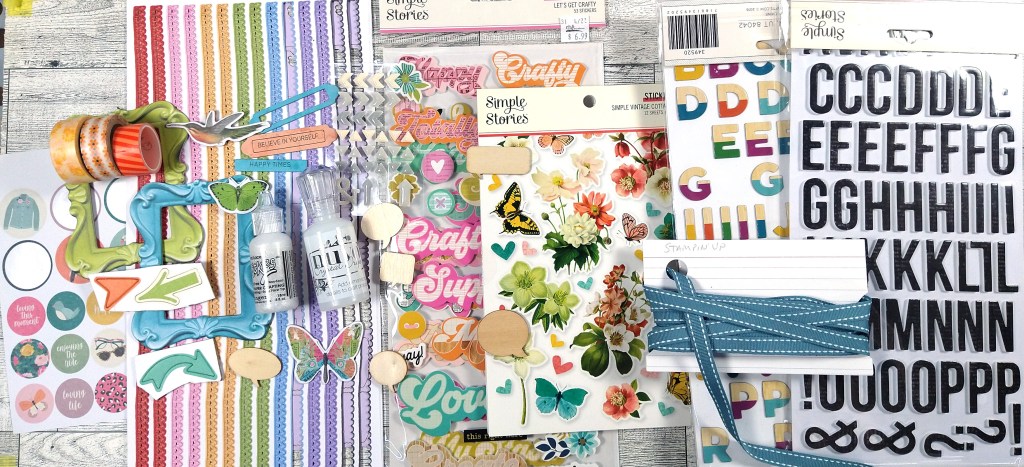
I loved the mellow color and patterns of the papers. That woodgrain paper is right up my alley! So that is exactly where I started my kit build. I knew I wanted to keep my choices under control. I managed that with my papers. But as you’ll see, my embellishment choices went way overboard, LOL. So here are the papers.
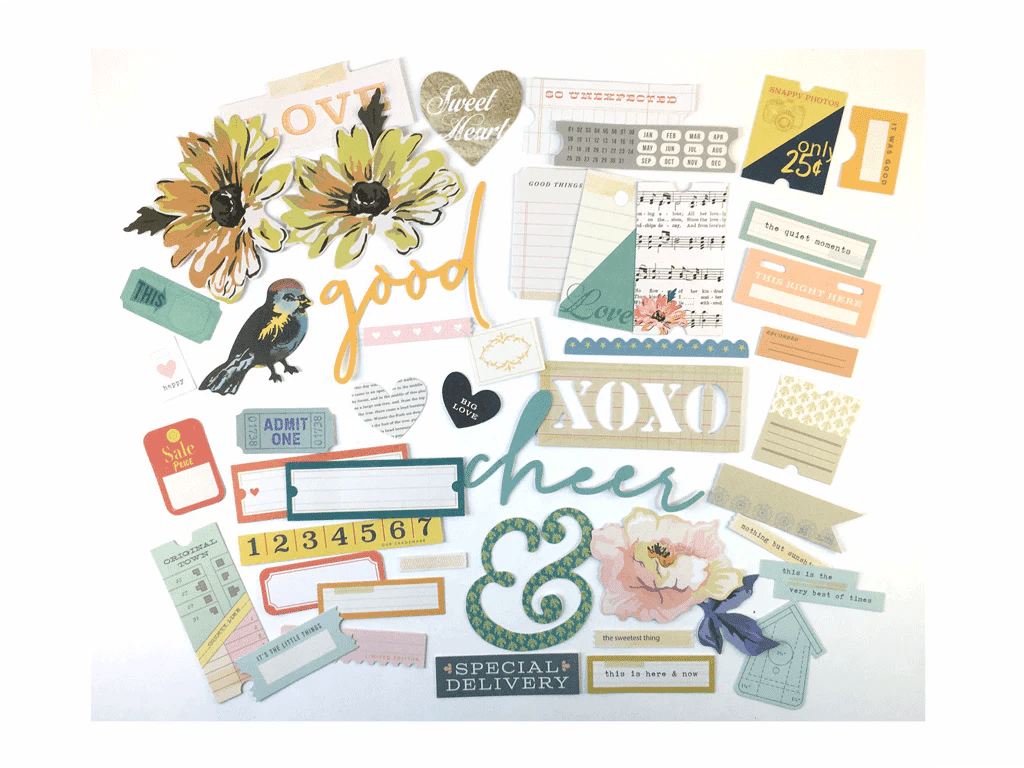
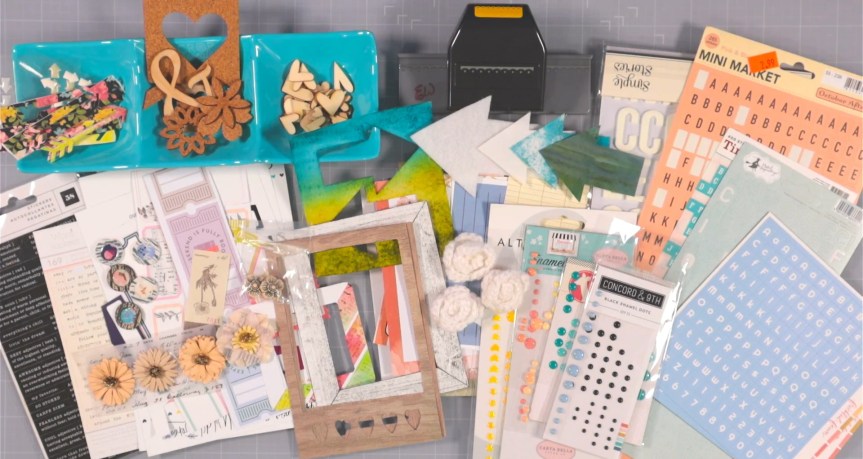
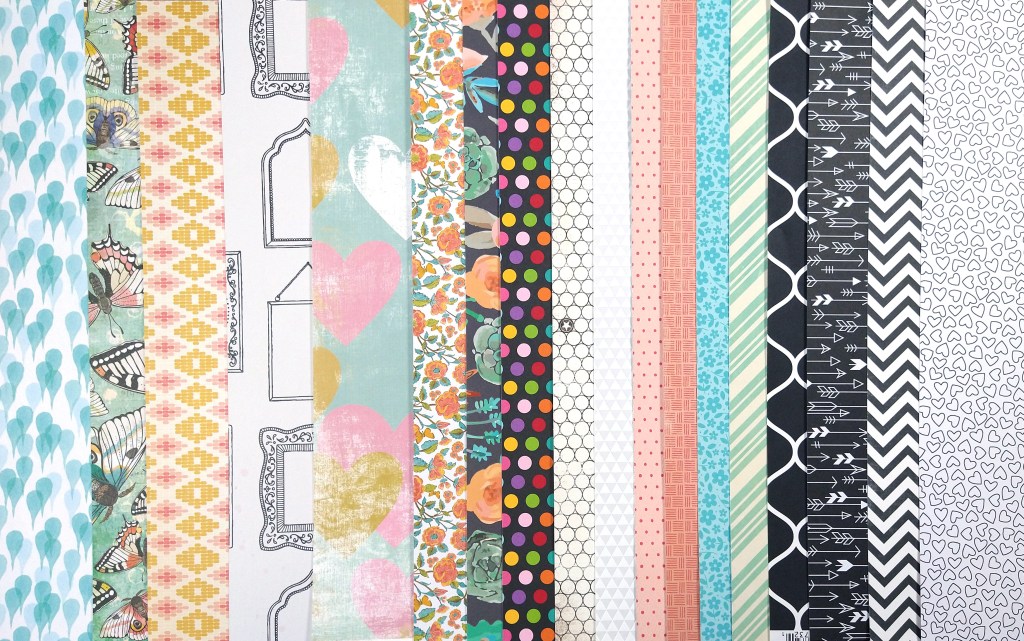
And here are the embellishments…
I was inspired to pull lots of diecuts, arrows, hearts and flowers from a peek at the kits simple embellishment selection. Plus I even spied a little bit of scalloped edges so I added a border punch to my kit. Even small things can be inspiring!
Don’t forget that each month I also create my own elements to add into my kit. Of course these are inspired by the original kit, but often have a twist of their own. So don’t miss what I will make in just a couple of days. I’m loving my ideas this time.
There is a tradition over at CKC of titling our kits just like companies do. When I went searching for a bird pattern paper I found multiple options which was unexpected. With that I’m calling my kit…
Bird Watch
If you want more details on my kit building thought process, check out my kit build video.
I hope you can follow along with the other designers and see how they interpreted their own kits.
I have a free download “worksheet” to help guide you through your own kit build process. It is a printable pdf and there are two worksheets per letter size page. Have fun kit building!
Don’t forget to show off your stuff over on the CKC Facebook group, or tag us on Instagram @counterfeitkitchallenge or use #counterfeitkitchallenge.
I’ll be back on the 4th, for our Product Forgeries. Until then, have an artful day!
I love kit building and that is why I am on the design team for the Counterfeit Kit Challenge project. We take an inspiration kit each month and proceed to replicate it, or as we say, counterfeit it. This is a free, friendly group that helps inspire you to use up supplies you already own. We are not about needing to buy the latest and greatest thing (though we won’t stop you if you enjoy new crafty goodies😉 ).
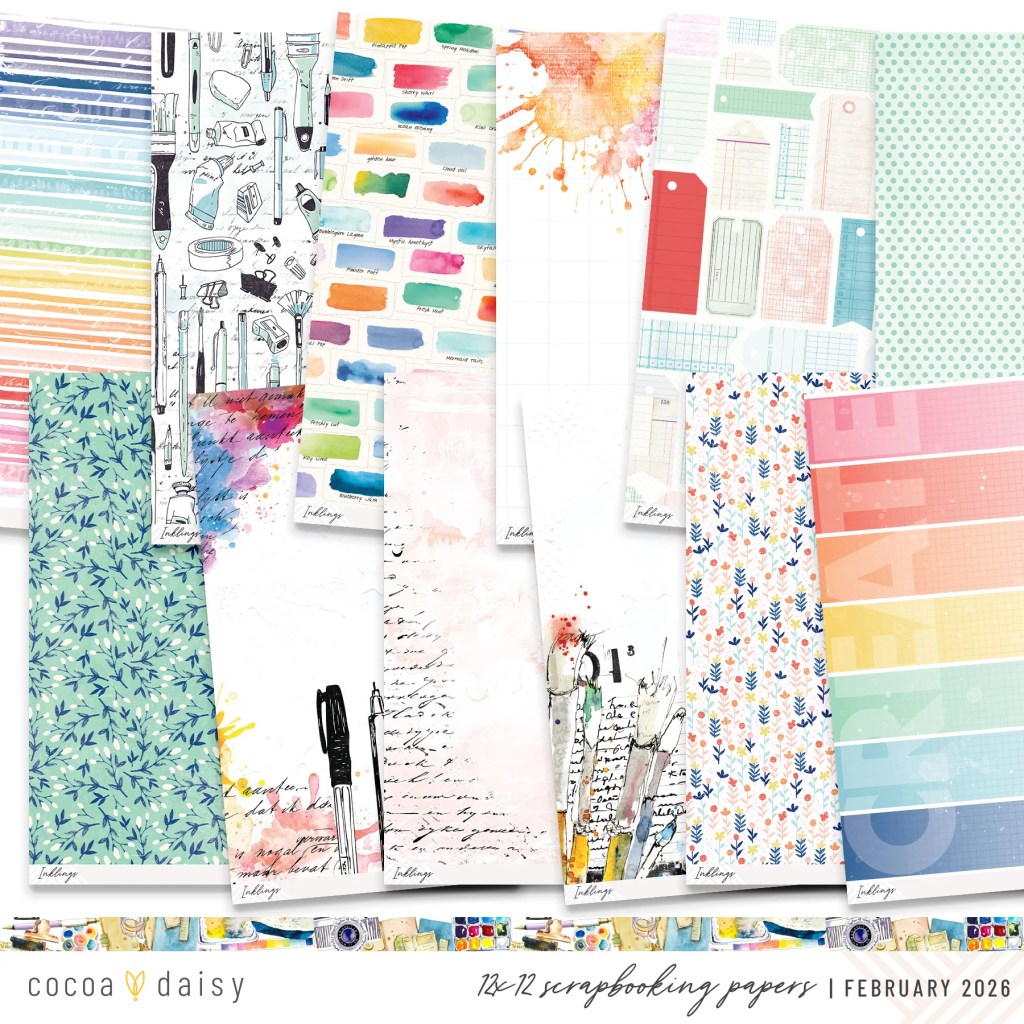
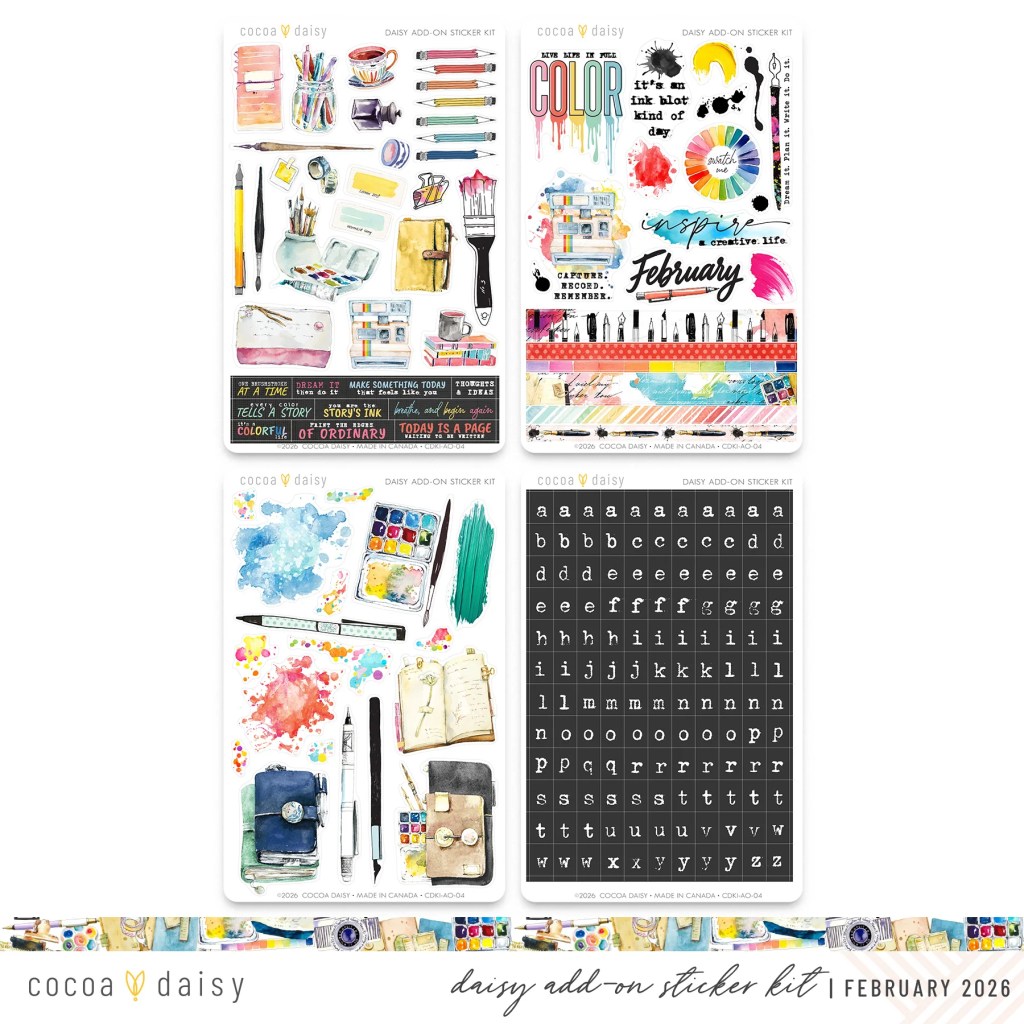
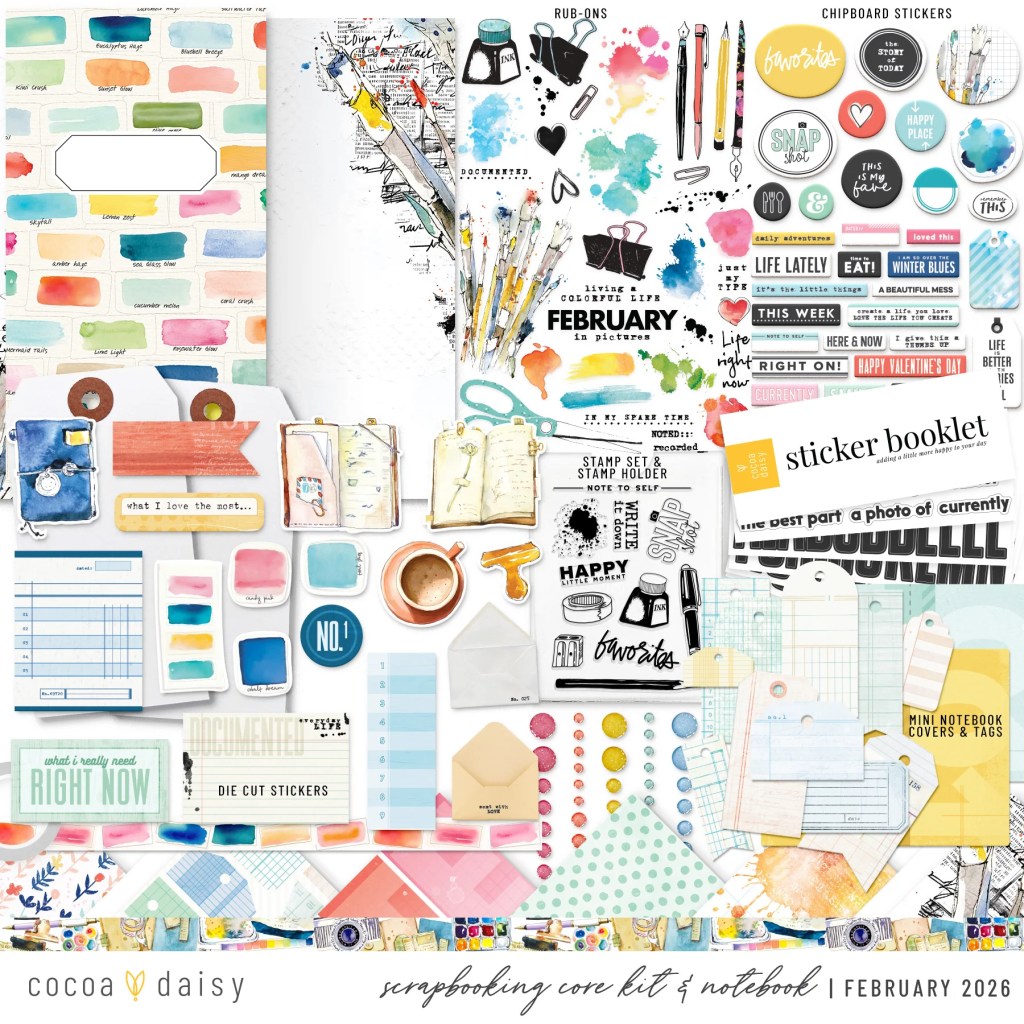
Welcome to a new month of kit building. Team lead Tara is our hostess this time! She chose the Inklings, Feb ’26 kit from Cocoa Daisy. to inspire us. Before we dive into the details of this kit, let’s give a warm welcome to our guest designer this month, Neyla. You can find her on Instagram or on YouTube.
So let’s move on with our kit. Here are a few looks at what we have in store this time around.
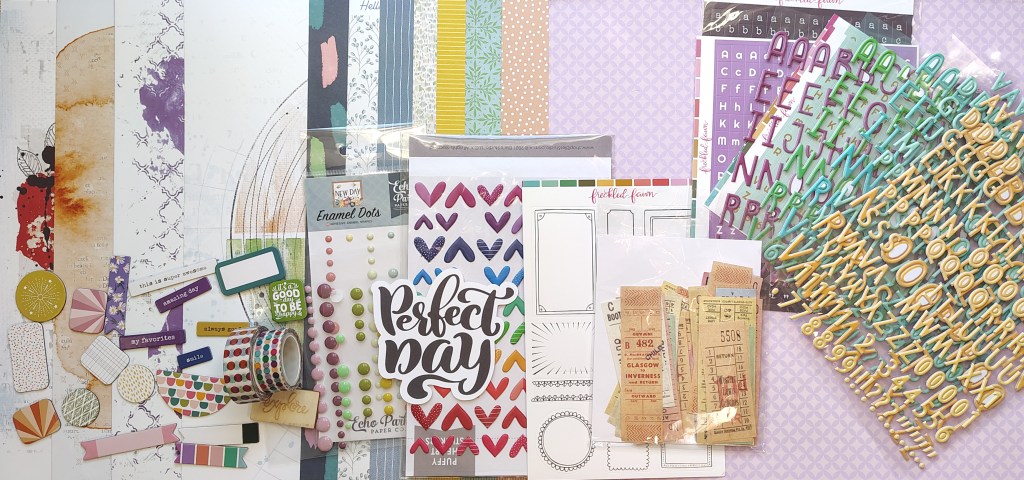
I need a small kit this month so I focused on just a few elements. I wanted to follow some of the color pops, add in some mixed media, plus include really non-themed embellishments. Here is what I came up with. I was going to add in a mixed-media friendly stamp set, but forgot! No worries, I can just grab that off my shelf and use it anyway.
Don’t forget that each month I also create my own elements to add into my kit. Of course these are inspired by the original kit, but often have a twist of their own. So don’t miss what I will make in just a couple of days. I’m loving my ideas this time.
There is a tradition over at CKC of titling our kits just like companies do. So I’m calling mine…
Media Pop
If you want more details on my kit building thought process, check out my kit build video.
I hope you can follow along with the other designers and see how they interpreted their own kits.
I have a free download “worksheet” to help guide you through your own kit build process. It is a printable pdf and there are two worksheets per letter size page. Have fun kit building!
Don’t forget to show off your stuff over on the CKC Facebook group, or tag us on Instagram @counterfeitkitchallenge or use #counterfeitkitchallenge.
I’ll be back on the 4th, for our Product Forgeries. Until then, have an artful day!
As a design team member over at the Counterfeit Kit Challenge group I play along with as many of our monthly inspiration challenges as I can. The Forgery on the Fourth project is definitely one I enjoy! That is where we see a scrap product we like and set out to recreate it with supplies we already own. So let’s go ahead and dive in to what I have for you this month.
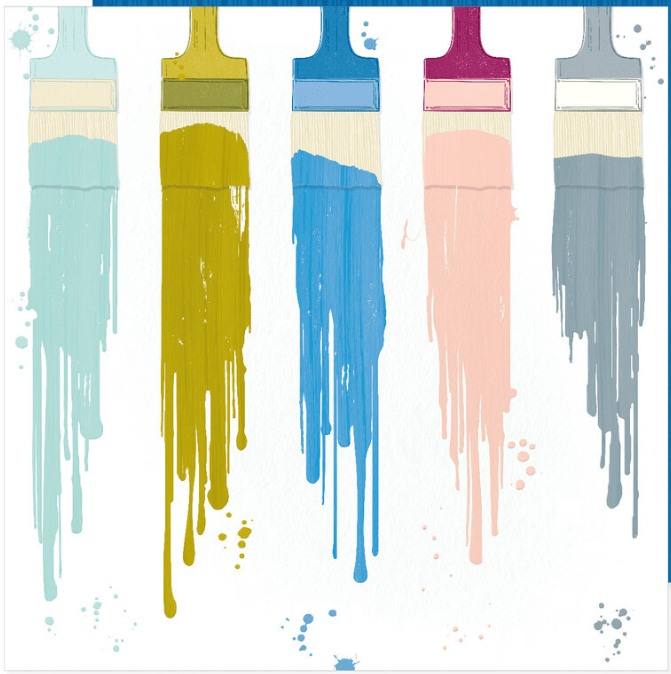
Since we always start our forgery projects with inspiration, here is the image we are working with this month. It is the [kit] from [company].
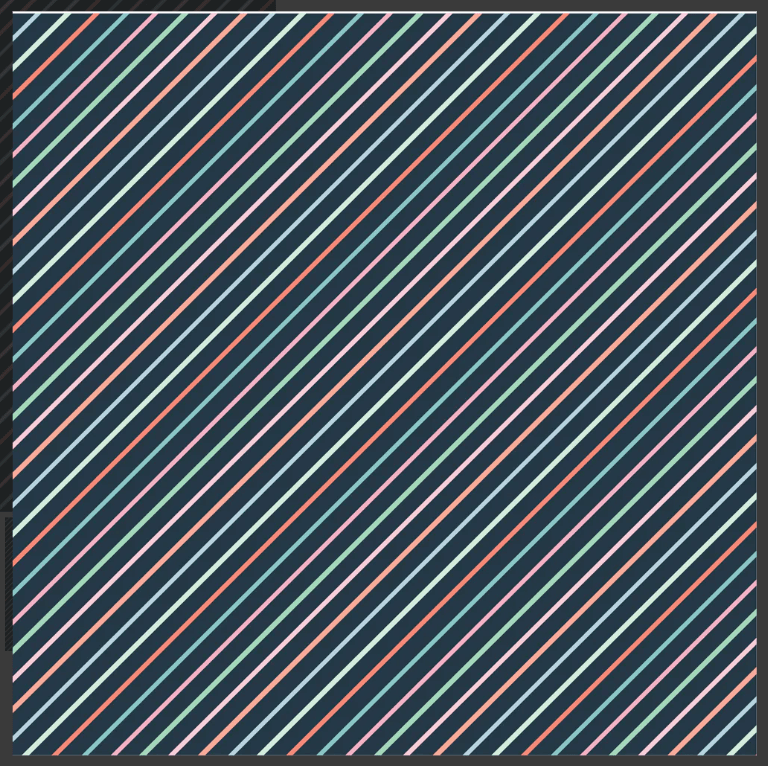
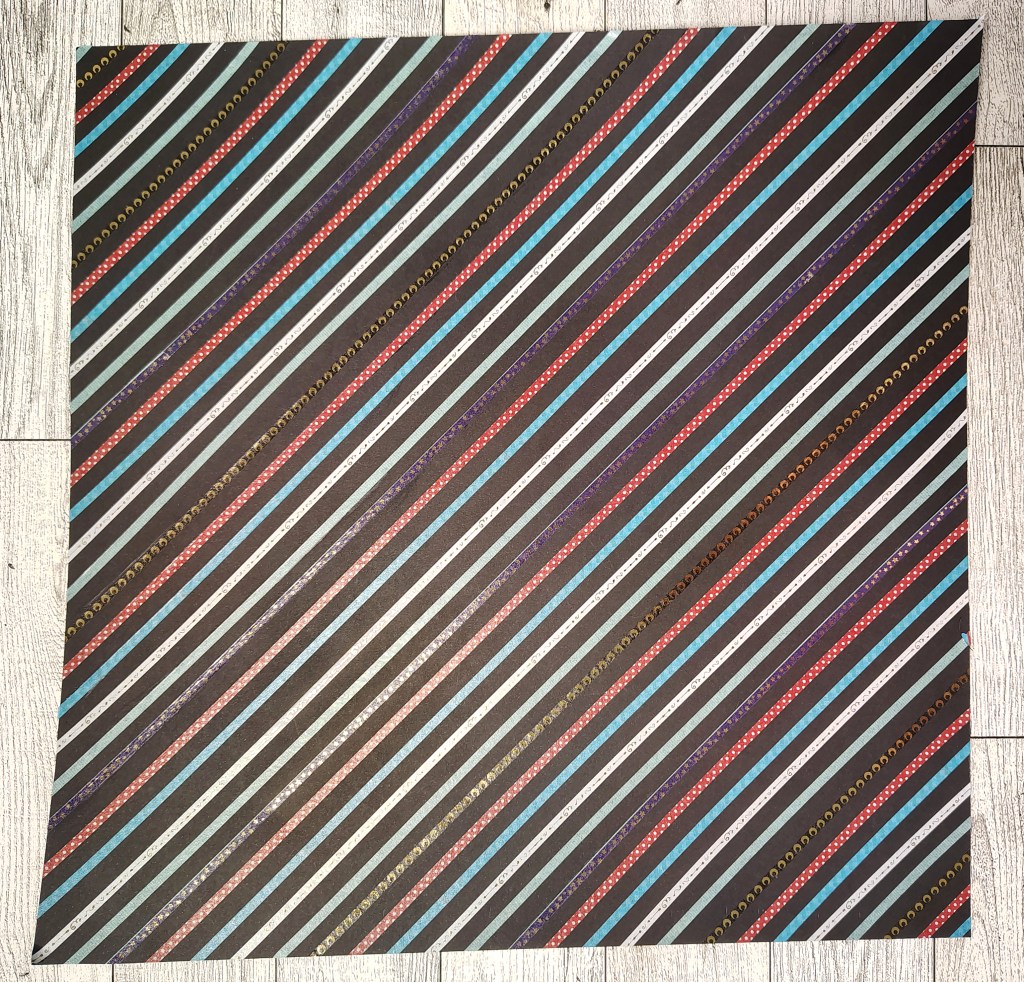
I had two big favorites from this kit. I loved the colorful stipes on black pattern paper from Simple Stories. Then of course I just adored the paintbrush paper from Vicki Boutin. I did have anything like either of these in my stash, so it was time to make my own.
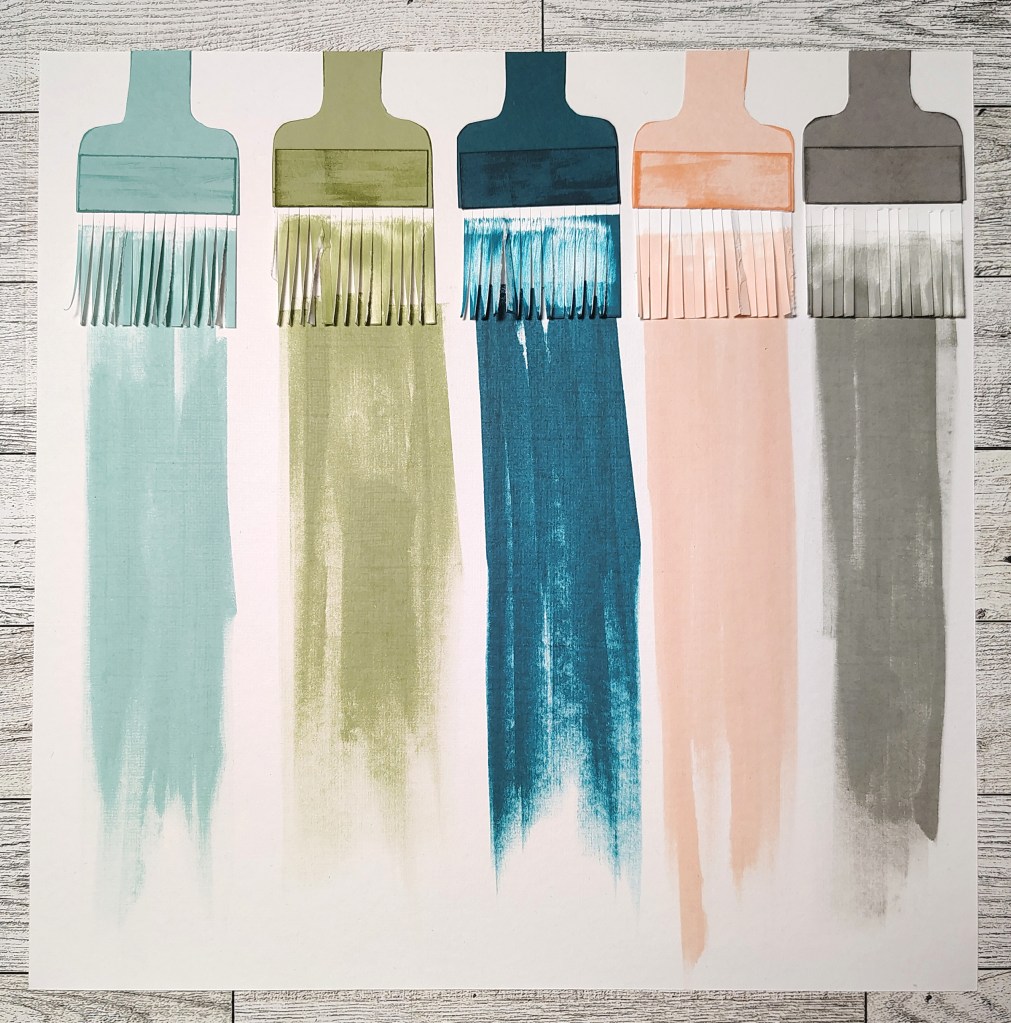
I decided to paper piece and ink my brushes. For the stripes I pulled out my thinest washi tapes and set to work. How do you think I did?
If you want to see more of the process on these, I do have a video tutorial up.
For more creative ideas, the CKC blog has more forgery examples to check out. I hope this gave you some ideas on how you can recreate your favorite product ideas with supplies you may already have on hand. Don’t forget to show off your stuff over on the CKC Facebook group, or tag us on Instagram @counterfeitkitchallenge or use #counterfeitkitchallenge.
I love kit building and that is why I am on the design team for the Counterfeit Kit Challenge project. We take an inspiration kit each month and proceed to replicate it, or as we say, counterfeit it. This is a free, friendly group that helps inspire you to use up supplies you already own. We are not about needing to buy the latest and greatest thing (though we won’t stop you if you enjoy new crafty goodies😉 ).
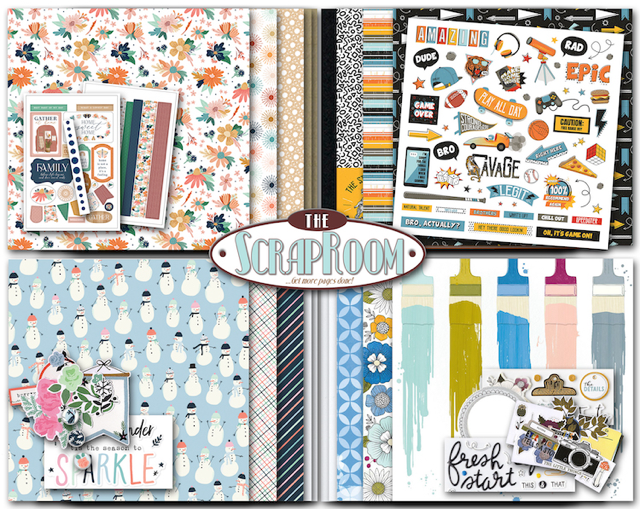
Welcome to a new month of kit building. Amanda is our hostess this time. She chose the January 2024 kit from The Scrap Room to inspire us. Before we dive into the details of this kit, let’s give a warm welcome to our guest designer this month. Kathy Price plays along with our challenge alrady and was happy to join as guest designer this month. She even created this month’s sketch which will be revealed on the 28th! You find find Kathy on her YouTube channel.
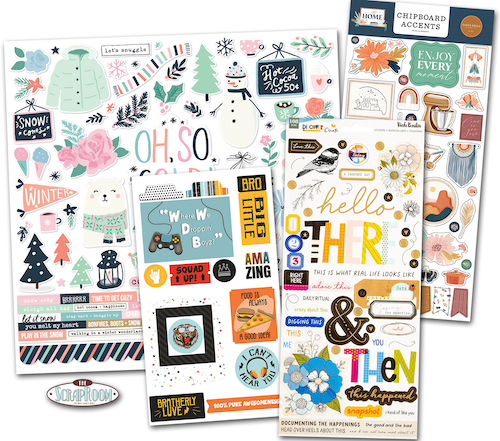
Now let’s look at the inspiration. Since this kit is so old, there aren’t many photos to peruse. But try zooming in to get all the vibes from this one.
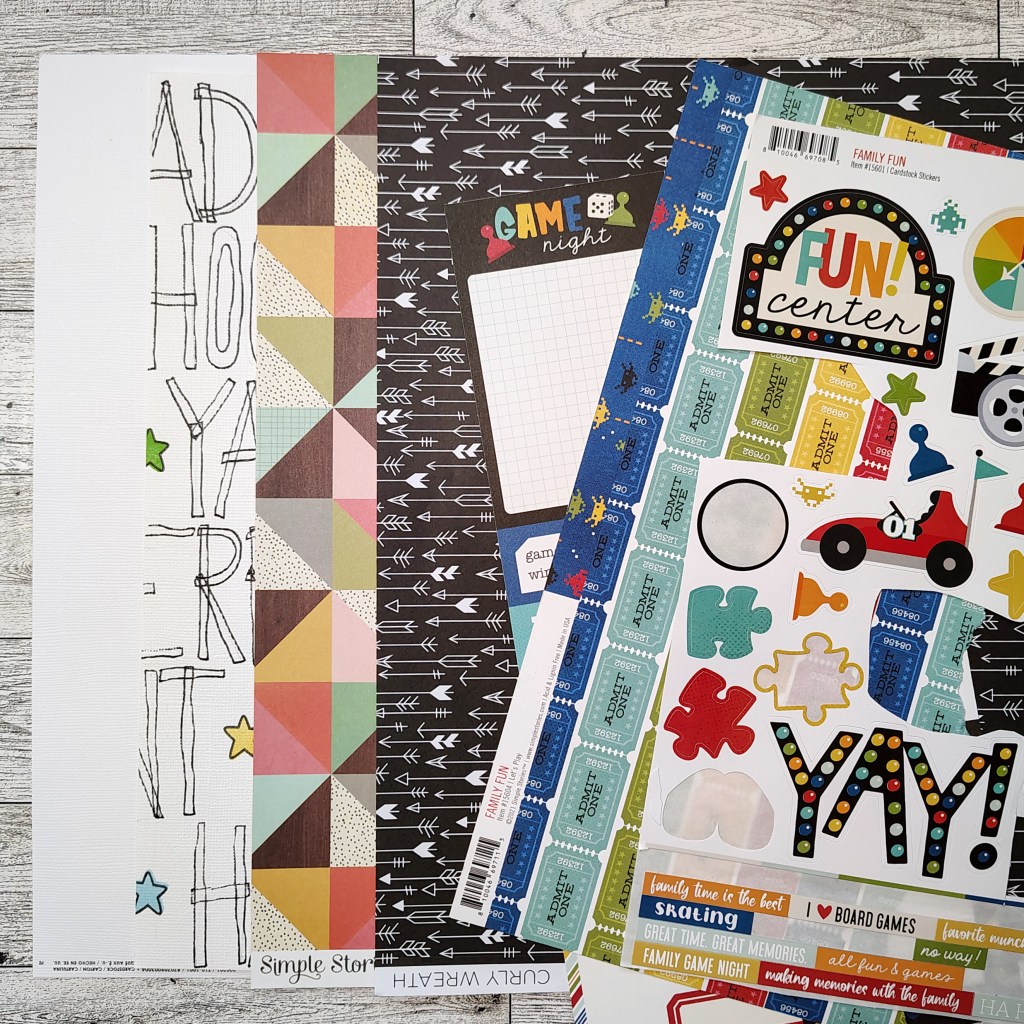
At first I though I would build one combo kit. But as soon as I reached for paper I found a selection of supplies from Creative Memories that fit perfectly with the upper left corner’s inspiration. So, building four mini kits it is!
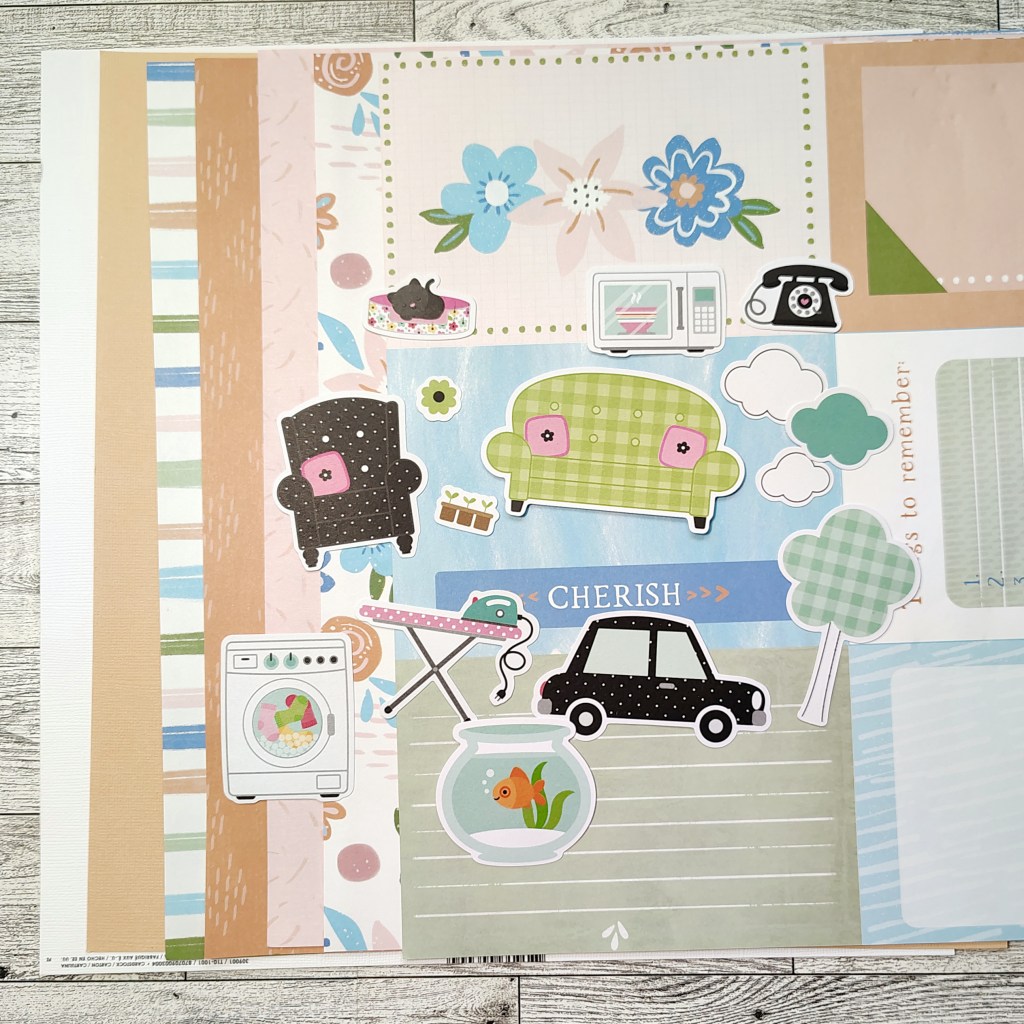
Kit #1: Family
Along with the Creative Memories supplies, I tossed in some homey icons from a pack of Bella Blvd ephemera. Notice the pops of black? That will be a thread that runs throughout my kits.
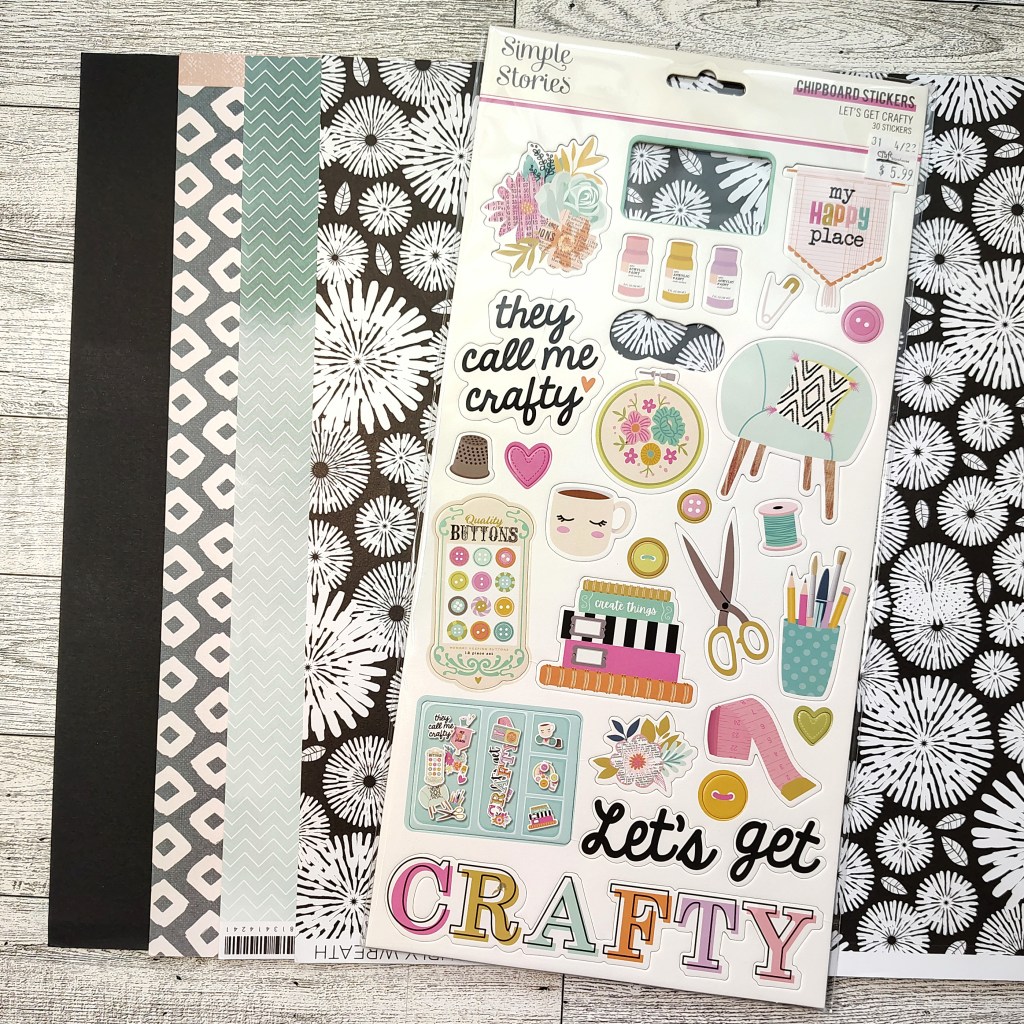
Kit #2: Crafty
This one came from the Vicki Boutin (bottom left corner) inspiration. I went with the mood of the inspo rather than a one to one match. I’ve got florals and gemotrics to capture the vibes. I’ve included a bit of “painterly” craft themed embellishments. Plus, I just may create some of my own items to go with this kit as well. See what I actually make on the 4th!
Kit #3: Games
Again, I wanted to capture the energy of the inspo rather than the exact match. Instead of “boy” I switched it up to “games”. I also included the idea of black and white, as well as the bold colors from the pattern papers. This kit will be well connected with the next one…
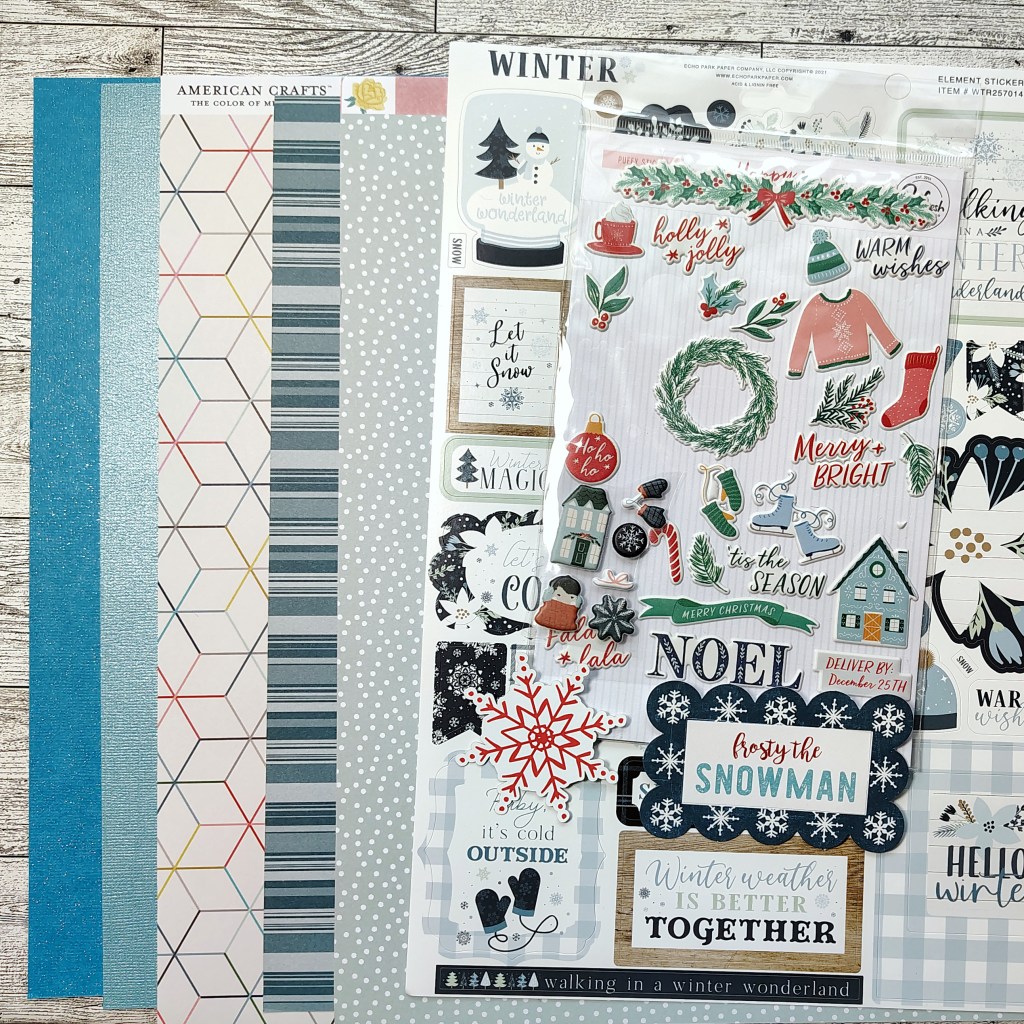
Kit #2: Winter/Christmas
I don’t expect to be able to scrap any fun winter photos this year (no snow for us so far, sniff). BUT, we do play a game each December that is an advent calendar as well! So with the game theme, and some of these winter/Christmas embellishments, I can create layouts for that specific story!
Don’t forget that each month I also create my own elements to add into my kit. Of course these are inspired by the original kit, but often have a twist of their own. So don’t miss what I will make in just a couple of days. I’m loving my ideas this time.
There is a tradition over at CKC of titling our kits just like companies do. With four kits, it may be hard to find one over arching name. But I’ve got it figured out…
Cozy Hobbies
If you want more details on my kit building thought process, check out my kit build video.
I hope you can follow along with the other designers and see how they interpreted their own kits.
I have a free download “worksheet” to help guide you through your own kit build process. It is a printable pdf and there are two worksheets per letter size page. Have fun kit building!
Don’t forget to show off your stuff over on the CKC Facebook group, or tag us on Instagram @counterfeitkitchallenge or use #counterfeitkitchallenge.
I’ll be back on the 4th, for our Product Forgeries. Until then, have an artful day!
I love kit building and that is why I am on the design team for the Counterfeit Kit Challenge project. We take an inspiration kit each month and proceed to replicate it, or as we say, counterfeit it. This is a free, friendly group that helps inspire you to use up supplies you already own. We are not about needing to buy the latest and greatest thing (though we won’t stop you if you enjoy new crafty goodies😉 ).
Welcome to 2026. Not only is it a new month, but is also a new year. Are you ready to get back to kit building? Honestly, I still feel like I have a December “hangover”. LOL. But here we go. Sometimes the best thing to do is just get right back into the flow.
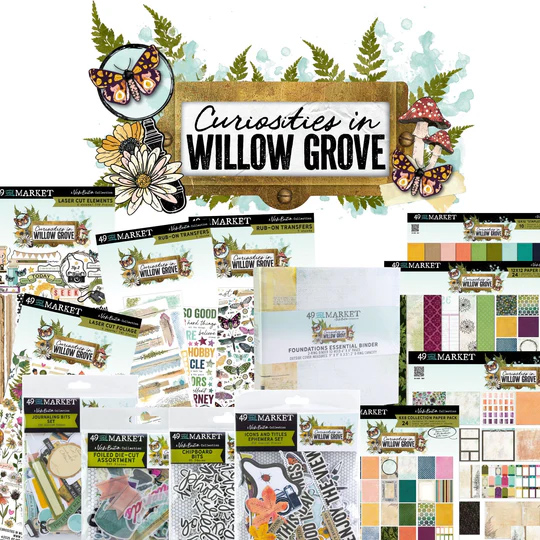
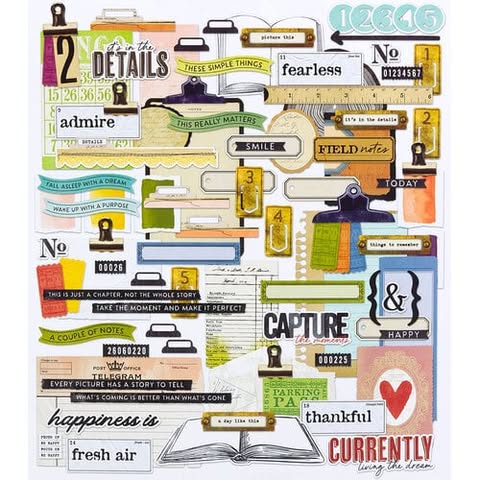
Team member Vikki is our hostess this time. She chose the Curiosities in Willow Grove* collection from Vicki Boutin and 49 & Market to inspire us. Before we dive into the details of this kit, let’s give a warm welcome to our guest designer this month, Melinda Barkman. You can check out her own Facebook group, Busy as a Bee Designs, to learn more.
Now we are ready to take a lookg at our inspiration! Here are a few looks at what we have in store this time around.
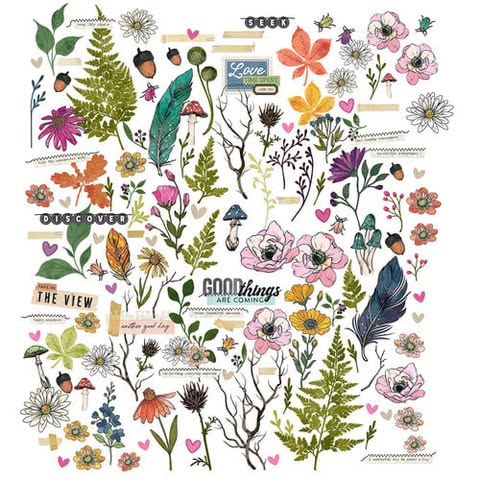
This is pretty classic Vicki Boutin. What drew me to this kit are the same things that draw me to all her work: nature, good color, pops of black, mixed media and word phrases that matter to everyday storytelling. Let’s see how that played out in my kit selections
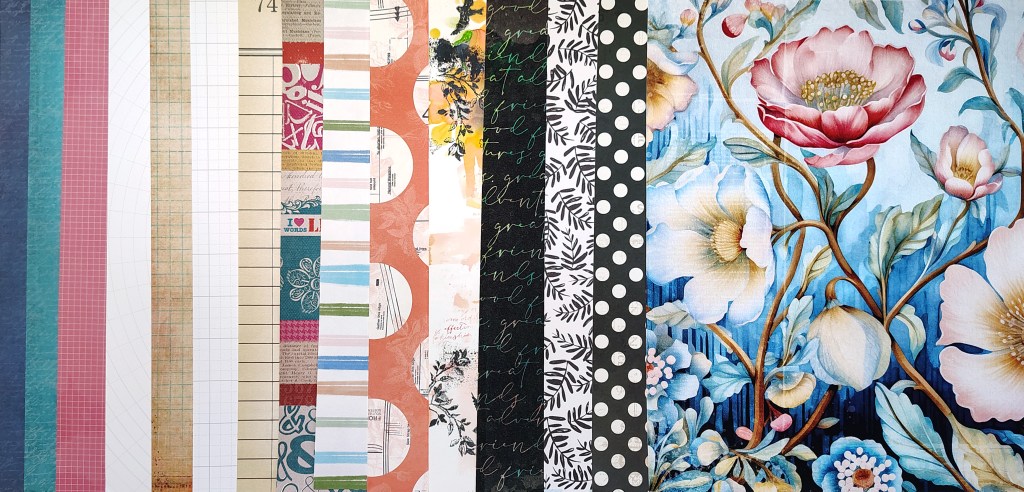
So these are the papers I came up with. I have just one VB paper in there, but found plenty of other manufacturers to vibe with. That bold floral is something I picked up at random on one shopping trip. I have no idea what I’ll do with it, but it is stunning. And VB does love some florals!
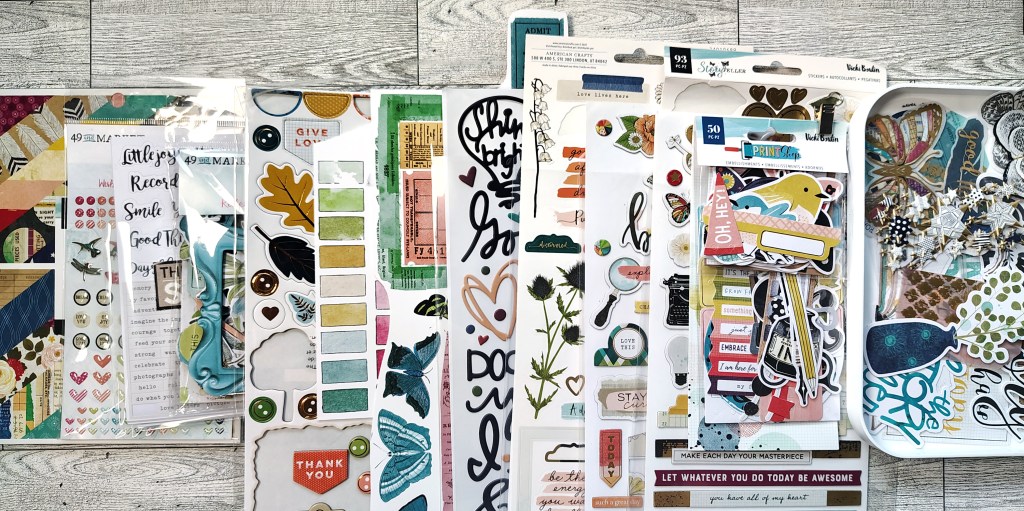
Now, with the embellishments I did dive heavily into my VB stash. I found similar icons in many of her previous collections. From typewriters to thistle, there is a bit of everything in my embellishments. I will never use all these pieces, but I find it easier to grab the entire package even when I only want one or two elements.
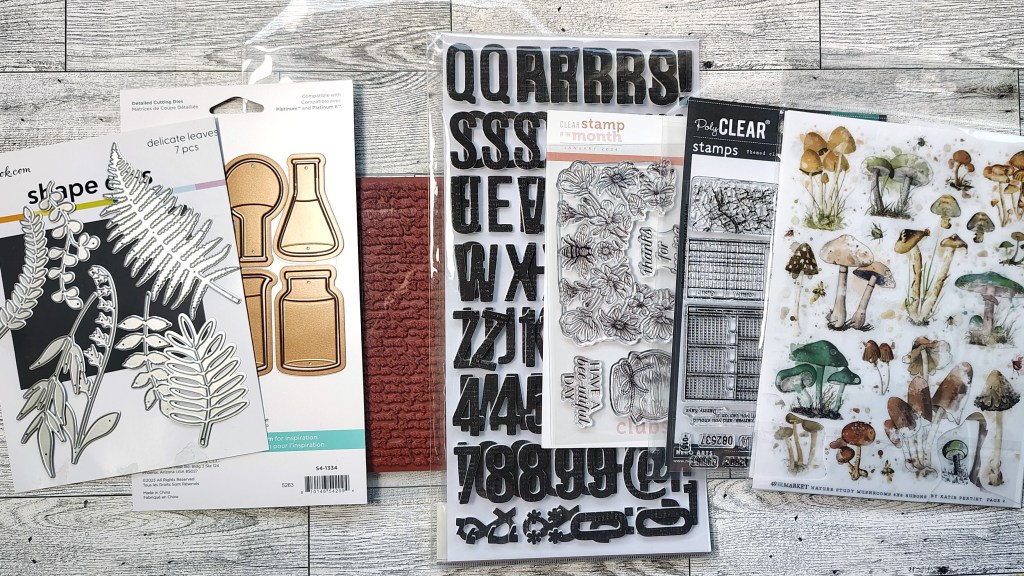
Can’t forget elements for mixing the media. So I have stamps and dies as well. My alpha and rubons ended up here since I forgot it in the above photo!
Don’t forget that each month I also create my own elements to add into my kit. Of course these are inspired by the original kit, but often have a twist of their own. So don’t miss what I will make in just a couple of days. I have simple, but completely DIY friendly ideas.
There is a tradition over at CKC of titling our kits just like companies do. So I’m calling mine…
Nature’s Whispers
If you want more details on my kit building thought process, check out my kit build video.
I hope you can follow along with the other designers and see how they interpreted their own kits.
I have a free download “worksheet” to help guide you through your own kit build process. It is a printable pdf and there are two worksheets per letter size page. Have fun kit building!
Don’t forget to show off your stuff over on the CKC Facebook group, or tag us on Instagram @counterfeitkitchallenge or use #counterfeitkitchallenge.
I’ll be back on the 4th, for our Product Forgeries where I create those DIY elements. Until then, have an artful day!
* I use affiliate links when available, at no extra cost to you. Using my shopping links helps support my work. Thank you!
I love kit building and that is why I am on the design team for the Counterfeit Kit Challenge project. We take an inspiration kit each month and proceed to replicate it, or as we say, counterfeit it. This is a free, friendly group that helps inspire you to use up supplies you already own. We are not about needing to buy the latest and greatest thing (though we won’t stop you if you enjoy new crafty goodies😉 ).
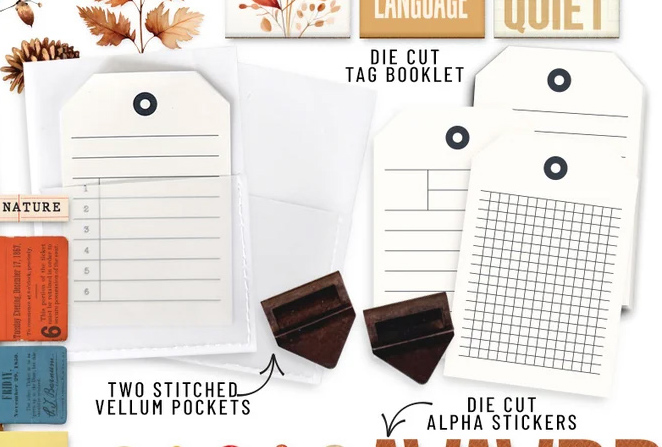
It is time for the final kit build of 2025! Our CKC group takes a kit break in December (don’t worry, we bring other fun instead). So, let’s get to this new month of kit building. Brandi is our hostess this time. She chose the Cocoa Daisy’sOctober Glow collection to inspire us. It is a kit full of atumnal colors and icons. Before we dive into the details, let’s give a warm welcome to our guest designer this month, Lisa. I hope you’ll cheer her on in our FB community group as well as on her YouTube channel.
So let’s move on with our kit. Here are a few looks at what we have in store this time around. We’ll start with some details and then look at the overview.
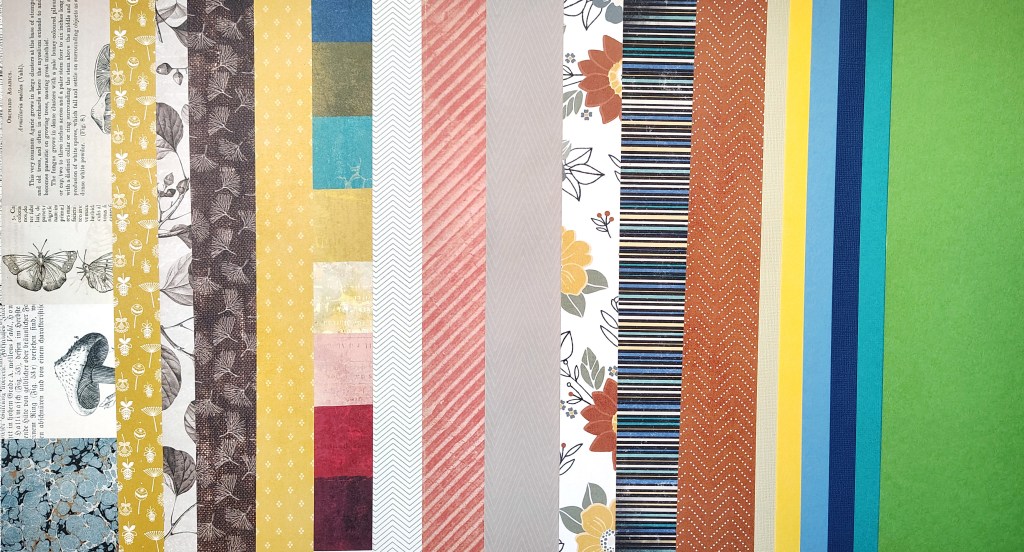
I am certainly ready for a fall vibe. The season finally changed where I live and I welcome it. (I know for our souther hemisphere friends, heading into spring must be a welcome change also!) While I’m ready for fall, I still need a broader color palette for my stories since my layouts often feature photos from other days of the year. So I will add in more color as I kit build. As always, I start with the papers.
I had some good options to go with many of the inspo papers. I did swap in a more colorful stripe in place of a plaid paper. Then I just added one more bold color stripe from Vicki Boutin. Using those two items, I brought in more yellow, blues and green in cardstock. This will help me feel flexible in my story options.
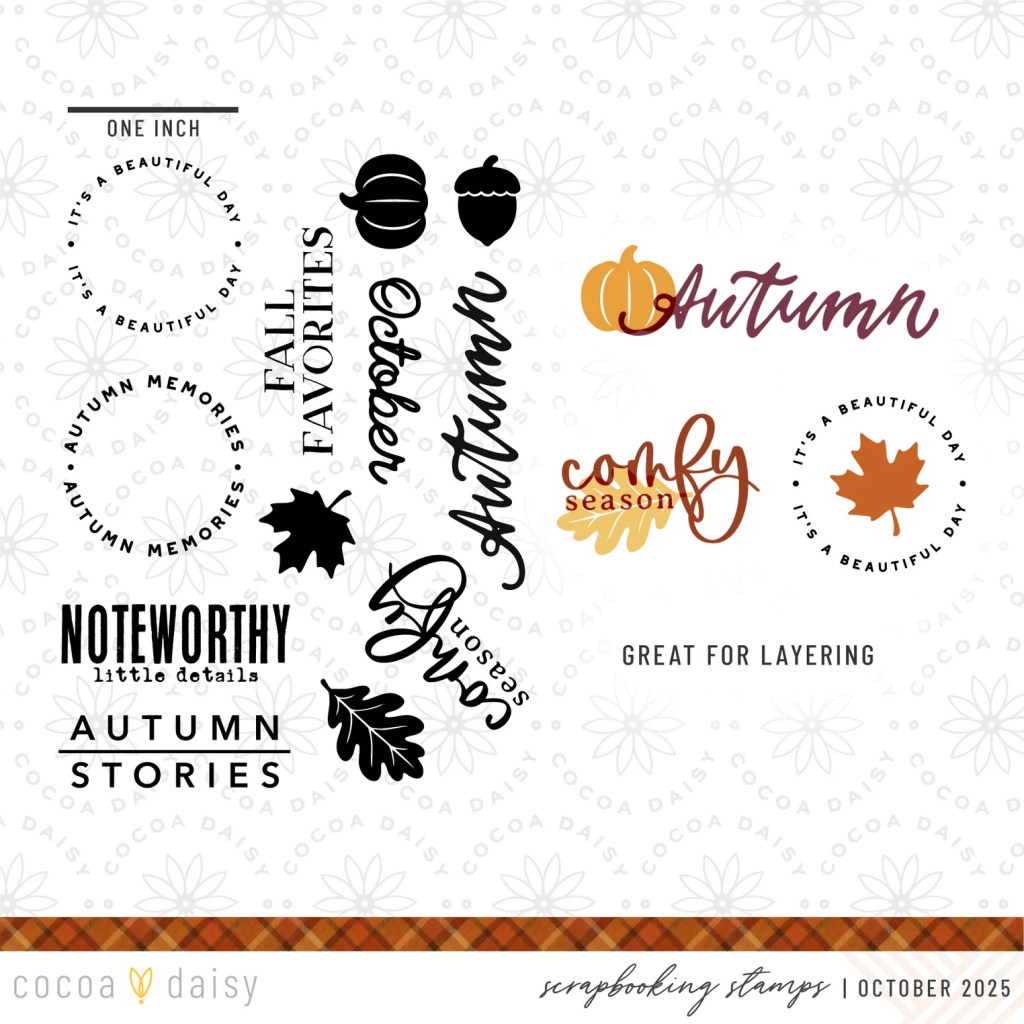
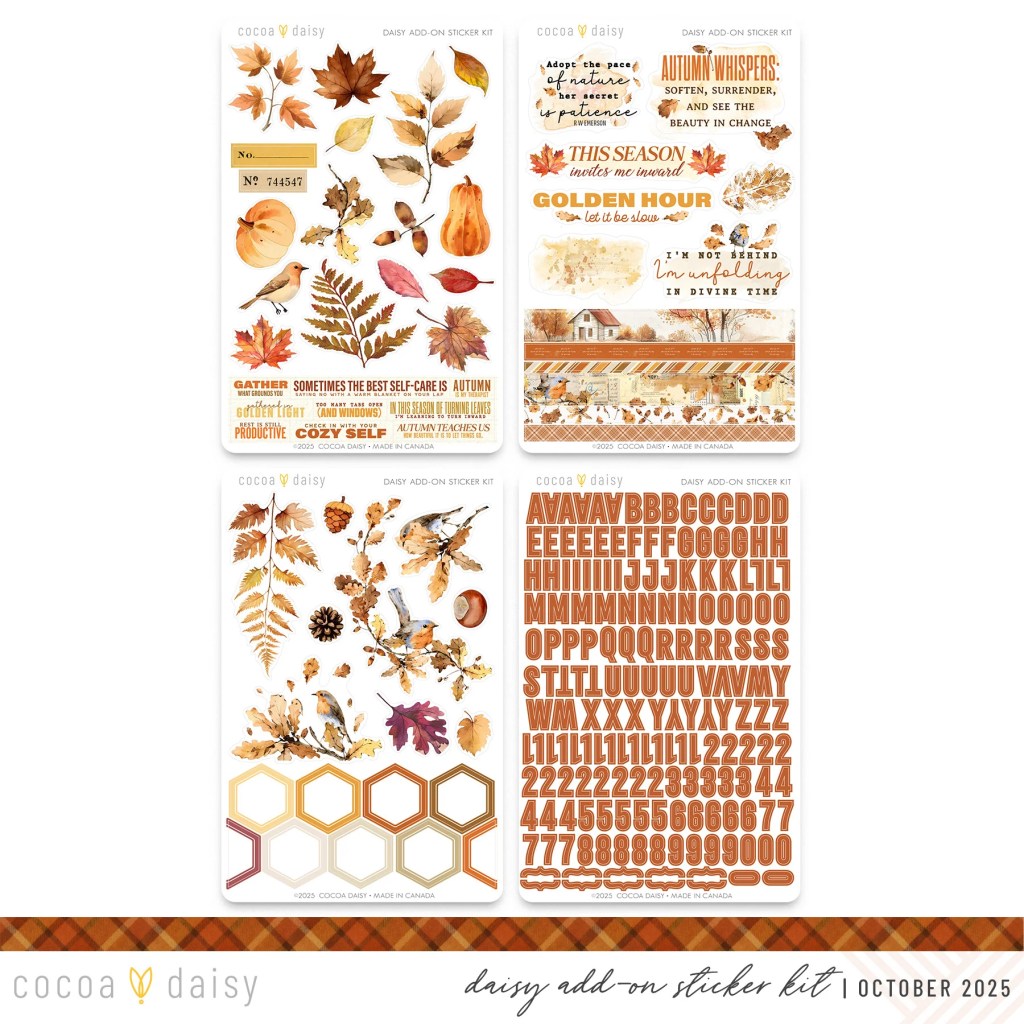
Moving on to embellishments… I found some great items that worked with the kit. I do have a bit more color with my chipboard, cutaparts and enamel dots. I also tucked in many stamps that I will put to use when I make my own supplies for this kit. Over at CKC we call that our Forgeries on the Fourth. For me I call it my Monthly Makes. I hope you’ll come back on the fourth to see what I do with those stamps. I have been wanting to do this for a while now! Plus I have more ideas to play with!
Before I go, there is a tradition over at CKC of titling our kits just like companies do. So I’m calling mine…
FALLing for stamps
If you want more details on my kit building thought process, check out my kit build video.
I hope you can follow along with the other designers and see how they interpreted their own kits.
Have fun kit building and don’t forget to show off your stuff over on the CKC Facebook group, or tag us on Instagram @counterfeitkitchallenge or use #counterfeitkitchallenge.
I’ll be back on the 4th, for our Product Forgeries. Until then, have an artful day!
I love kit building and that is why I am on the design team for the Counterfeit Kit Challenge project. We take an inspiration kit each month and proceed to replicate it, or as we say, counterfeit it. This is a free, friendly group that helps inspire you to use up supplies you already own. We are not about needing to buy the latest and greatest thing (though we won’t stop you if you enjoy new crafty goodies😉 ).
Hello, hello, hello. This is the first time in a while that I am officially creating a full scrapbook kit for the month. Over at CKC we share duties and I was on other tasks the last few months. It feels good to be back to my full kit self. With that…
Welcome to a new month of kit building! Team member Tina is our hostess this time. She chose the Not Just for Boys Kit Club kit called Journey the World to inspire us. We’ve got more travel theme to work with this month and a very neutral color palette. But before we take a closer look at that, let’s welcome our guest designer for October. Lori Stroup, a prior forger, is joining us. You can find her on instagram or her blog, My Happy LIfe.
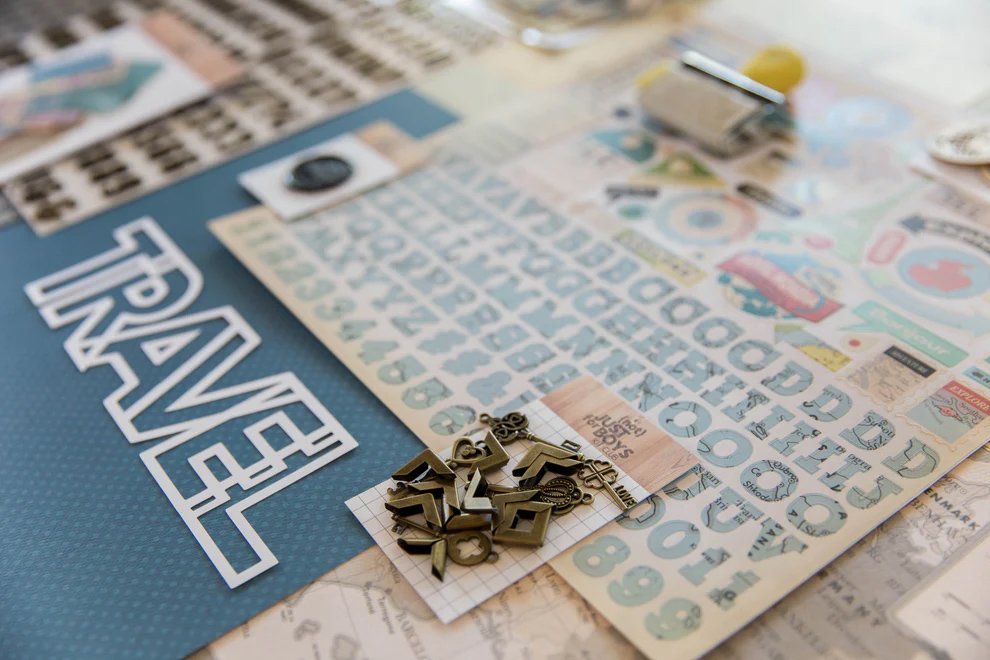
And now for the crafting! Here is what is inspiring us this time around.
While I DO have travels to document, there was a time when travel scrapping was not my thing. I just didn’t go anywhere. So if that is the case for you, remember that travel and easily slide over to “Advendure”. You can have adventures anywhere at any time, big or small. Keep that flexibility in mind as you build your kit.
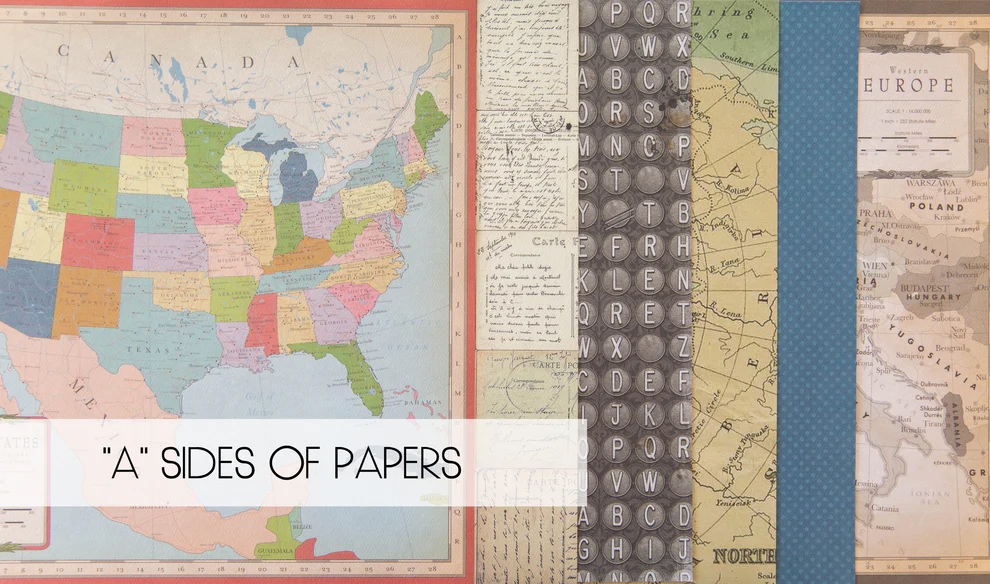
For me I will still with the solid travel theme. I’ve included several map prints, as well as a few other travel related ideas: geotags, luggage tags, camera. I’ve also added bright pops of color with a handful of scrap papers. This helps me shift a neurtral color palette more to my style.
I loved a lot of the embellishment elements in the inspo. From roller phrase stamp, to wax seals, I tucked in plenty of ideas right out of the kit. I’ve also thrown in a few of my own items, such as ribbon, puffy phrases and chipboard. When I finish making some embellishments on the Fourth, that will round out my extras.
Speaking of the Fourth, I hope you’ll join me as I create those elements to add into my kit. Of course these are inspired by the original kit, but often have a twist of their own. So don’t miss what I will make in just a couple of days.
There is a tradition over at CKC of titling our kits just like companies do. So I’m calling mine…
Rainbow Globe
If you want more details on my kit building thought process, check out my kit build video.
I hope you can follow along with the other designers and see how they interpreted their own kits.
Have fun kit building and don’t forget to show off your stuff over on the CKC Facebook group, or tag us on Instagram @counterfeitkitchallenge or use #counterfeitkitchallenge.
I’ll be back on the 4th, for our Product Forgeries. Until then, have an artful day!
I love kit building and that is why I am on the design team for the Counterfeit Kit Challenge project. We take an inspiration kit each month and proceed to replicate it, or as we say, counterfeit it. This is a free, friendly group that helps inspire you to use up supplies you already own. We are not about needing to buy the latest and greatest thing (though we won’t stop you if you enjoy new crafty goodies😉 ).
July! July? Yes, it is indeed a new month and we are now past the half way point of 2025. If you’ve been longing to slow life down and take a step back in time, then Julene has you covered this month. We are heading back to July 2014 for a throwback inspiration. On the CKC blog you can find the Noel Mignon’s Balboa Kit. We’ll take a look at that in a moment. Before we do, let’s give a warm welcome to our guest designer this month Kate Blue. Kate was on or design team for a year, so we are happy to welcome her back for another month of fun.
So let’s move on with our kit. Here is the one big look at this kit. Man, these older kits were packed with FUN stuff like ribbons, mini clothes pins and felt flowers. We just don’t seem to find this variety of elements anymore. Perfect reason to counterfeit our own!
I made my typical list of elements that caught my attention and got right to work. I don’t own many of the bold organes and magentas in the inspo, so I had to make do with what I could find. Let’s see how I did.
Papers
I leaned into the black and white. I pulled coral tones as close to the orange as I could get.Plus there are plenty of geometrics. I even has a special pre-embossed piece for a color resist technique where I can add in my own bolder colors.
Embellishments
I tried to pull in more of the bold colors in my embellies. I have orange washi and some stickers with more pops of color. Are they perfect matches? Nope. But we make adjustments when we are pulling our own kits!
Don’t forget that each month I also create my own elements to add into my kit. I have an interesting idea that I hope works out. So don’t miss what I will make in just a couple of days.
There is a tradition over at CKC of titling our kits just like companies do. Since my colors don’t quite reach the boldness of the originals, I’m calling mine…
Unripe
If you want more details on my kit building thought process, check out my kit build video.
I hope you can follow along with the other designers and see how they interpreted their own kits.
Have fun kit building and don’t forget to show off your stuff over on the CKC Facebook group, or tag us on Instagram @counterfeitkitchallenge or use #counterfeitkitchallenge.
I’ll be back on the 4th, for our Product Forgeries. Until then, have an artful day!