Freebie Friday — Storage Box cutfiles!

I love learning, creating and sharing. That is why I offer freebies up to you each month. Usually I offer both a layout sketch and and cut file, however this time around I’m working on a bigger, specific project. I am reorganizing my ink pads and other color products into an up-cycled CD “bookcase”.

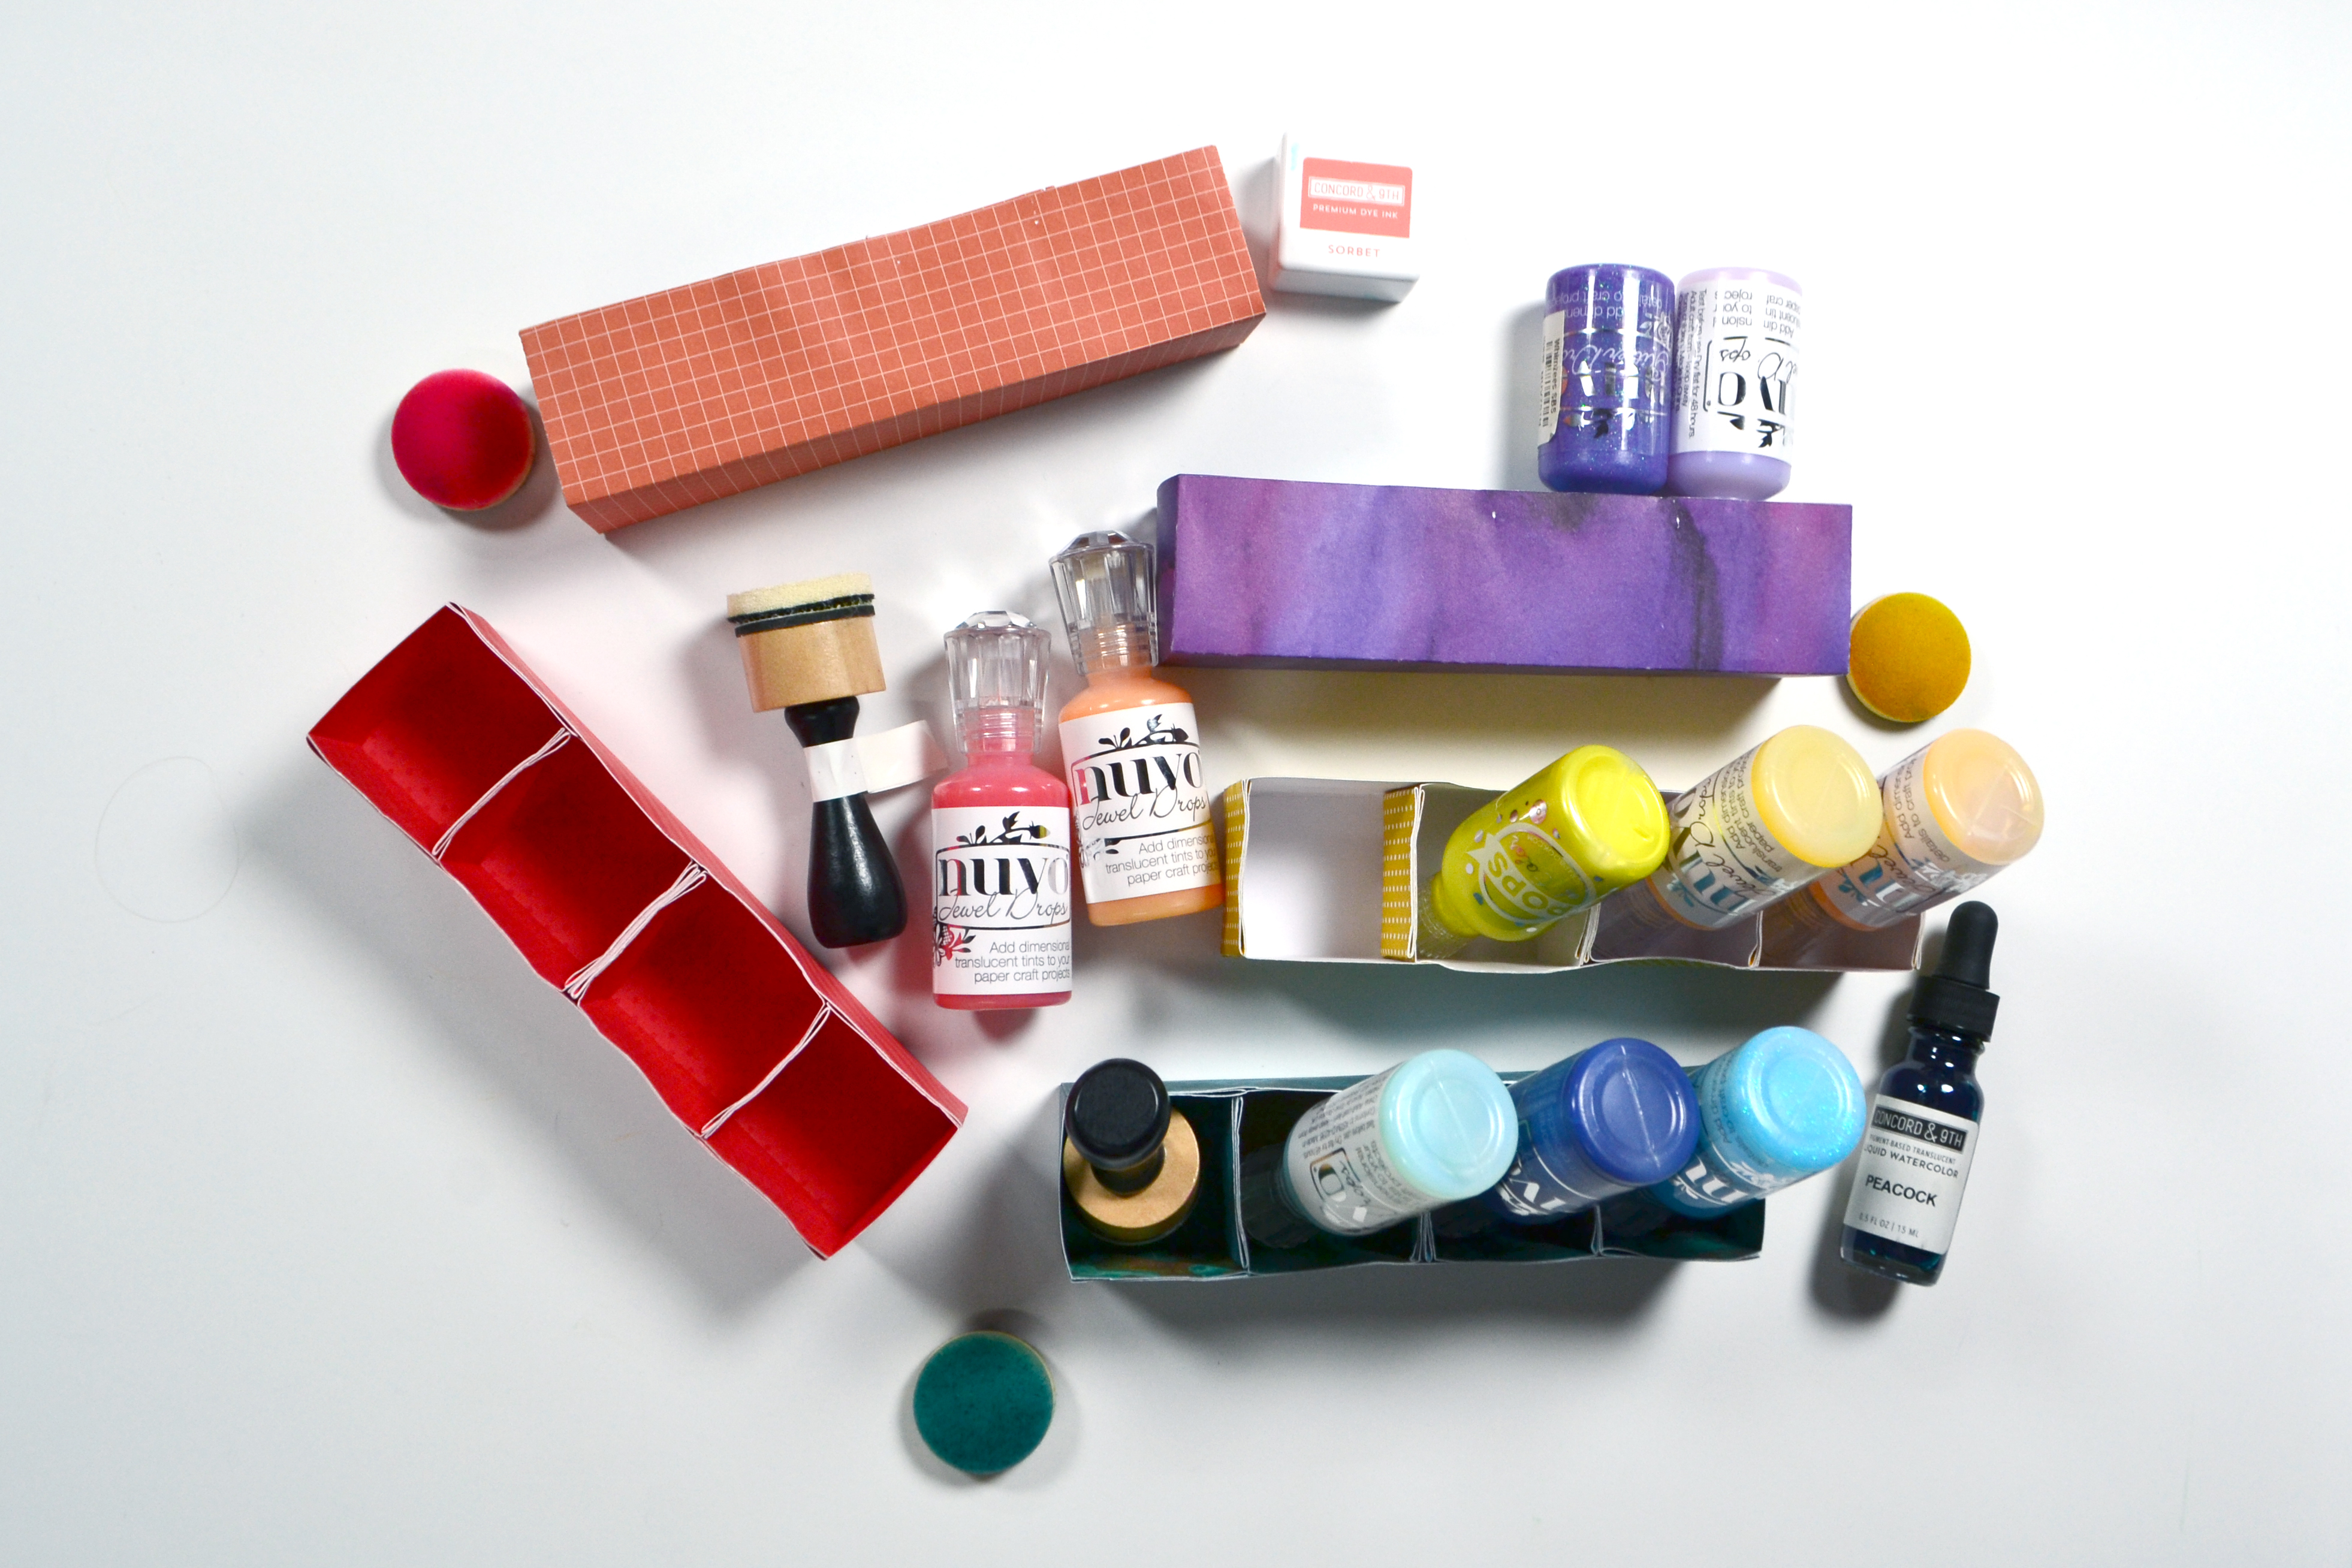
Eventually all the colors of ink pads will share shelves with these little organizers for other color products! Since I needed to create many of these organization boxes, I decided to create a cut file and share it with you. (Links to the files below.) The video has all the details on the cut file, but if you don’t own a cutting machine, read on for a manual version of this project.

For the Manual Version

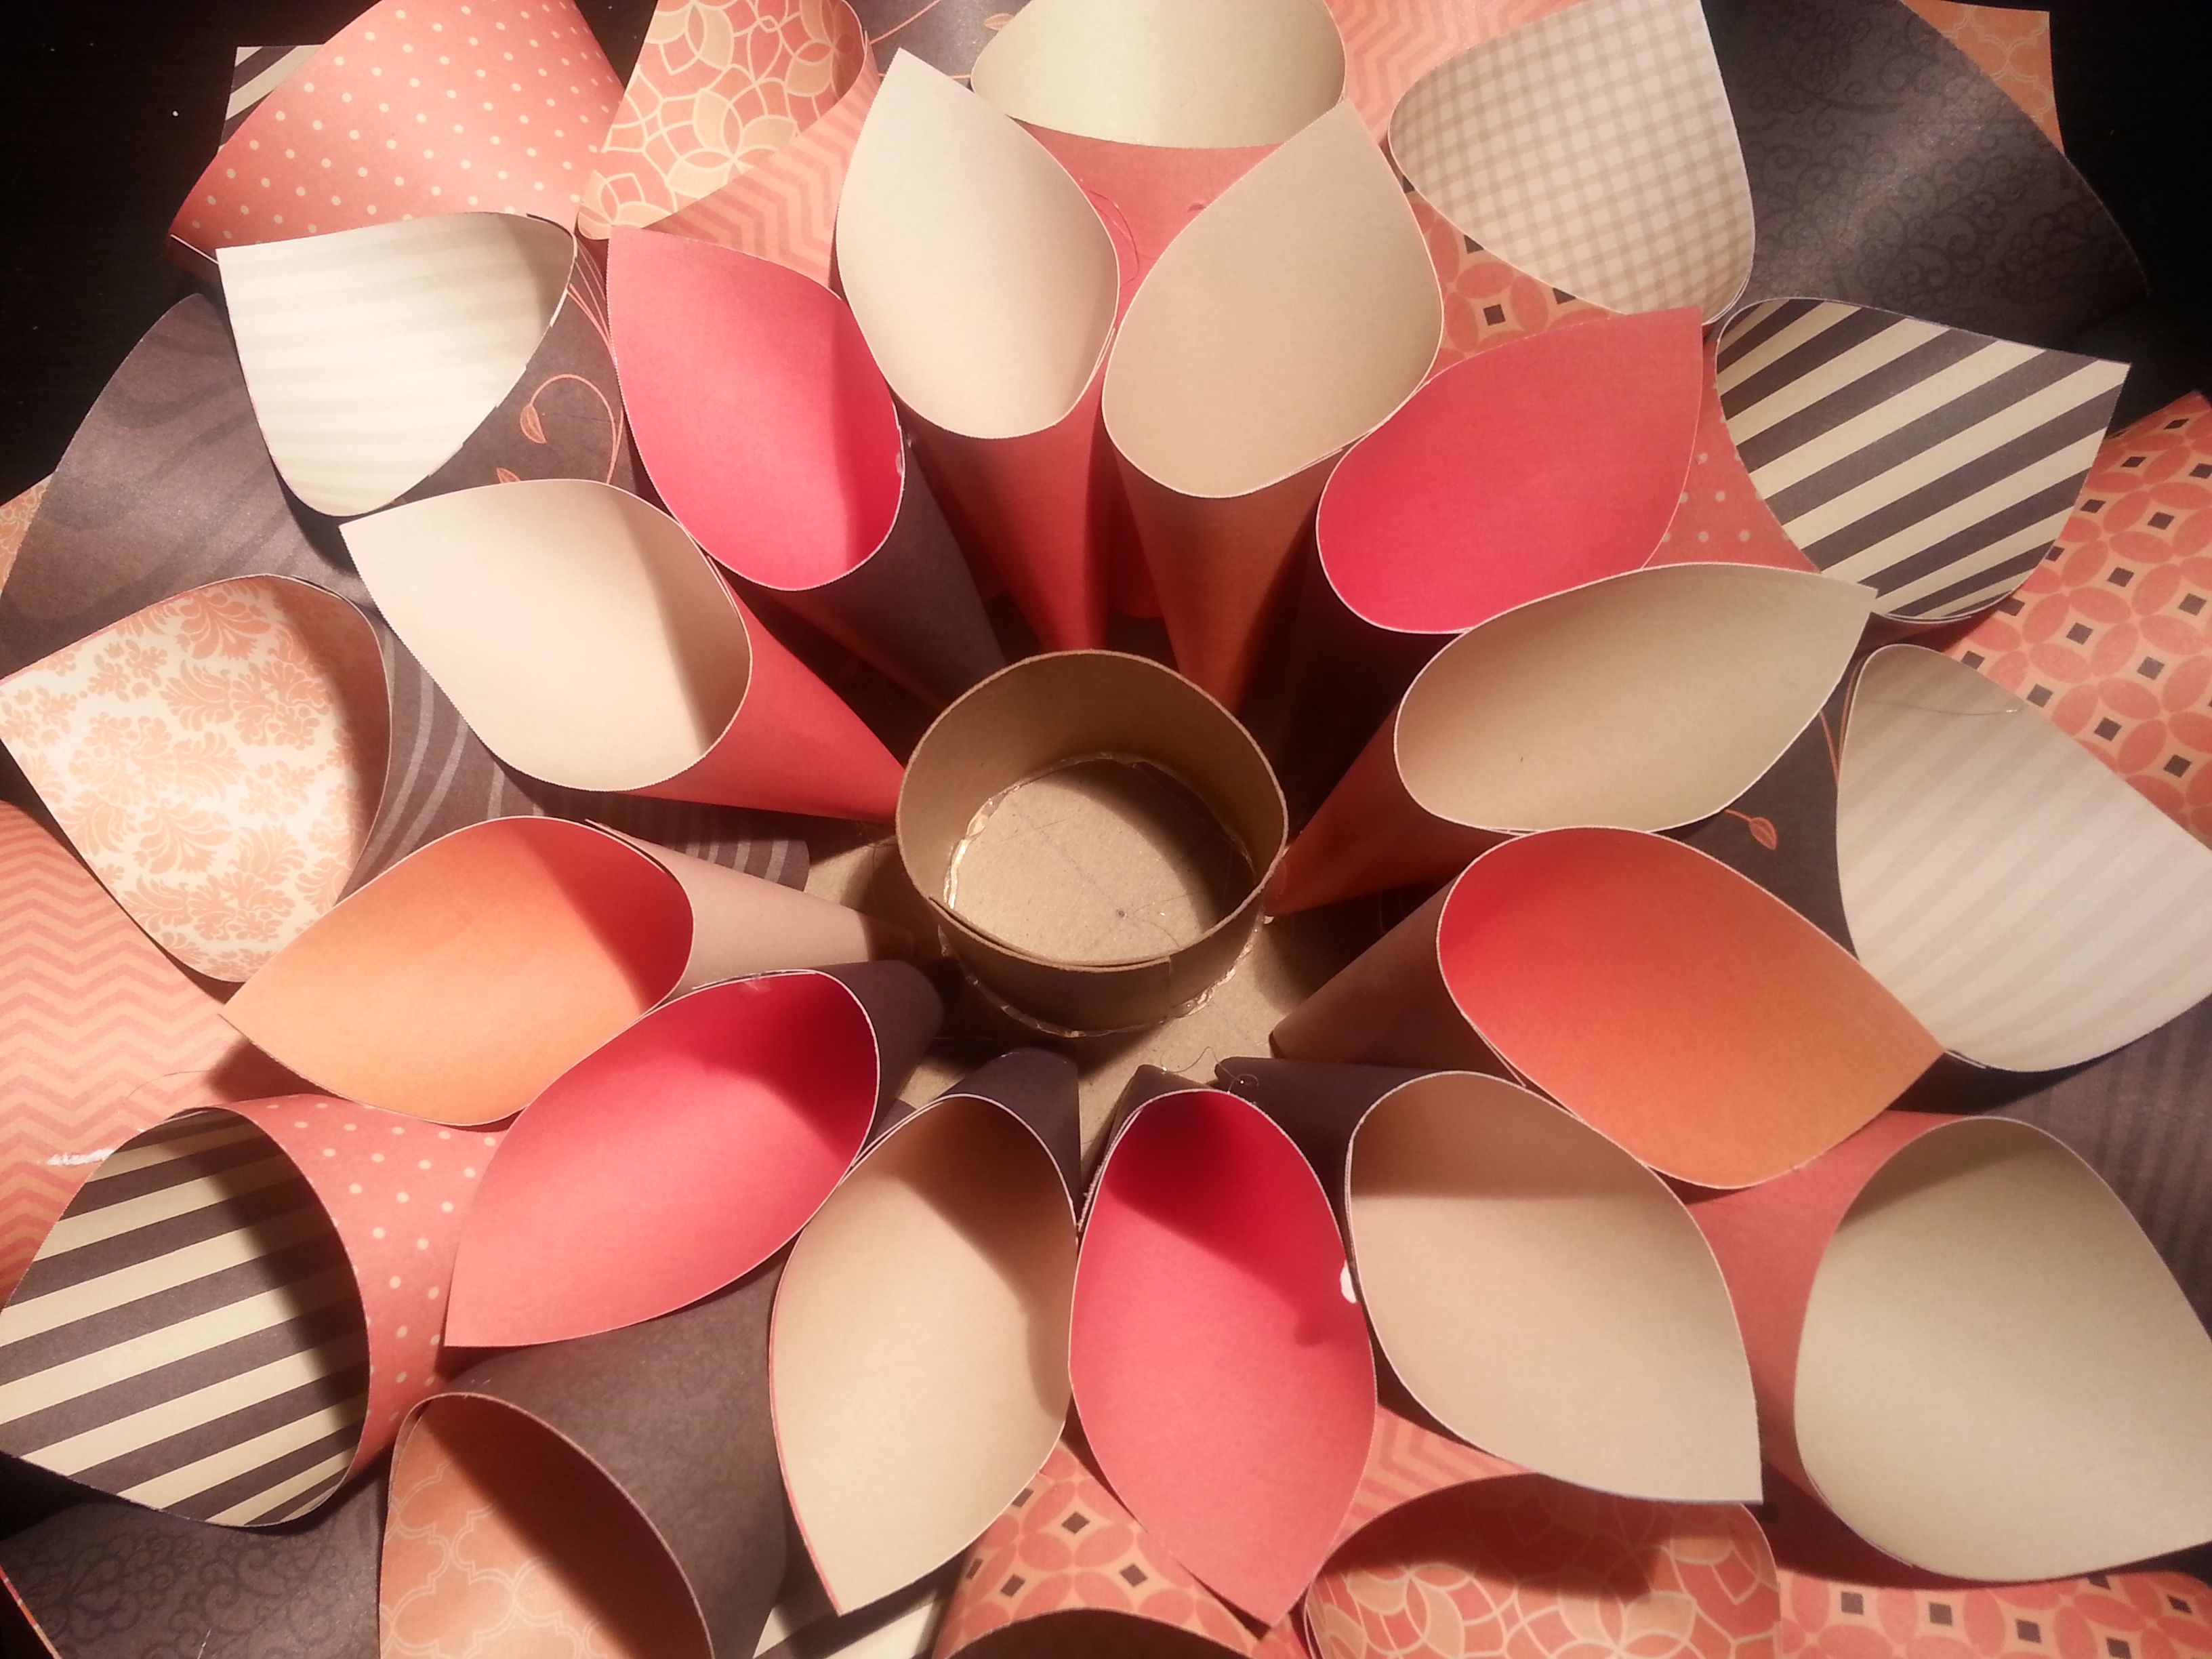
You will need to cut and score your boxes following the guide below. White lines are cutting and blue lines are scoring. The squares are cut slightly smaller than the rectangle to allow for stacking and gluing them into the rectangle. They can also be glued to the ends of the rectangle, or to each other for an array of configuration options (see pics below).

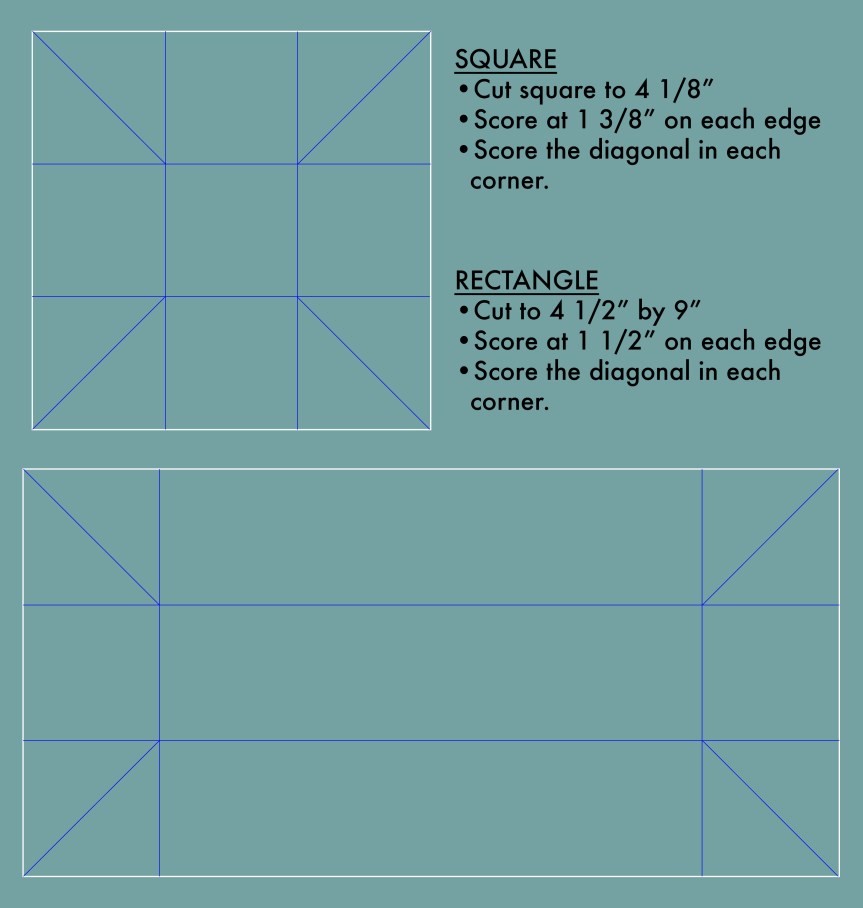
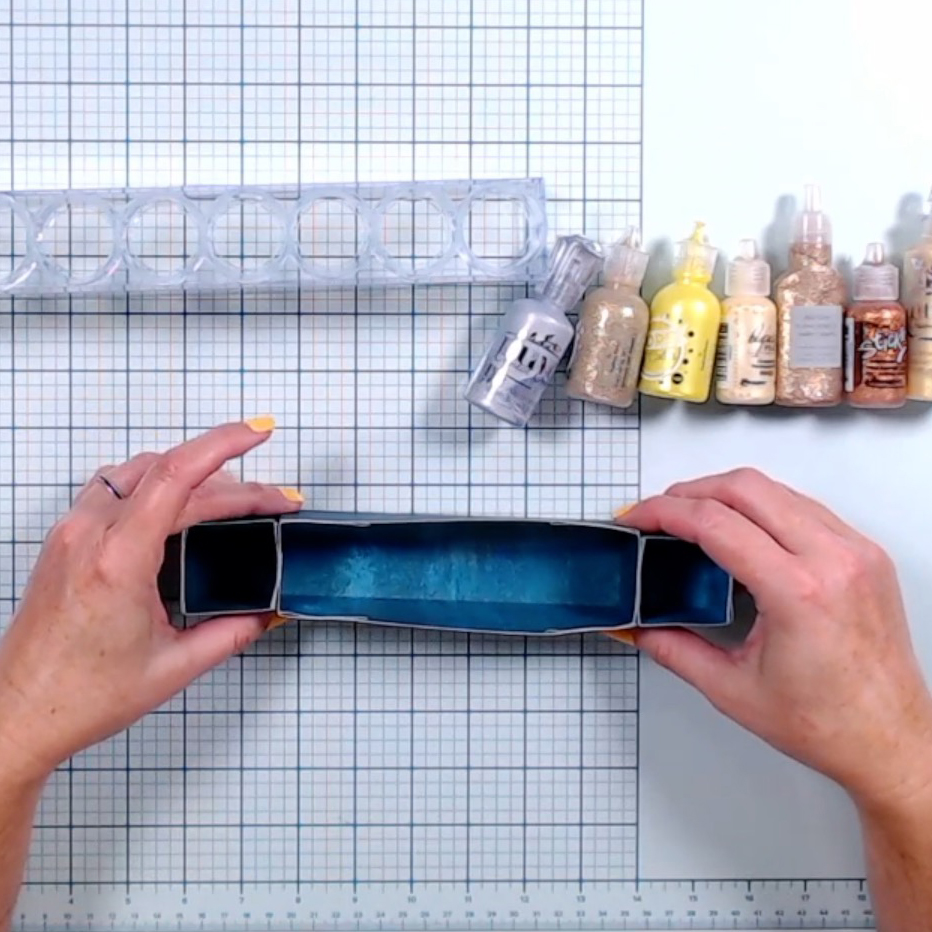
The video has a few tips and tricks to assembling these boxes, but really it is pretty straight forward. Fold along all the score lines. The corners will form little flaps. Tucks those flaps into the box and glue down to the sides of the box. Make however many boxes you need!

Get the Cut Files

I do offer a raw svg file for these cuts. However… in order to use the files with both cutting and scoring properties on a machine, you’d need to do some file manipulation to the svg. I do cover those manipulations in the video. But, if you want to skip the manipulation steps, then use the links below to access the Cricut or Silhouette brand specific files. Sorry, I don’t have access to other machine options; you’ll have to use the svg file and figure out how to manipulate it in your software. The video tells you WHAT to do, just not HOW to do it on all software. All links are right here for your conveniences, or you can pop over to my Freebies Page to see what other goodies I offer.

That is it for this week. I’ll see you all next week. Until then, have an artful day!

Craft Projects… What do you make?

While scrapbooking, and to some extent card making, take up the majority of my crafty time, I also like to dabble in other crafty creations. Today I’d like to share some of those ideas with you, starting with my latest video on creating a door hanging sign. The good thing about the majority of those projects is that I use my paper crafting supplies and skills to bring them to life.

You can see a version of that sign in the video thumbnail above, but here is a better version.

I made this project as a challenge for the CKC group. While I was working on the project I started reminiscing about past projects. As I was pulling some of those photos to include in my YouTube video I really felt that blast from the past. Some of the projects I cringed at now, but some of them have been total favorites. I think that is how crafting goes in general, right?

At any rate, here is a gallery of some of those older projects. I’ve captioned them so that you know what they are all about.

DIY small item storage

I’ll admit that I can get a little carried away with organization and storage. But when I figure out some simple and affordable ways to stay organized I get excited and I have to share! So that is what we are dong to do today.

In part 1 of my process I created small trays/boxes that can be used solo, sized to stack, or made with lids. Part 2 shows how to make a drawer system to hold the trays for yet another option.

Download the template guide to help you create these drawers.

Family Friendly Holiday Crafts

I have been very busy this December creating videos of craft projects for families to enjoy together. This year we all highly need some distraction from missing our normal routines! I created a play list of all the crafts from this moth, as well as a couple videos previously made that fit the bill. I hope you find something enjoyable to create with your families! Happy Holidays to you all, no matter what events you celebrate this time of year.

One technique, two crafts

Today I’m taking a tried and true technique and turning it into two different Christmas craft projects. And it you have kids, they can certainly play along.

I have an svg freebie for you of that Christmas tree available in this file download. Bundled together you will get the svg as well as a pdf copy of the instructions for the greeting card. (For the svg along click here.) If you make these projects and post them to Instagram, please tag me @craftysouppics and use the hashtag #craftysoupsharing and we can start seeing each other’s work!

Wreath Home Decor

My daughter graduated from high school last month and her ceremony was postponed until August in the hopes of having an in person celebration. While the gathering is still currently in the works, the format will be very different, with an outdoor event, limited family member participation, social distance zones on the lawn and no food or social time afterwards.

Still, even with those restrictions I will take some celebration over no celebration. And I want to capture a photo of the important moment and hang it in my craft space. So I designed my own svg file to create a floral wreath. (direct download, or go to my freebies page to find the file).

You can see my process in my latest YouTube episode.

I used my current month’s Scrapbook & Cards Today magazine craft kit, called the SCT Sampler as the base of products for this project. I love these little bitesized kits, but of course you could use your favorite supplies.

And here is how my wreath turned out, graduation photo pending!

DCWV cone wreath

I received some paper stacks from DCWV to make projects, including one to make seasonal cone wreaths. As Thanksgiving approached I decided to quickly try to put together the fall wreath.

cone wreath 3

I had to cut my own circle base from chipboard. There is one base included but knowing I will need to make 4 wreaths total I just started this one with my own chipboard. I trimmed all the papers from the stack into their rectangle shapes. After a little playing around, I figured out how to quickly fold each rectangle of paper into a cone and hot glue it together. Each layer uses slightly smaller rectangles. I found the center to be rather deep and didn’t want to decorate down in that hole so I took some leftover chipboard and created a platform to fill in the hole.

cone wreath 2cone wreath 1

And that is as far as I got. Why you ask? The project wasn’t hard and it was starting to shape up to look lovely. But in the end I decided I just didn’t like the colors for Thanksgiving. Too much black. Too much orange. I will save this wreath for Halloween next year. I may try some other papers in greens and browns and golds to make a Thanksgiving wreath some other time. But for now, this project remains unfinished.

And that is okay. Go ahead and try things; and then decide you don’t like them. It is all part of the creative process.

I will give the winter wreath a go soon and see if that one fits my color ideals better!


Update & crafting with kids

Remember these guys? I posted about them a few days ago.
ornaments

I didn’t mentioned that I was still working on two more designs. Well I got them finished and look how cute they turned out.
moreornaments

My middle child got really involved with decorating all the stockings on the fireplaces. We’ve made at least 10 of each style of ornament so that means 30 colorful stockings that she worked on. That yellow ombre stocking was our favorite of the batch.So pretty. It is going to be hard to give them all away since they are so fun. (If you didn’t read the last post, these are all gifties for the holidays.)

Which brings me to the second part of my post today. When I bought all these to make my own gifts, I also bought a batch for the kids in my card class. I teach a card making class at my kids’ alternative school. It is so much fun to share my love of crafting with all of these young people. So here is what they look like before young minds get to work on them.
cardclassornaments

I’ve removed the price labels and used my crop-a-dile to punch holes in them for the hanging string. I’m looking forward to seeing what they all come up with to decorate these items.

It just so happens that Jennifer McGuire’s theme this week for her Share Handmade Kindness campaign. What perfect timing since I am sharing these small wood disks for the kids to turn into treasures. Why don’t you go craft with or even for some kids in your life.

Look What arrived

I’ve got some new DCWV stacks in the house. Check it.

lablanc


I’ve already put the Le Blanc stack to use in my teacher thank you cards from a couple of days ago. This stack is a mix of beige on white prints and white-on-white emboss-resist prints. So fun to add your own colors to and make them fit whatever project you are working on.


conewreath


I have a great spot in my living room for seasonal decor. Putting up a wreath for the season will be a perfect way to add a little extra decoration to my home. I will be putting together the wreaths from this kit soon, starting of course with the fall themed wreath for Thanksgiving. I will give you my thoughts once I’ve got that put together.

Christmas Ornaments

We have a tradition, that was started by my husband’s grandmother, to give christmas ornaments to friends on Thanksgiving. Last year we stamped inked images into sculpy clay rounds.

This time, when I saw Jennifer McGuire’s video on stamping & coloring wood rounds I knew I had to C.A.S.E. this idea. I made a guess at how many ornaments I need this year and decided a simple wood blank from JoAnn’s would be the most practical choice. Turned out I miscalculated. Once I got home and made a physical list of people I’d like to give these little gifts to, there are nearly 50 ornaments I need to make. With an assembly line method and some help from the kids I know we’ll get through these all on time! So far I’ve come up with three stamped designs. There is the front art and a holiday sentiment stamped on the back. Using my crop-a-dile I punched holes in the rounds and added string. Stamps (older sets) and color pencils are from Stampin’ Up. I do have to say that my color pencils aren’t nearly as creamy smooth as the Prismacolor pencils appear to be in the video. New color pencils sound nice but it is hard to buy something new when I already have some, even if they aren’t as smooth.

ornaments