I’ve been participating in the Mix It Up Monday hope hosted over at the Peace Craft Love Facebook page. Anyone in the community can participate in the hop on any social media platform you use, not just YouTube.
The last couple of mixed media video’s I’ve done have felt pretty simple, and that is again true this time. But sometimes we just need simple! And if you are at all intimidated by mixed media, having simple ideas can be encouraging. Here is the full video (and don’t forget the video description has links to the other hoppers!!)
But if you want the quick version, here is how my layout turned out.
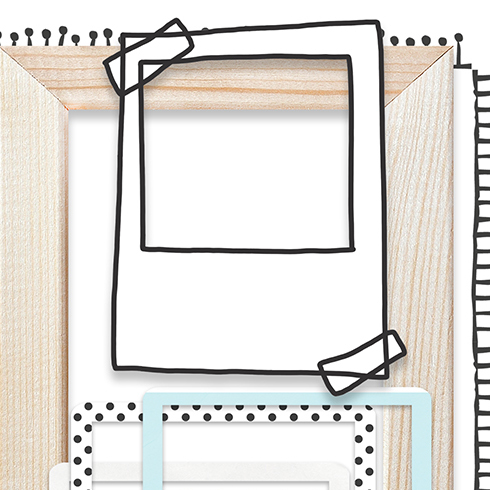
Notice that I used the pattern paper, photo frame, and speech bubbles I created in my previous post on doodling your own embellishments. All that counts as mixed media too in my opinion. But the main mixed media consists of watercolor penciling in scribbles on the background and to color in the title.
These simple, slightly messy techniques work well for this story. And don’t worry, she was A-OK after a couple of days!
Disclaimer: I offer affiliate shopping linked products when possible. This shopping won’t cost you anything extra, but I get a small kick back from the companies for sending business their way. It is an easy way to tell me “Thank You” for the content I provide. I appreciate you using my links!
As a design team member over at the Counterfeit Kit Challenge group I play along with as many of our monthly inspiration challenges as I can. The Forgery on the Fourth project is definitely one I enjoy! That is where we see a craft product we like and set out to recreate it with supplies we already own. So let’s go ahead and dive in to what I have for you this month.
Since this kit is so jam packed with stuff, if you want to see more, you will have to read my kit building post. There is a whole gallery from this inspiration kit. Or visit their website. we are all about supporting the crafty industry who bring us beautiful products and inspiration. Yet sometimes our crafty needs mean counterfeiting works better for us.
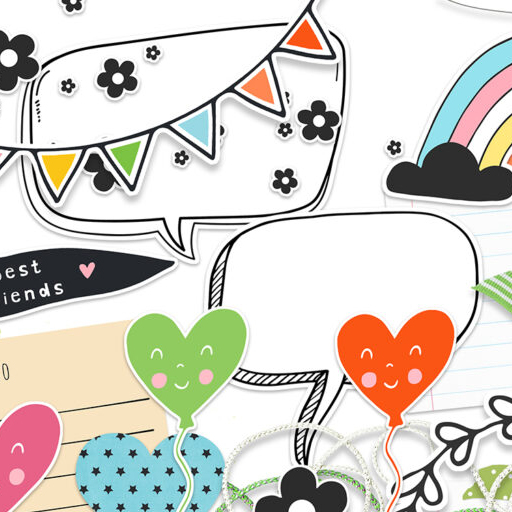
Speaking of which, let’s talk about what I wanted to forge this month. I had a couple of the papers in mind to recreate but my attention really got drawn into all the doodled elements I noticed. Like all of these…
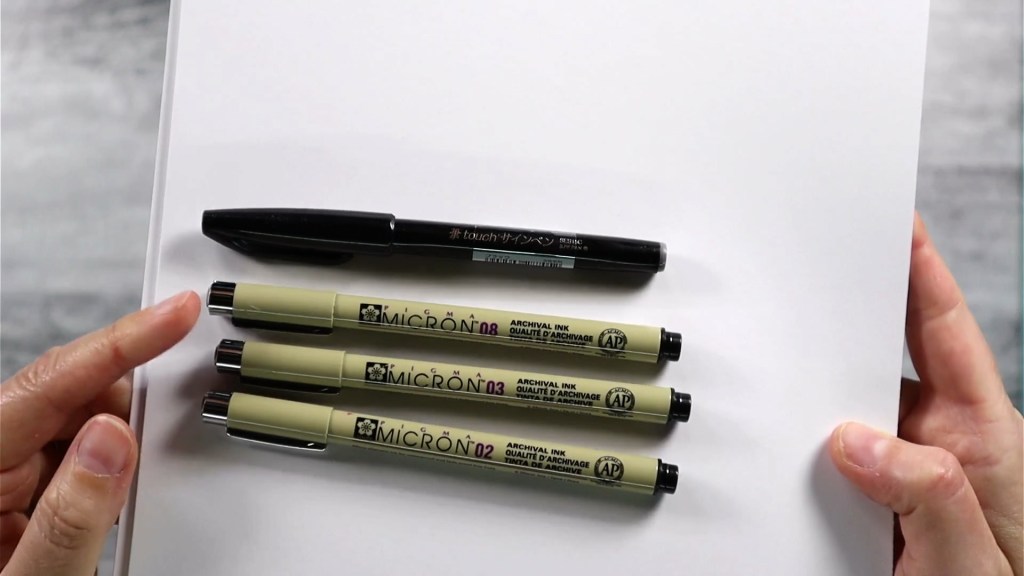
So I pulled out my favorite pens as well as some coloring products. I used my Tim Holtz watercolor pencils but I also show some items using simple markers. Most of the pens that I use for doodling are readily available — the Micron pens. However I have one favorite that I had to track down and that is the Pentel Fude brush pen. Luckily it is available on Amazon, so an easy purchase for most if you like the idea of doodling. That pen is my favorite since the flexible nib allows really easy integration of thick and thinner line work. It is that black pen at the top. As for the Microns, my favorite sizes are 08, 05 and 02 but my 05 has gone rogue so I pulled in an 03 and I don’t think I actually used it!
There are several tips and tricks that I cover in the video below, so if you want some specifics on how I created these items, check it out.
For more creative ideas, the CKC blog has more forgery examples to check out. I hope this gave you some ideas on how you can recreate your favorite products with supplies you already have on hand. Don’t forget to show off your stuff over on the CKC Facebook group, or tag us on Instagram @counterfeitkitchallenge or use #counterfeitkitchallenge.
^^ Disclaimer: I offer affiliate shopping linked products when possible. This shopping won’t cost you anything extra, but I get a small kick back from the companies for sending business their way. It is an easy way to tell me “Thank You” for the content I provide. I appreciate you using my links!
I love kit building and that is why I am on the design team for the Counterfeit Kit Challenge project. We take an inspiration kit each month and proceed to replicate it, or as we say, counterfeit it. This is a free, friendly group that helps inspire you to use up supplies you already own. We are not about needing to buy the latest and greatest thing (though we won’t stop you if you enjoy new crafty goodies😉 ).
Let’s welcome our guest designer before we dive in. Stacy will be joining us for kit fun this time around. You can find here work at https://www.instagram.com/scrapstuffwithstacy/! Leave her some love as we move through June.
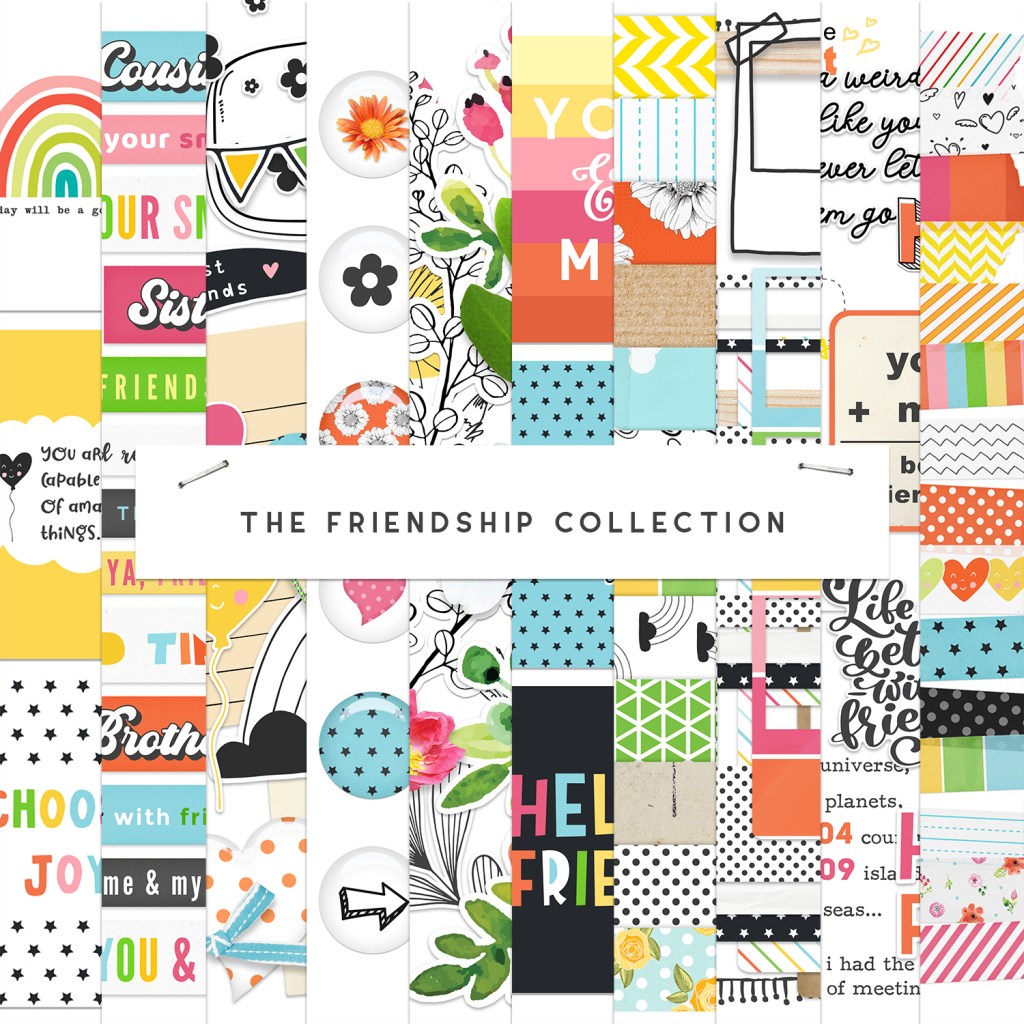
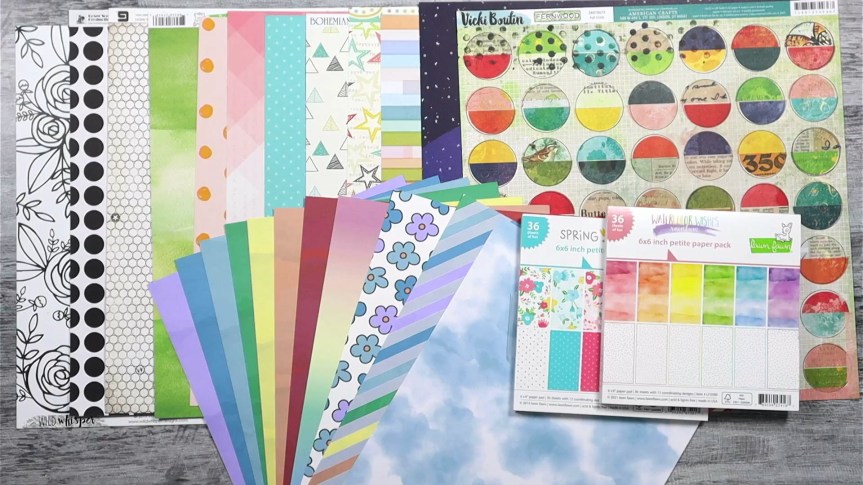
Now we can get to the pretty stuff. To start, here is our inspiration kit. It is The Friendship Collection kit by Weeds & Wildflowers Supply Company. They seem to be a digital product supplier, so keep that in mind! Our CKC team member hosting this kit is Tara and she was appreciated the range of options available in this kit. And since she is consistently creates large kits, this inspiration has plenty to offer! As you can see from the inspiration kit images, there is a lot going on!
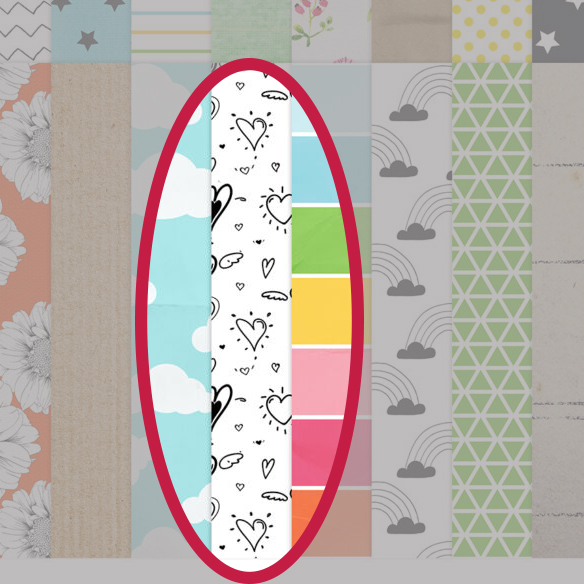
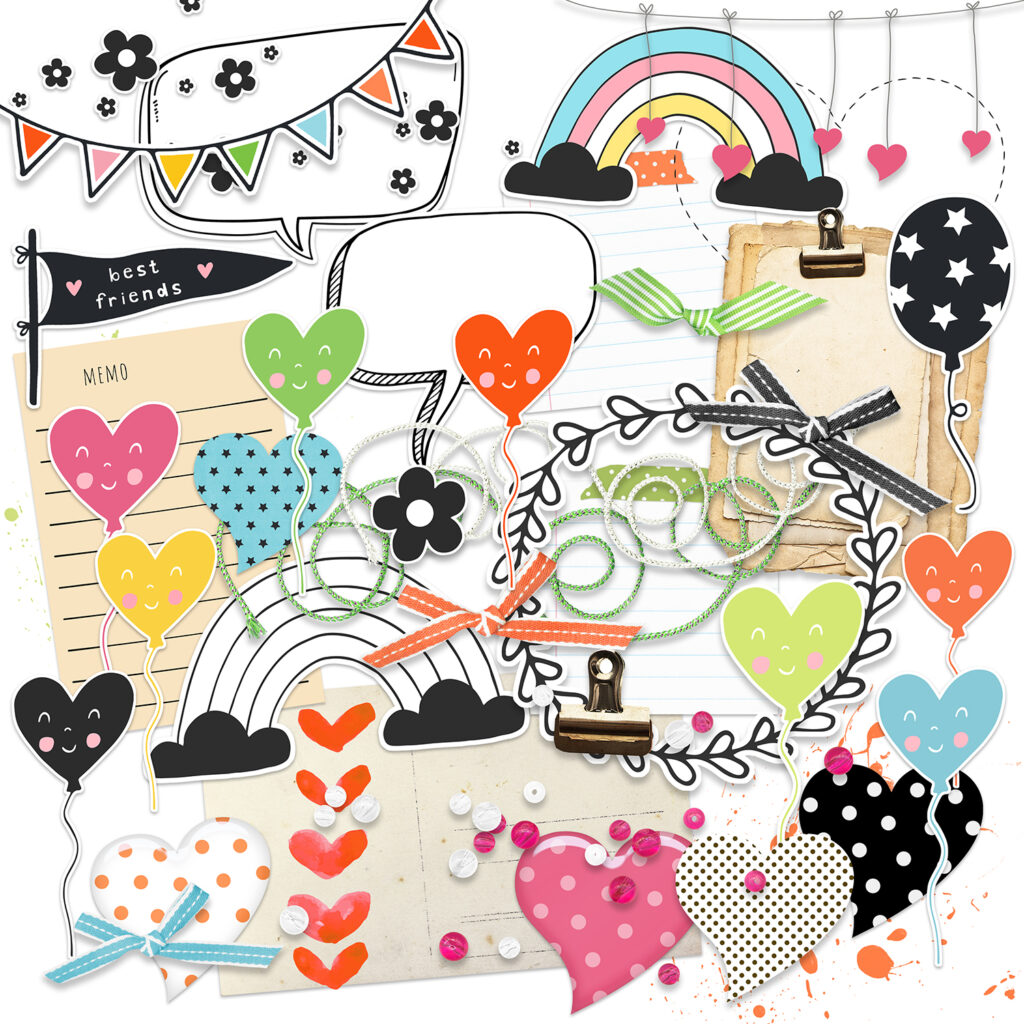
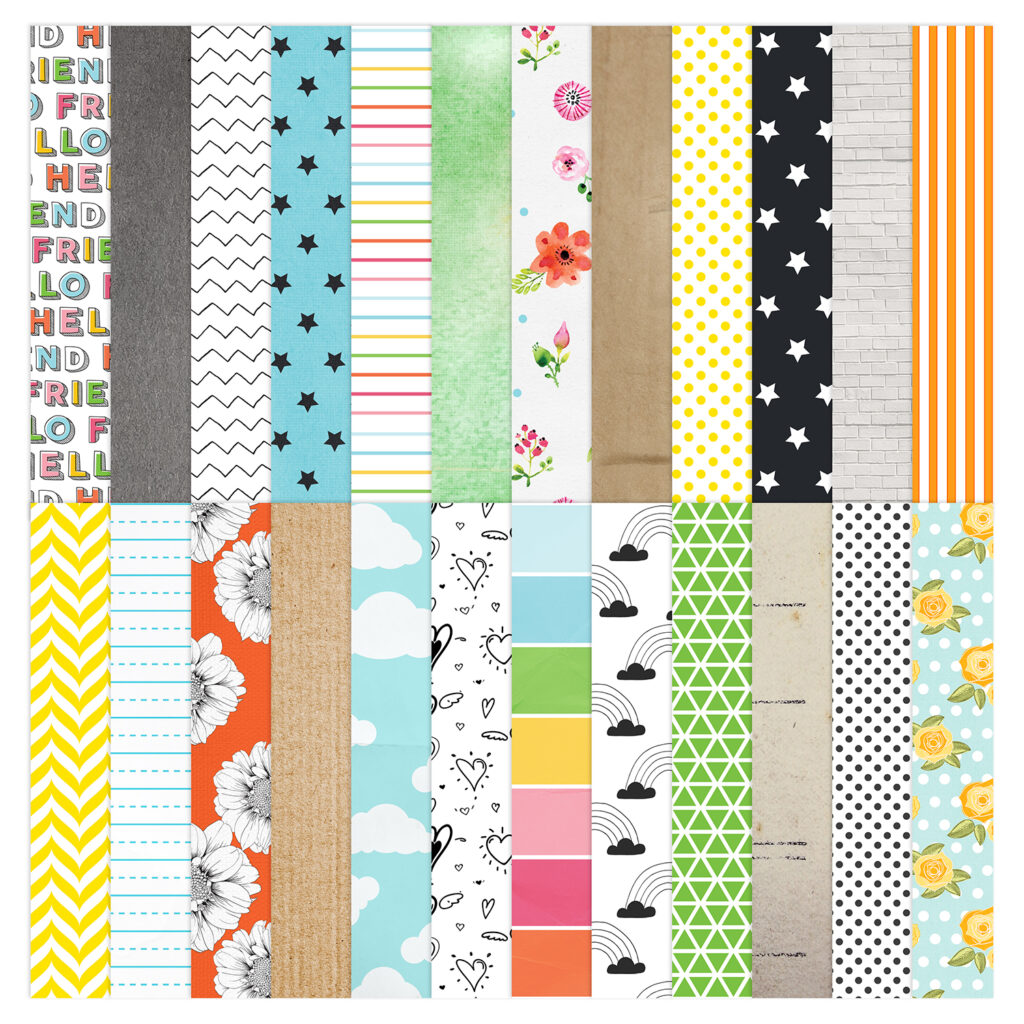
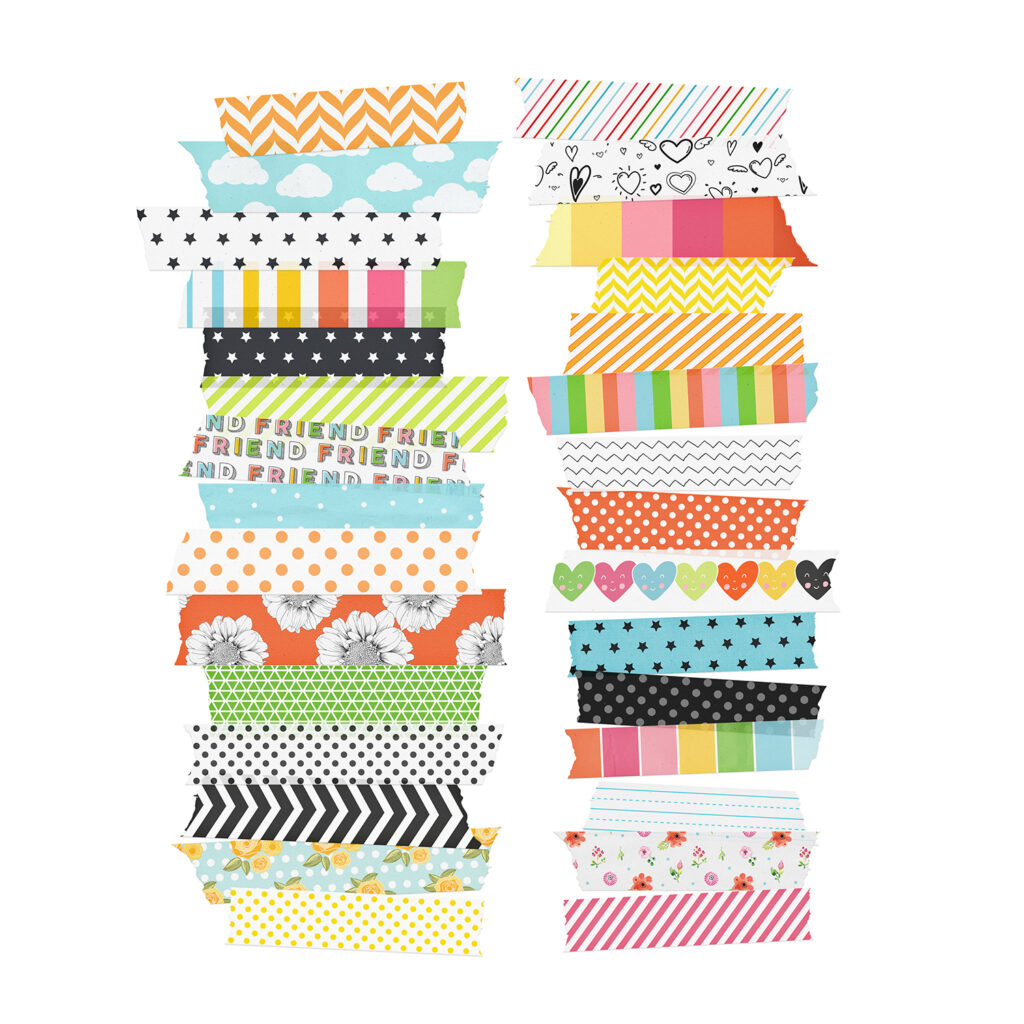
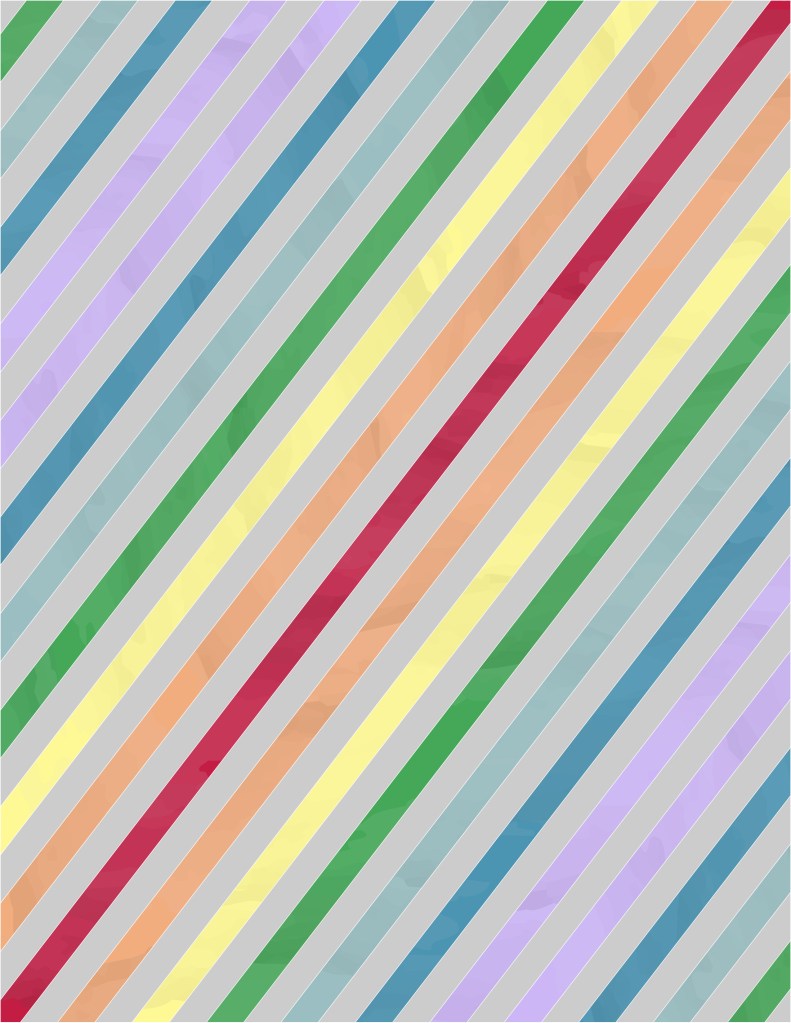
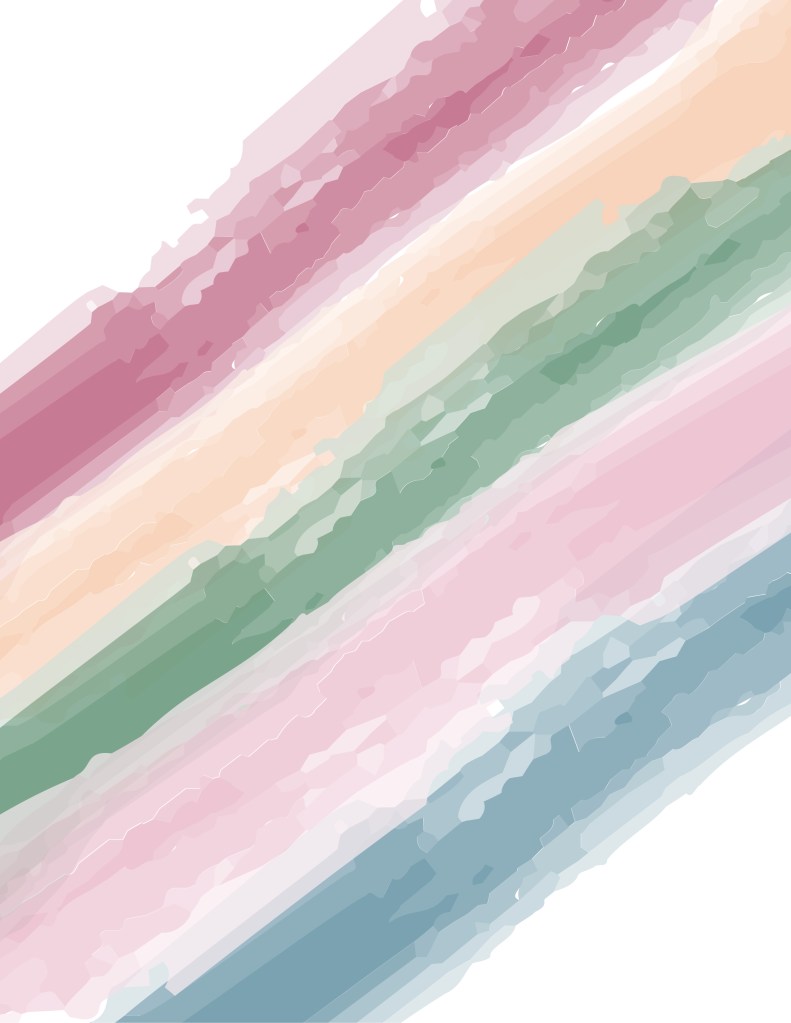
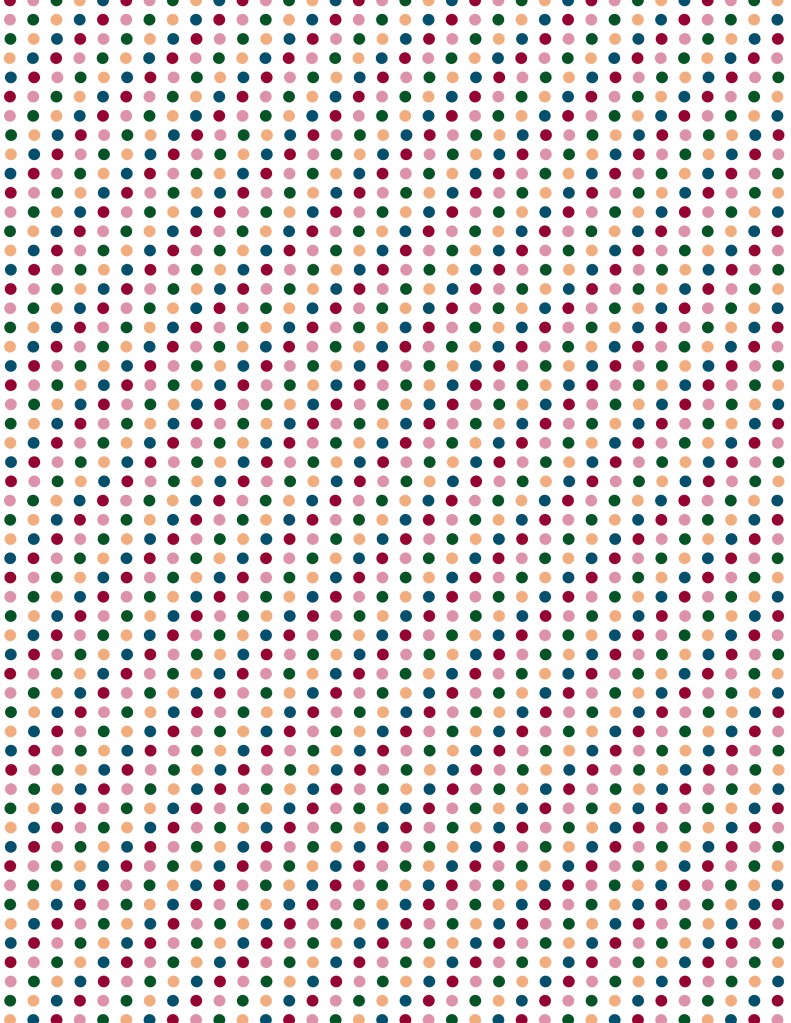
I was inspired by rainbows and clouds, pops of black and white, washi tape, flair buttons and a few other bits and pieces. The very first thing I wanted to pull was my own paper collection design since it had clouds and rainbows! (It is a free download and you can check it out if you want more information.)
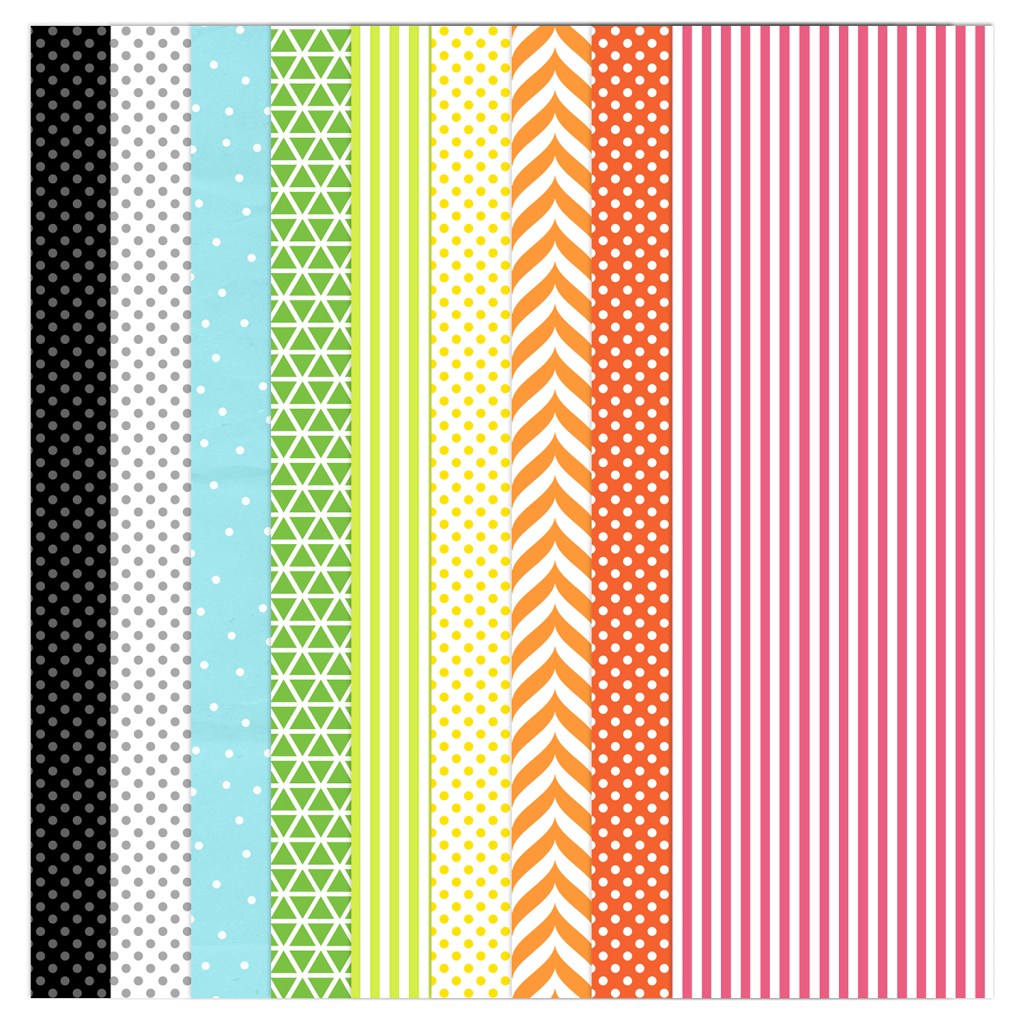
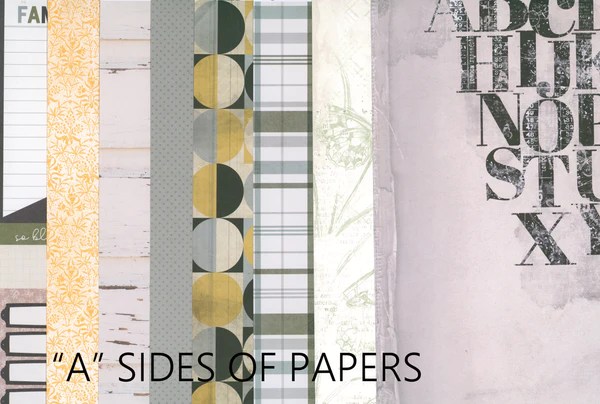
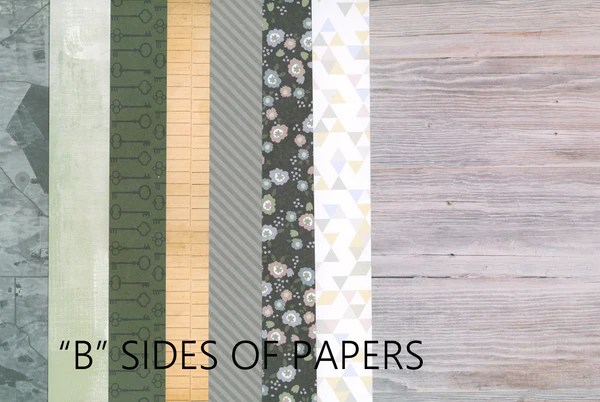
So these are the papers I came up with. The 8.5×11 sheets are from my collection. I didn’t include everything, but just the most relevant pieces. Notice I also have a couple of 6×6 paper pads. There are lots of techniques to incorporate these onto 12×12 layouts if that is your style (This YouTube playlist has many examples.) But… they always make great layers not matter what you do.
Here is a look at the embellishments. I’ve got way more supplies in here than I can possibly use, but having options is good. Kitting helps me limit my supplies just enough so that I am not browsing through my entire craft room each time I sit down to create. Yet a big kit offers plenty of options depending on the mood of the stories I have to tell.
Don’t forget that each month I also create my own elements to add into my kit. Of course these are inspired by the original kit, but often have a twist of their own. So don’t miss what I will make in just a couple of days for that Forgery on the Fourth project. I’ll tell you I’m showing you some doodling tips and tricks!
There is a tradition over at CKC of titling our kits just like companies do. So I’m calling mine Under the Sun.
If you want more details on my kit building thought process, check out my kit build video.
I hope you can follow along with the other designers and see how they interpreted their own kits.
Have fun kit building and don’t forget to show off your stuff over on the CKC Facebook group, or tag us on Instagram @counterfeitkitchallenge or use #counterfeitkitchallenge.
I’ll be back on the 4th, for our Product Forgeries. Until then, have an artful day!
I love learning, creating and sharing. That is why I offer freebies up to you each month. I have both a layout sketch (in printable pdf as well as editable photoshop) and an electronic cut file (in svg) for your electronic die cut machines.
Here is some further exciting news… new for 2023 are PRINTABLES.!! You can print them at home, cut apart the embellishments and use them to create your projects. This month I was inspired by the upcoming Mother’s Day holiday here in the US. You can see all the details in my reveal video, or read on for the short version.
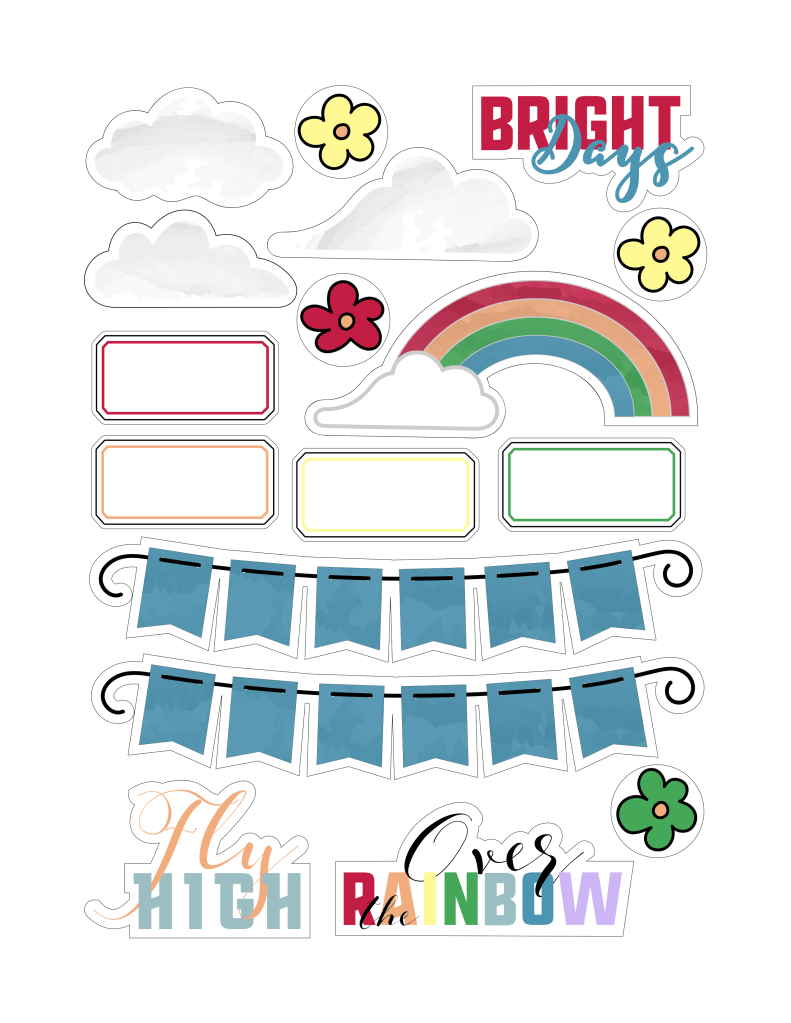
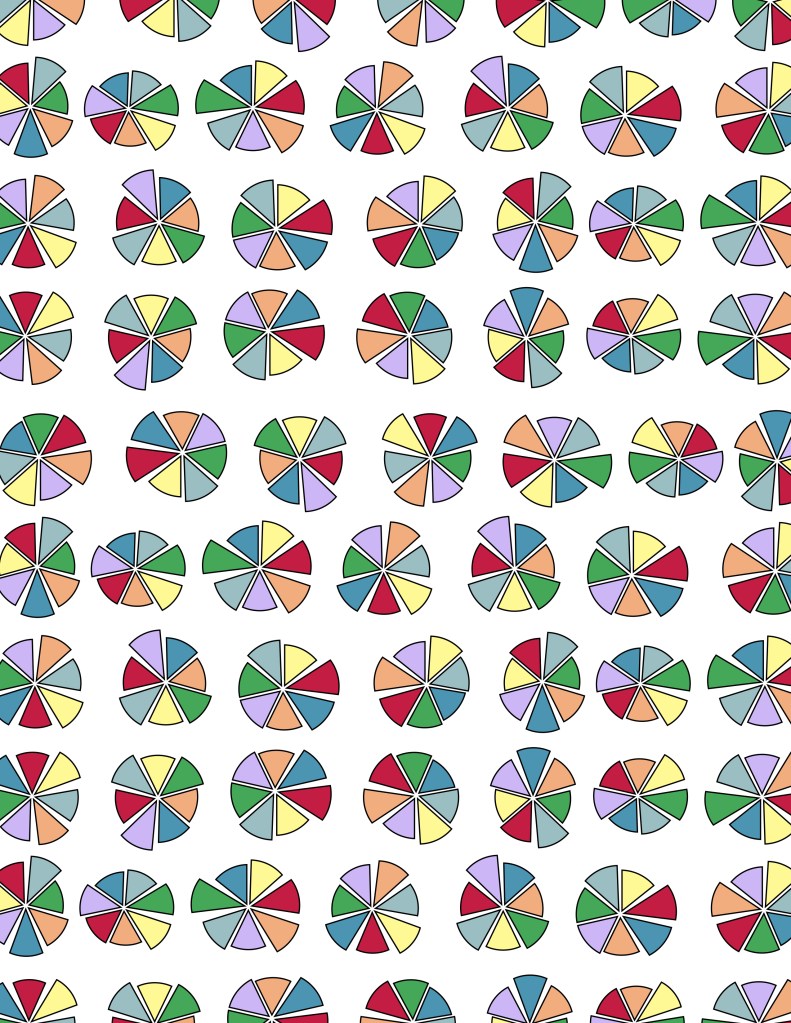
For iNSD this year I am releasing a full collection kit! I’m very excited to share this complete 8.5×11 digital and printable scrapbooking kit called Fly High.
Printables
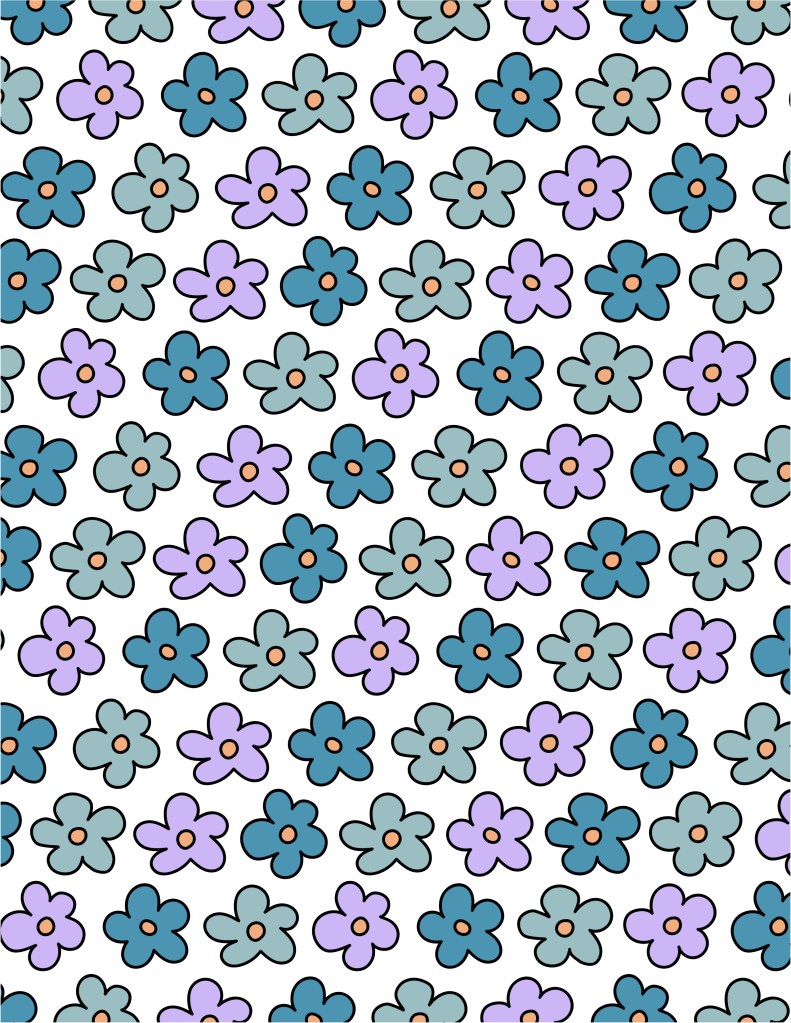
Since I am most excited about this printable collection, let’s start here. These files come to you in an 8.5×11 inch format for easy at-home printing—or use them digitally. Keep in mind that monitor/screen colors and printed colors will NOT be the same! Screen colors often appear more vibrant. Colors even vary from printer to printer!
The pattern papers are ready to print and use. Embellishments will either need to be fussy cut, or use the print-then-cut version for your electronic die cut machine. The file names help you know which is which. Fussy cut files will have the work “fussy” in the name! I try to keep the fussy cutting to simple shapes. Plus, any circle elements can be punched out with a 1″ circle punch or die. Any cutting tips beyond these will be in the current video reveal!
If you are a cut file lover, I’ve got you covered too! My video covers any details for this file and any tips and tricks I have to share. Be sure to get all the info by watching above. This month I have a few items to compliment the paper line.
As the printables took me a long time to create, I have not created the sketch yet. It will be coming by the end of the week. And perhaps even a layout video featuring the Fly High collection, so stay tuned. 😉
MAY 2023
Printable pdf version
Editable Photoshop version
See release & layout video
The download links have been included besides each image. However, you can always head over to my Freebies Page to peruse the catalog of files I have offered in the past. And if you have any ideas I’d love to hear them. I can’t make promises but I can take suggestions!
As a design team member over at the Counterfeit Kit Challenge group I play along with as many of our monthly inspiration challenges as I can. The Forgery on the Fourth project is definitely one I enjoy! That is where we see a scrap product we like and set out to recreate it with supplies we already own. So let’s go ahead and dive in to what I have for you this month.
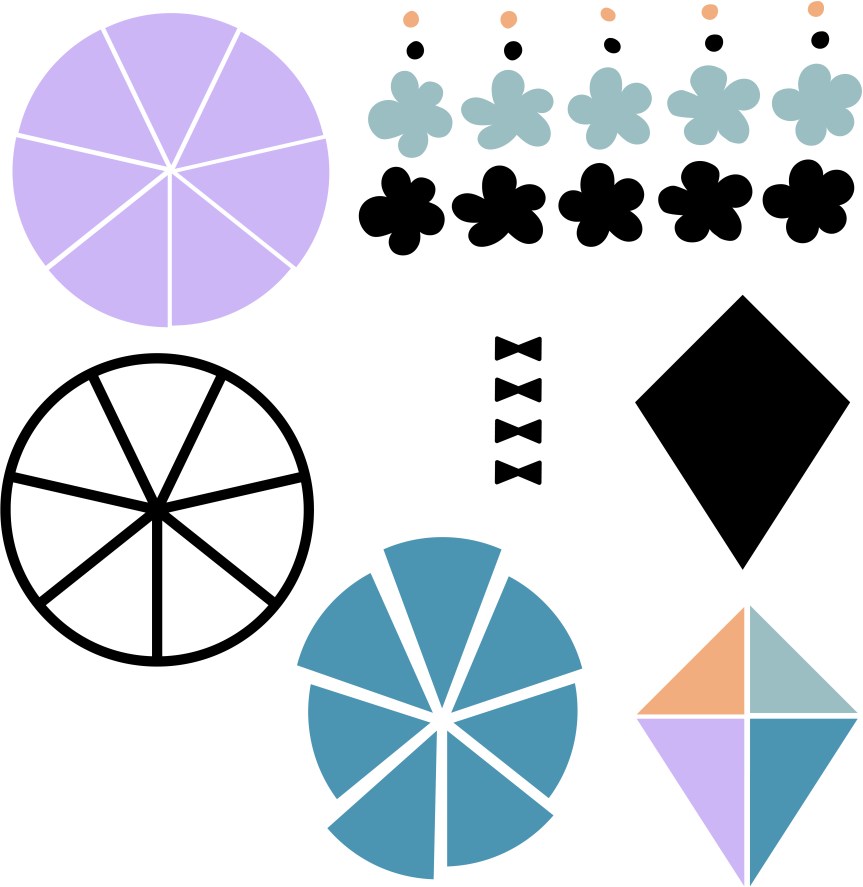
We are being inspired by this kit from the Not Just for Boys kit club called Noteworthy. Notice in this picture the “wonky” flowers and the geotags? That is what inspired me this time.
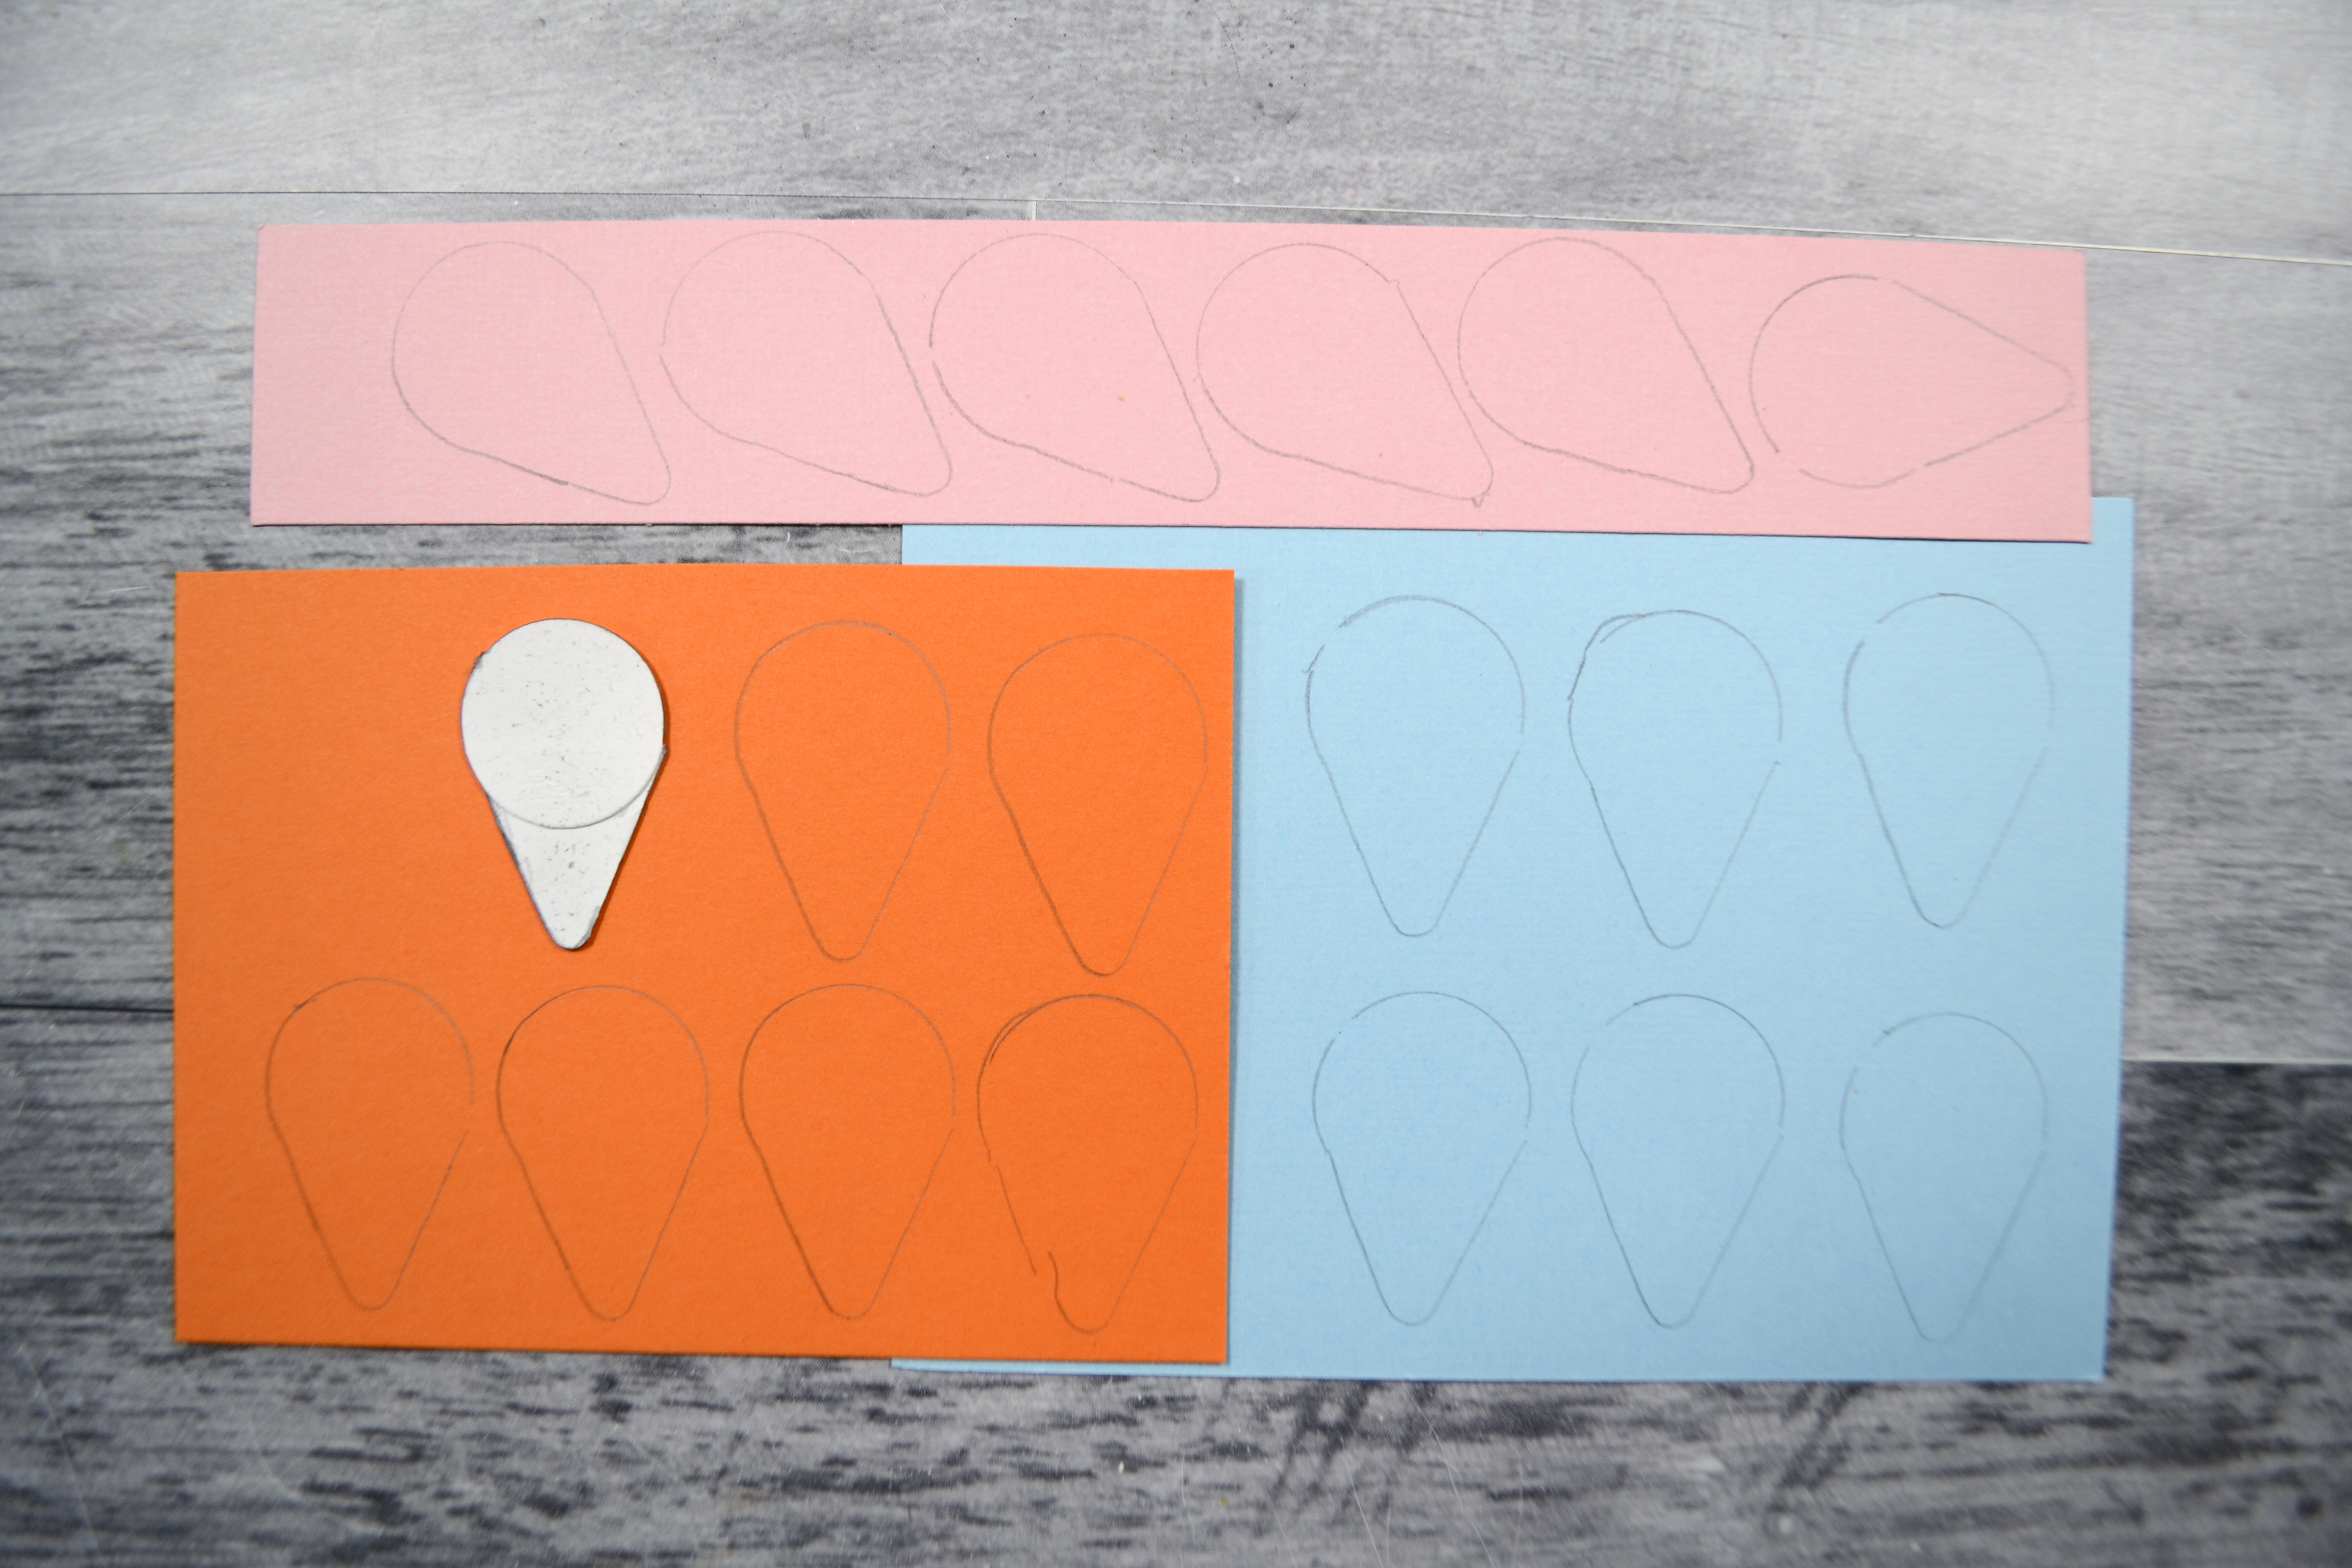
I easily saw how both these items begin as circles. In the case of the geotag, it is a circle atop a triangle shape, much like an ice cream cone. So I created a temple just that shape!
With that template ready to go, I traced it many times on various papers, cut them out then decorated them with stamped circles and arrows much like the inspiration image. (You’ll see the final results in a moment.)
For the florals, I layered up various circle stamps in white pigment ink as well as blue ink, then punched them out with a circle punch. For the leaves, they started as circles too! Once a circle is punched, you place the circle partially back into the same punch and then cut out a “cats eye” shape to create the leaf. This is more understandable if you want to watch the video below. But here is the final pic to see what I mean.
You can see all the details of these builds in the forgery video.
For more creative ideas, the CKC blog has more forgery examples to check out. I hope this gave you some ideas on how you can recreate your favorite products with supplies you already have on hand. Don’t forget to show off your stuff over on the CKC Facebook group, or tag us on Instagram @counterfeitkitchallenge or use #counterfeitkitchallenge.
I love kit building and that is why I am on the design team for the Counterfeit Kit Challenge project. We take an inspiration kit each month and proceed to replicate it, or as we say, counterfeit it. This is a free, friendly group that helps inspire you to use up supplies you already own. We are not about needing to buy the latest and greatest thing (though we won’t stop you if you enjoy new crafty goodies😉 ).
This month Sheryle Thomas is our guest designer. Give her a warm welcome over on our Facebook group,. She is from Michigan and is a retired nurse. Now that some of her care duties are behind her she has time to use the stash she has been collecting. I think the CKC group will certainly help her do that.
Now we can get to the paper stuff. To start, here is our inspiration kit. It is Noteworthy by the Not Just for Boys kit club. Julene is our team hostess and she appreciated this kit since it moved far away from pinks and florals.
That circular geometric paper caught my attention instantly. Then upon closer inspection I noticed greens, yellows and a bit of blue along with plaid and woodgrain. So that is where I went with my kits. Oh, that is not a typo. I did say kits, plural. With May being a Layout A Day month, aka LOAD, I will be telling a variety of stories so I wanted to break my kit up into page kit themes all while keeping the inspiration in mind.
I had a formula for my kitting. Two papers were pulled from a current Pinkfresh Studio paper line called Spring Vibes^^. That line had colors and geometrics that caught my attention. Then I added in a third focal sheet of something from my stash. Sometimes it was inspired or sometimes it was just something that fit the other papers. Finally each kit got a sheet of woodgrain. For embellishments I pulled an alpha set to match, included some type of enamel dot type element, journaling/ephemera bits, a stencil, some type of icon embellishment, and finally word elements. Those words were the first thing I added and those set the theme for the kit to pull all the other items. Notice the purple tags in the photo? That labels each kit’s mood.
And as such, with our tradition of naming kits, I am going to call my kit Not Just for One Mood, as a nod to our inspiration company!
Don’t forget that each month I also create my own elements to add into my kit. Of course these are inspired by the original kit, but often have a twist of their own. So don’t miss what I will make in just a couple of days.
If you want more details on my kit building thought process, check out my kit build video.
I hope you can follow along with the other designers and see how they interpreted their own kits. To see the full hop list this month, head over to the CKC blog post and find the list near the bottom.
Have fun kit building and don’t forget to show off your stuff over on the CKC Facebook group, or tag us on Instagram @counterfeitkitchallenge or use #counterfeitkitchallenge.
I’ll be back on the 4th, for our Product Forgeries. Until then, have an artful day!
^^ Disclaimer: I offer affiliate shopping linked products when possible. This shopping won’t cost you anything extra, but I get a small kick back from the companies for sending business their way. It is an easy way to tell me “Thank You” for the content I provide. I appreciate you using my links!
Getting my SCT Sampler kit in the mail each month is a bright spot. This small affordable package is just enough newness + surprise to keep me satisfied. This month the package contained products from Scrapbook.com, Talyored Expressions, Simple Stories and LDRS Creative. It is jam packed with goodness.
I wouldn’t want to leave you wondering just what to do with these supplies. So I almost always make a project as soon as my box arrives. That way I am sure to use it instead of just showing it off. This time around I again made a 12×12 layout. But I had an interesting idea on how to put that 6×6 pattern paper to use! Check it out.
Of course if you want more information you can watch my YouTube video to get a better look at the kit products and my project.
If you want more info on these kits, check out the links and info below.
SCT sampler kit information Please note: you can not order the current kit. Instead you sign up for a future beginning date for your kits. Kits currently run between $14 per month (1-year commitment billed every 4 months) to $17 per month (4-month commitment billed fully). Extras not shown in the video include a private Facebook group with video shares each month, a cut file download to match the theme word and discounts for prominent online scrapbook shops.
I hope you enjoyed taking a look at what these little kits have to offer and seeing it put into action with a project. I’ll be back soon with more crafty goodness. Until then, have an artful day.
Disclaimer: I offer affiliate shopping linked products when possible. This shopping won’t cost you anything extra, but I get a small kick back from the companies for sending business their way. It is an easy way to tell me “Thank You” for the content I provide. I appreciate you using my links!
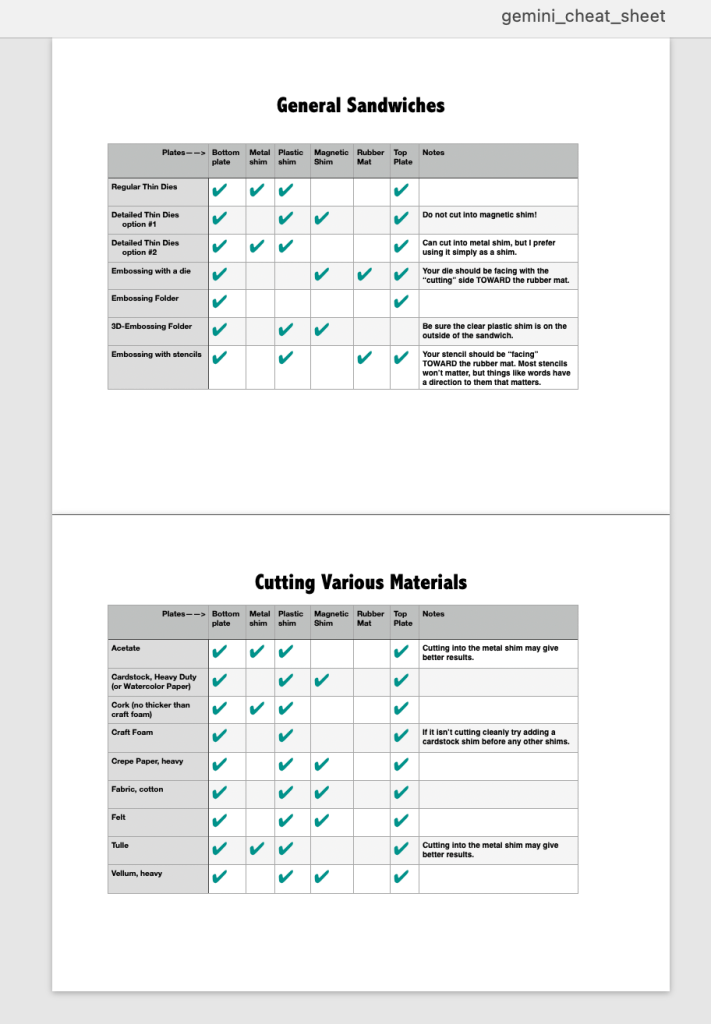
UPDATE: The cheat sheet sandwich chart is now available. Apologies for the delay. You can click to download the zip file which contains a small sized version to fit inside the storage drawer and a larger version for easier viewing. (Photos at the bottom)
I’ve been on the fence for a while now about upgrading from my manual Sizzix die cutting machine to a powered/electric die cut machine. Two reasons behind that line of thinking is that 1) I’ve been doing more die cutting and feeling limited by the size of my platform and 2) With that much die cutting + my age, my hands and wrists are feeling the strain.
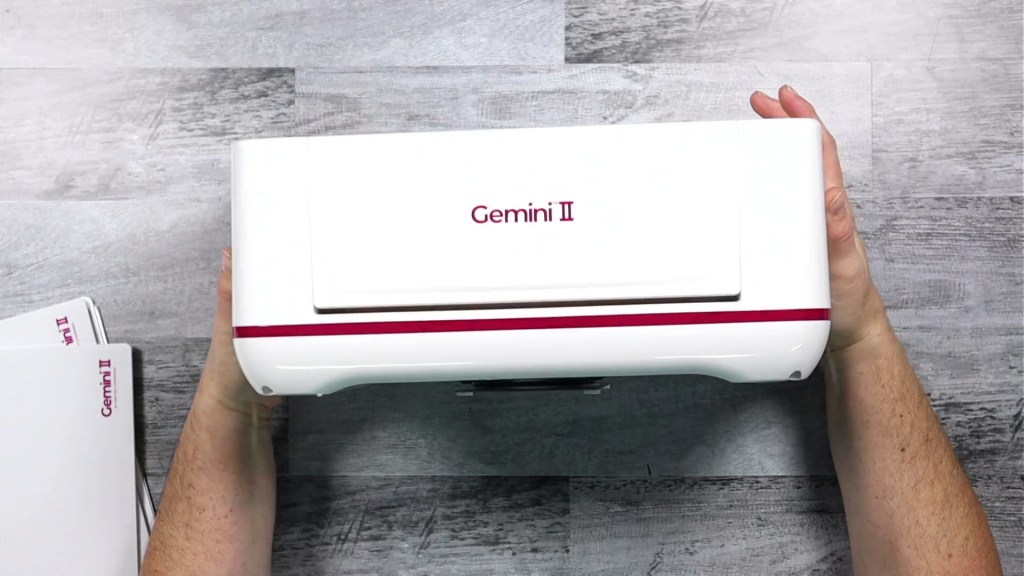
I was looking seriously at two machines… the Sizzix Switch Plus and the Gemini. Then some set of circumstances landed me on the HSN shopping website and there was the brand new Gemini II machine. While my hesitation all this time had been the price of these machines, I decided now was the time. If I was going to make the switch, I was going to do it with the latest model with the most up to date features.
So the new machine landed on my doorstep. As an aside, I bought the machine at a high price and when HSN put it on sale days later, THEY emailed me to say they refunded the difference in price. I’ve never shopped HSN before, but that type of customer service definitely makes me re-consider my anti-TV shopping point of view. A little.
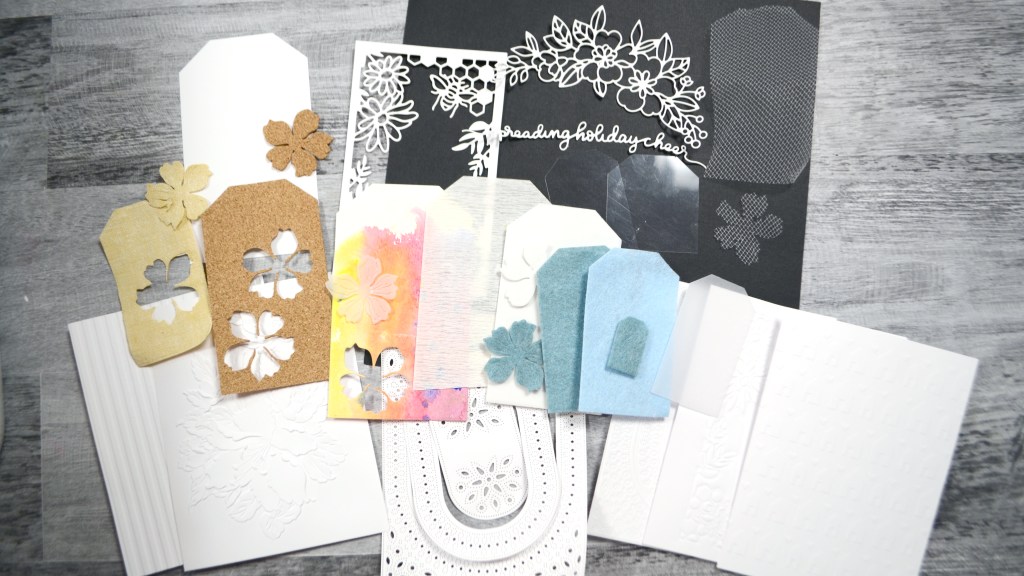
I knew I was going to put this machine to the test, so why not film it and share it. As you can see in the picture above, I really threw everything at this machine. That was a lot of filming, and even more editing to make the video manageable. I could have been two hours long, but then no one would watch. LOL.
If you don’t want to watch the video, the end story is I like this machine and am happy I bought it. There are a few niggly things that are less than ideal, but nothing in life is perfect. For this machine, the instructions had a couple of unclear points. No big deal. However, the larger thing is that the problem with electric machines warping cutting plates is real! I’m working on learning to adjust my workflow to pay more attention to cutting plate care. Even so, I have been making die cutting projects aplenty! Here is a quick look at the one I shared at the end of the video.
Here is what the two different versions of my sandwich guide looks like. I hope you find this useful. If you notice any errors or have suggestions, please reach out to me.
This is a single 8.5×11 printable. It is sized to cut as indicated and it will fit inside the storage tray of the Gemini II machine. (Both files are included in the download.)
This is a two page 8.5×11 pdf document for printing the chart full size in the landscape orientation. (Both files are included in the download.)
And that brings us to the close of another post. I hope you found this review helpful. Until next time, have and artful day.
^^ Disclaimer: I offer affiliate shopping linked products when possible. You can use these links to buy these products, or any products from the site once you get there. This shopping won’t cost you anything extra, but I get a small kick back from the companies for sending business their way. It is an easy way to tell me “Thank You” for the content I provide. I appreciate you using my links.
I love learning, creating and sharing. That is why I offer freebies up to you each month. I have both a layout sketch (in printable pdf as well as editable photoshop) and an electronic cut file (in svg) for your electronic die cut machines.
Here is some further exciting news… new for 2023 are PRINTABLES.!! You can print them at home, cut apart the embellishments and use them to create your projects. This month I was inspired by the upcoming Mother’s Day holiday here in the US. You can see all the details in my reveal video, or read on for the short version.
Sketch
Here is a closer look at the sketch. I created a layout with this sketch as part of the reveal video! You can see a photo gallery of that below as well.
If you are a cut file lover, I’ve got you covered too! My video covers any details for this file and any tips and tricks I have to share. Be sure to get all the info by watching above.
These files come to you in an 8.5×11 inch format for easy at-home printing. Keep in mind that monitor/screen colors and printed colors will NOT be the same! Screen colors often appear more vibrant. Colors even vary from printer to printer!
The pattern papers are ready to print and use. Embellishments will either need to be fussy cut, or use the print-then-cut version for your electronic die cut machine. I try to keep the fussy cutting to simple shapes and any circle elements can be punched out with a 1″ circle punch or die. Any cutting tips beyond these will be in the current video reveal!
The download links have been included besides each image. However, you can always head over to my Freebies Page to peruse the catalog of files I have offered in the past. And if you have any ideas I’d love to hear them. I can’t make promises but I can take suggestions!
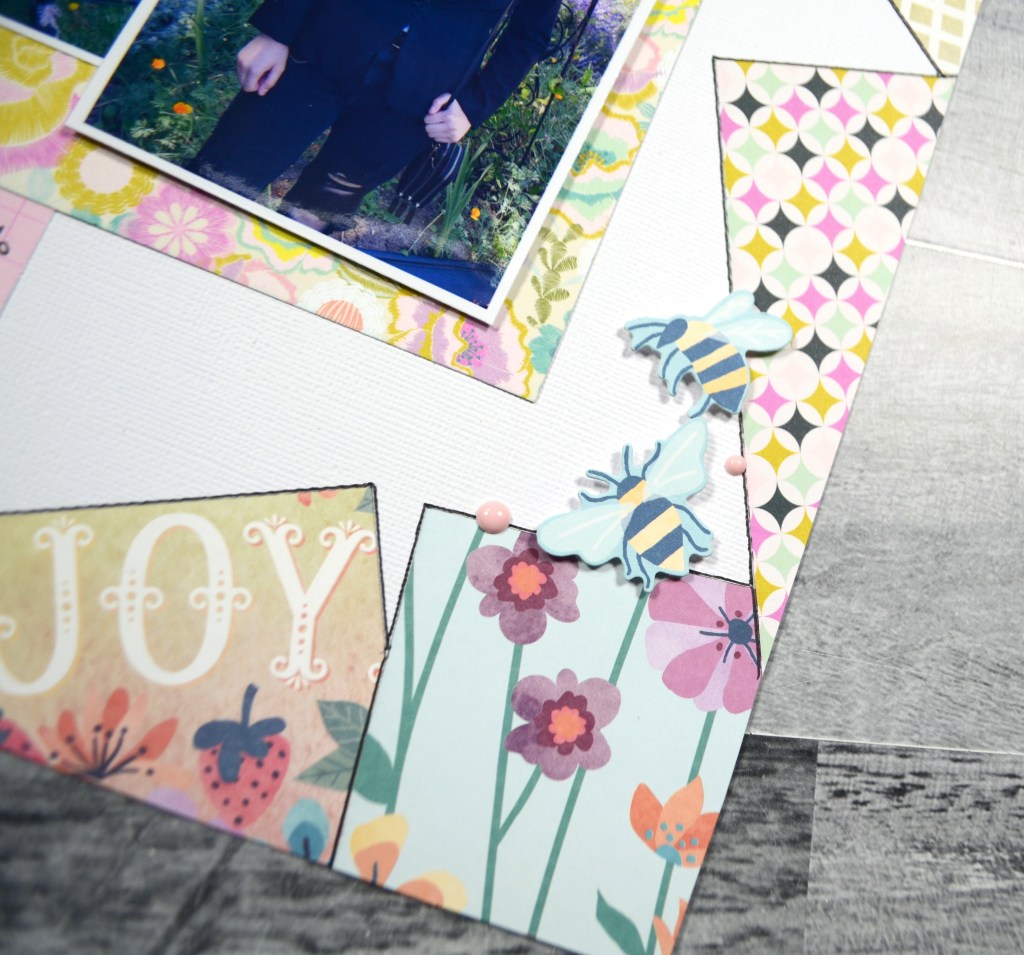
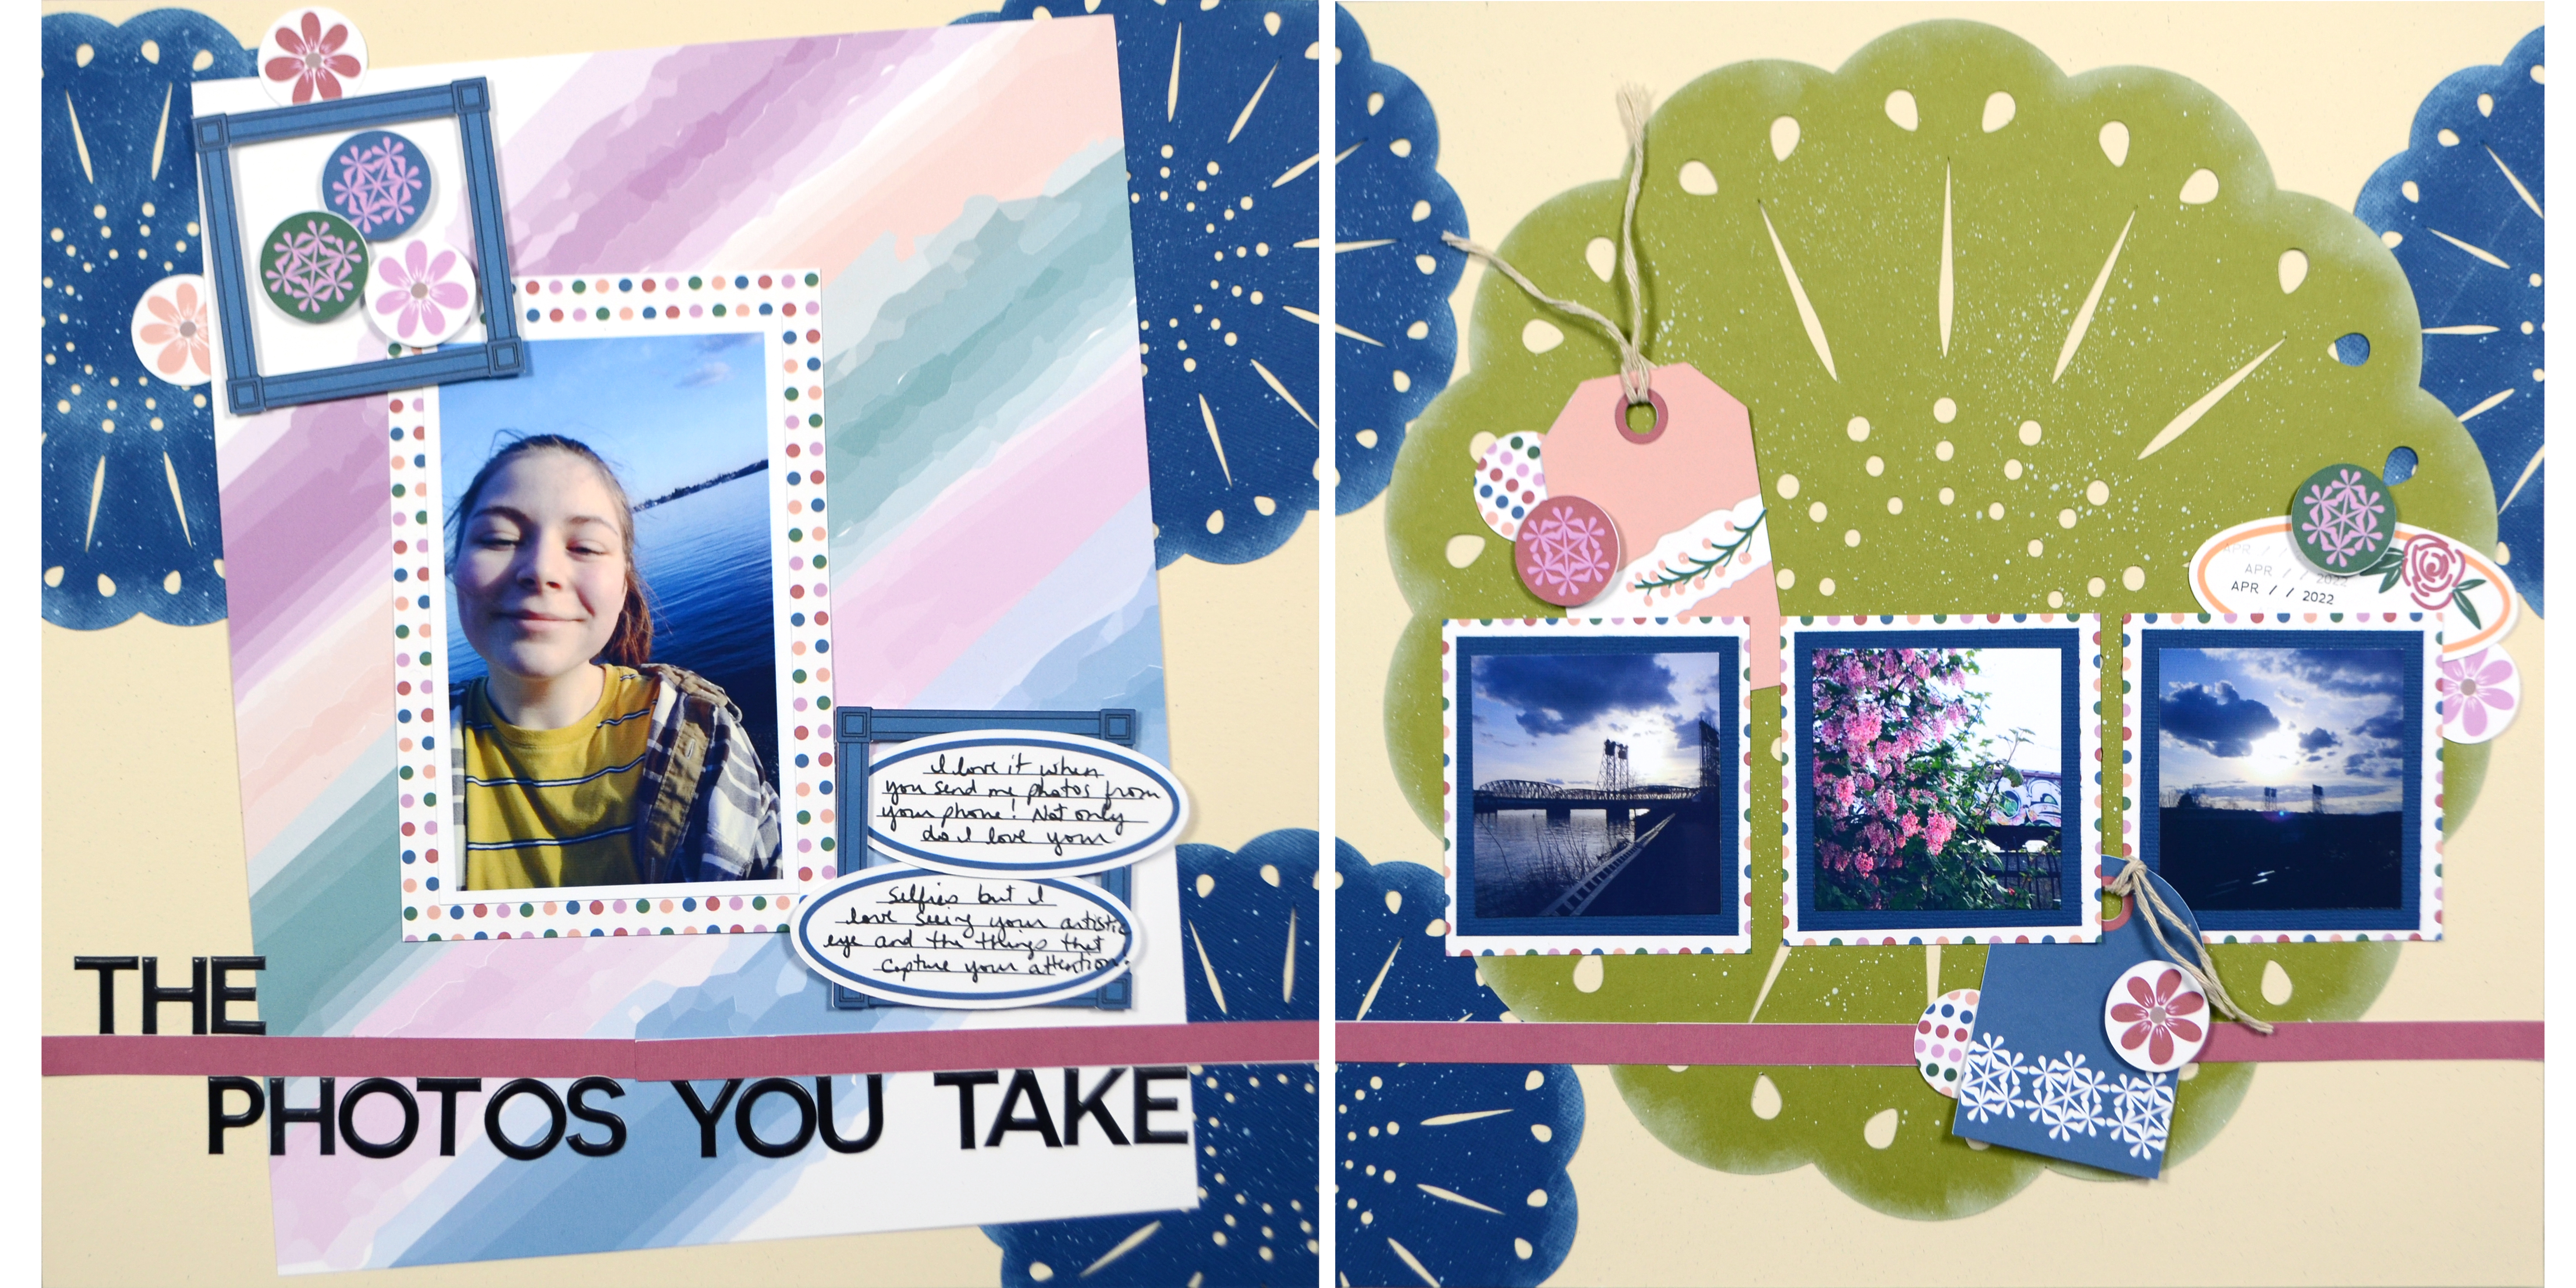
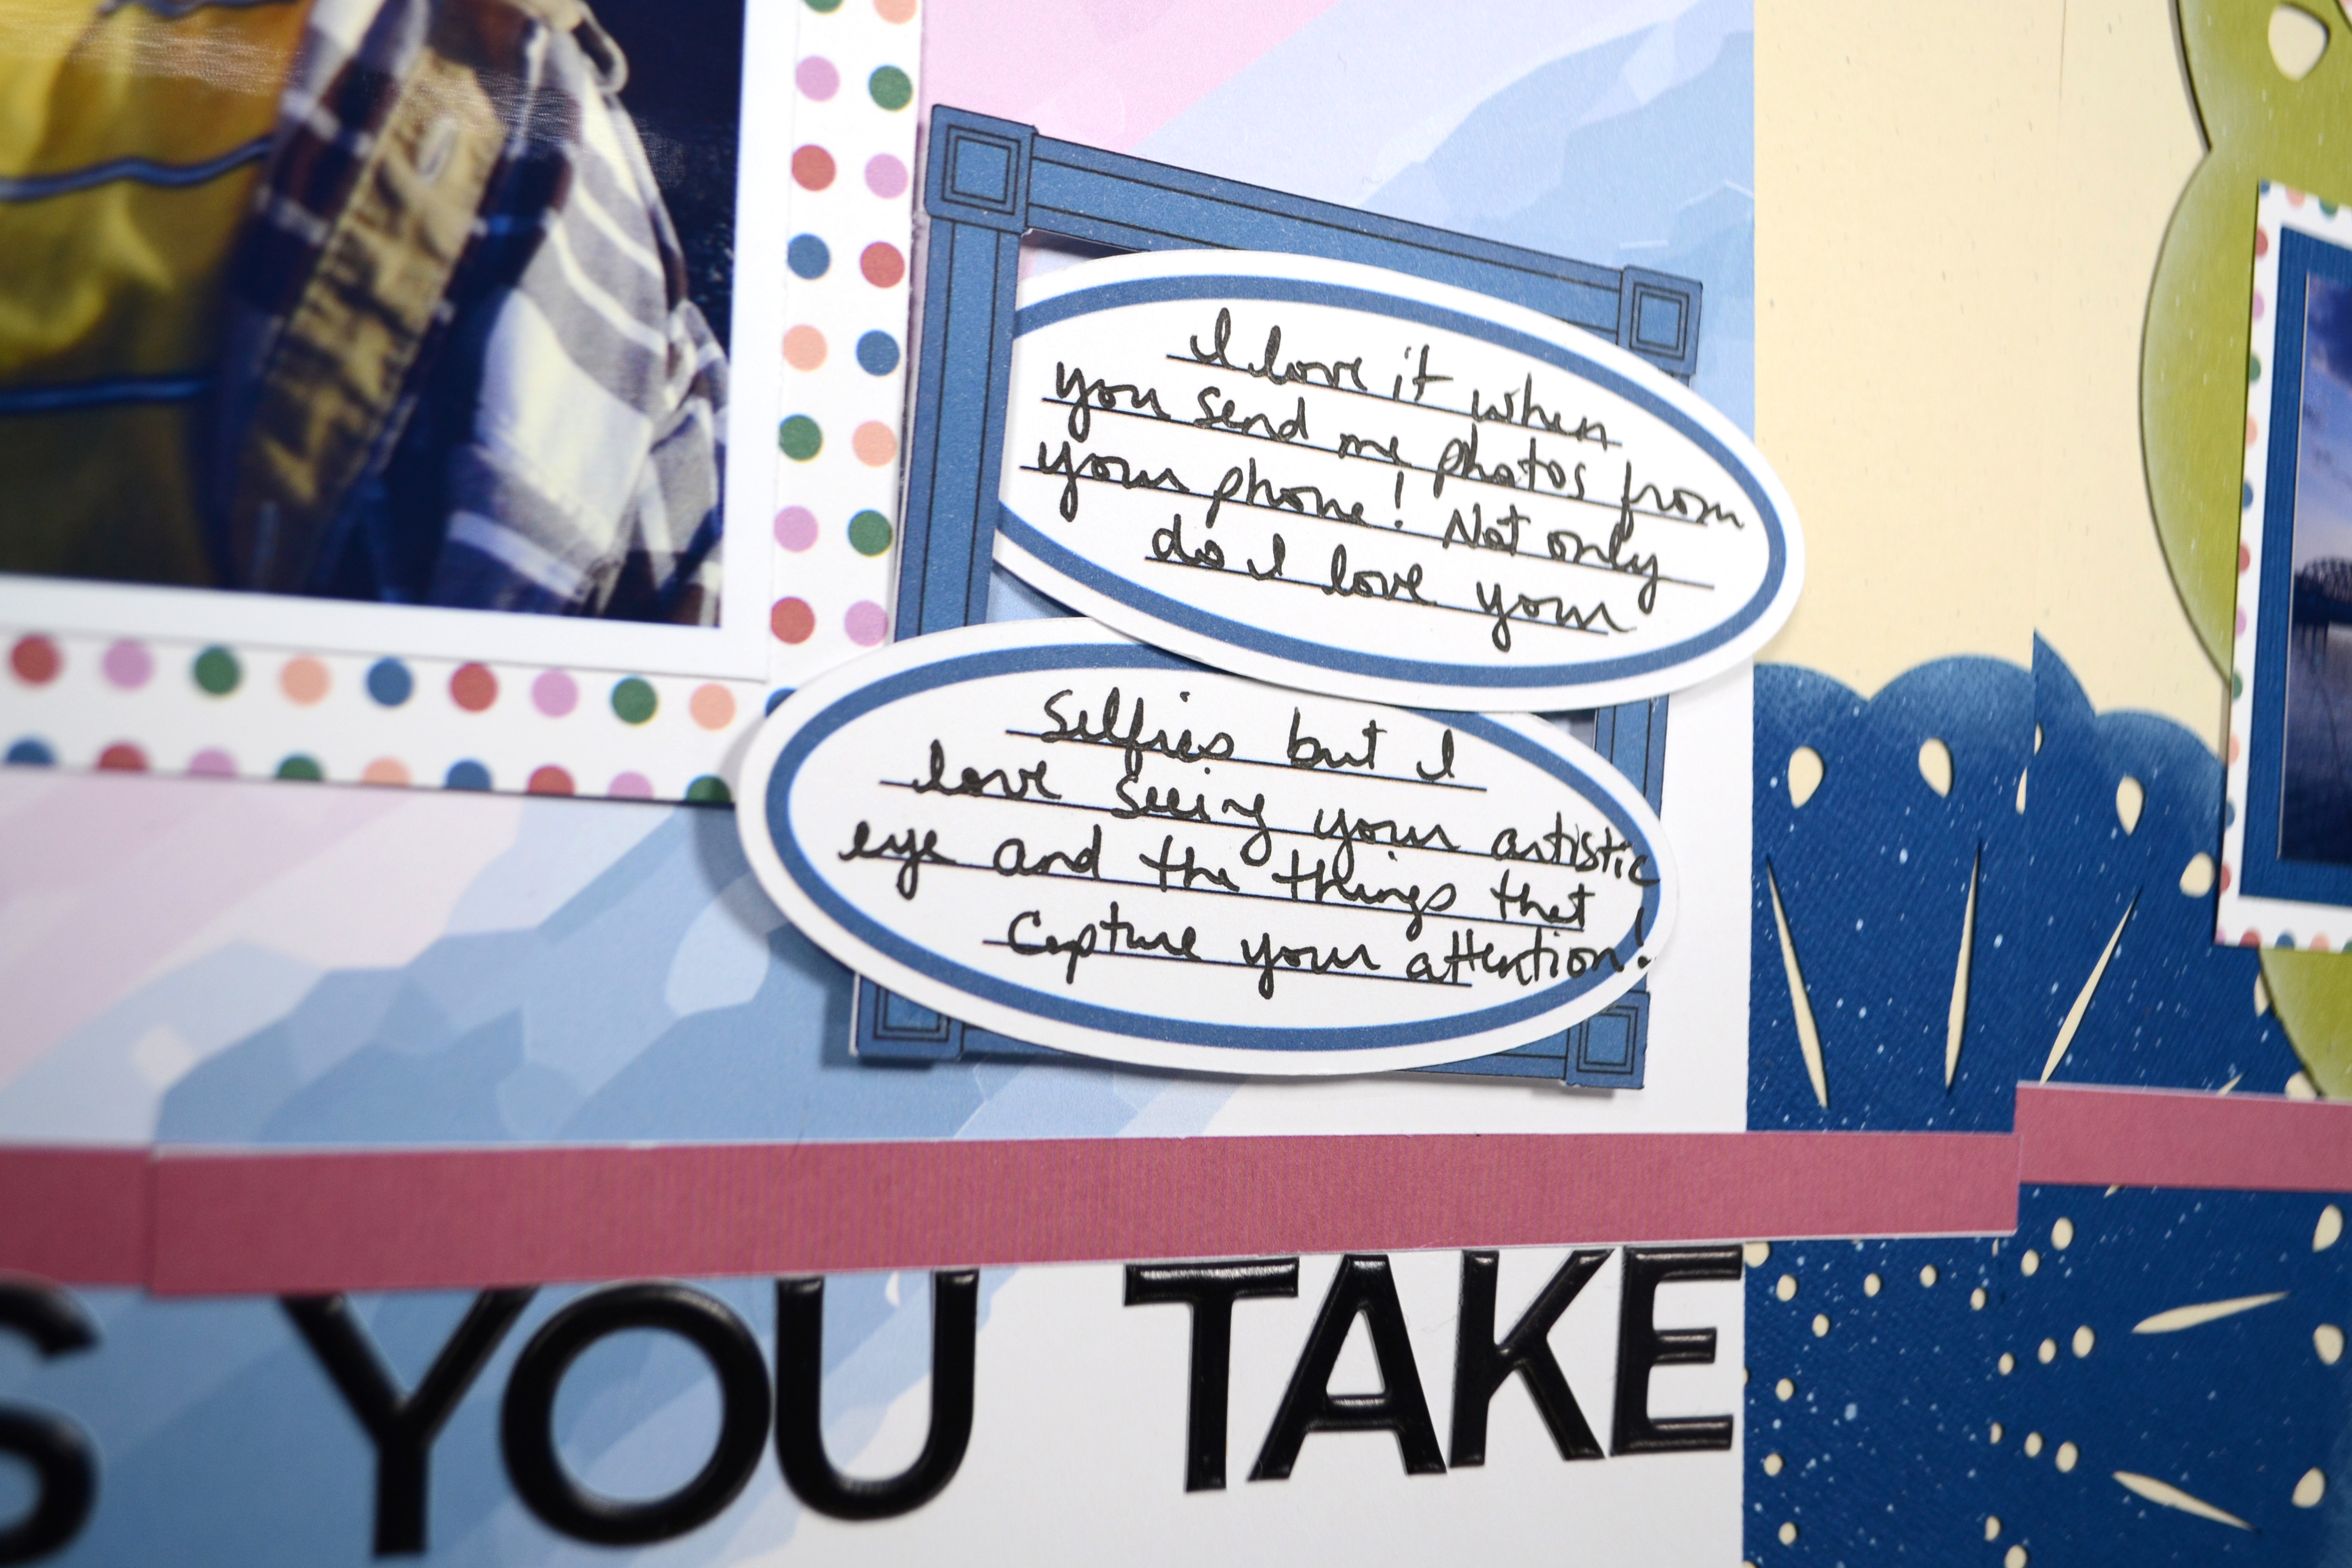
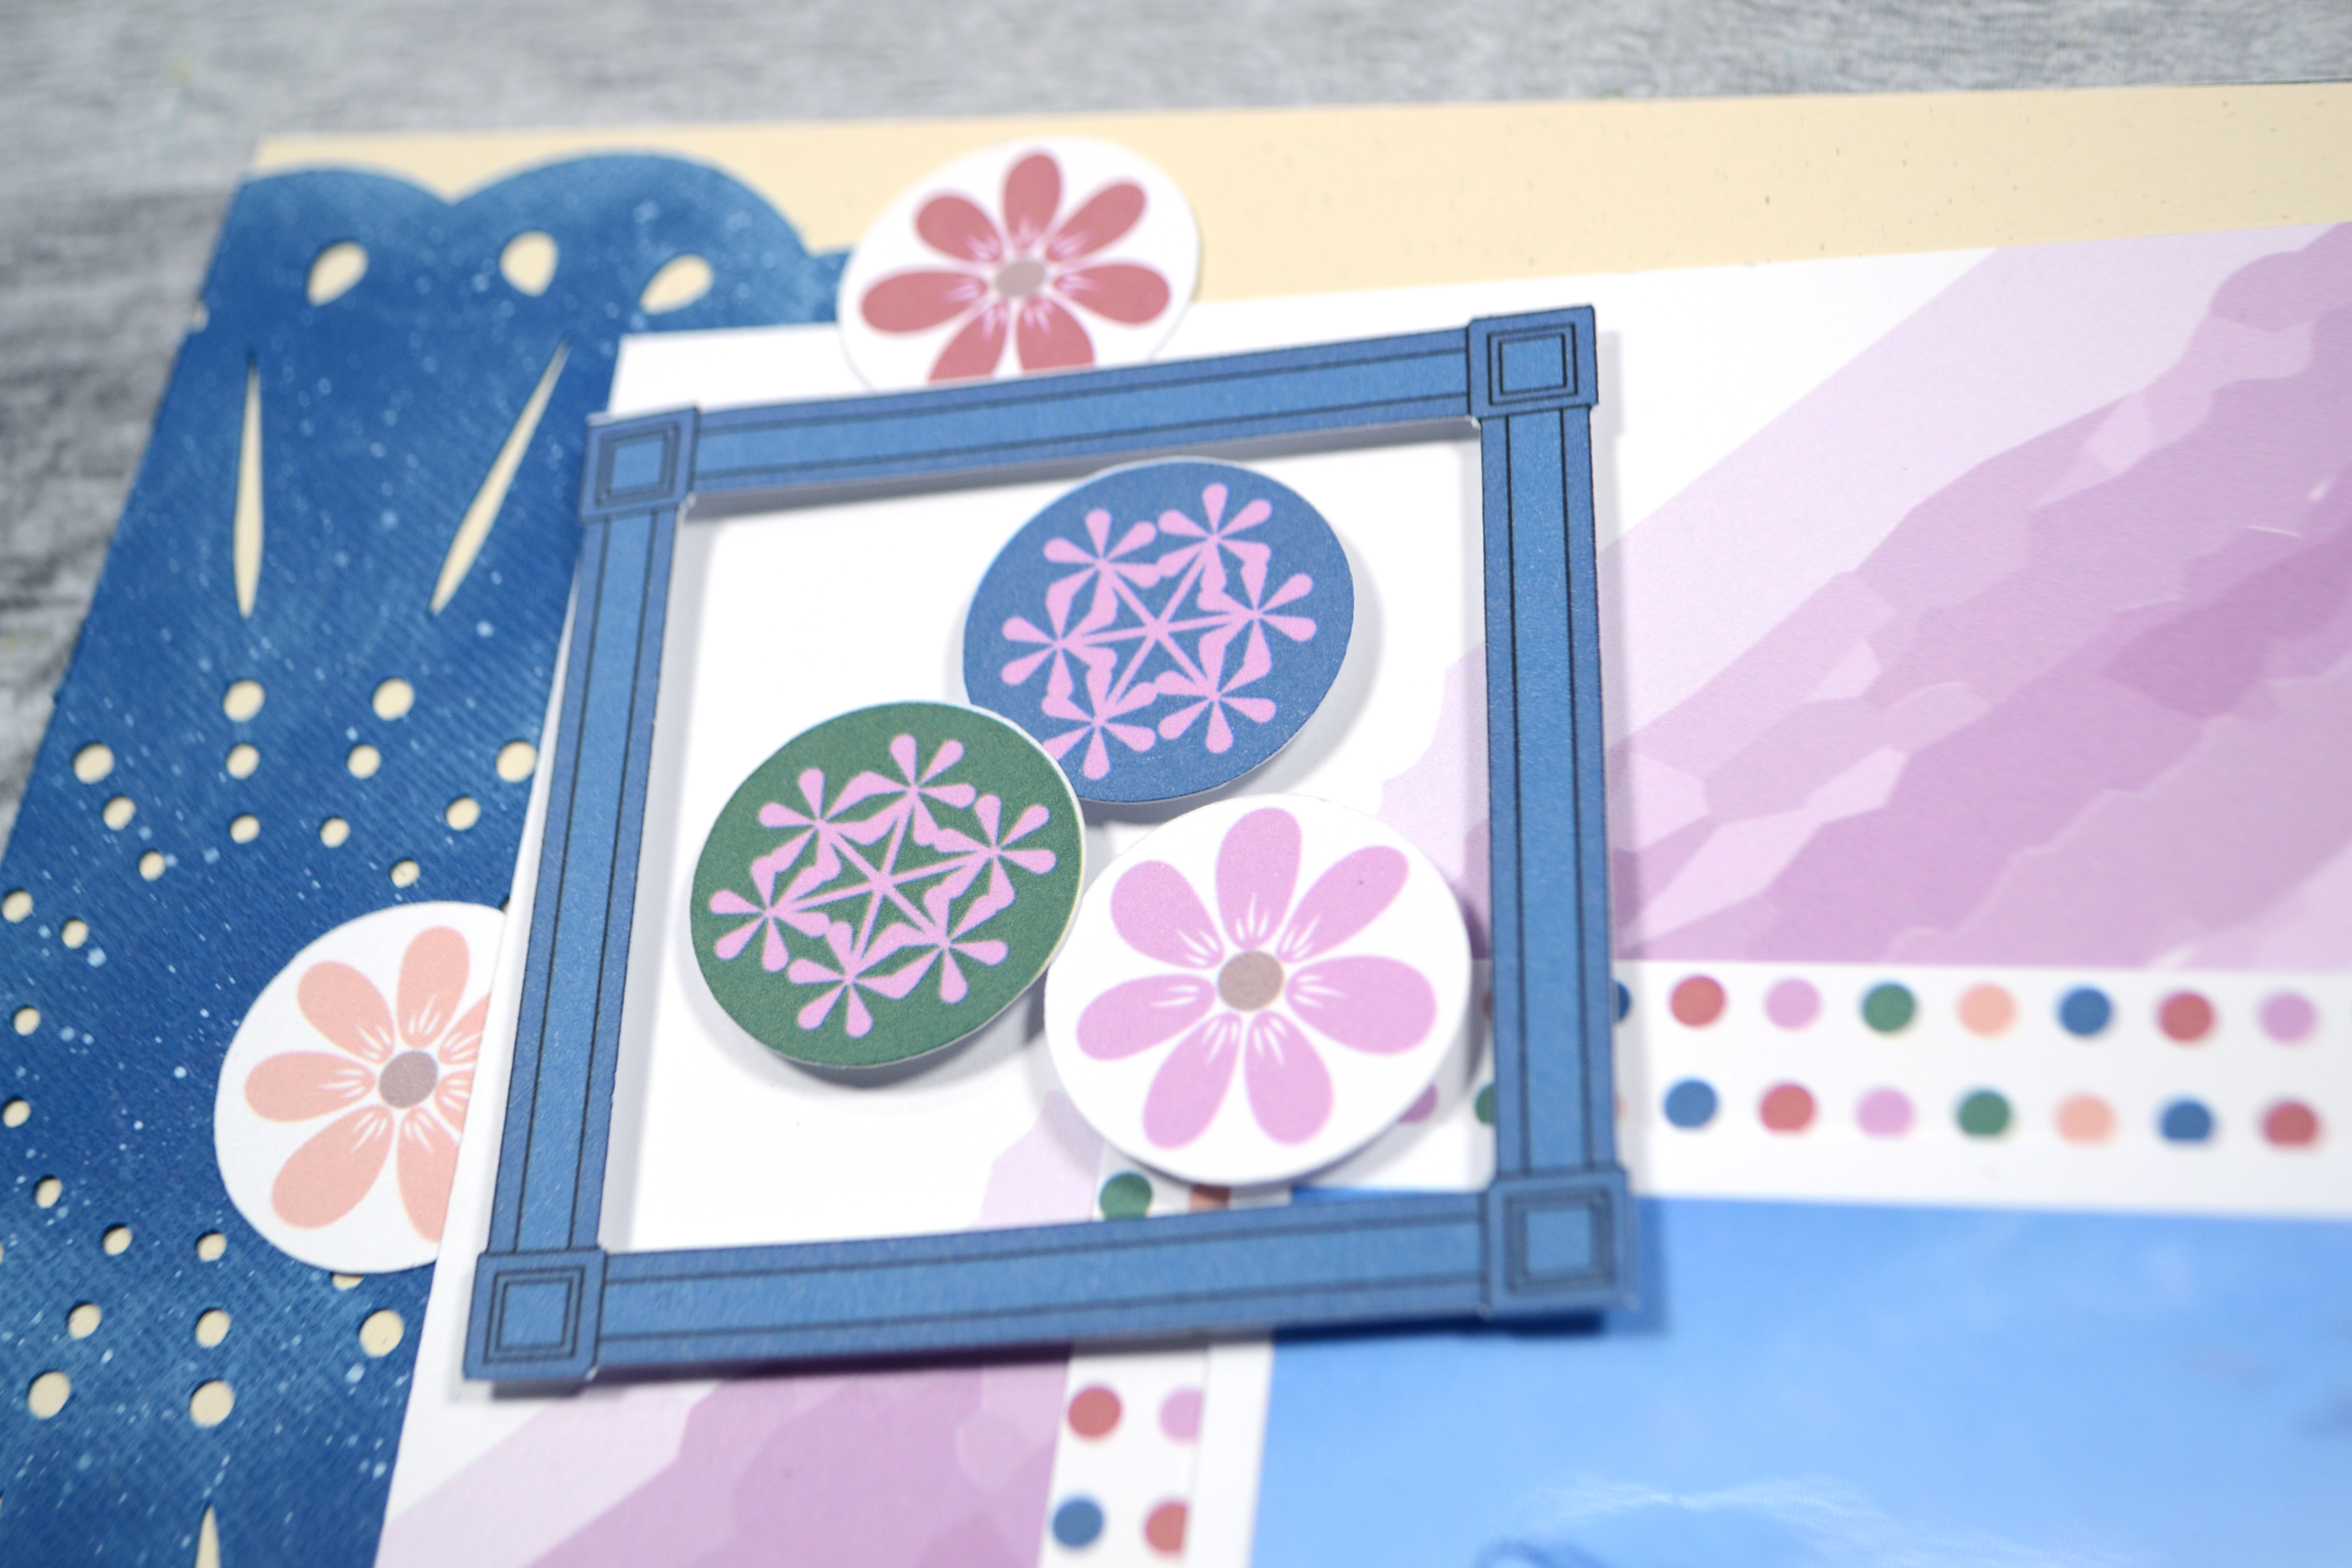
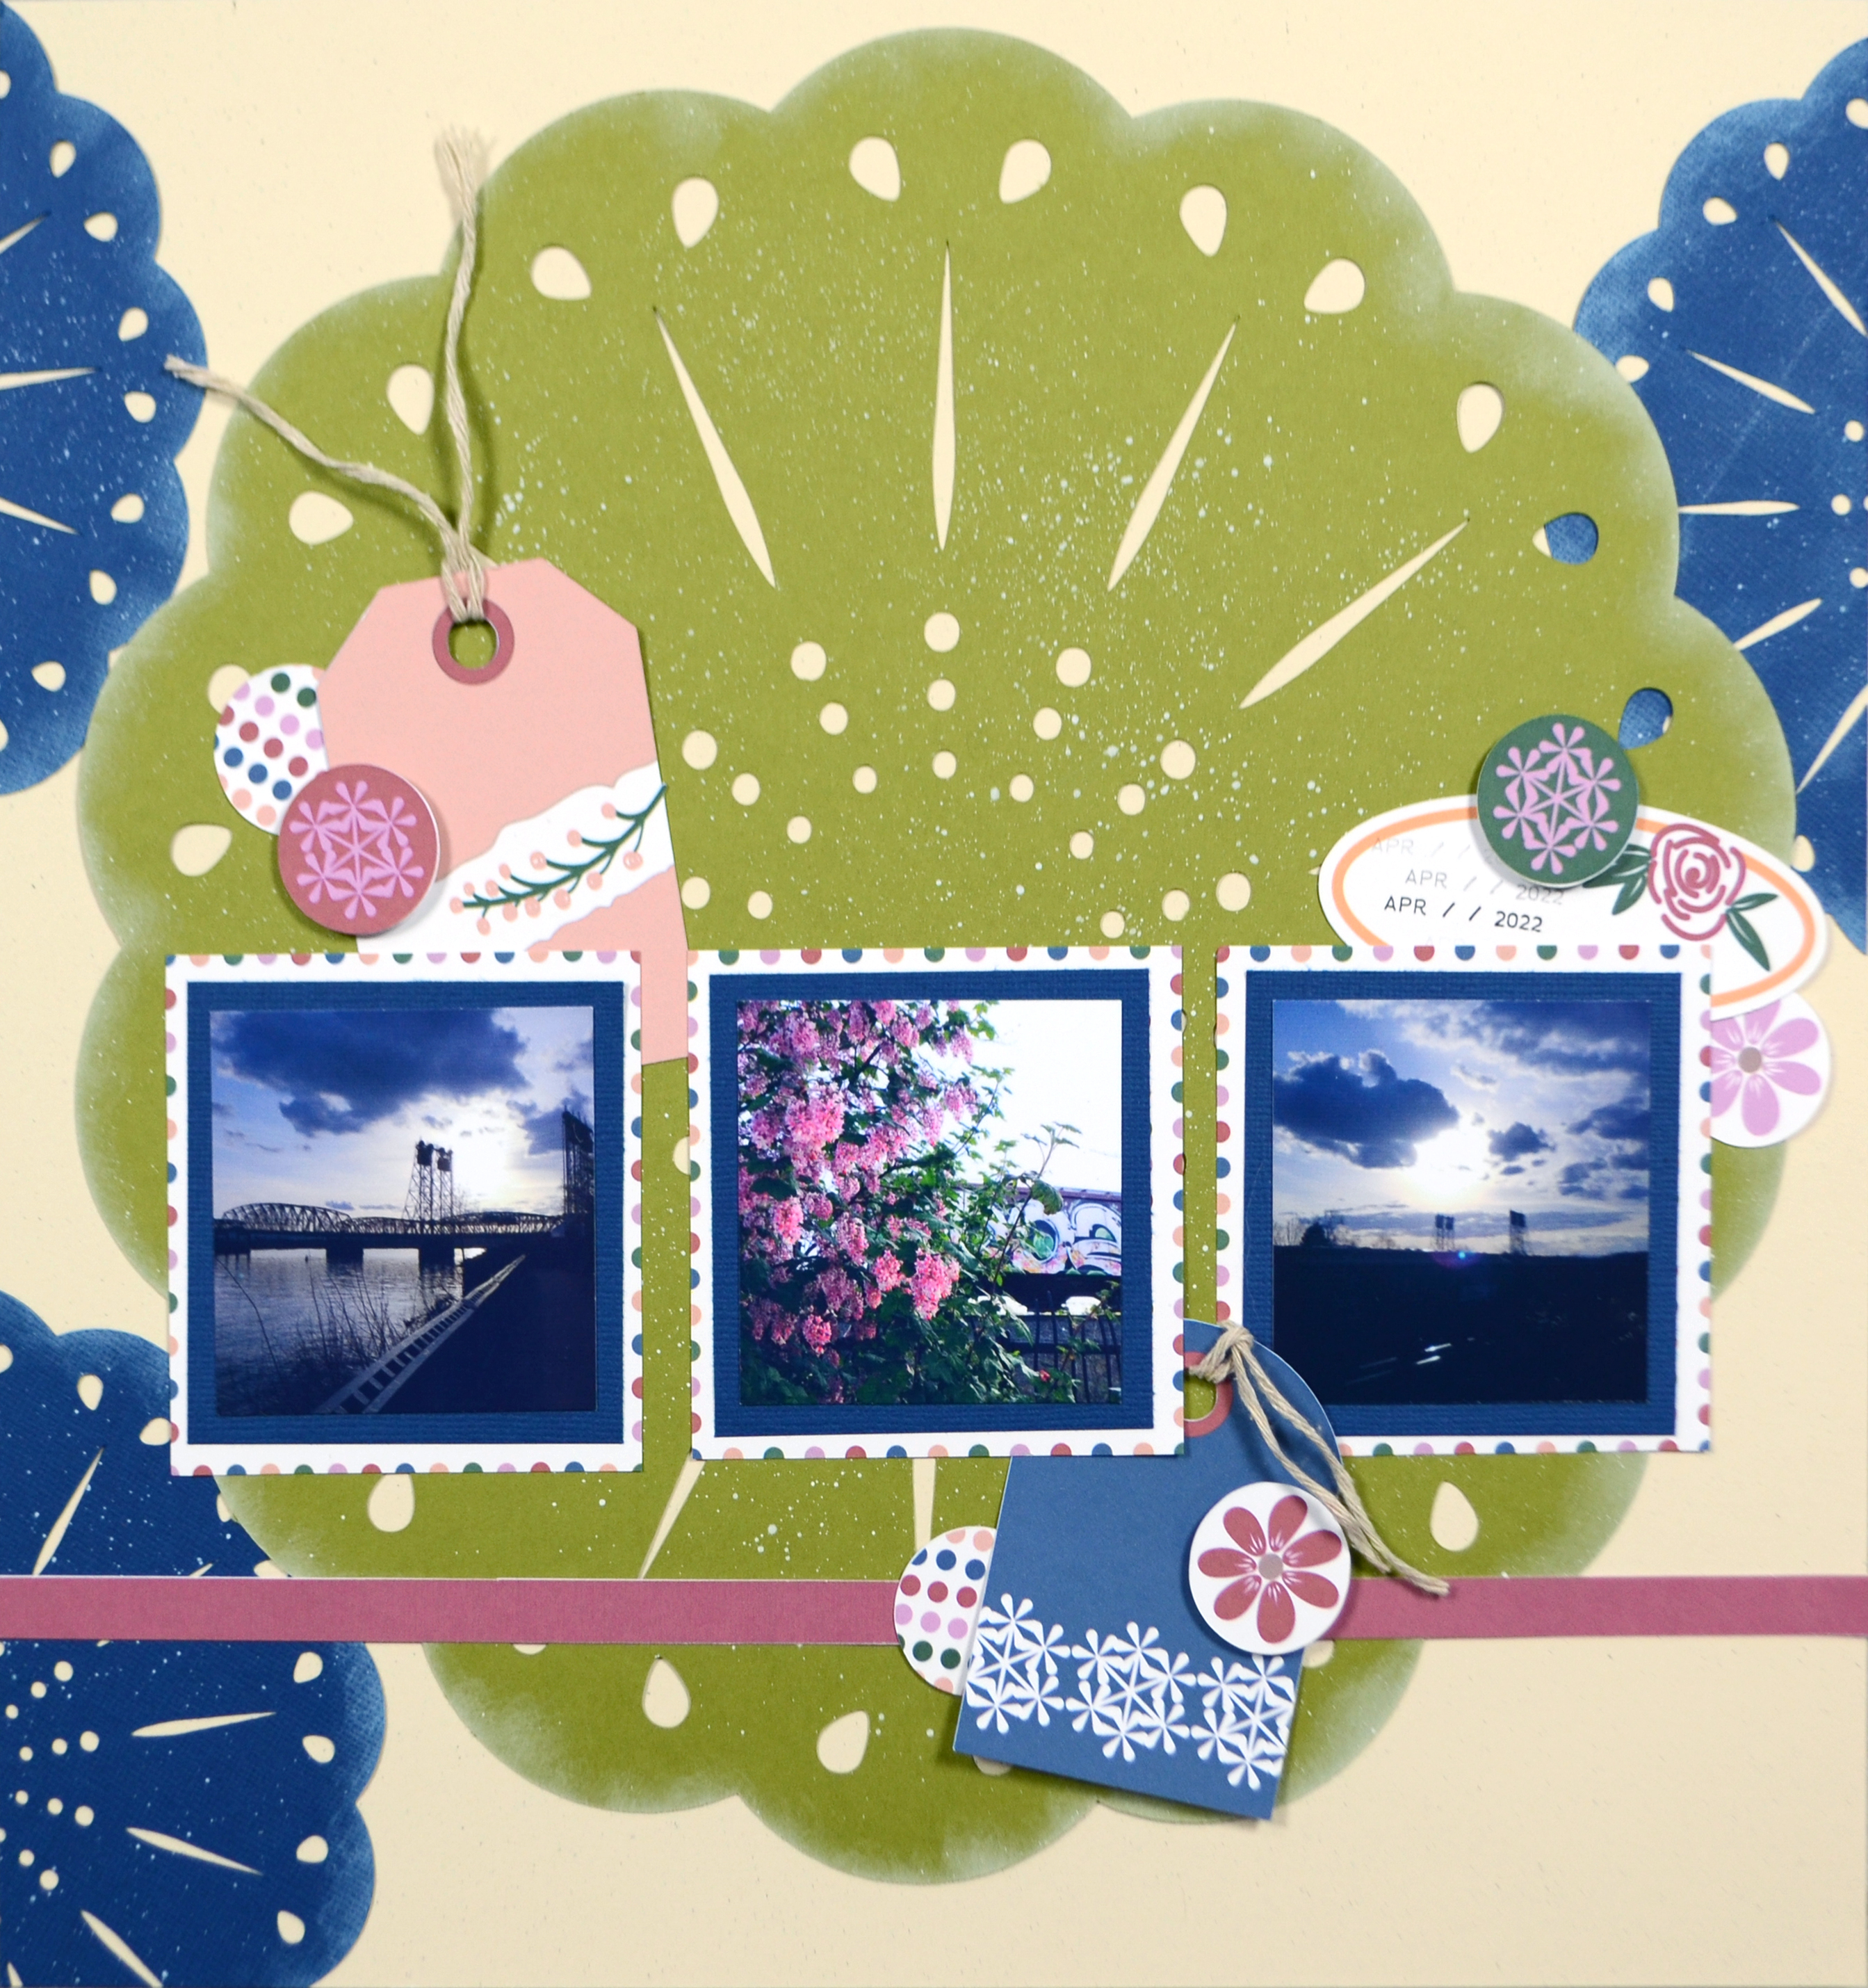
Before we go, here is the photo gallery of this double page layout. Until next time, have an artful day.
If you don’t follow my YouTube channel, you may be wondering what I’ve been up to in April. Hopefully you’ve already seen my posts for the Counterfeit Kit Challenge kit build and first two layouts. If not be sure to head back to read up on those.
I’ve had a few other things going on so far this month.
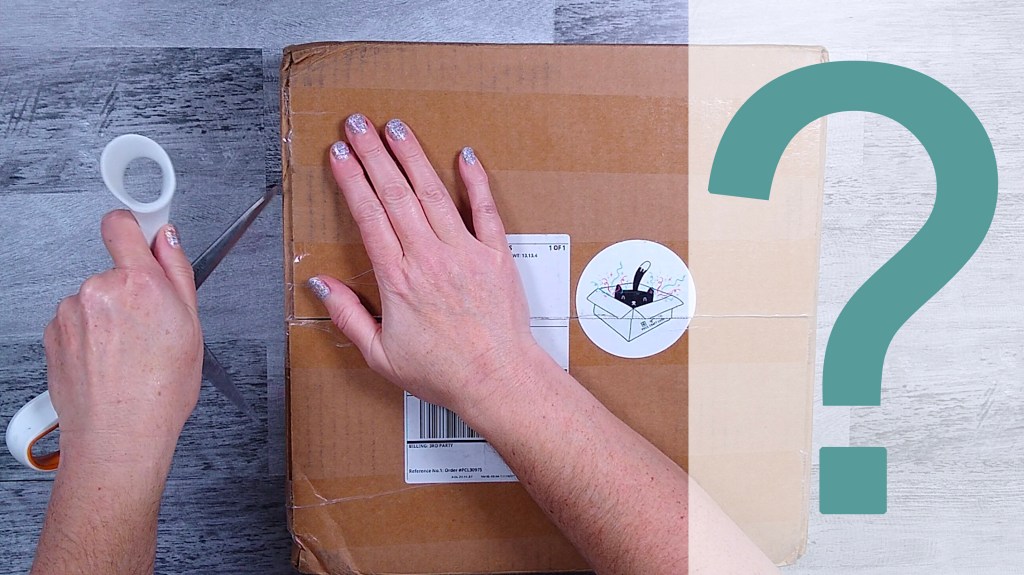
First up as this photo indicates, I did get a Mystery Box Monday project done and I liked how it came out. Be sure to read on for more on that.
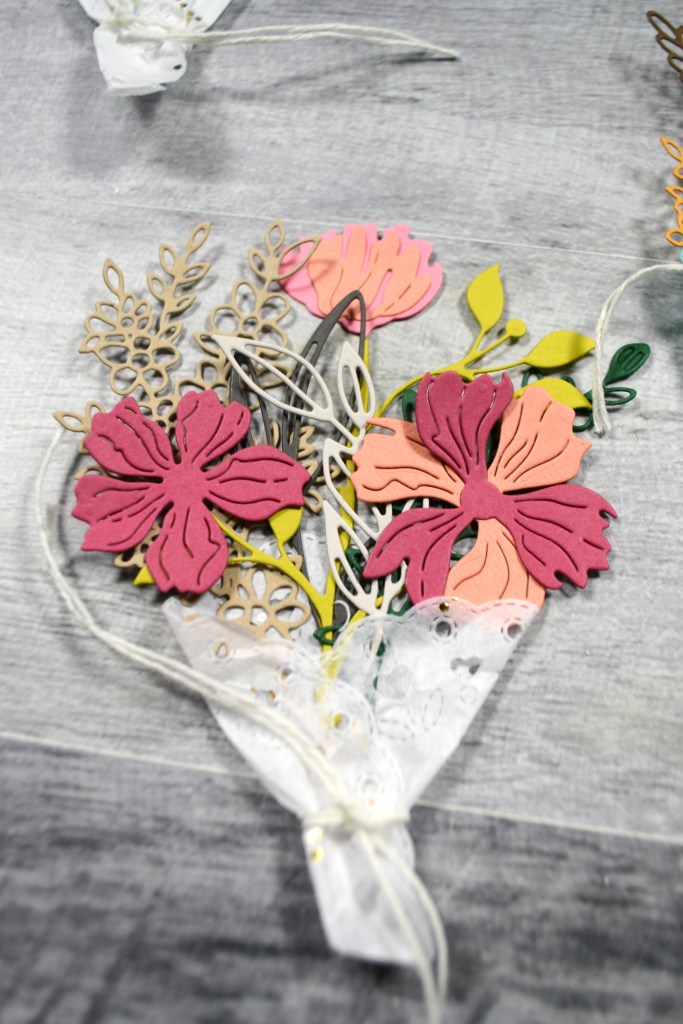
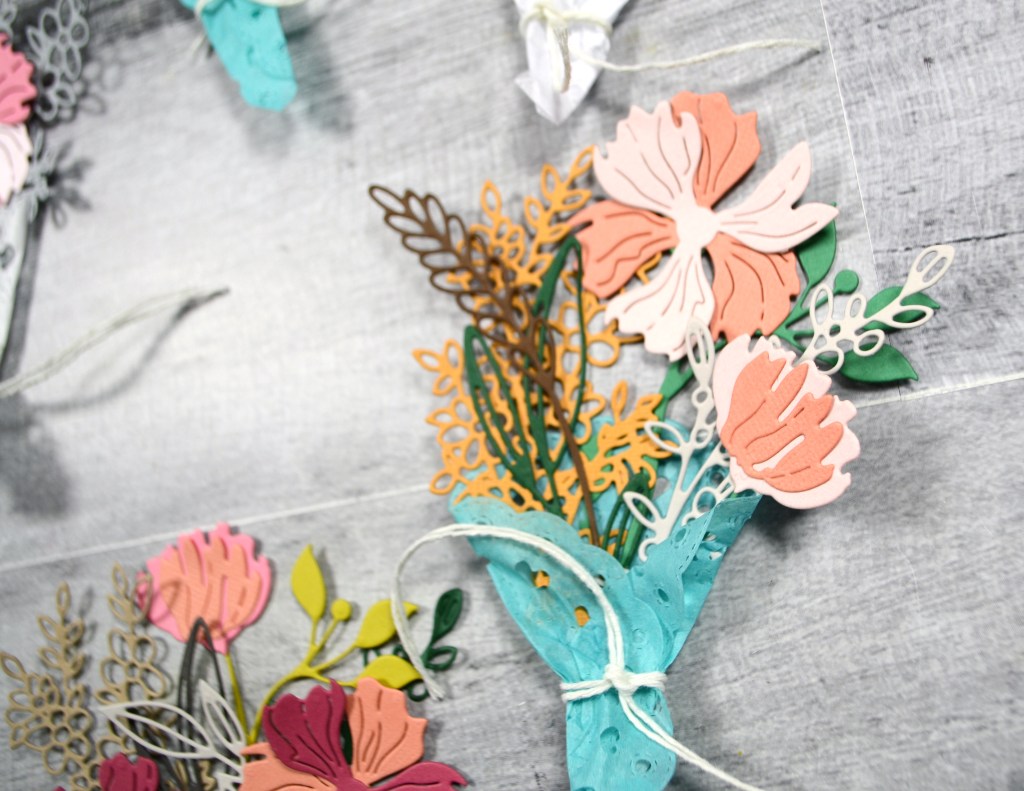
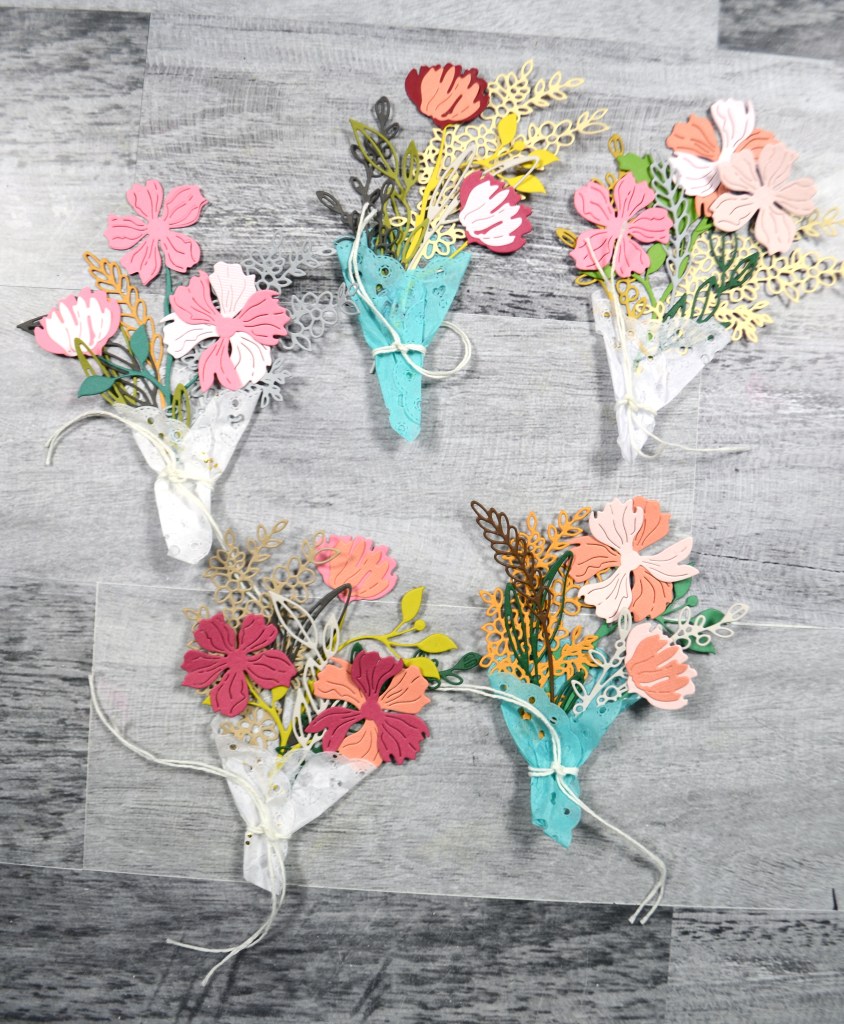
I also made some sweet little bouquet embellishments. I did not do my usual project forgery for the CKC group this time around as my ideas were very simple and not worth a whole post/video. These sweet little bouquets came about from a spin off of the other project I worked on this month…
…I did a very big product review that I will detail in another post (coming soon!). I put that product to use in a pretty project, so be sure to check that out!
Mystery Box
Each month I reach into my mystery box of crafty supplies and pull out three items. Much like that cooking show with the mystery basket ingredients, I have to put those items to use on one crafty project. Will these ingredients work together? Or will it be a recipe for disaster? Let’s find out…
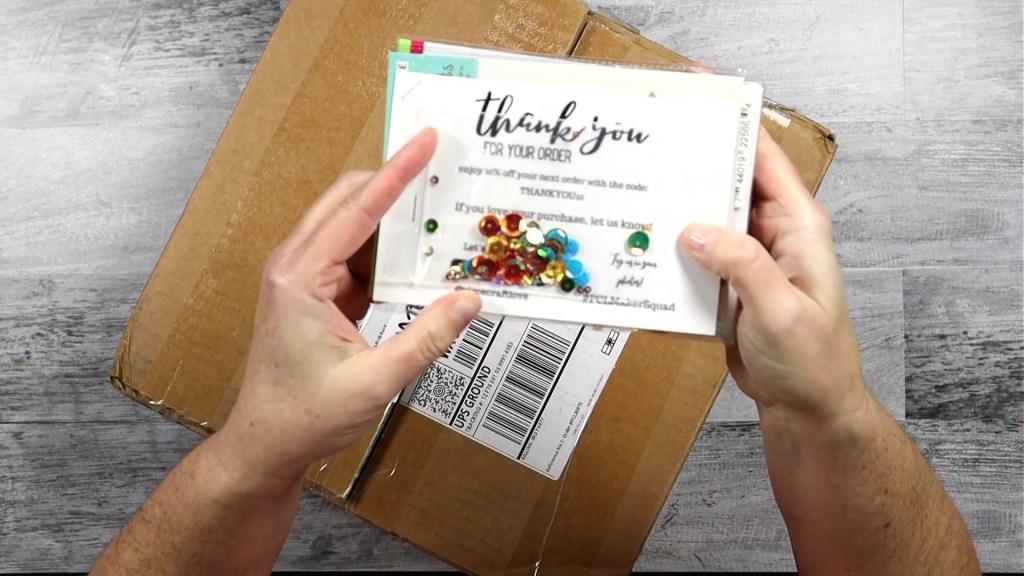
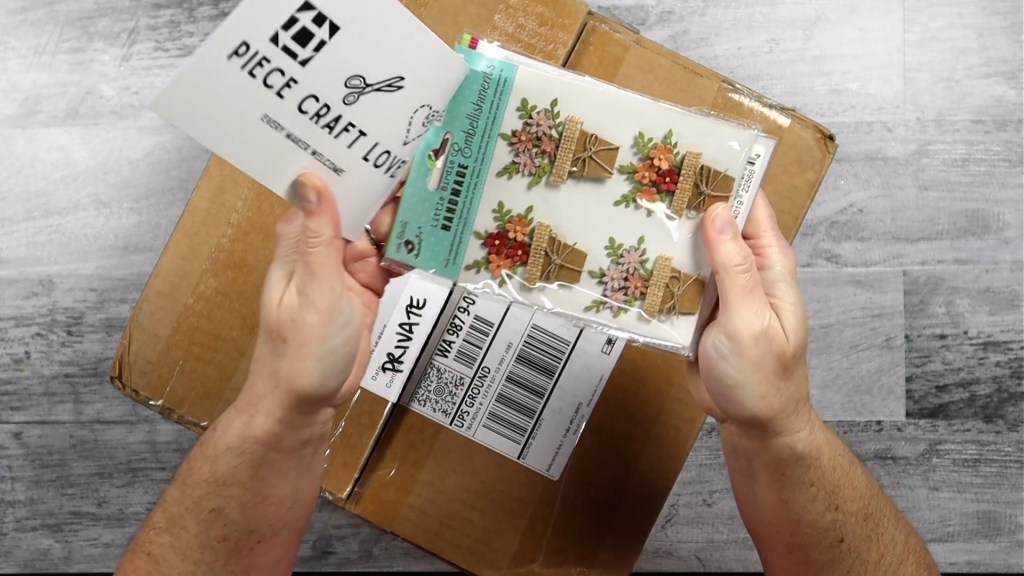
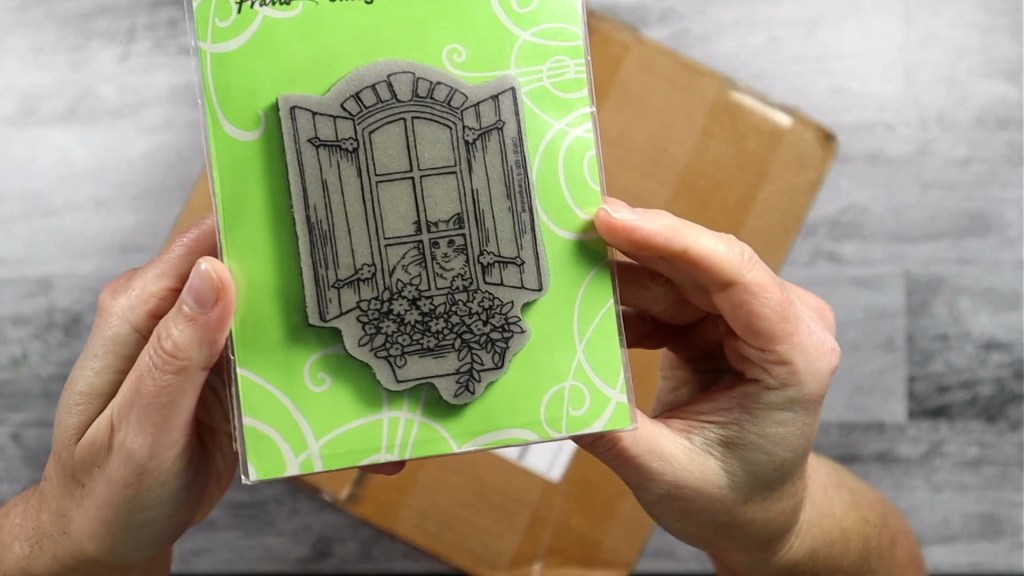
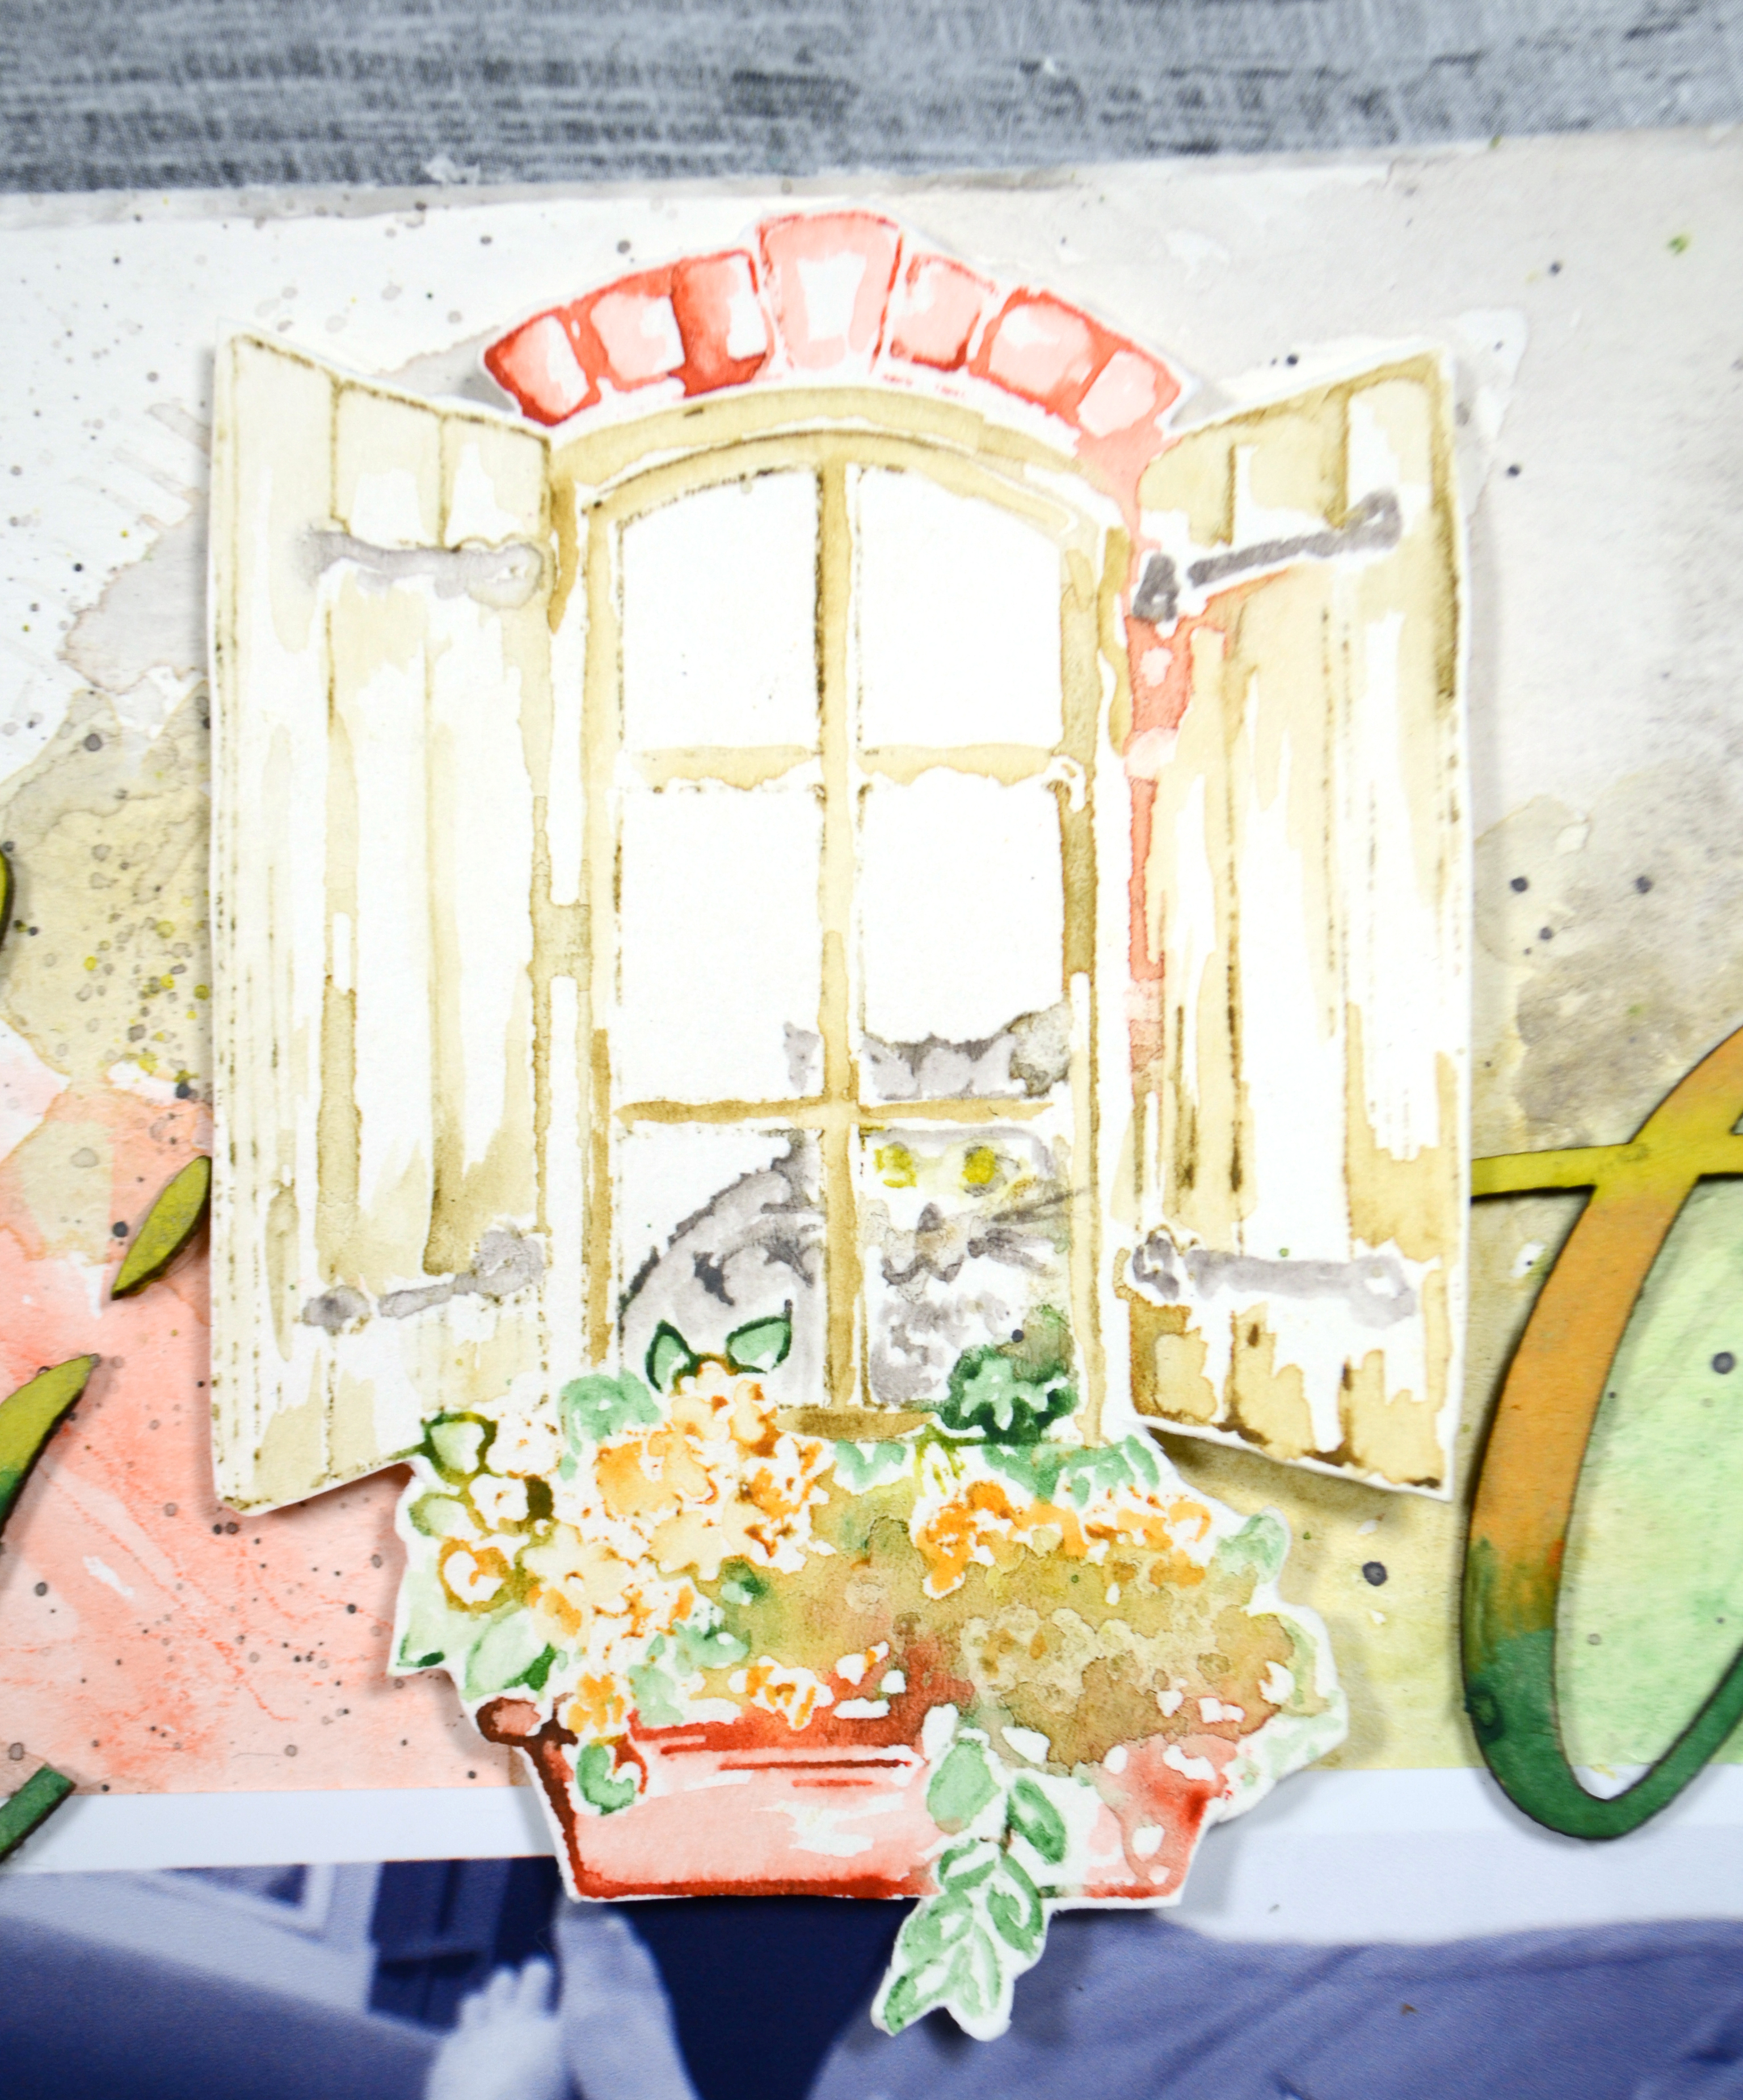
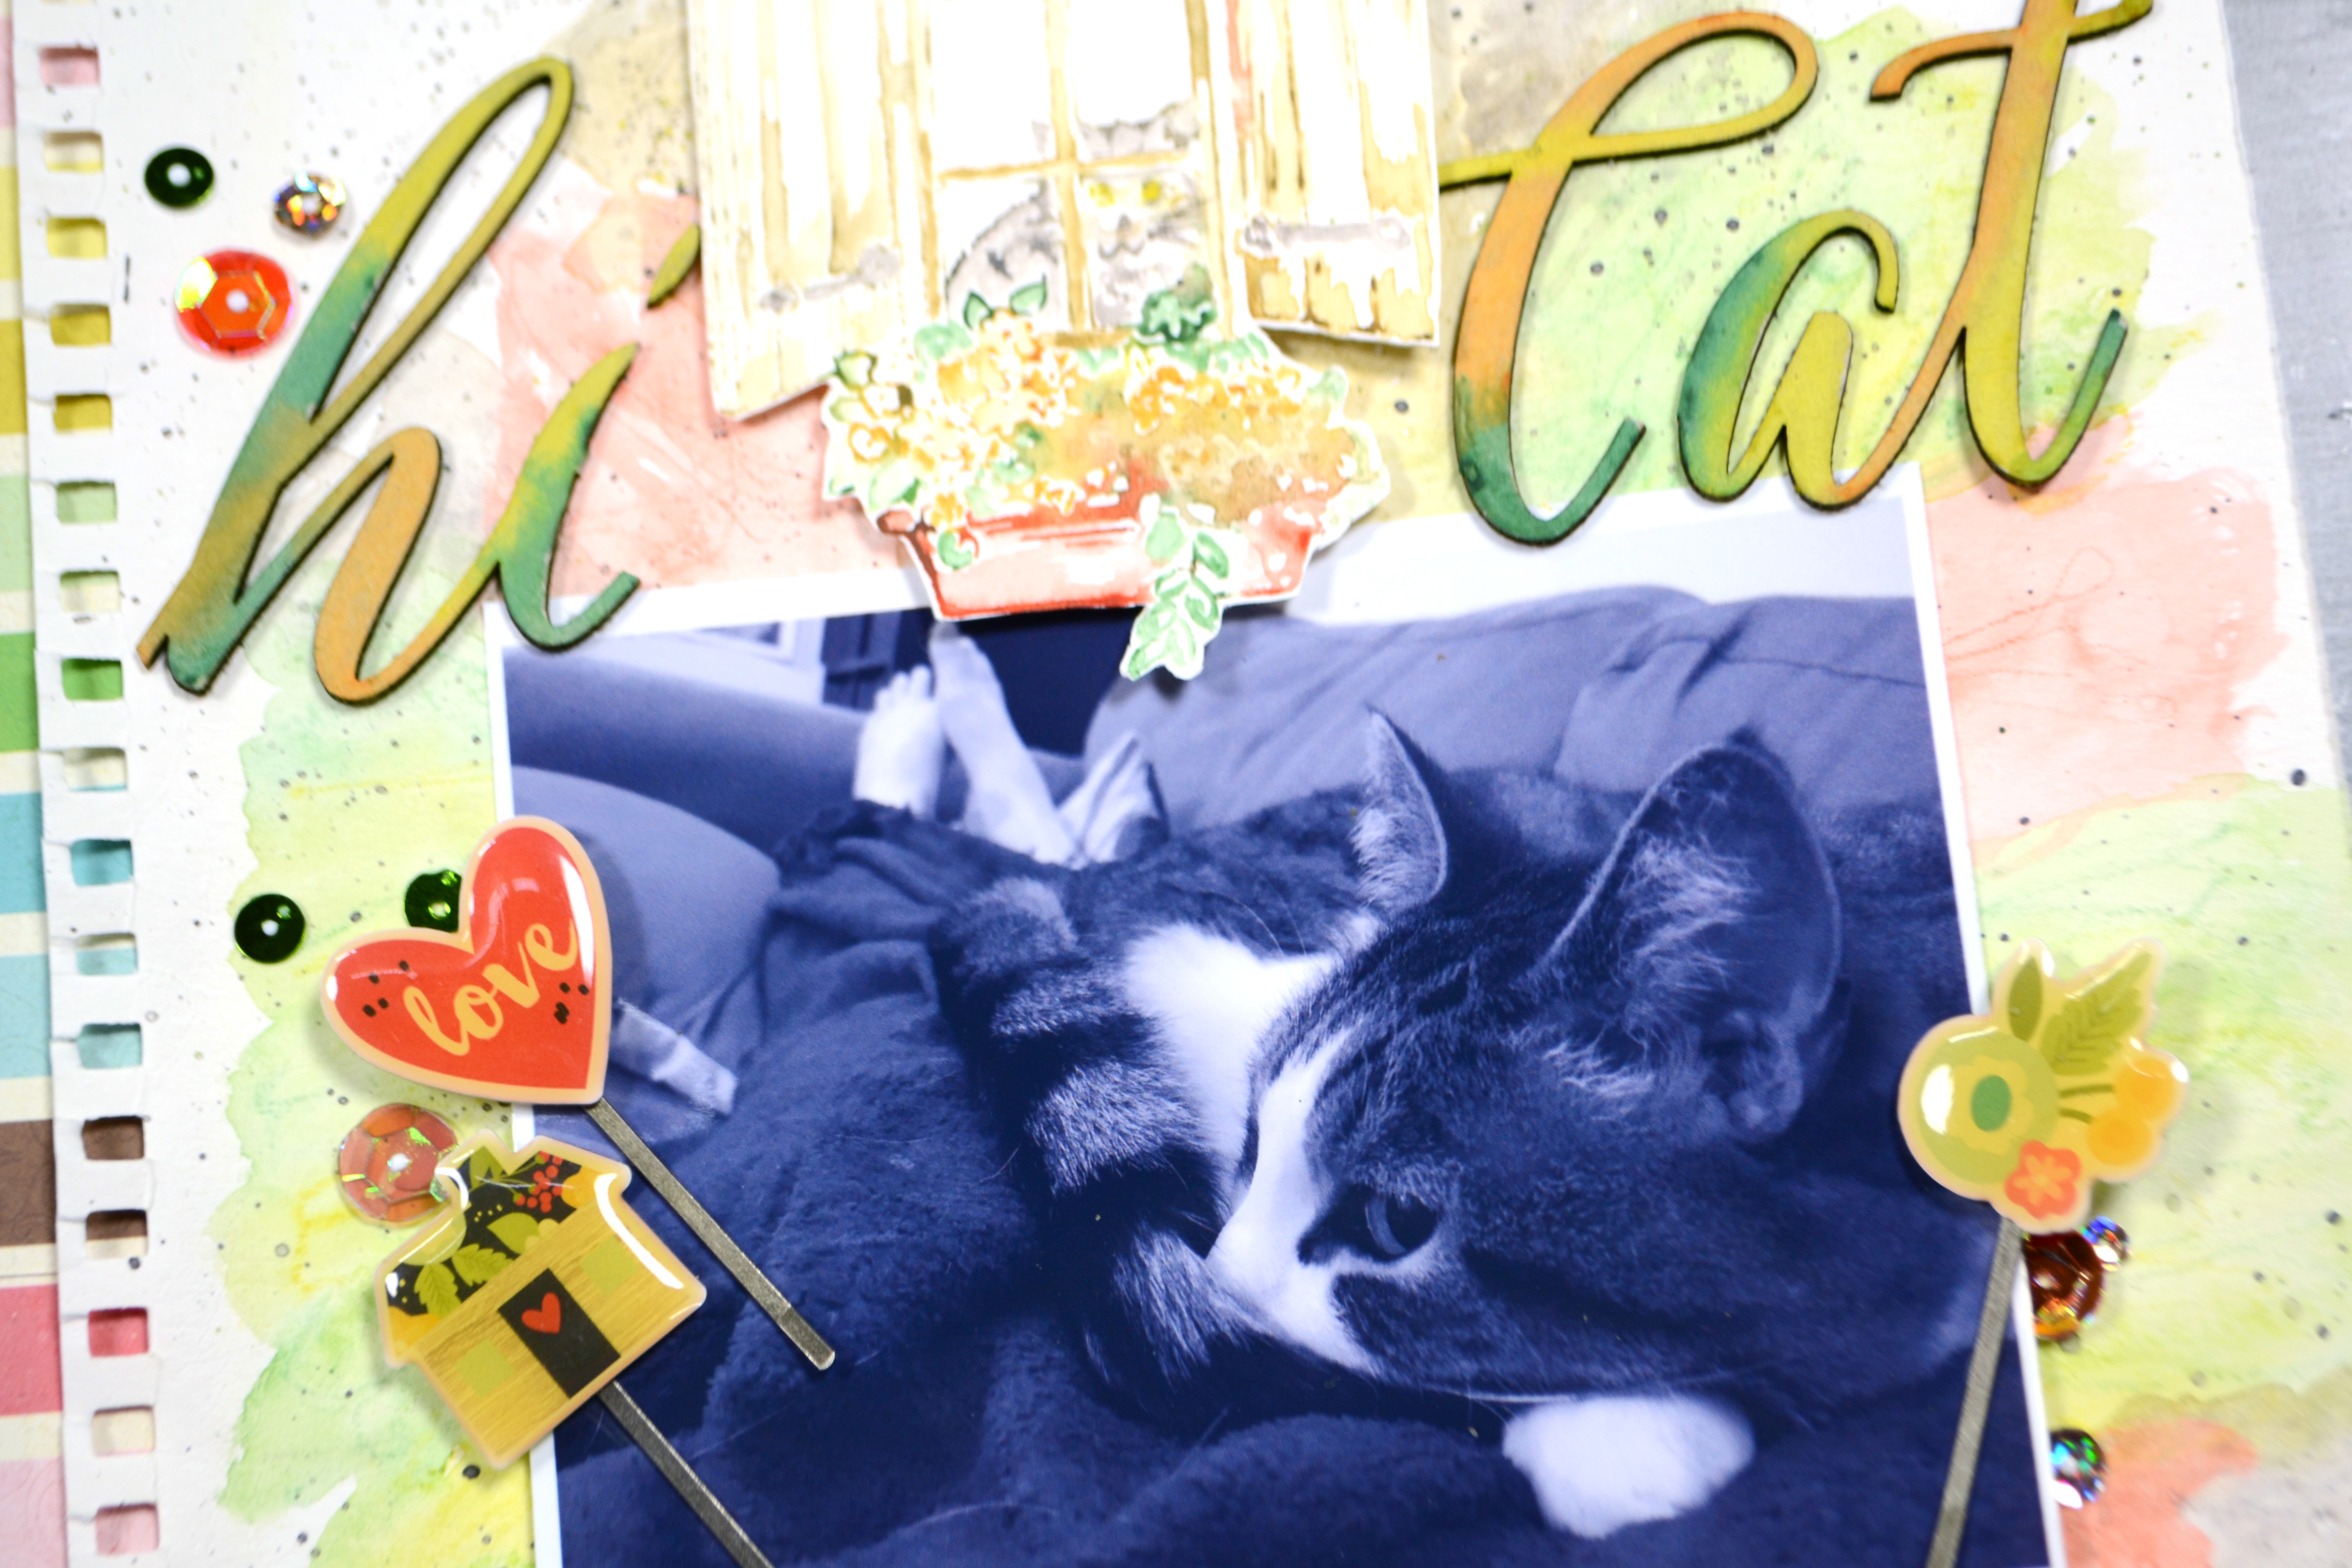
Here is a peek at the mystery items I pulled out of the box this time around. The “first” item was actually a bundle of three things as part of the thank you note from the shop. I hade some sequins, some floral embellishments and a stamp of a cat in a window. The next two items are as pictured below.
That stamps definitely set the tone for this entire project! You can view all about it in the video.
But here are the final project pictures if you want a quicker view.
Bouquet Embellishments
So this idea got stuck in my head when I was playing with my new die cutting machine. It just took me a little while to find the time to get to it. But once I was in the process it didn’t take a huge amount of time at that point since the new die cutter has a much larger cutting area than my old one!
That wraps up another blog post. Until next time, have an artful day!
^^ Disclaimer: I offer affiliate shopping linked products when possible. This shopping won’t cost you anything extra, but I get a small kick back from the companies for sending business their way. It is an easy way to tell me “Thank You” for the content I provide.