It is the first challenge of the month over at the Counterfeit Kit Challenge! This time our kit hostess set us a challenge inspired by the tractors used in many fall festivals. No you don’t need to include a tractor; you can be inspired by the idea of transportation! I took it in a very metaphorical level and talked about my daughter being ready to fly off to college (no she isn’t flying, she’ll be driving since campus is about 2 hours a way!)
I’ve been doing free svg and sketch files for download all year long. This month I am combing the freebies into a single video. You can still download the files individually for just the files that are interesting to you! The sketch shows on the left and the cut file on the right, with a project combing the two in the center. Larger photos follow if you’d like to see more
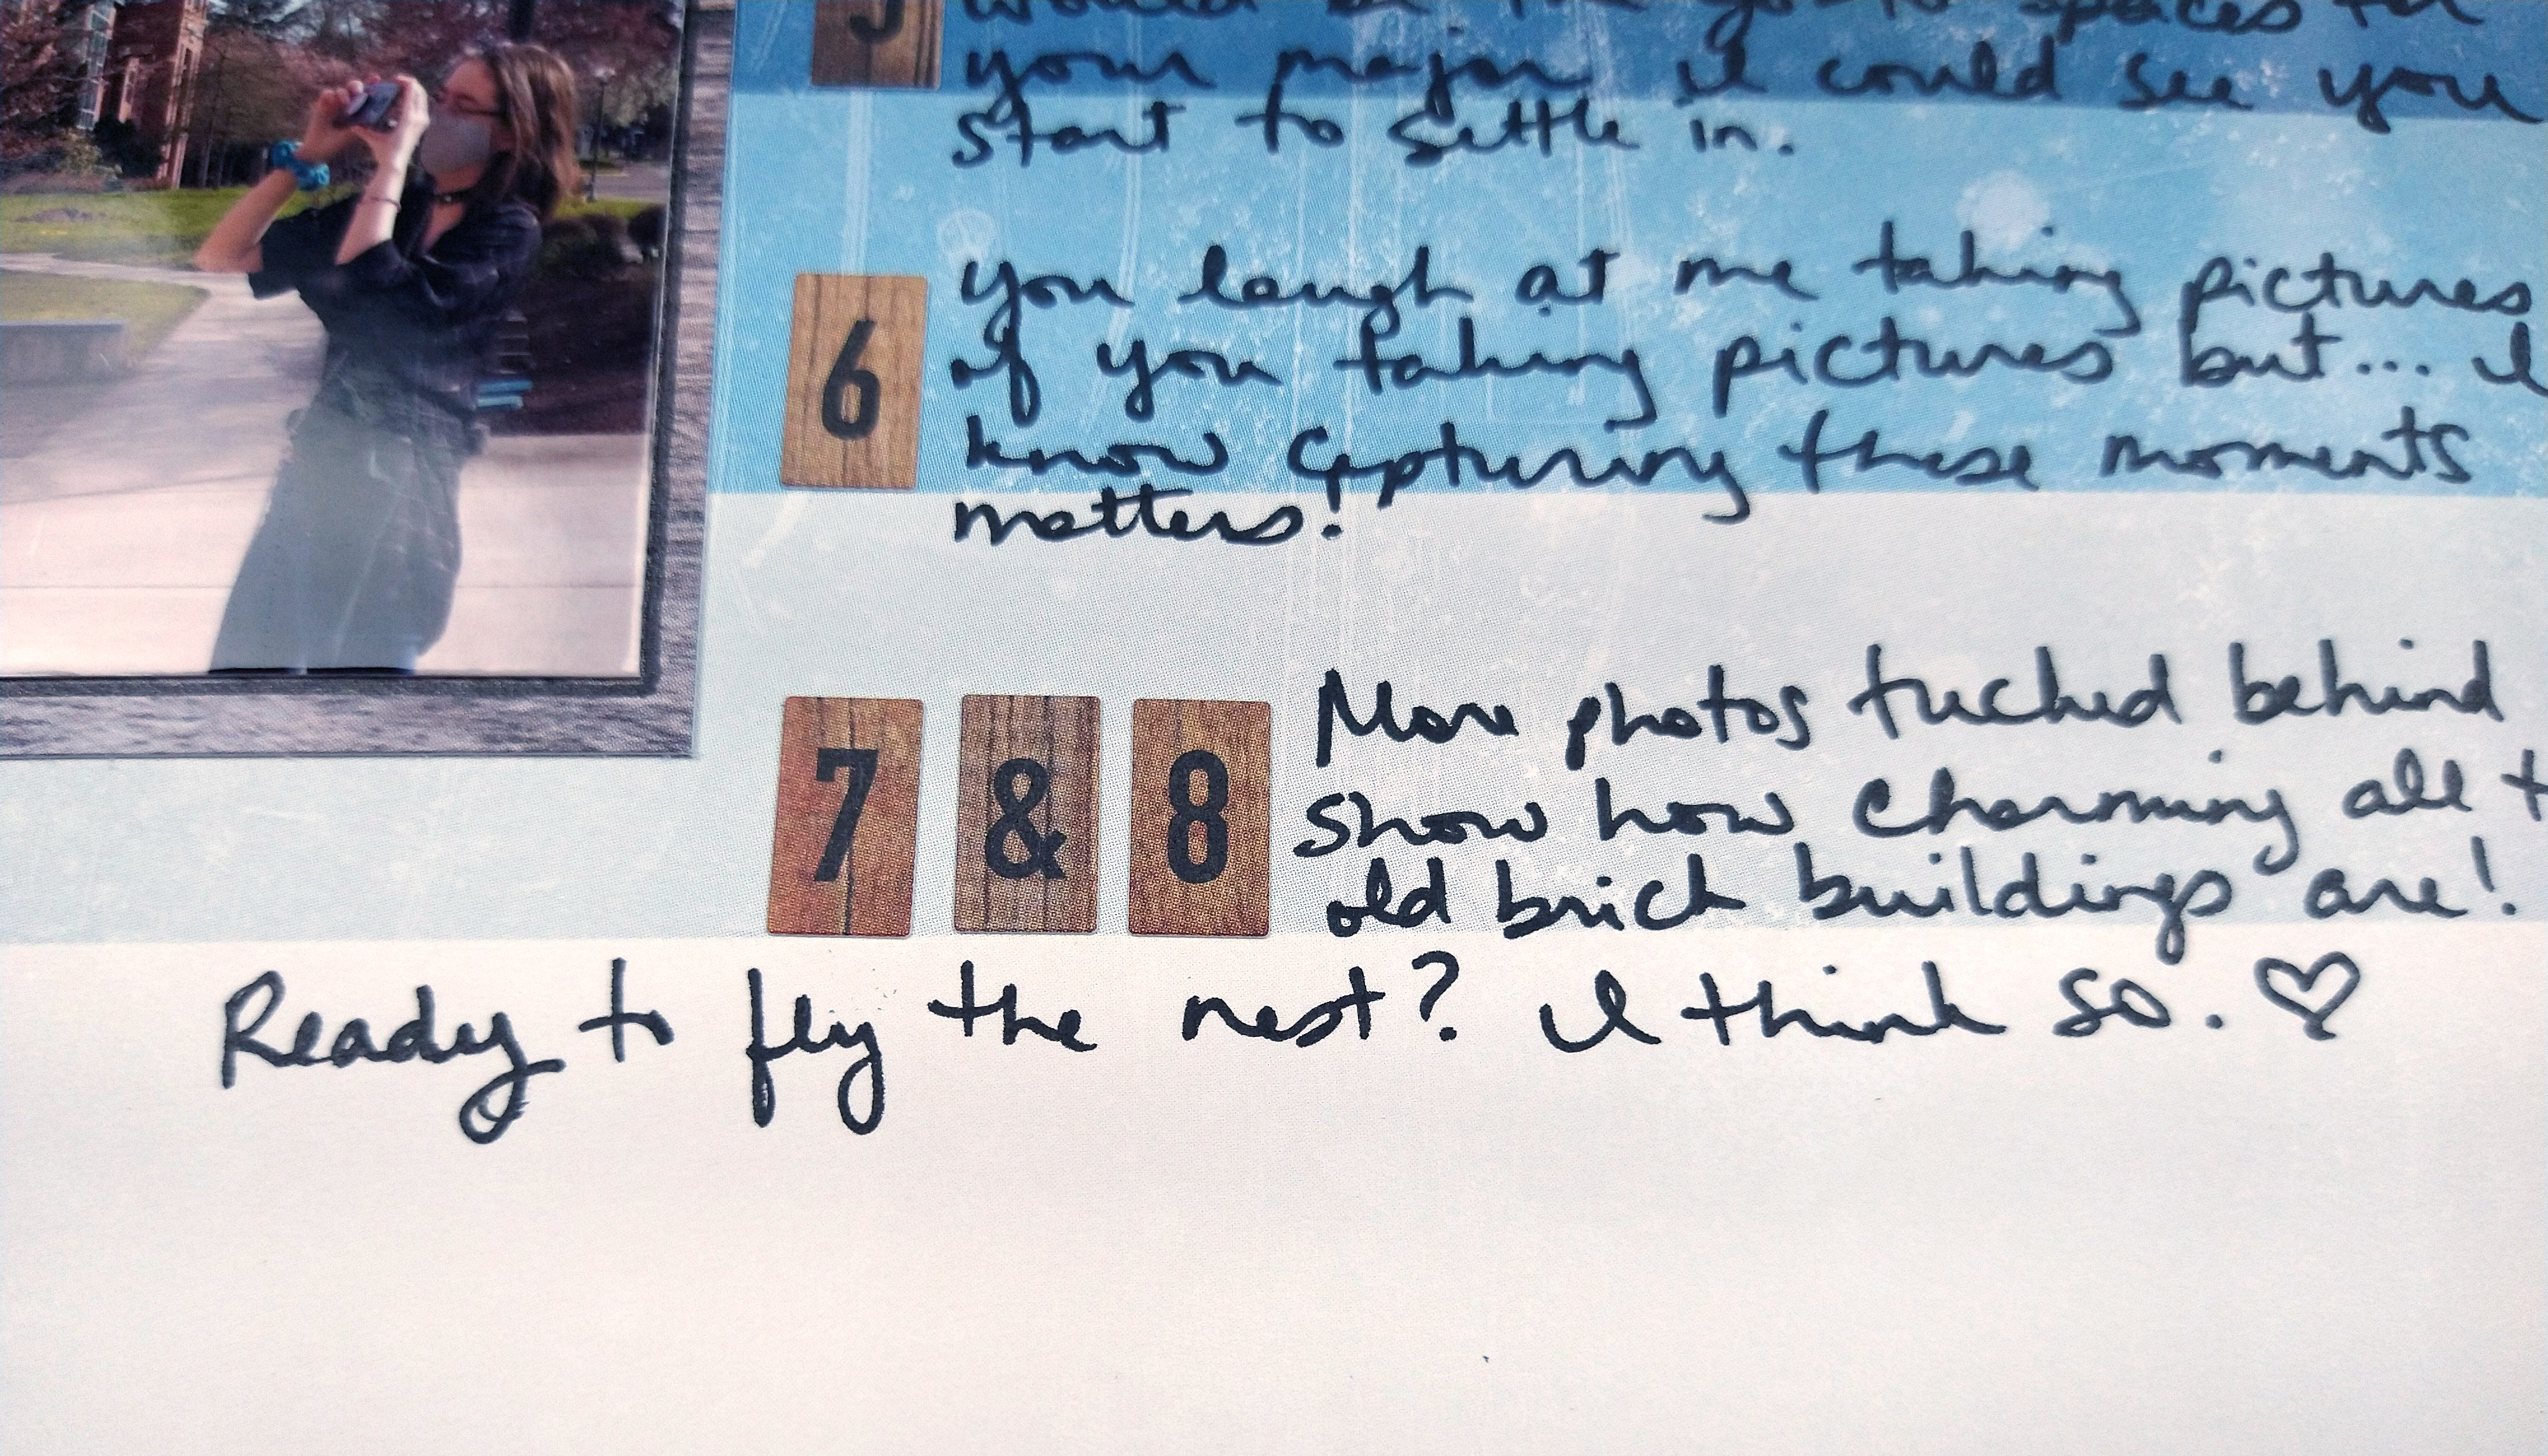
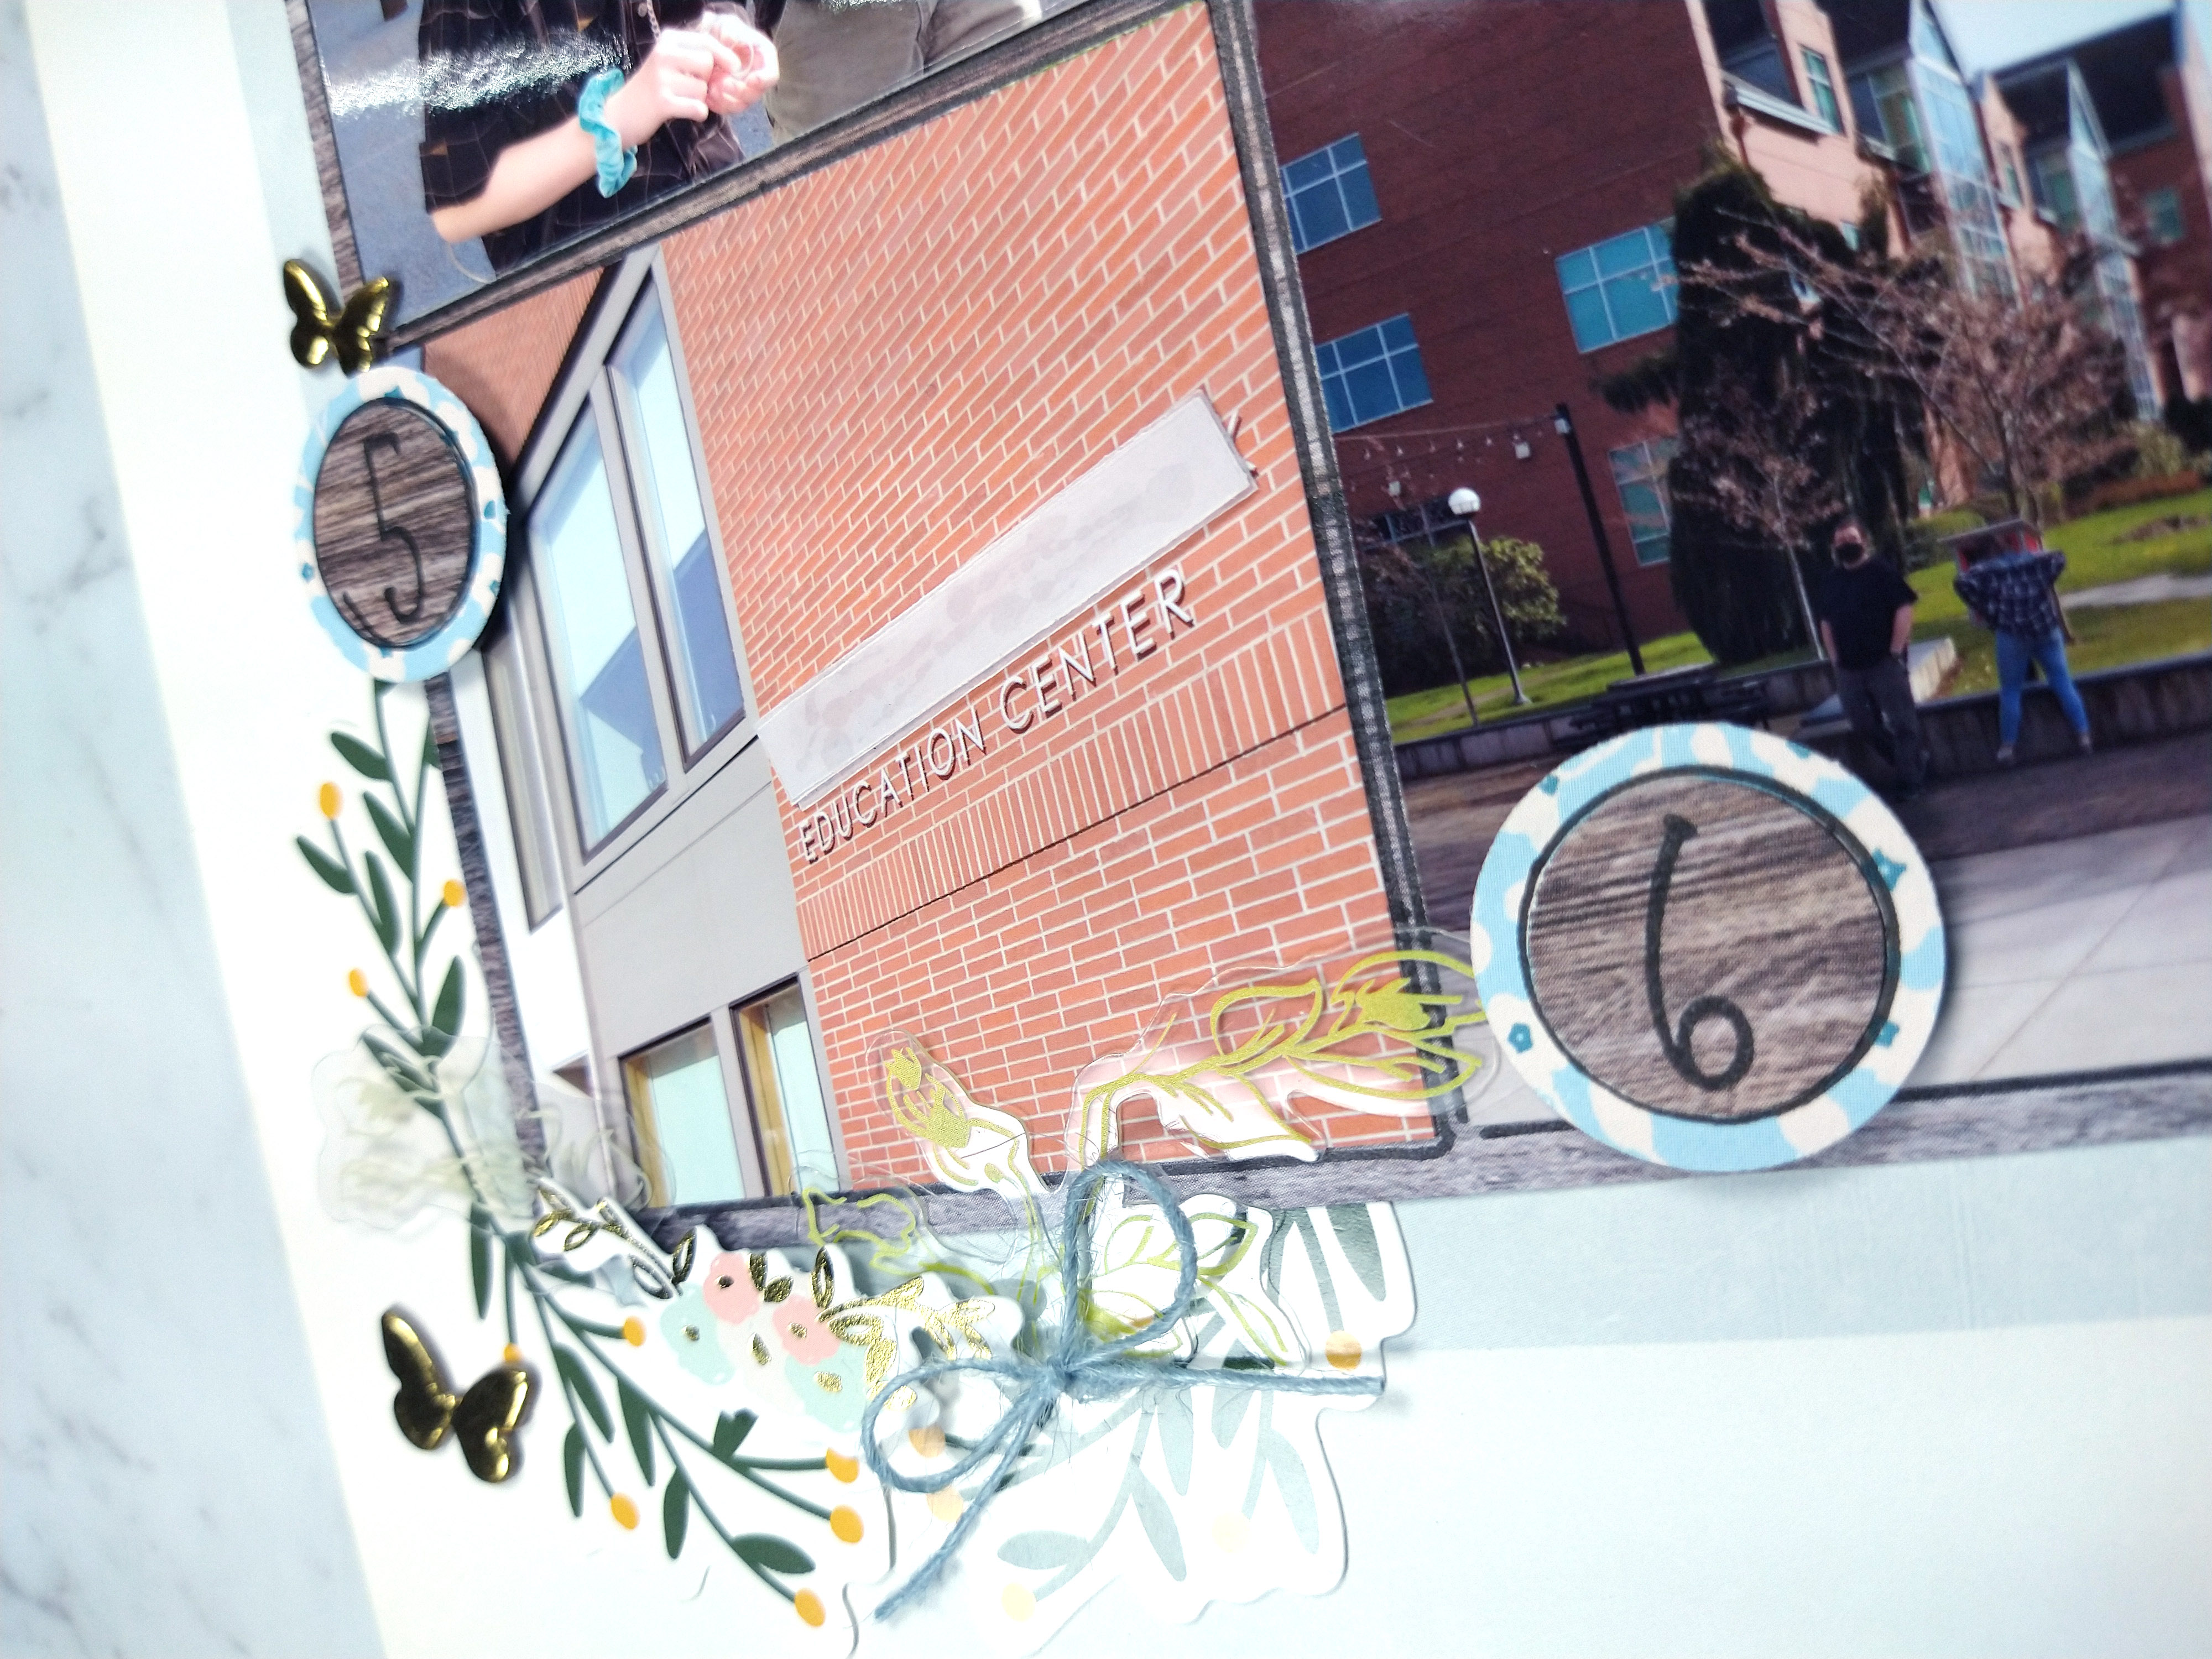
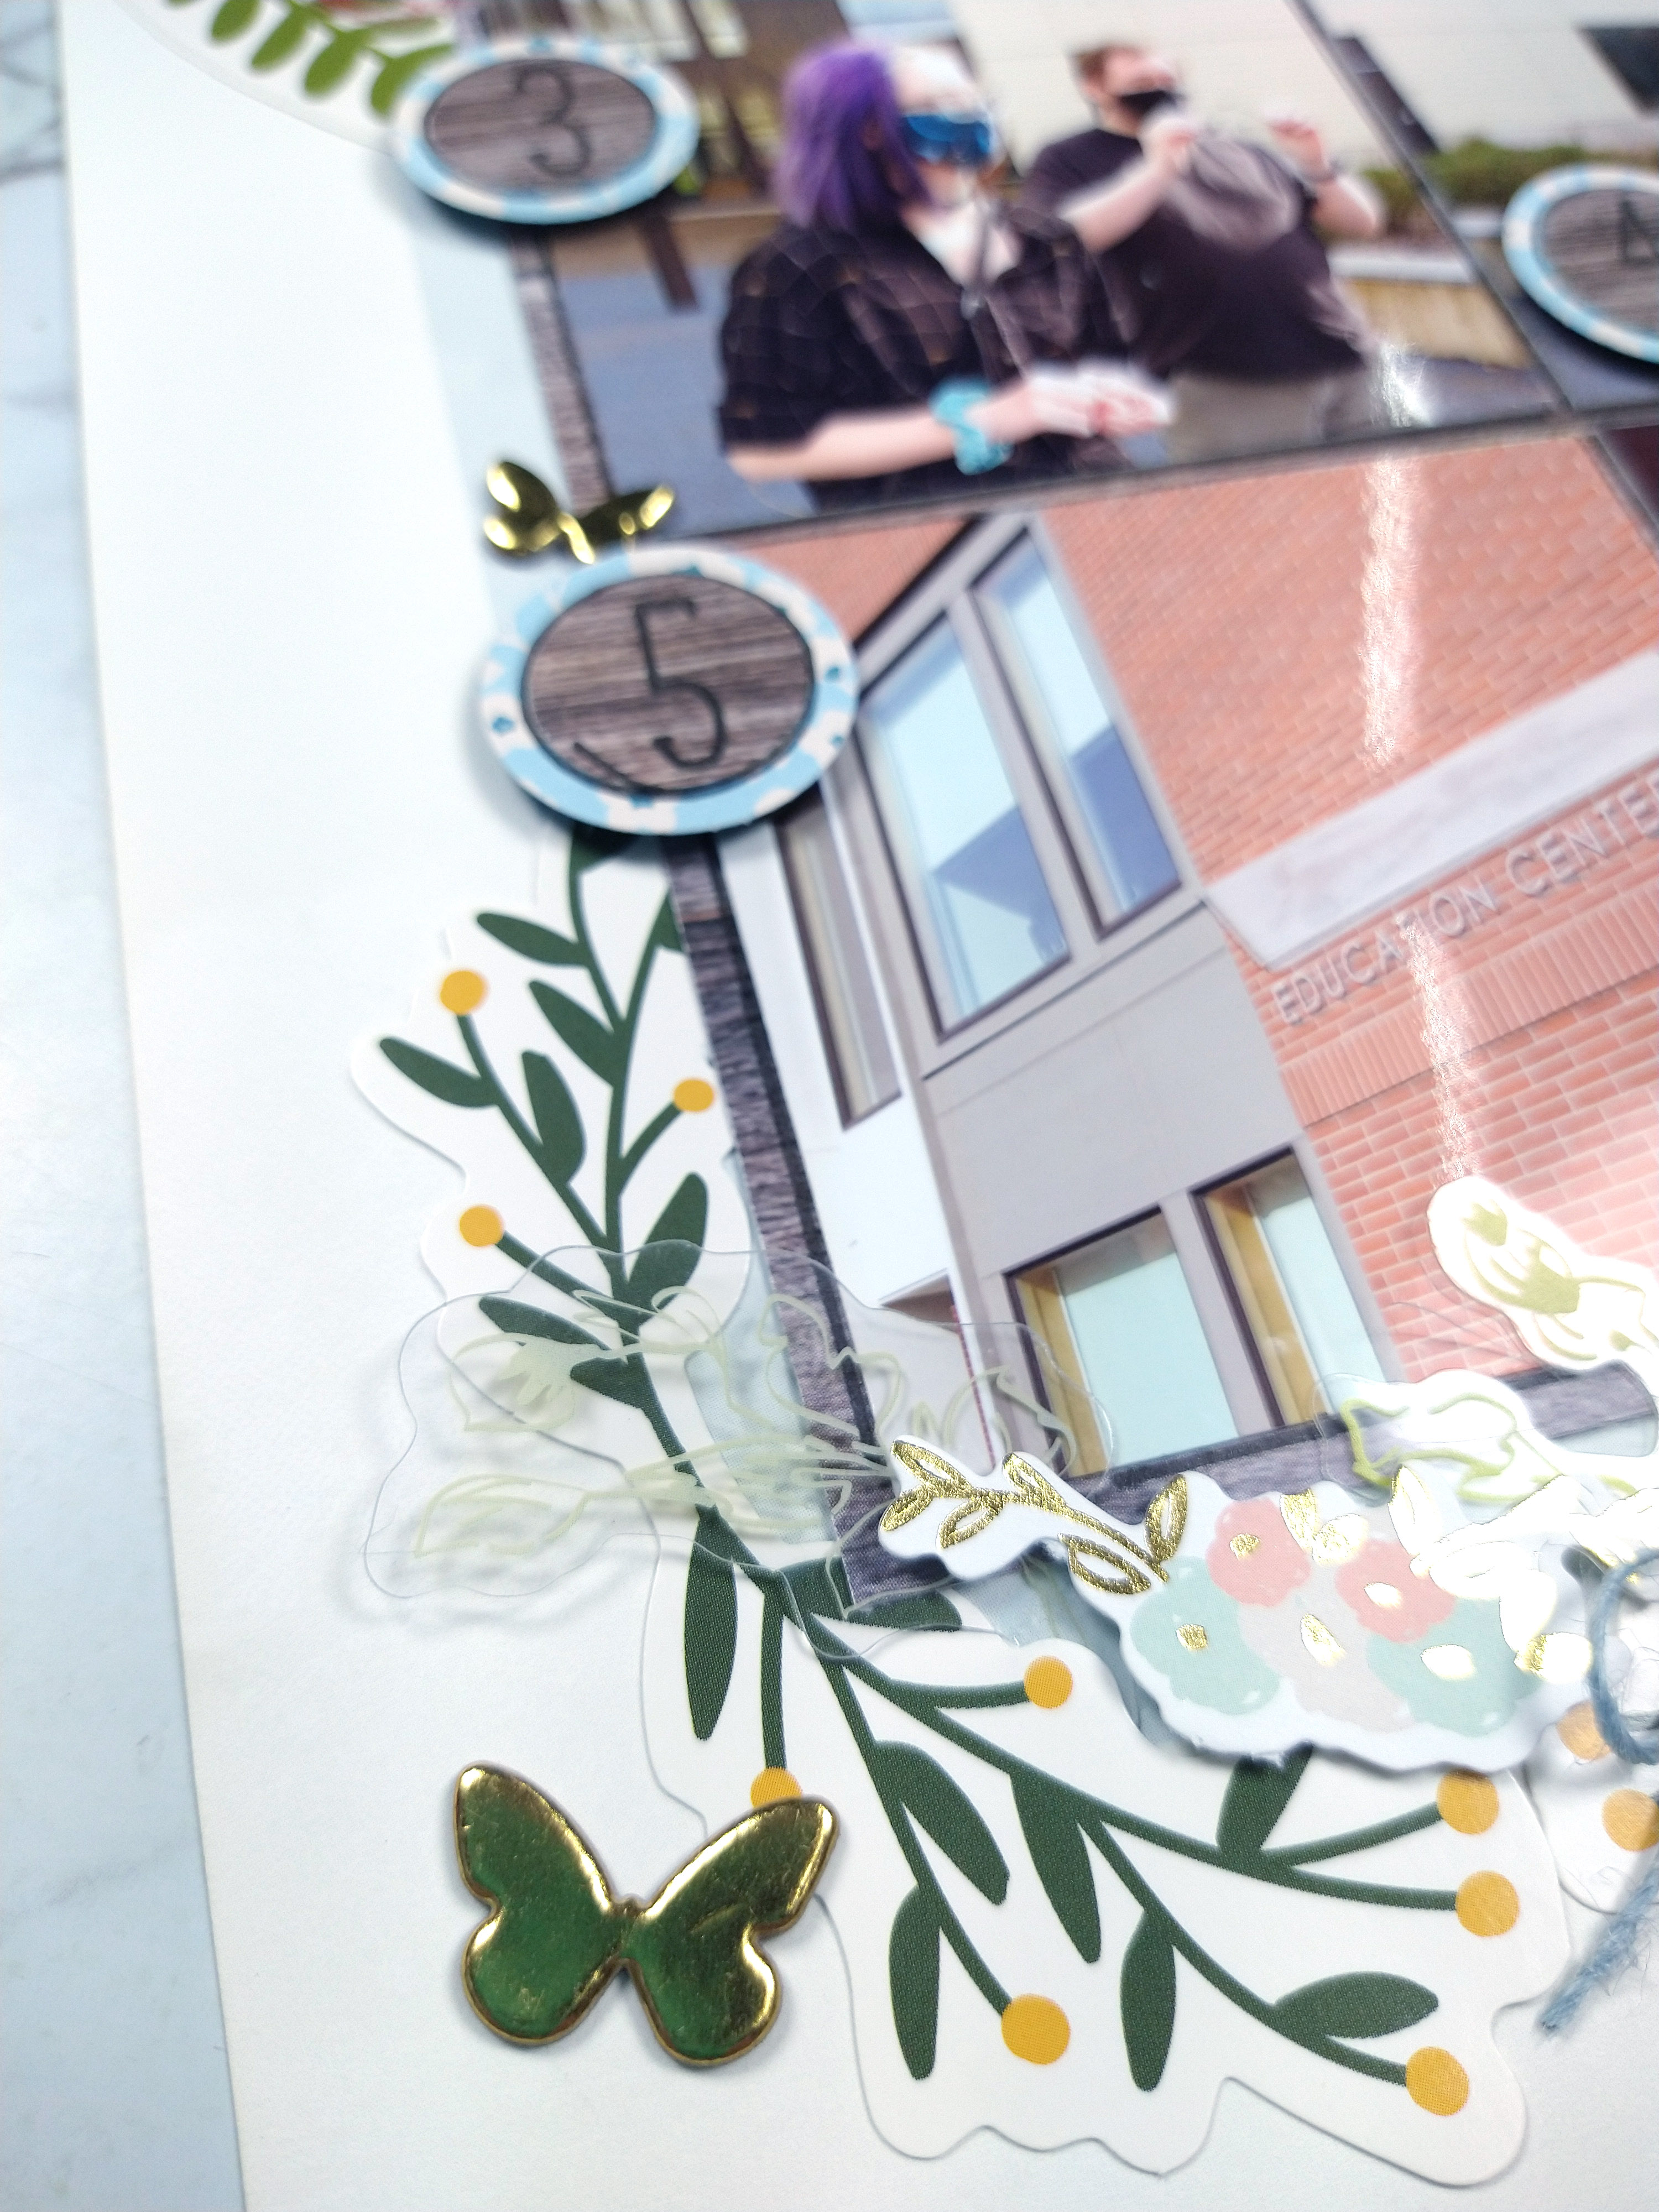
The sketch features a single 4×6 photo but if you watch the video you’ll see how I sneak in more photos.
This file is made up of various cuts. The gray leaves there are just extras if you want to build a fuller wreath. And the colored layers in the wreath are the backings for the cut file so you don’t have to trace and cut your own backs.
Of course if you have any questions, do get in touch with me at the Contact Me tab above.
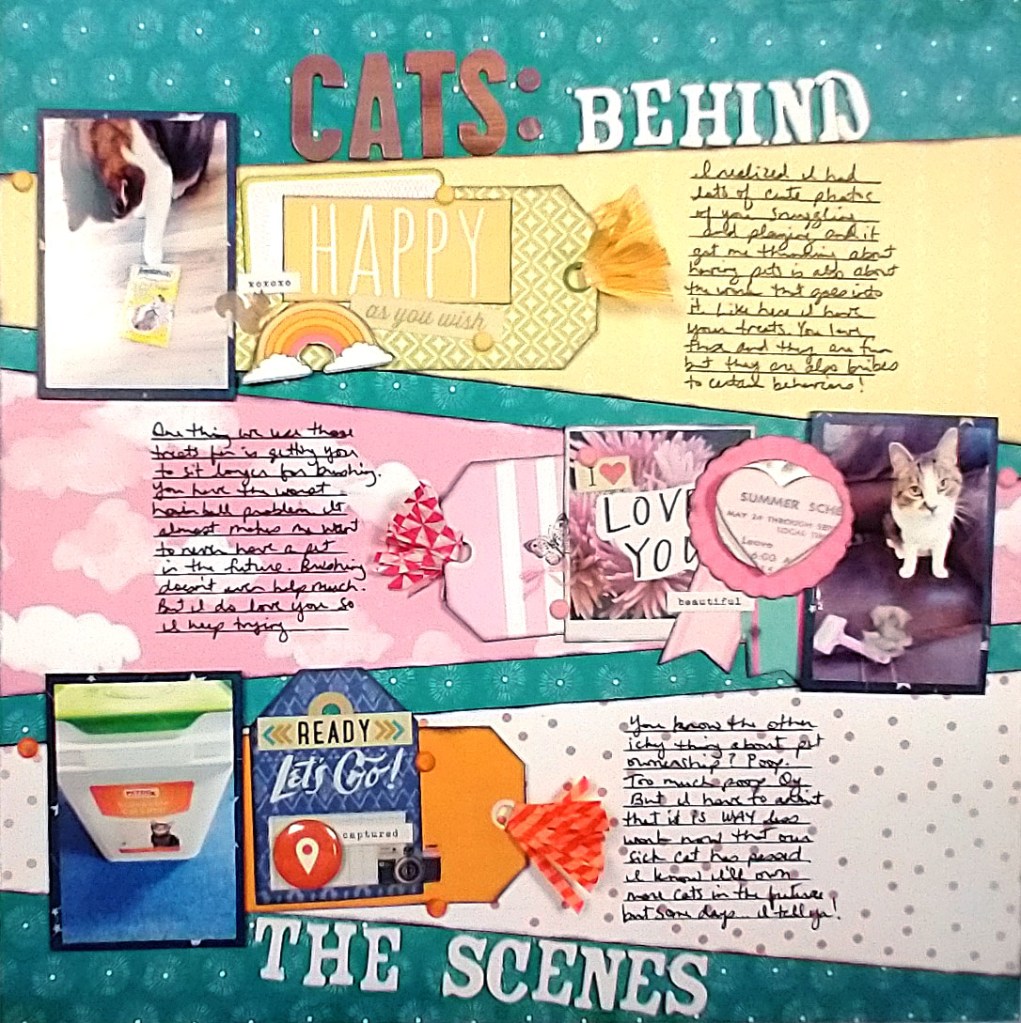
Hello everyone. I’m here with the Counterfeit Kit Club’s Mini Kit and project for the month of September 2020. You can quickly see my whole process in the video below or keep reading for the text and photo version.
Our inspiration kit (Vivid by {Not} Just for Boys kit club) shown below had a strong fall theme vibe.
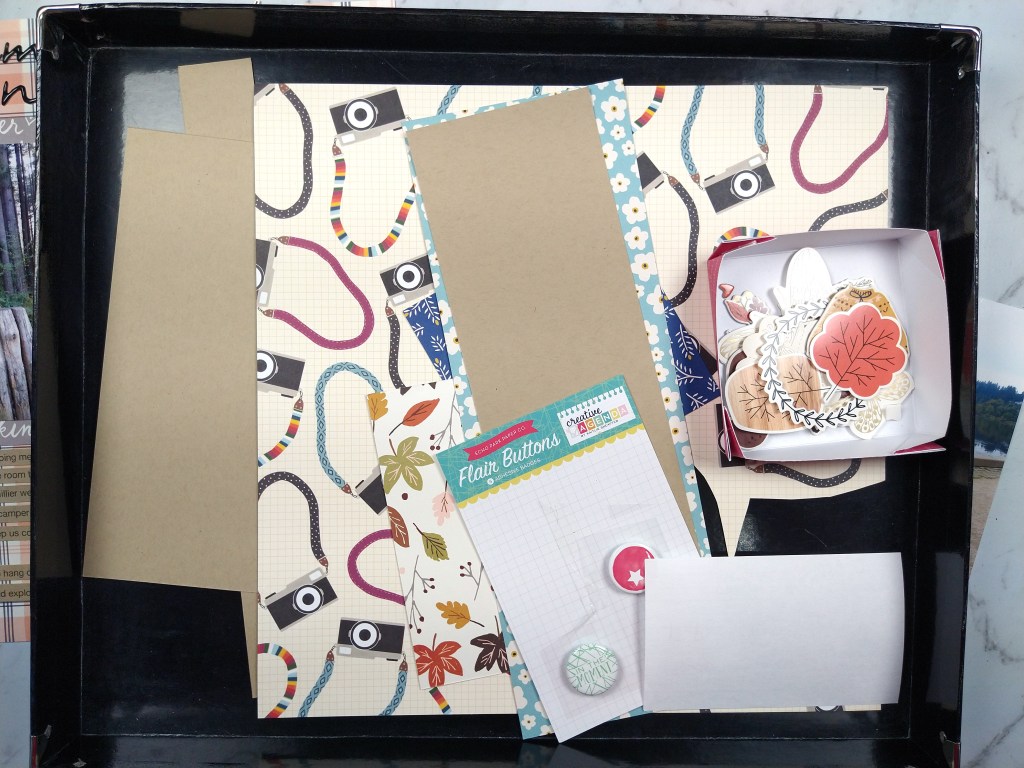
When I was pondering this project I was in the process of cleaning my scrap space. While doing that I came across this bin that contained the extra photos, paper scraps and previous fall themed layout I had created a couple of month back.
Admittedly this gave me a huge head start on creating a page kit for this month’s mini. If you think I cheated, I promise all you would need to do to get to this same point is choose a base pattern paper or cardstock, plus 3-4 pattern paper scraps in various sizes. Then grab 6-10 embellishment pieces in various sizes to support your theme and you are done. Simple as that. Really.
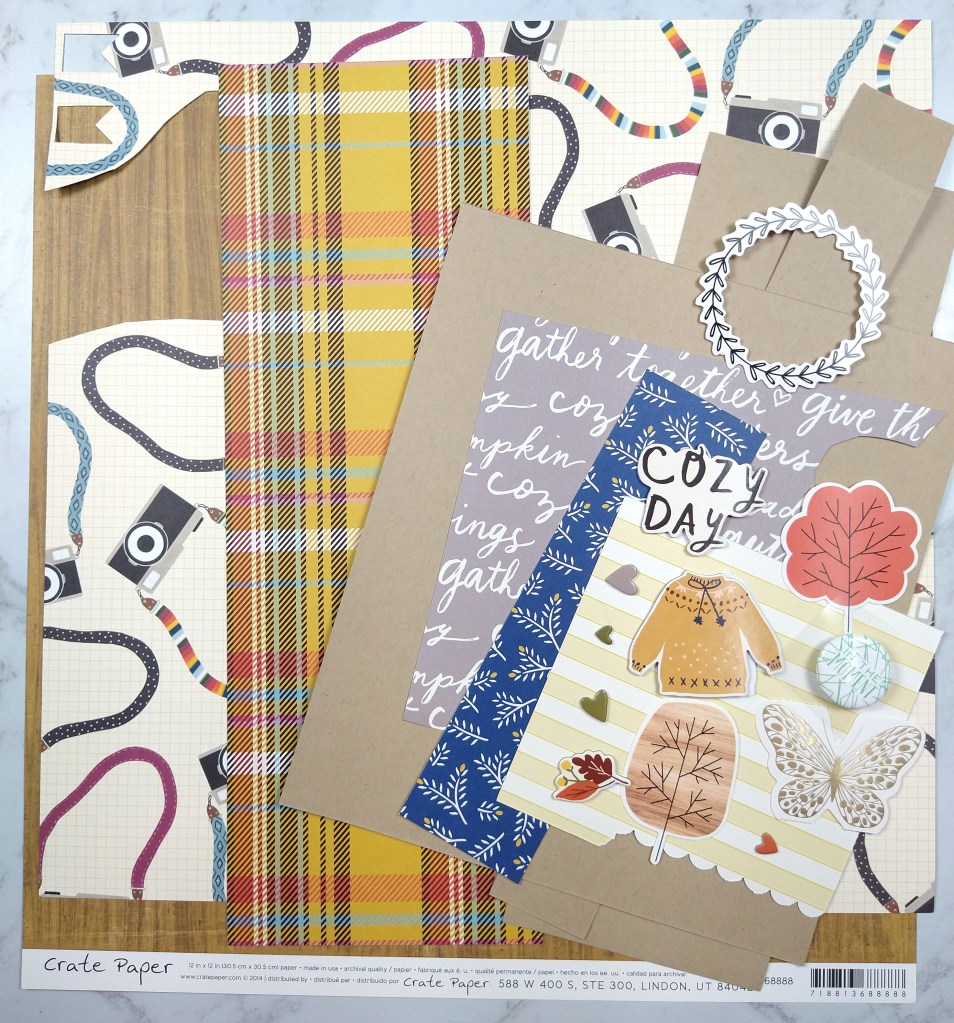
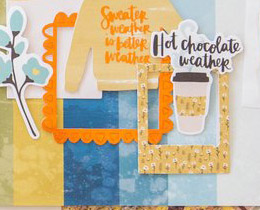
Here I chose a base woodgrain paper, 5 pattern paper scraps, 1 cardstock and literally 12 individual embellishment pieces. The woodgrain, plaid and use of blue comes from our inspiration piece. The other imagery I chose to support my page theme (cameras + together/cozy)
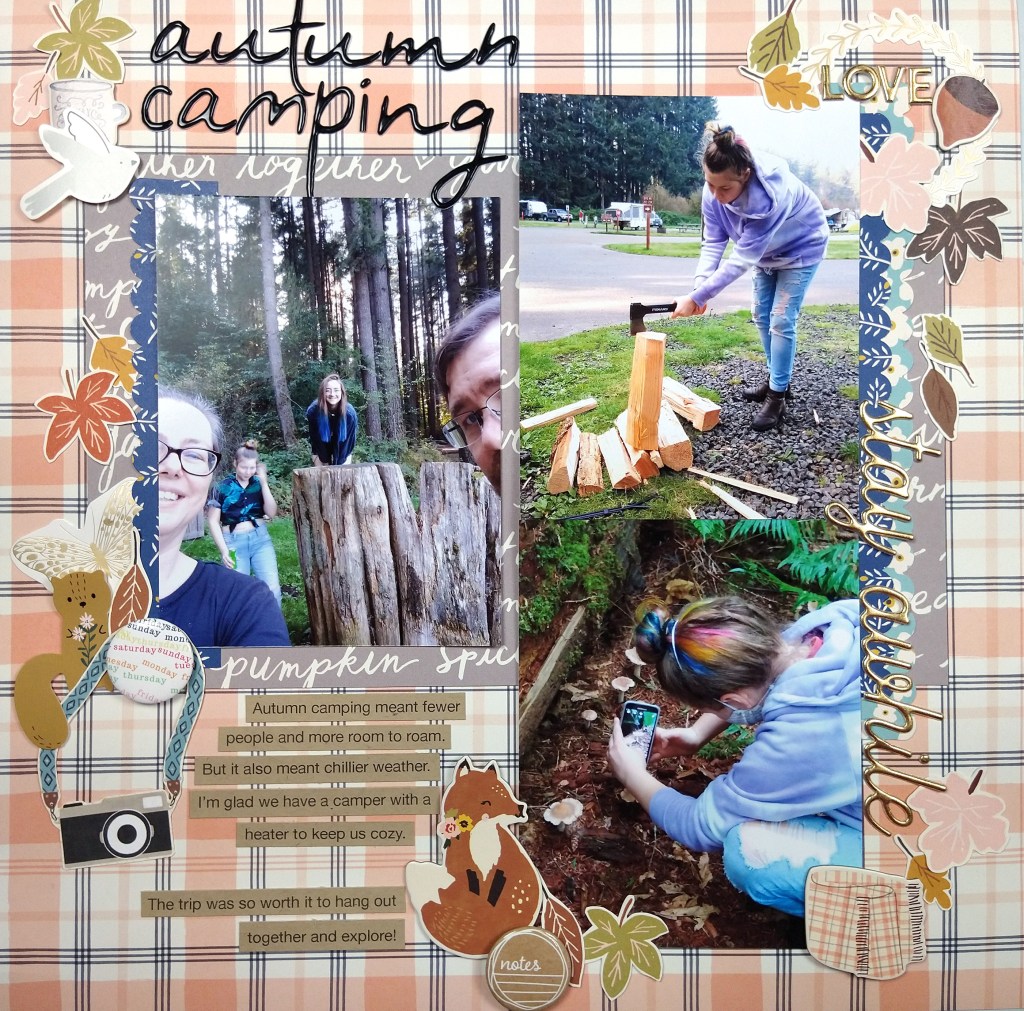
Once I had a narrow palette of supplies to work with, my layout came together quickly. I think about this style of layout as a “pocket page” layout without the actual pockets. (You could also just call it a grid layout). I love the idea of pocket pages for ease but I feel too constrained by the pocket numbers and orientations. So I started my layout with the base page + photos. I trimmed my photos, and in fact all the pocket elements, down by 1/4″ in both height and width to give that gap that pockets have.
The open areas around the photos now become other “pockets.” The top right was very large and could have been broken down into several pockets, but I left it large for more visual impact to those cameras since this layout is about selfies. The journal pocket on the bottom left is 6×4″ (or rather 5.75×3.75″ once trimmed down.) The gray strip started at 2×4″ before trimming and the lower plaid is 2×8″ before trimming.
Sprucing up each pocket with limited embellishments helps the whole page feel cohesive. I also repeat elements, such as circles, blue, and plaid, in a visual triangle to pull everything together. Approaching a layout this way is super straightforward. It gives you the ease of pocket pages without the constraints. And with this design you could include way more photos than I did! Just so much flexibility here.
I hope you were inspired by how easy it can be to put together a quick page kit as well as a quick layout!
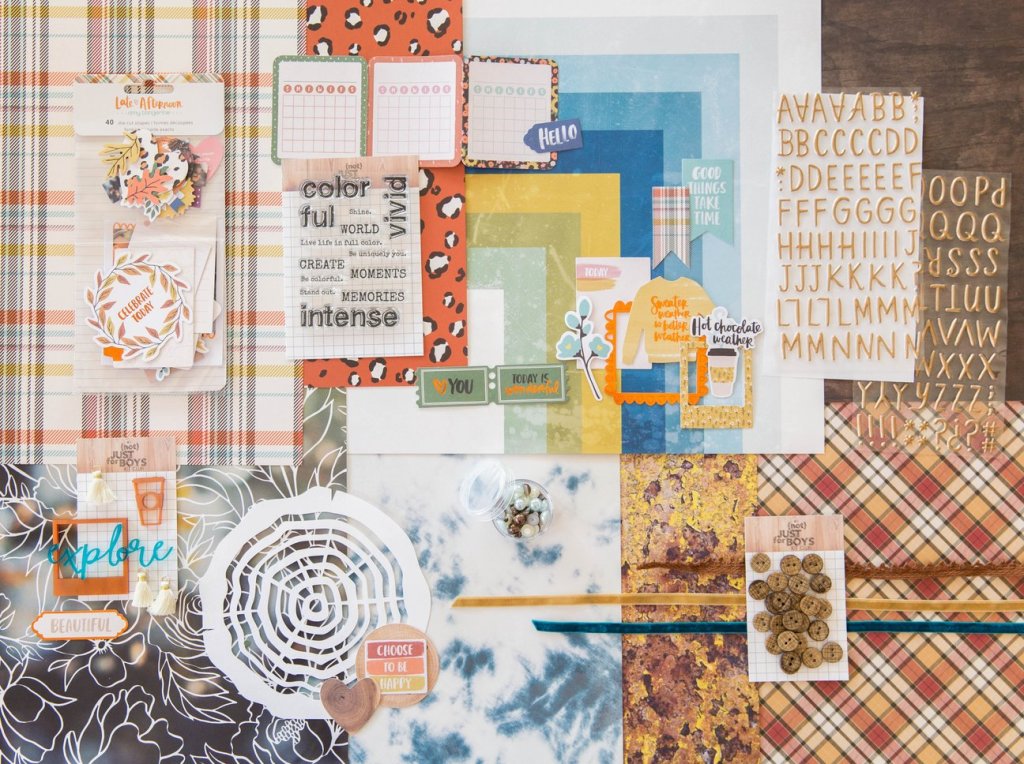
I admit that I am a forger. Luckily since it is just craft supplies that I forge, I am innocent of any crimes! Take a look at the items I was inspired by. The kit inspiration we are using this month over at CKC is the “Vivid” kit by {Not} Just for Boys kit club from September 2020.
Here you can see the whole kit plus two close-ups. Notice all the frames? And how about those three little tassels? I’m going to recreate those and it is easy. Check out the whole process on YouTube. That is the best way to see everything, including how to use the Frame Punch Board to create frames. For photo tutorial on the tassels, keep reading.
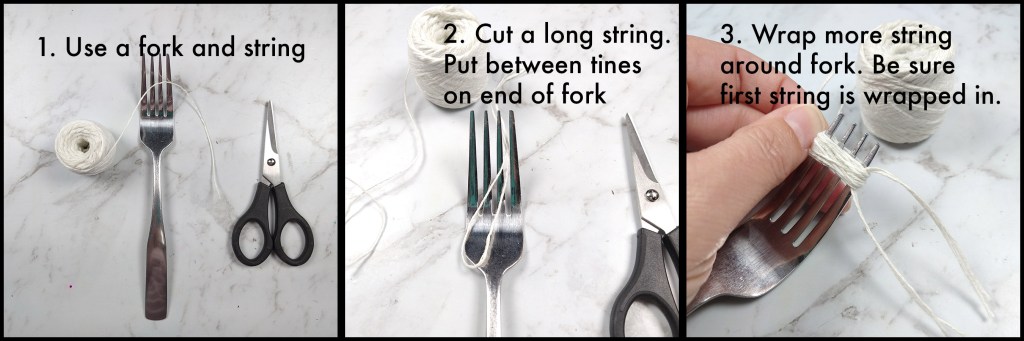
You can follow along on this photo tutorial to create simple little tassels. I used literal bakers twine here from the kitchen section of my grocer, but any light weight twine or embroidery floss will work.
The punch board pictured far left is a tool made by We R Memory keepers and it is one of my favorites in my stash. It eliminates most :thinking” needed to cut simple frames. Learning to use it is not too hard, but you do have to pay attention to the steps, so checking out my video above is the best way.
Now go forge some craft supplies. But if you get arrested, don’t mention my name 😉
Welcome to September 2021 everyone. For me this year has flown by despite all the continuing troubles with covid. I thought for sure this would be another year that crawled by. Yet here we are. I hope you have all stayed safe and healthy. I send you extra wishes for continued health as we head back indoors with the chill of fall weather looming.
Lets get on to crafting, shall we? This month Master Forger Tina is our kit host and she has invited Tori Gaines as our guest designer!
Tina has offered up this kit called Vivid from the {Not} Just for Boys kit club from September 2020 as our inspiration this month. Of course it is sold out at this point so counterfeiting this kit is a great option to get the vibe you are going for.
This kit includes
“Vivid” Paper:
1 piece 12×12 paper- Amy Tan-Late Afternoon “Make a Wish”
1 Pack of NJFB Exclusive Acrylic Embellishments and 3 Mini Tassels
24 “Vivid” Textured Buttons
1 “Tree Slice” cardstock cut by Sophie Gallo
For the whole process of my kit build you can check out the video I made for this month.
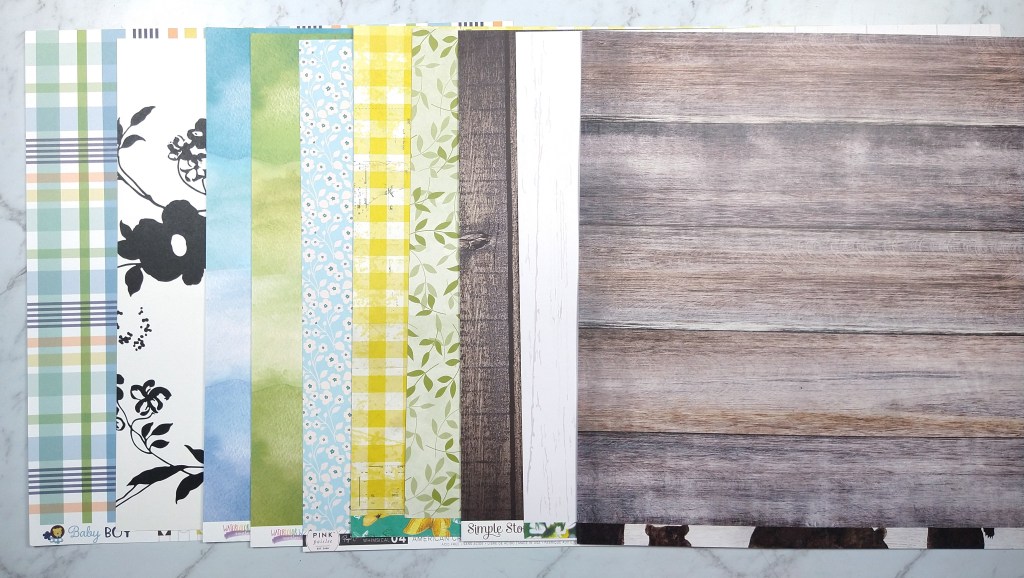
The first thing I noticed about the kit is the warm oranges and browns of the classic fall season imagery. Since these are not my favorite colors and I am just plain not ready for fall, I looked deeper at the kit for inspiration. The Heidi Swapp blue and yellow stripe/geometric paper caught my attention next. I know I have this paper in my stash… well at least I thought I did. When building my kit I just couldn’t find it. (I may have tucked it away in another project and since forgotten which project and where!) Despite not being able to find that paper I let the colors lead the way for me. And then I followed this inspiration kit’s path in terms of pattern. I found some plaids/checks, a bold floral, woodgrain and some watercolor textures. I then added a couple of supporting patterns to round out the choices.
Moving on to embellishments I was inspired by the leafy die cuts, ribbon texture, wood texture buttons, and the log cut file. I decided to pull wood and cork elements and add in plenty of floral die cuts. It worked out that some of my leafy ephemera also had gold, which was included in the alpha from the inspiration kit. I also found some floral acetate that can take the place of the acrylics in the inspiration kit. Toss in a few natural fibers and some alphas and that topped off my kit.
With this lighter, brighter take on this inspiration that clings to the remnants of summer, I’m calling this kit Last Hurrah.
Be sure to check out all the fun over at the Counterfeit Kit Club blog for challenges and inspiration to build and use your kit. Don’t forget to see the other design team members’ takes on this months inspiration. Be sure to leave extra love for Tori for being our guest designer this time around.
I’ve got a new 12×12 scrapbook layout sketch up for you here on the blog. Normally I’d use this sketch to show you a take on it for a layout, but a few things happened that made me take this sketch into a card making direction instead.
I’ve already done a process video for this sketch. (In fact I based the sketch off of this project to begin with!)
I created that project as a scraplift of myself from several years ago
I wanted to do something different.
I took a card making class recently and was feeling inspired to make cards!
Thus this adaptation was born. First let’s take a look at the sketch and the supporting layouts that inspired this sketch.
So here is the sketch you can download it directly here in a photoshop format or a printable pdf format or you can head to the Freebies tab above to see this and many more sketches available for download. This sketch came out of the layout below that I created for the ScrapHappy.org membership group blog post.
And in turn this layout was scraplifted from myself. I made the original layout below many years ago and it has remained one of my favorites.
And here is the layout process for the most recent project.
With that out of the way I wanted to move on to another project… adapting this sketch to card making. I used the same idea of angles, but inked and stamped them instead of using paper. I repeated the greeting instead of using three photos and I embellished with smaller items instead of layered clusters. And just like that, a card is born! Hope you enjoy a view of these cards and the products used are listed below.
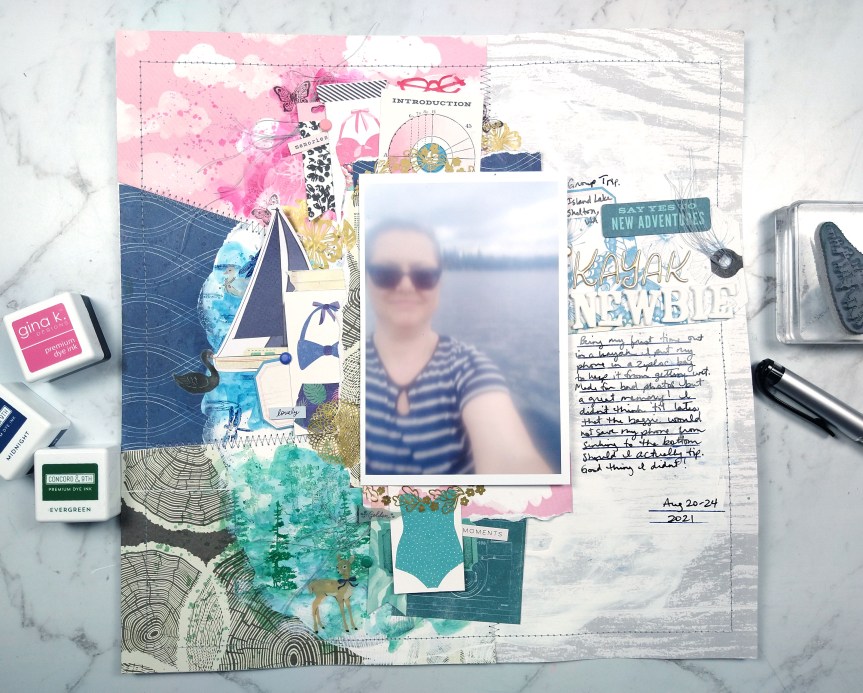
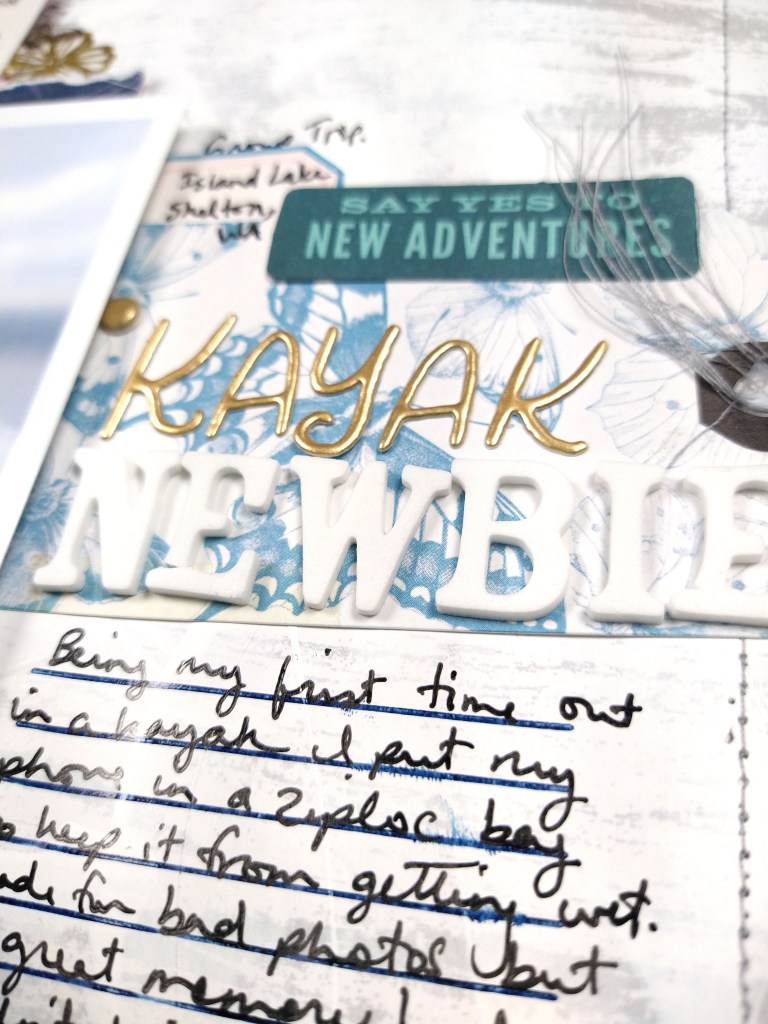
I’m back with the August ’21 Mixed Media Frenzy YouTube hop. The final Friday of each month the group invites all members to participate in a community hop. If you want to join in the fun, visit their Facebook group for inspiration and interaction. We were scrap lifting the image below, created by the very talented Missy Whidden. If you haven’t seen her videos I highly recommend them. She has so much patience for layering details onto her projects!
I had fun playing with plenty of ink (as paint!), stamps, and die cuts for my own interpretation. You’ll notice the photo is very fuzzy. That isn’t you, or my graphic, it is actually how the picture was taken! I was on my first kayak trip and my phone/camera was in a ziplock to keep it dry. I was too nervous about dropping it in the water to take it out of the ziplock. But do I let a bad photo stop me from scrapbooking? Never!
Check out the entire process over on my YouTube episode. And remember this is a hop! The video description box will lead you to each creator playing along. Check them all out and leave them all some love.
Each month I offer free cut files for download here on the blog. If you head to the Freebies tab you can find all the previous freebies, both cut files and sketches.
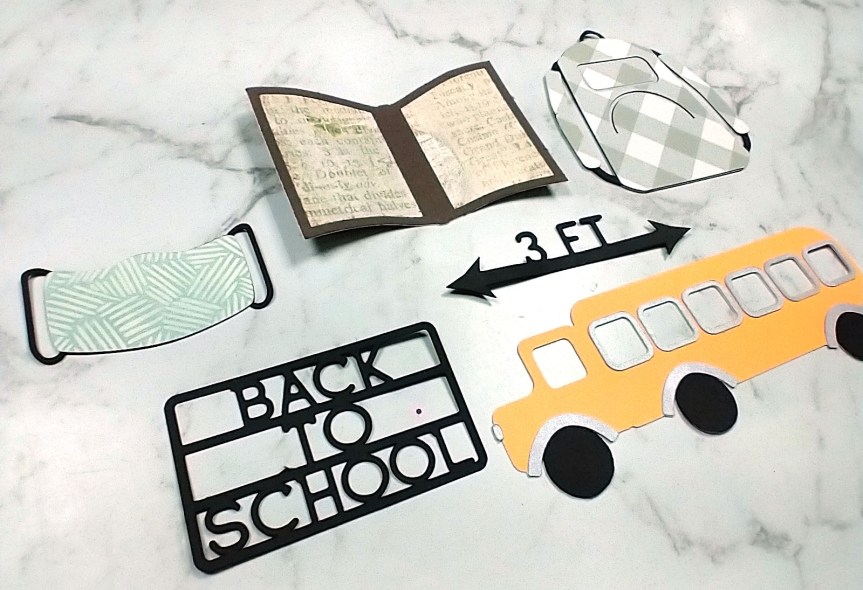
This month’s file is all about Back to School! With all of the US schools reopening full time this fall going back to school means something this year that it hasn’t in years past! I wanted to honor that story telling with this cut file. You have your typical school icons such as a bus, backpack and book. But you now have the mask and distancing sign which many schools are using as part of the CDC guidelines.
You can download the svg cut file directly by clicking here. And here is a brief look at the digital design (left) and my cut and assembled pieces (right). Click to enlarge.
If you want to see the details on assembling the multi-piece cuts, like the bus and backpack, then check out the accompanying video.
I was not on official design team duty over at CKC for this challenge, but I love to play along anyway when time allows. So for this sketch challenge I knew I had to play. I love sketches almost as much as I love kits! Put my CKC kit together with a good sketch and I’m a happy camper.
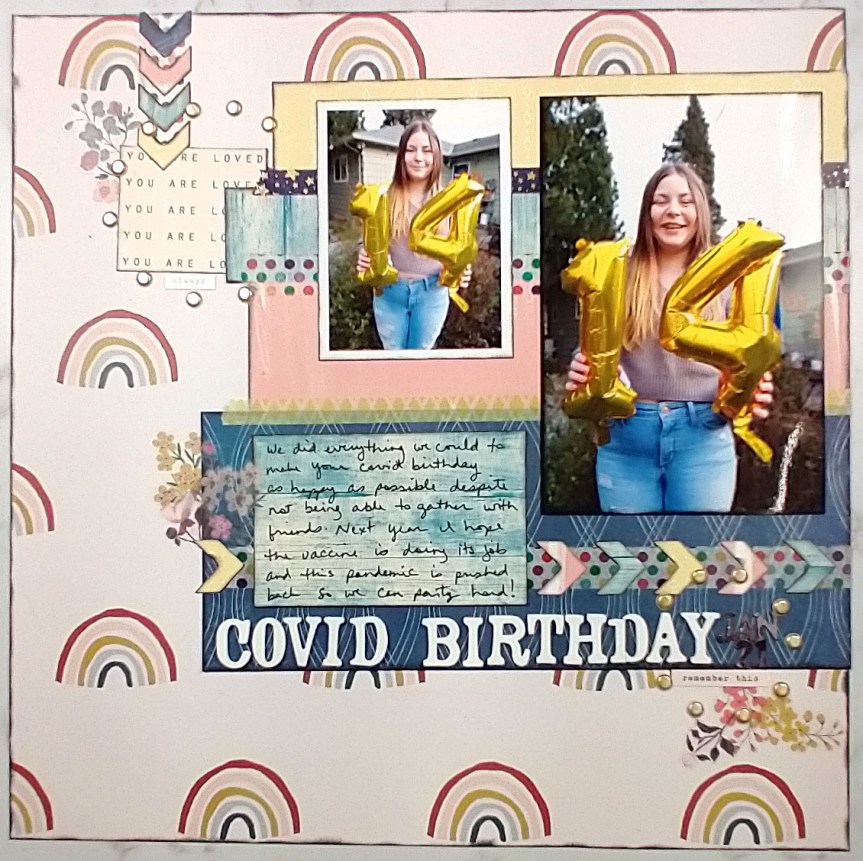
This old sketch we are working with comes from the much missed Basic Grey company. At the point in time when Basic Grey was hot I was more of a double page scrapper. But crafty styles shift and I’ve moved into being more of a single page scrapper. So that is where I started in this challenge.
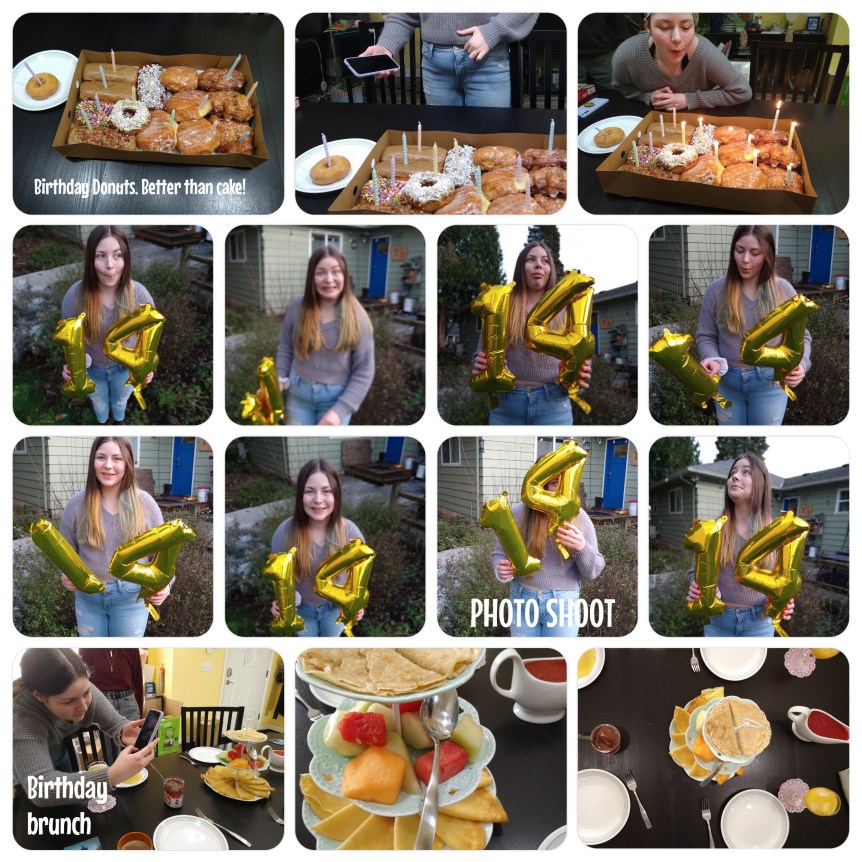
I pulled out photos of my daughter and her 14th birthday and a cheery rainbow print since they felt so right together. And then I realized I had a Project Life layout that I had done on my phone with all the fun pictures we took during her photo session. So I pulled arrows off the right page of the sketch and included them near my title on the left page layout. That way it leads the story into this accompanying layout. I ended up with a two-pager after all!
It is no secret that I am a fan of crafty kits. I have subscribed to various kits over the years, largely scrapbooking. But I always end up cancelling. This is often for three reasons:
On ongoing spending commitment. Many scrapbooking kits clock in anywhere from &25-40 per month.
Stash overwhelm. I found I wasn’t using everything from those big kits every month.
Shipping. Many boxes containing 12×12 papers cost $8-10 to ship. Imagine what I could by with the money spent on shipping.
And yet I still WANT the kits. I want the surprise. I want to try new things. I love getting goodies in the mail. I love digging into a fresh set of supplies and the inspiration that sparks excitement.
So what is a crafter to do when the pros and cons collide? I went on a search for smaller scrappy kits and couldn’t find what I was looking. Then somehow I realized that the SCT Sampler kit, put out by Scrapbook and Cards Today Magazine, was right under my nose. (And just to get this clear right now I do not in any way work for SCT. I simply use their kits and am happy to share my love of them.) The kits are packed with fun at a fair price point, between $14-17 per month including shipping. Longer commitment = lowers price. Yes there is still a commitment but that is why I like to show these kits off so you can decide if they are right for you.
Look at the goodies that come in a typical kit! Like the name implies these are samples of supplies. You get 6×6 papers cut down from 12×12 (no shipping fee on the “large” item boxes!). You get partial packs of die cuts, stickers enamel dots and other items from two different paper collections. You get a theme word embellishment (currently a chunky acrylic word). Plus there is a long-term reusable item that is often a stamp set but may otherwise be a stencil, storage pouch or other item to keep.
You can see the full unboxing on my YouTube channel. I even have a playlist of previous kits so you can see the things to expect from these kits.
When you watch my unboxing I also do a project to show you that these kits can pack plenty of possibilities. For this episode I created a Christmas layout using summer products!