February Wrap Up

Wow, February just got away from me. I’m hoping to do better for March. Yet as I woke up today I realized it IS March 1st. Oh boy. So I need to bring February to and end before I move on to March.

My last post was back for CKC’s first layout challenge for Feb. 12th. I love that layout very much, so if you missed it, go check it out.

As for the rest of March, my schedule was fairly typical. Let’s walk through it.

I created a shiny mixed media layout for the Mix It Up Monday hop. Process video available.

I played with embossing powder for a technique share. One of the viewer favorite idea was embossing with water. Yes, water! That is the first technique of the video if you want to check it out.

The second challenge for CKC was to use an envelope to hide journaling. I got that on there in the upper right corner and my journaling pulls out with a chipboard arrow “tab”. I also used the leftover heart from challenge number one!

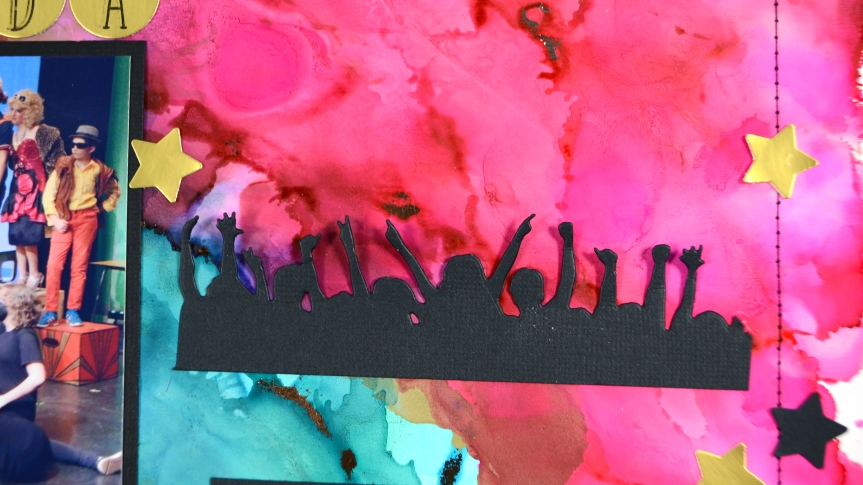
For this next one I unboxed my SCT Sampler kit and was inspired by the product to create a then-and-now themed layout all about music.

Next up I was over on the ScrapHappy.org blog along with my creative team discussing cascade design. A simple twist—literally—on this concept is to turn the paper 90 degrees for a windswept look instead. And if you like watercoloring, this video has you covered.

Finally I was in on the Mixed Media Mayhem Hop that now overlaps with the Iron Crafter Challenge hop. The first was a recipe: inky background, no pattern paper and stamping. The latter was to use dimensional drops like Nuvo. And boy did I take on these challenges. This one is a bit busy, but sometimes the process of play is as important as the final product.

So that wraps up February. I’m hoping to be a bit more up to date for March. (Best laid plans, right?) However, you can start off with checking out my scrapbook kit build for March coming up next!

Have an artful day!

Mystery Box Monday is back!

Hello, hello! I am excited to bring back my Mystery box Monday series. I did this series back in 2020 and since it did not get a lot of views back then I had retired it. But I missed it. This project was just some weird, creative fun and I am happy to be back to it.

So, what is Mystery Box Monday? I have a “grab-bag” style box of supplies that I purchased from Piece Craft Love as part of a clearance sale back in Dec ’22. Since the box is a grab-bag, that means all the supplies in the box are a mystery. The box comes at a steep price reduction because the supplies are unknown. Who doesn’t like a good mystery?

I’m going to reach into this box and pull out three items. Much like that cooking show with the mystery basket ingredients, I have to put those items to use on one crafty project. Will these ingredients work together? Or will it be a recipe for disaster? Let’s find out…

Here is a peek at the mystery items I pulled out of the box this time around. I have a stamp set of a girl with a pirate/Halloween theme, some die cut ephemera from Echo Park with a winter theme, and some green india ink markers from Faber Castel. Hmm. How to combine pirates and snow…

With those items in front of me I was inspired to create a tag using a tissue paper technique! Here is how it came out. Notice the wrinkly looking background behind that girl? That is the tissue paper in action!

If you want to see all the details and techniques of how I went from mystery items to a finished project, you can check out the video.

So that is it this time around. What do you think? Did I “make the cut” or did I get “chopped” from future crafting?

I hope you join me for future Mystery Box Monday goodness. Until next time, I hope you have an artful day.

MUM, January ’23

I love a bit of mixed media every now and then. There are two mixed media inspiration groups I play along with once or twice a month. (More info on those at the bottom of this post!)

To begin the month, on the second Monday the Piece Craft Love facebook group holds a member hop. The project there is called Mix It Up Monday or MUM for short. So let’s dive into this mixed up layout…

We always start with a sketch and then add in our own mixed media bonus. Now this sketch had some messy spatters, but that isn’t enough! I turned all those strips into watercolor strips. You’ll have to look closely as my layout is jam packed and those stripes are hiding behind everything.

I did get in festive splatters and stars too. Bonus mixed media? I made those numbers with alcohol ink techniques back in December for my 2K subbie celebration hop (coming in just 24 hours!).

So. Much. Fun. I’ll have to do a video on that alcohol inking sometime soon as well.

Of course I have a process video for this layout as it was part of the monthly hop.

Hope I inspired you to pull out some paints or inks and get messy! Until next time, have an artful day.


So if you are inspired to play with mixed media, you can join in on the fun with either group.

  • Piece Craft Love Facebook group offers the Mix It Up Monday challenge (aka MUM) on the second Monday of the month.
  • Mixed Media Mayhem Facebook group is for all the love of mixed media. There is plenty of weekly inspiration over there and a once a month hop that let’s members play along.

Mixed Media, Nov ’22

I love a bit of mixed media every now and then. There are two mixed media inspiration groups I play along with once or twice a month. More info on those down at the bottom of the post!

This time around I’m sharing layouts from both groups. First up I played with the Mix It Up Monday group. We had a sketch with plenty of circles. I stretched it to two pages and created a Halloween layout.

You can catch the video if you want to see how I created my circles with masking, spray inks and stamping.


Next up is a layout process with Mixed Media Mayhem. Our inspiration was from Janet Fritz of Galaxy Girl Creations. You can find her at her YouTube channel. My interpretation focused in on the pattern of her mixed media as opposed to any other elements.

And of course I have a process video for that too. This video also includes some experimentation I did with a new-to-me color product.


So if you are inspired to play with mixed media, you can join in on the fun with either group.

  • Piece Craft Love Facebook group offers the Mix It Up Monday challenge (aka MUM) on the second Monday of the month.
  • Mixed Media Mayhem Facebook group is for all the love of mixed media. There is plenty of weekly inspiration over there and a once a month hop that let’s members play along.

Mix It Up Monday Hop

For this month’s participation in the Mix It Up Monday (aka MUM) hop hosted by Piece Craft Love Clubhouse Facebook group. We take a sketch and add in our mixed media touches. This time the sketch is from Lanette Erickson on the Scrap Our Stash blog.

Notice the sketch already has some mixed media qualities to it. I took that idea and expanded on it.

My layout used shimmery spray inks over circle masks to create my circular shapes. I think filled in the circles with some stamped Halloween images. A bit of pattern paper and a few stickers and the layout is good to go.

See all the details in the video!

I hope you will go and check out all the creatives on this hop. Most of them are on YouTube, but we have a couple of Instagrammers joing in too. Find the details below.

Until next time, have an artful day.


PRODUCTS USED^^

^^ Disclaimer: I offer affiliate shopping linked products when possible. This shopping won’t cost you anything extra, but I get a small kick back from the companies for sending business their way. It is an easy way to tell me “Thank You” for the content I provide. I appreciate you using my links!

Ink Lifting/ghosting technique

I posted this pic over in my ScrapHappy community group and got some very kind responses. One of my scrappy friends over there happens to be a kind supporter of my YouTube channel and requested I demo the inked card fronts on the left. I was happy for the suggestions and showing it off today with an ever so slight variation.

As you can see I have a different color pallet, circles instead of hearts, a layout instead of a card and a touch of distressing. If you want to see how to give this technique a try you can check out the video

If you want just the very basics, I ink blended a sheet of watercolor paper with a mix of Distress and Oxide inks (Tim Holtz for Ranger), used a stencil to dab a damp sponge trough to reactivate and lift the ink, adding a bit more traditional ink stenciling over the top and finished off with some water spatters. Hope you are inspired to give this technique a try.

Gentle Watercolor

The idea of watercoloring can stress some people out. It doesn’t have to be that scary! This layout shows a few very simple watercolor techniques that can be easy, even for newbies.

All the details are up in the video below so if you want to know more, you can check it out. For the quick version:

  • The journal spots are created with circles of very lightly tinted paint and then more concentrated color dropped into the middle while the paint is still wet. This creates a halo effect for the spots.
  • For the title I penciled in straight lines with a ruler, penciled in my letters and then use the edge of a wide flat brush to trace the letters. Be sure to pencil lightly so the marks don’t show later.
  • The “washi” strips at the top, as I call them, were created with a glazing technique. Paint a strip of color; i purposely made the edges look torn. Dry that color!! Then paint another color slightly overlapping the first. Repeat until you have the number of strips you want. I varied the width and length of my strips for more detail.
  • The target spot was more complicated and I’m not fully happy with it. But you could do a simple version just by dragging the full edge of a wide flat brush around a circle. I suggest tracing something circular first in pencil to get a nice straight line. I didn’t do that an my circle is a bit wonky.

Hope this inspires you to get painty. Have an artful day!

Mixed Media Friday

My month almost always wraps up with a mixed media layout as I play along with the free Mixed Media Frenzy Facebook group and join in the monthly membership hop. We typically work with some form of inspiration to inform our projects. Lately we’ve been scraplifing other talented scrapbookers!

Check out the inspiration photo on the left and my take on the right…

Since my printer was misbehaving (well actually it was user error, sigh) I did not have photos to include when I photographed my project. But you can see the place holders where I included two photos instead of the single in the inspiration.

As always I have a YouTube video sharing how I approached my take on this inspiration. And since it is a hop, do find the show description and hop over to all the other creators.

Adapt scrapbook sketches to cards

It is free sketch time!

I’ve got a new 12×12 scrapbook layout sketch up for you here on the blog. Normally I’d use this sketch to show you a take on it for a layout, but a few things happened that made me take this sketch into a card making direction instead.

  1. I’ve already done a process video for this sketch. (In fact I based the sketch off of this project to begin with!)
  2. I created that project as a scraplift of myself from several years ago
  3. I wanted to do something different.
  4. I took a card making class recently and was feeling inspired to make cards!

Thus this adaptation was born. First let’s take a look at the sketch and the supporting layouts that inspired this sketch.

So here is the sketch you can download it directly here in a photoshop format or a printable pdf format or you can head to the Freebies tab above to see this and many more sketches available for download. This sketch came out of the layout below that I created for the ScrapHappy.org membership group blog post.

And in turn this layout was scraplifted from myself. I made the original layout below many years ago and it has remained one of my favorites.

And here is the layout process for the most recent project.


With that out of the way I wanted to move on to another project… adapting this sketch to card making. I used the same idea of angles, but inked and stamped them instead of using paper. I repeated the greeting instead of using three photos and I embellished with smaller items instead of layered clusters. And just like that, a card is born! Hope you enjoy a view of these cards and the products used are listed below.

Mixed Media Hop, 8/21

I’m back with the August ’21 Mixed Media Frenzy YouTube hop. The final Friday of each month the group invites all members to participate in a community hop. If you want to join in the fun, visit their Facebook group for inspiration and interaction. We were scrap lifting the image below, created by the very talented Missy Whidden. If you haven’t seen her videos I highly recommend them. She has so much patience for layering details onto her projects!

I had fun playing with plenty of ink (as paint!), stamps, and die cuts for my own interpretation. You’ll notice the photo is very fuzzy. That isn’t you, or my graphic, it is actually how the picture was taken! I was on my first kayak trip and my phone/camera was in a ziplock to keep it dry. I was too nervous about dropping it in the water to take it out of the ziplock. But do I let a bad photo stop me from scrapbooking? Never!

Check out the entire process over on my YouTube episode. And remember this is a hop! The video description box will lead you to each creator playing along. Check them all out and leave them all some love.