Hello, hello! Welcome to the info page for my new livestream series. I’ll be using my Spellbinders Crafty Advent Calendar from 2025 to extend the fun all year long in 2026. I’ll have a live stream on the 4th Friday of every month at 4pm Pacific time. The stream will last between and hour and an hour and a half. This series is also a craft-along!
I will preplan a project, post sneak peeks and post of things you can prep ahead of time if you want to craft live with me. I’ll try to use the advent supplies in a way that may not be super obvious. That way you can get more ideas on using your advent goodies. Hope you will join me.
Date
The next live will be March 27, 2026 at 4pm Pacific Time. Join the live now or watch the replay.
March Project
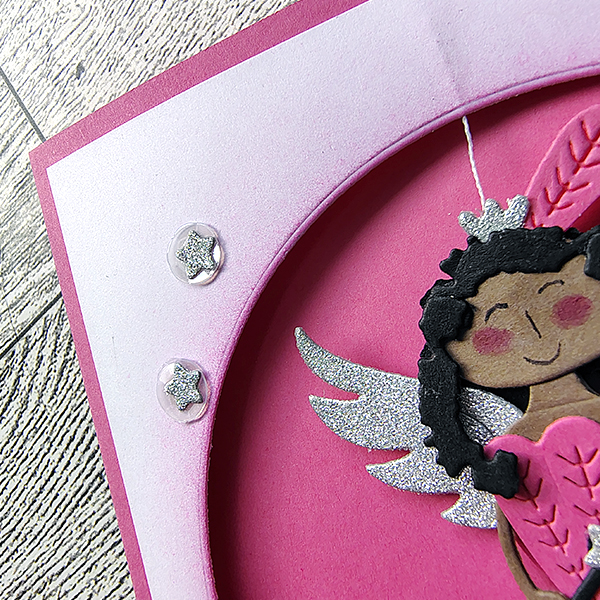
This month we will be creating a lovely lady to adorn our card. She is also interactive! While I went all in on pink, feel free to use your own color palette. Believe it or not I’m not really a pink girl. LOL.
There is a bit of prep if you want to craft live with me. The “hair” can be done later if you want to reduce the amount of die cutting. However, I find if you cut one “hair” piece each time you cut something else, the work isn’t that bad. We will do some die cutting on the day of the event as well. I’ve noted in the preparation instructions what you need for now and what we will do live.
If you want to craft along with me, here is a preview of the preparation list. Click this link to download the instructions. A zip file will download. The folder includes PDF and JPG files.
If you have any questions or comments, you can message me here on the blog from the Contact tab. Or you can email me by using misty at craftysoup dot com. I’ll do my best to get back to you in a timely fashion. Hope to see you on the live!
Valentine’s Day is fast approaching! If you haven’t already created your cards, I’ve got some ideas to share. I wanted to add techniques and ideas you can use all year long. Starting with three basic supplies, a modern color palette that steps away from the traditional, and a solid design principle means we have the recipe for many lovely cards.
Products
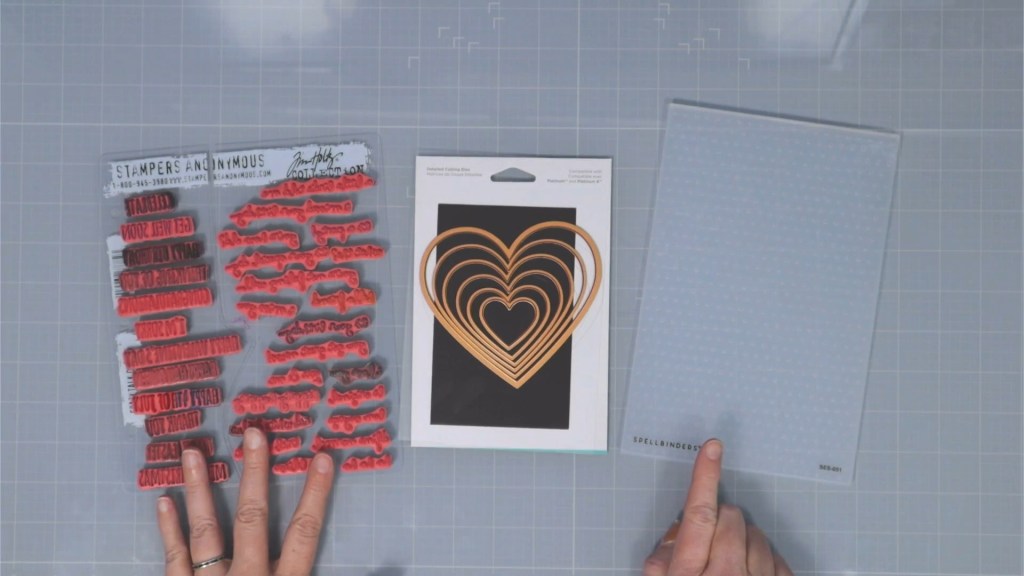
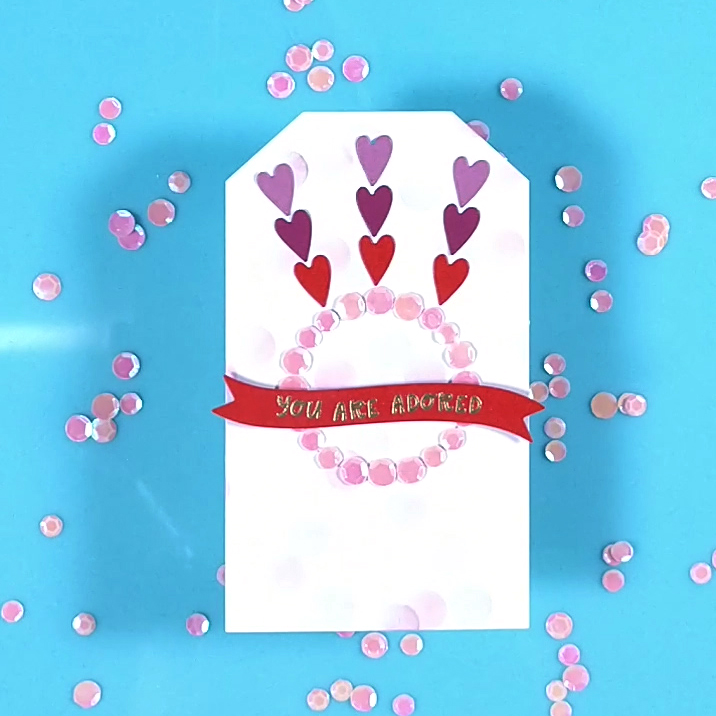
I started with a sentiment stamp set that can be created for a Gal-entine’s sentiment or for more typical Valentine’s. I have a nested set of heart dies. Having different sizes allows for more design options. Finally a simple geometric 2D embossing, in this case polka dots, will add some texture to the designs.
Design Element
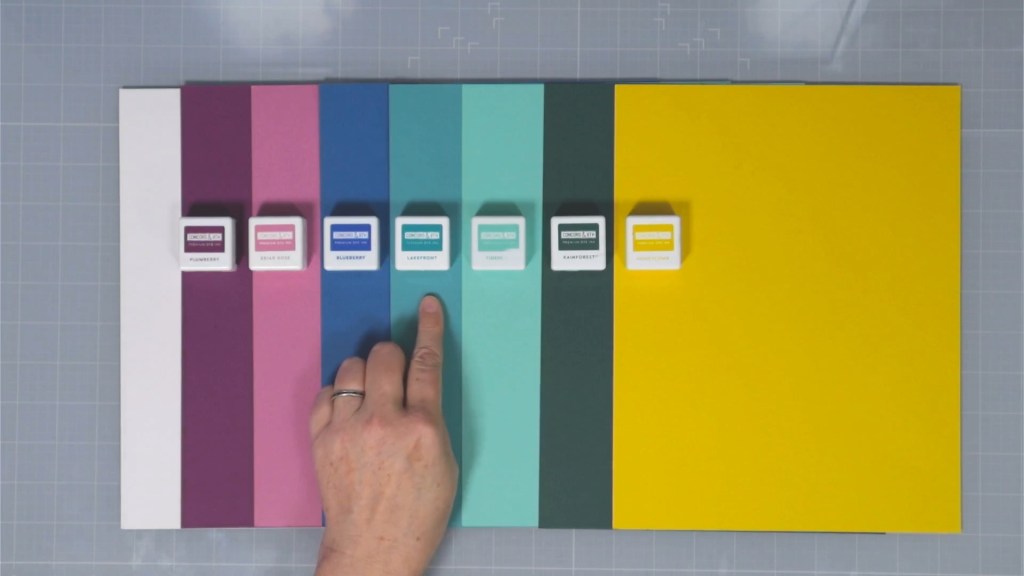
My favoite part about these cards is this fresh modern color palette. It is also a great one for masculine cards or for cards that step away from mushy sentimentality. All my colors come from Concord and 9th.
The heart die set is going to give us various ways to play with negative space. Often we will cut shapes and then use that shape. But if we use the hole left behind from cutting, we get different design options.
The Cards
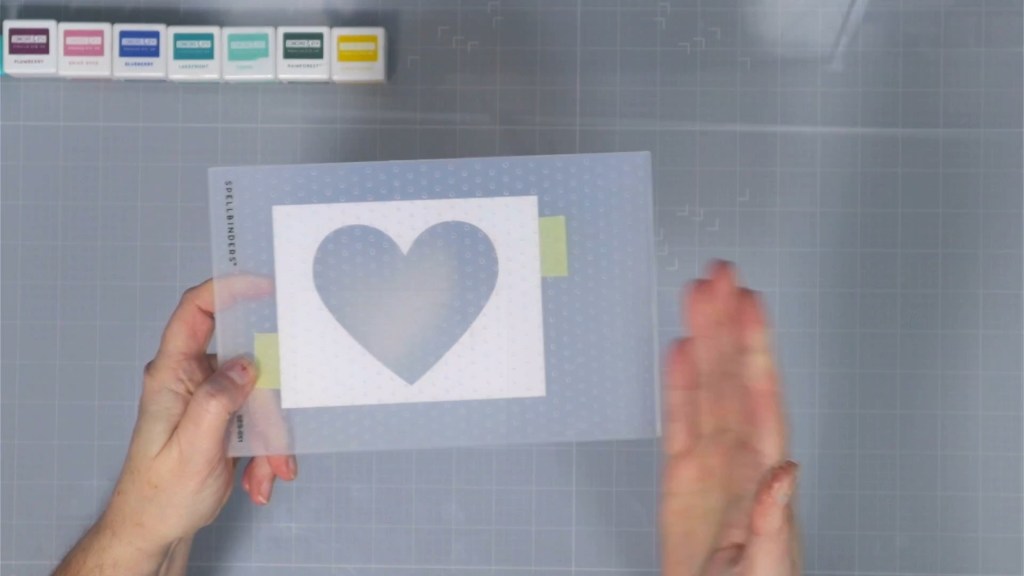
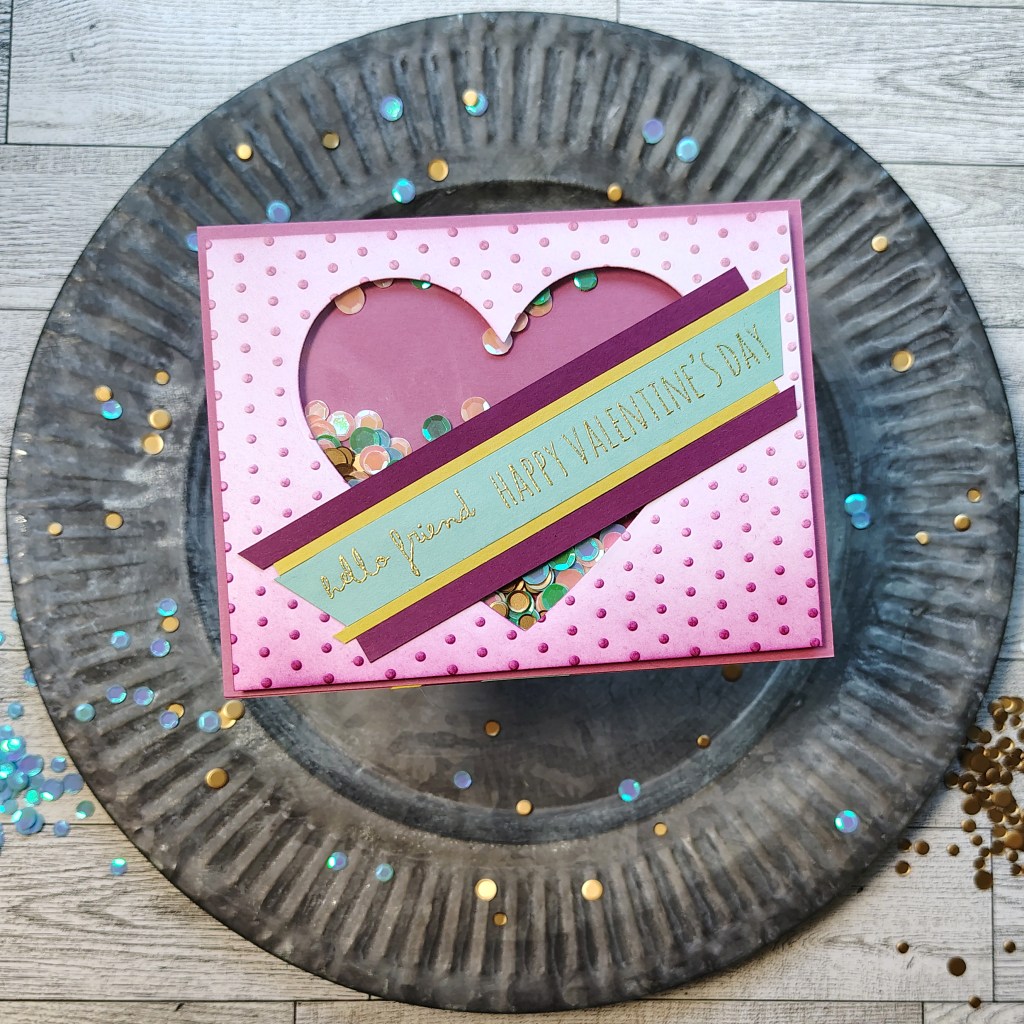
The most common way to use a negative space is to create a shaker card. And that is where I started my creations. I’ve leaned int more of the pinks for this Gal-entine’s card. But I have kept it more modern by including yellow and aqua.
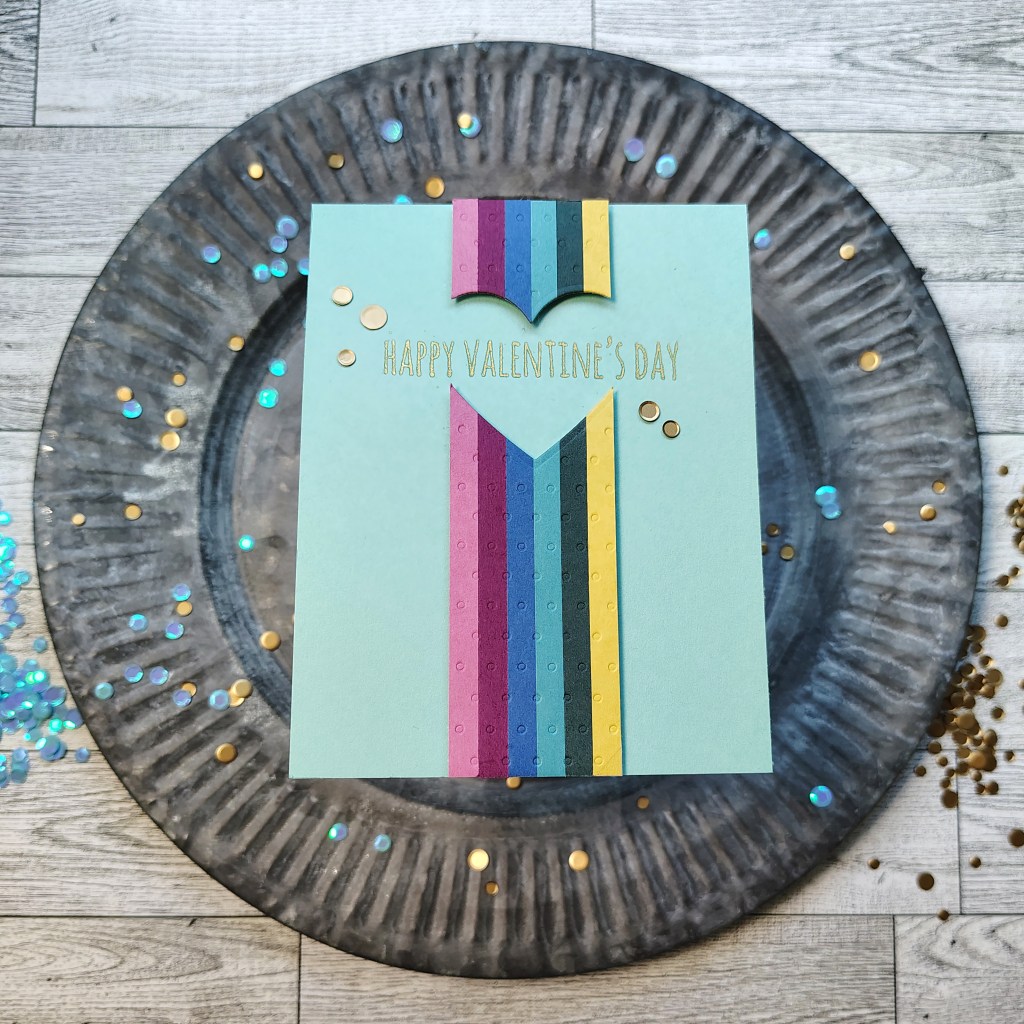
Card two plays with negative space in a very different way.
After creating a striped panel, I cut out the heart but let it overhand the edges to get just a partial negative space left behind. The I filled in the space with the sentiment. I adore this one!
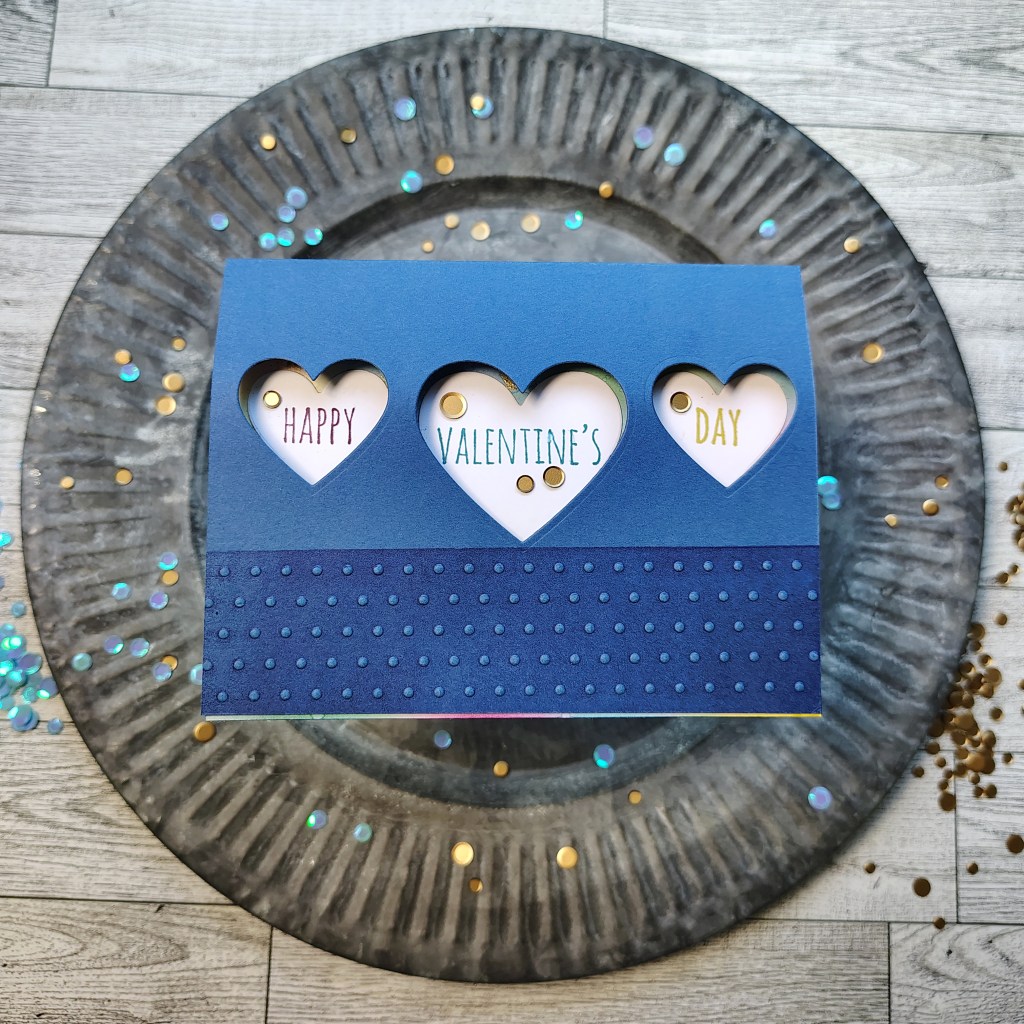
Card three looks simple at first glance. The hearts are cut to reveal some other elements. However, when the card is open, there is a pretty surprise.
I also have an interesting technique happening with the gold splatters. If you want to know more about that, check out my tutorial video.
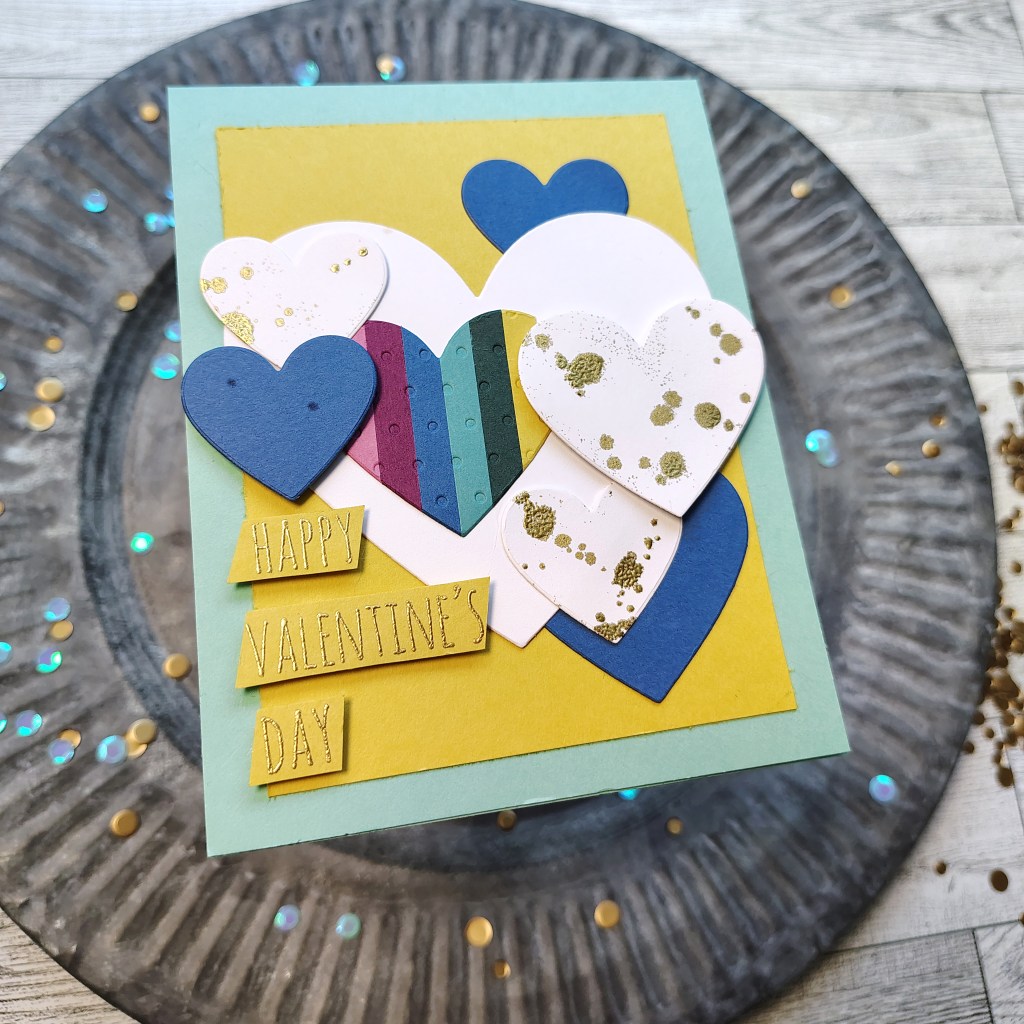
Before you go I have a bonus card. When using negative space, there will always be positive shapes leftover. I just can’t let those go to waste. So here is a heart filled card to used up those bits.
Hope you have happy Valentine’s Day crafting! Until next time, have an artful day.
As a design team member over at the Counterfeit Kit Challenge group I play along with as many of our monthly inspiration challenges as I can. The Forgery on the Fourth project is definitely one I enjoy! That is where we see a scrap product we like and set out to recreate it with supplies we already own. So let’s go ahead and dive in to what I have for you this month.
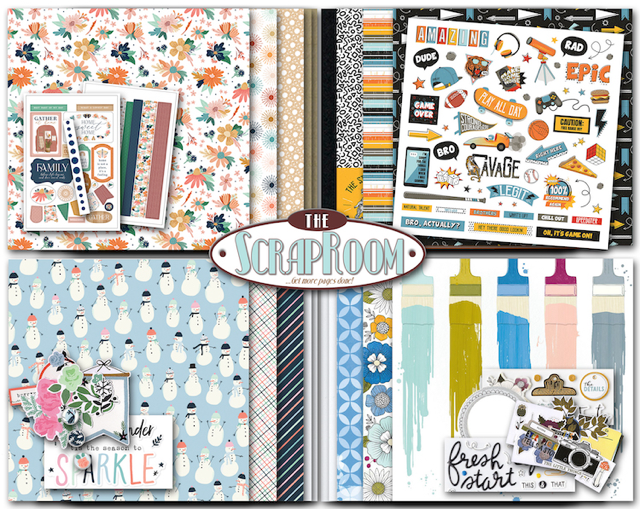
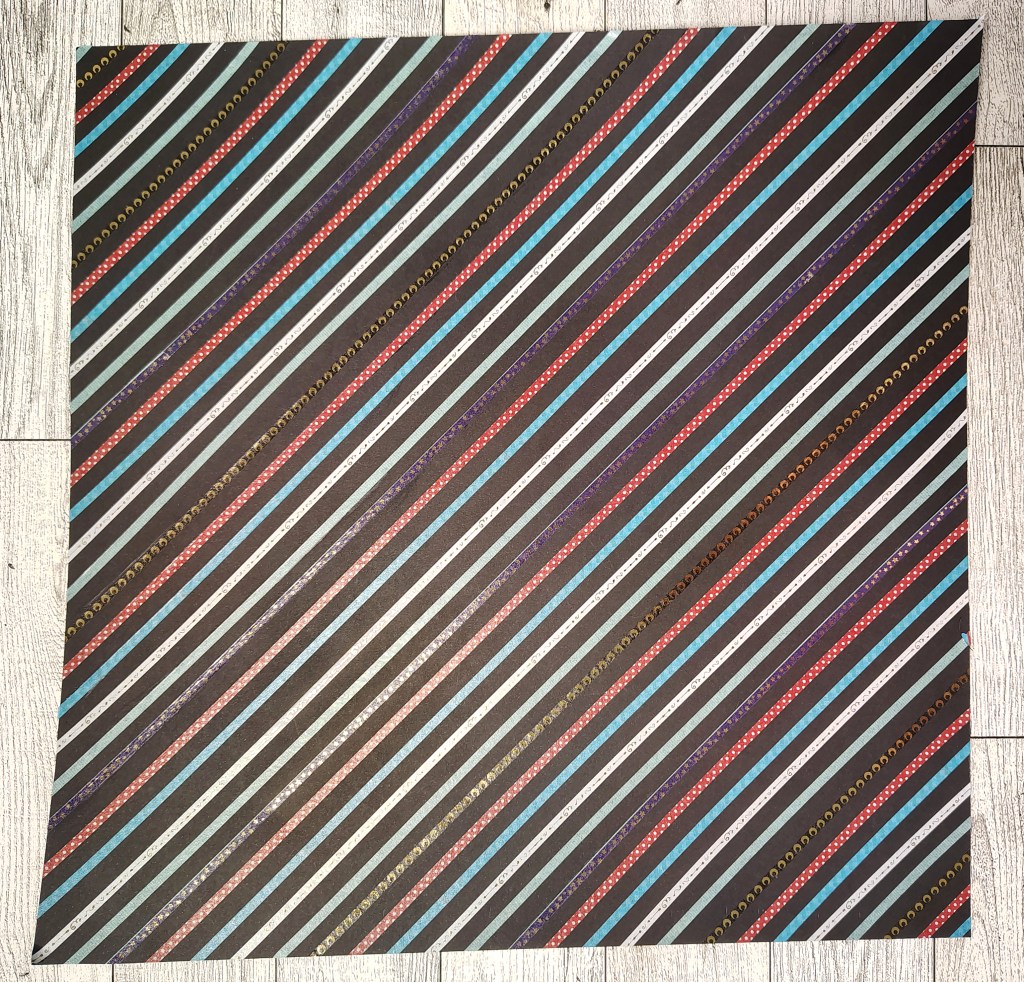
Since we always start our forgery projects with inspiration, here is the image we are working with this month. It is the [kit] from [company].
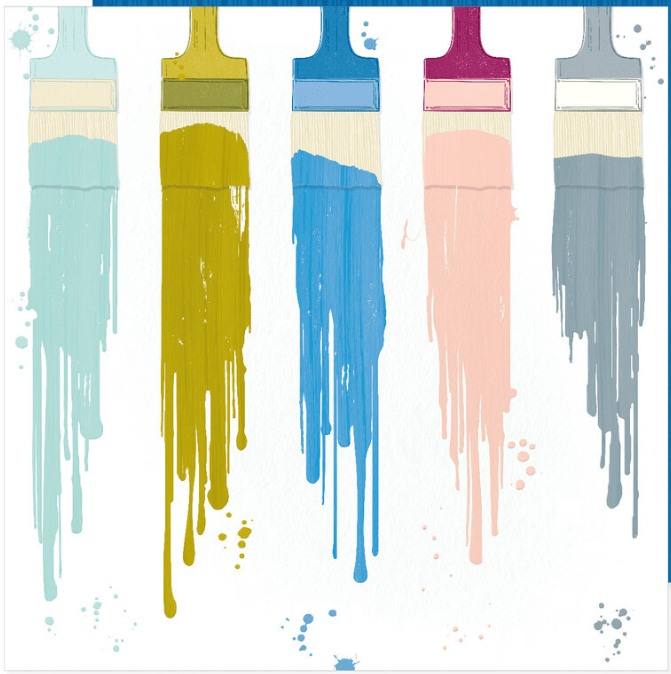
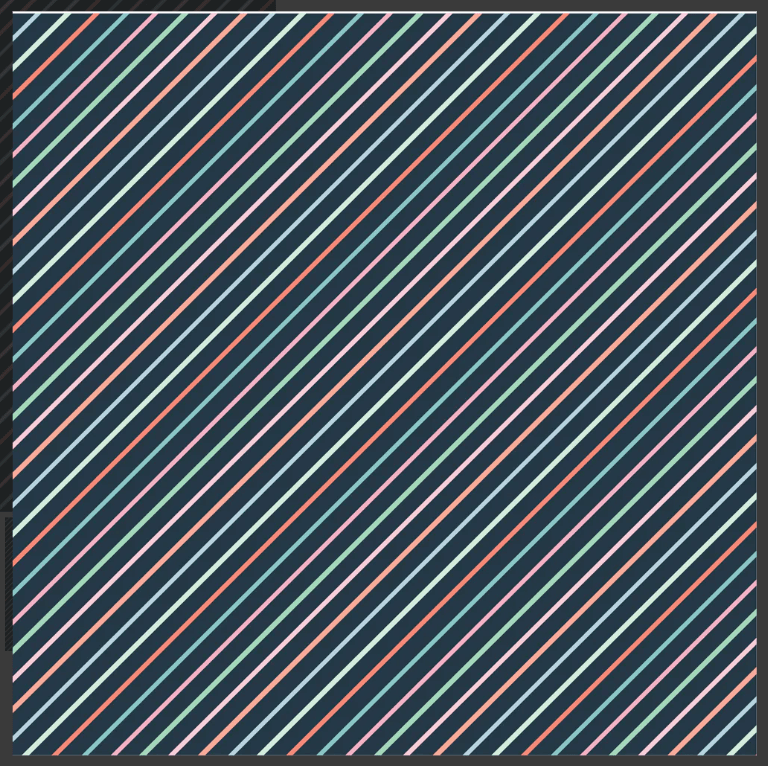
I had two big favorites from this kit. I loved the colorful stipes on black pattern paper from Simple Stories. Then of course I just adored the paintbrush paper from Vicki Boutin. I did have anything like either of these in my stash, so it was time to make my own.
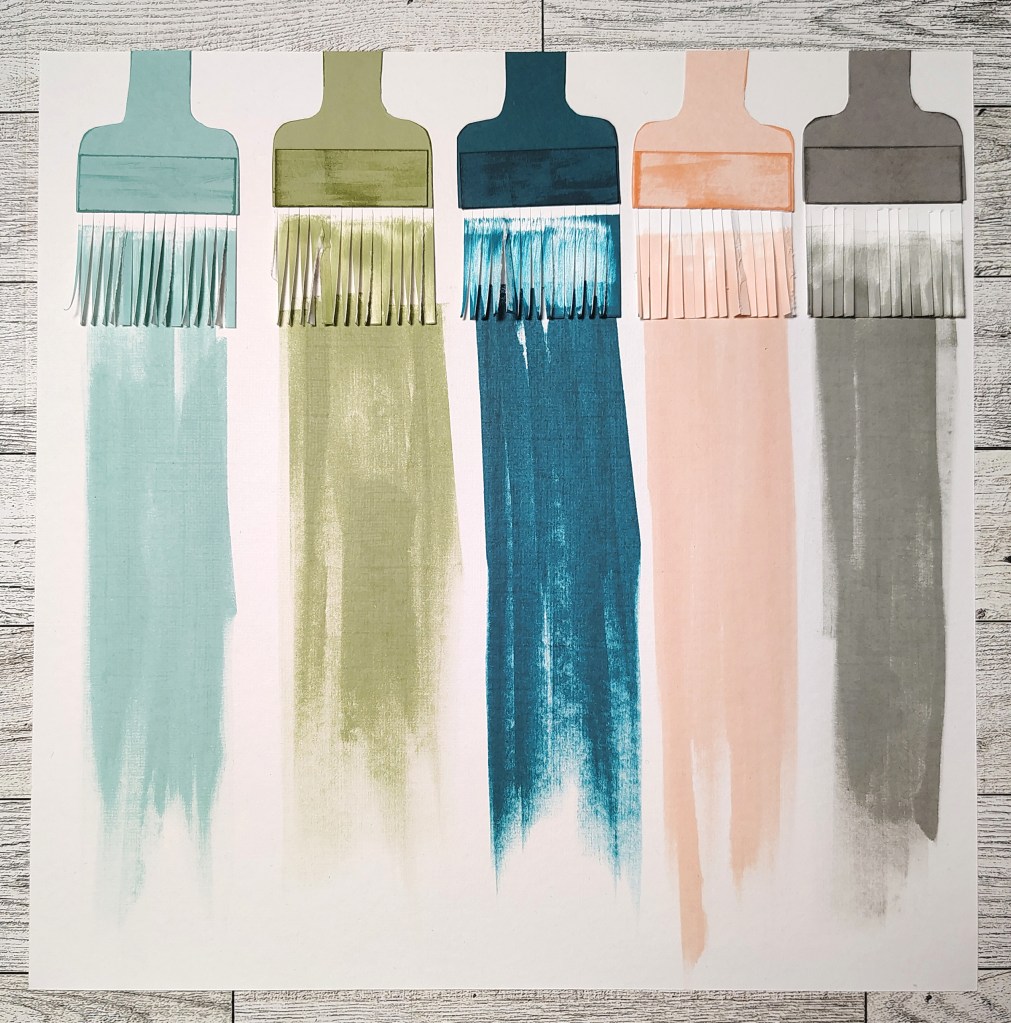
I decided to paper piece and ink my brushes. For the stripes I pulled out my thinest washi tapes and set to work. How do you think I did?
If you want to see more of the process on these, I do have a video tutorial up.
For more creative ideas, the CKC blog has more forgery examples to check out. I hope this gave you some ideas on how you can recreate your favorite product ideas with supplies you may already have on hand. Don’t forget to show off your stuff over on the CKC Facebook group, or tag us on Instagram @counterfeitkitchallenge or use #counterfeitkitchallenge.
I love kit building and that is why I am on the design team for the Counterfeit Kit Challenge project. We take an inspiration kit each month and proceed to replicate it, or as we say, counterfeit it. This is a free, friendly group that helps inspire you to use up supplies you already own. We are not about needing to buy the latest and greatest thing (though we won’t stop you if you enjoy new crafty goodies😉 ).
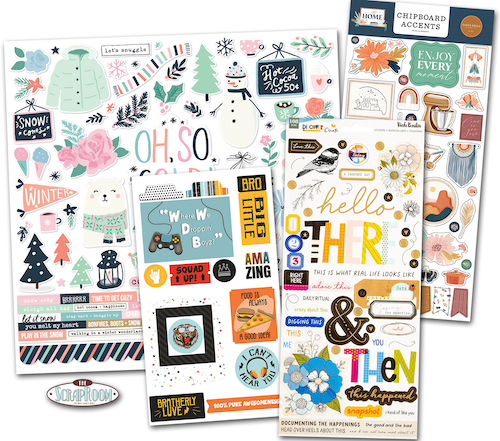
Welcome to a new month of kit building. Amanda is our hostess this time. She chose the January 2024 kit from The Scrap Room to inspire us. Before we dive into the details of this kit, let’s give a warm welcome to our guest designer this month. Kathy Price plays along with our challenge alrady and was happy to join as guest designer this month. She even created this month’s sketch which will be revealed on the 28th! You find find Kathy on her YouTube channel.
Now let’s look at the inspiration. Since this kit is so old, there aren’t many photos to peruse. But try zooming in to get all the vibes from this one.
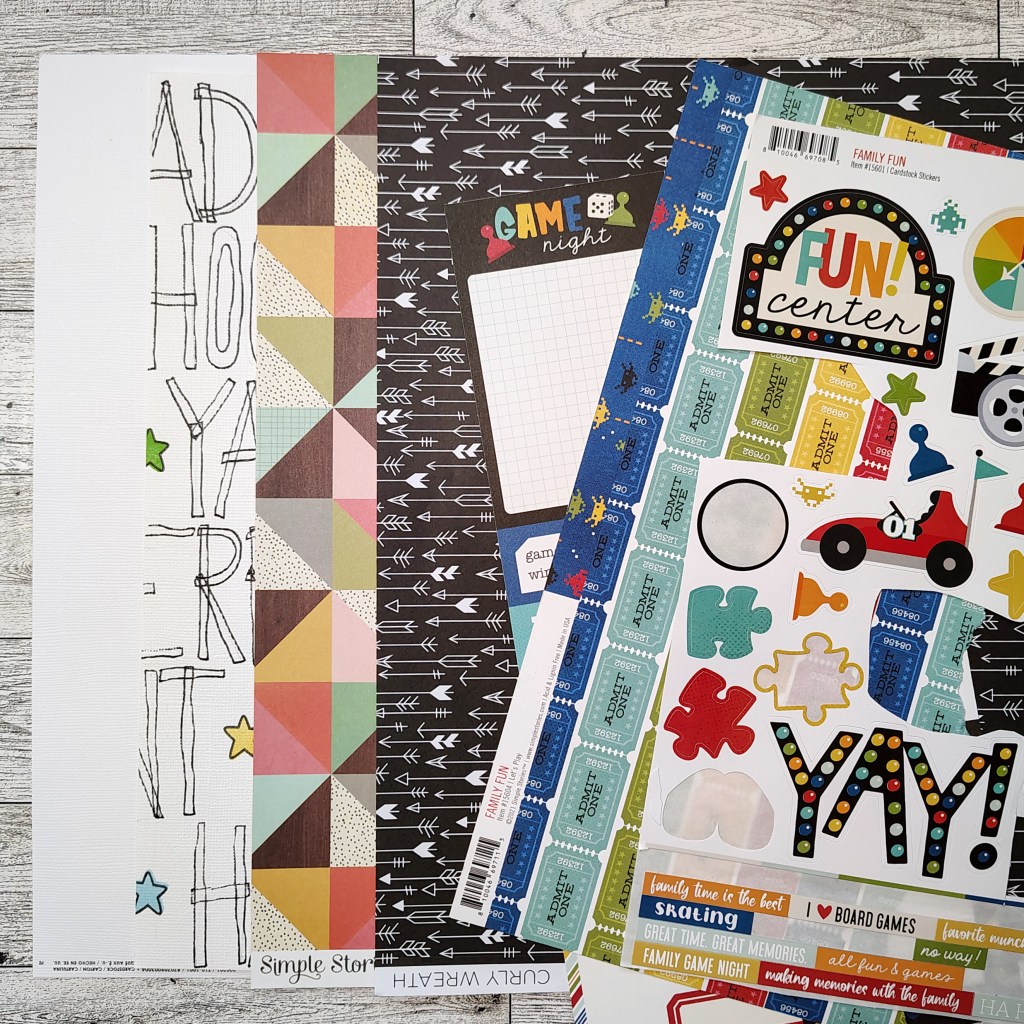
At first I though I would build one combo kit. But as soon as I reached for paper I found a selection of supplies from Creative Memories that fit perfectly with the upper left corner’s inspiration. So, building four mini kits it is!
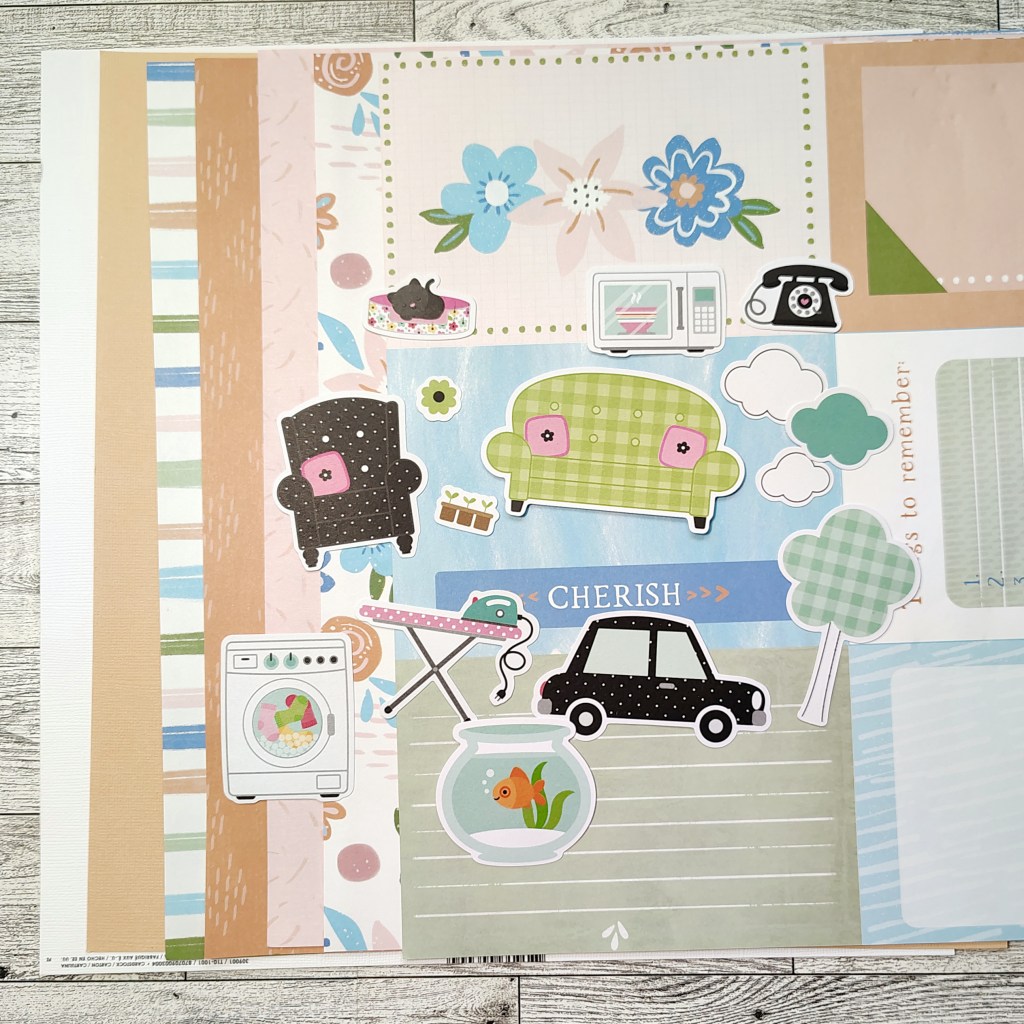
Kit #1: Family
Along with the Creative Memories supplies, I tossed in some homey icons from a pack of Bella Blvd ephemera. Notice the pops of black? That will be a thread that runs throughout my kits.
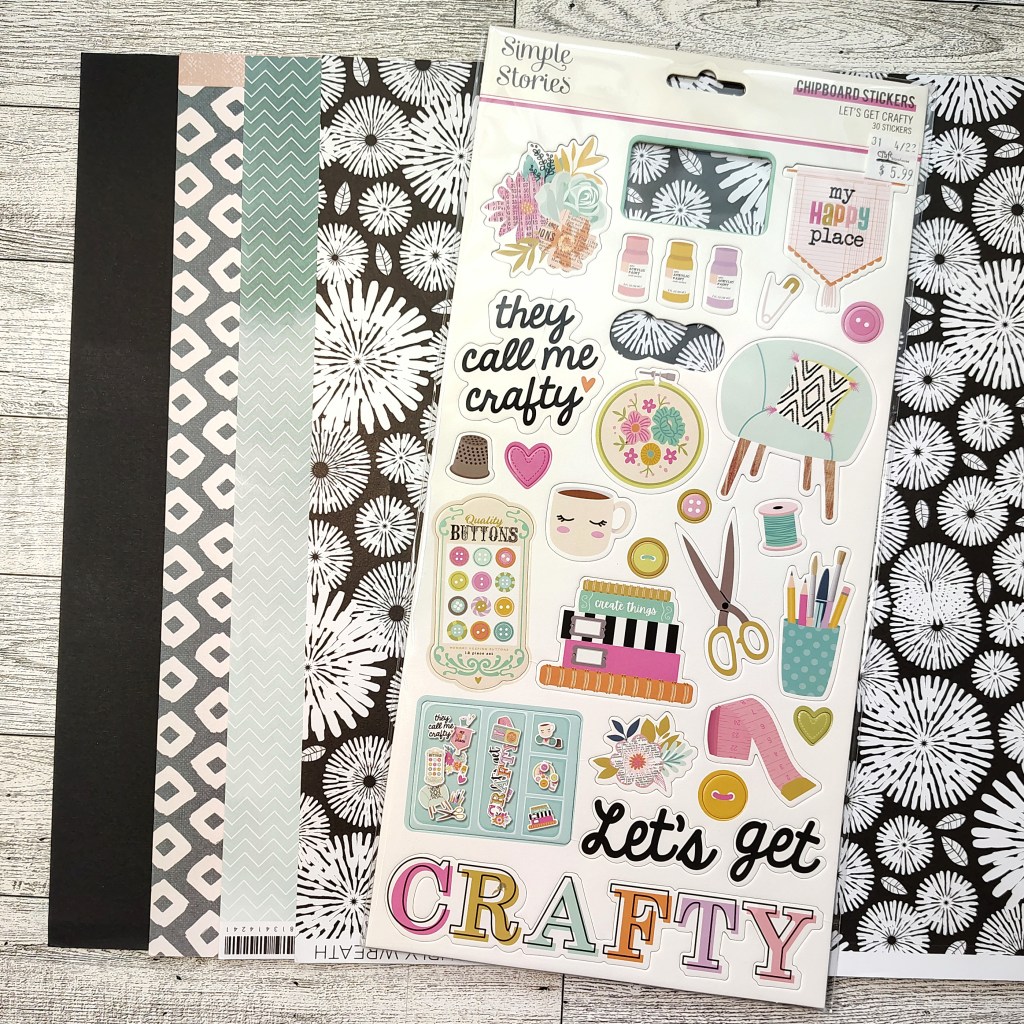
Kit #2: Crafty
This one came from the Vicki Boutin (bottom left corner) inspiration. I went with the mood of the inspo rather than a one to one match. I’ve got florals and gemotrics to capture the vibes. I’ve included a bit of “painterly” craft themed embellishments. Plus, I just may create some of my own items to go with this kit as well. See what I actually make on the 4th!
Kit #3: Games
Again, I wanted to capture the energy of the inspo rather than the exact match. Instead of “boy” I switched it up to “games”. I also included the idea of black and white, as well as the bold colors from the pattern papers. This kit will be well connected with the next one…
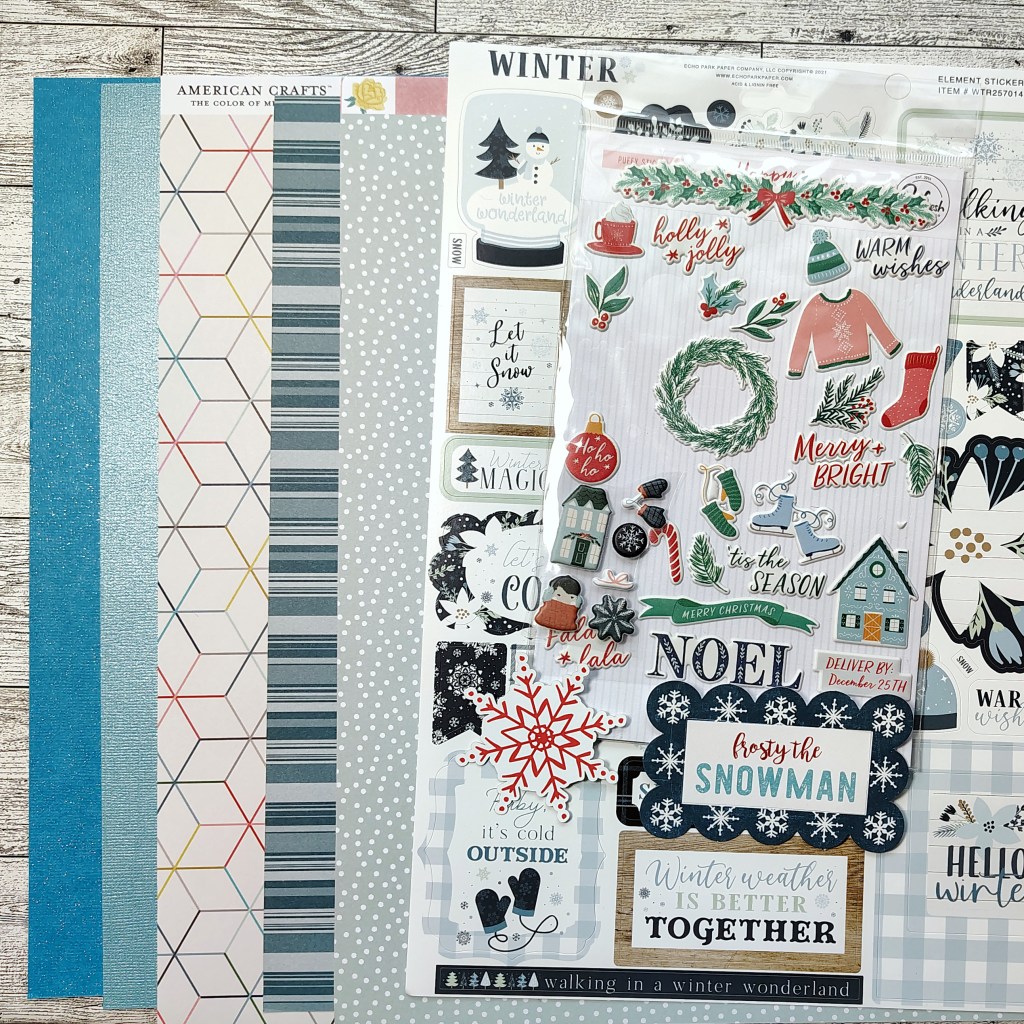
Kit #2: Winter/Christmas
I don’t expect to be able to scrap any fun winter photos this year (no snow for us so far, sniff). BUT, we do play a game each December that is an advent calendar as well! So with the game theme, and some of these winter/Christmas embellishments, I can create layouts for that specific story!
Don’t forget that each month I also create my own elements to add into my kit. Of course these are inspired by the original kit, but often have a twist of their own. So don’t miss what I will make in just a couple of days. I’m loving my ideas this time.
There is a tradition over at CKC of titling our kits just like companies do. With four kits, it may be hard to find one over arching name. But I’ve got it figured out…
Cozy Hobbies
If you want more details on my kit building thought process, check out my kit build video.
I hope you can follow along with the other designers and see how they interpreted their own kits.
I have a free download “worksheet” to help guide you through your own kit build process. It is a printable pdf and there are two worksheets per letter size page. Have fun kit building!
Don’t forget to show off your stuff over on the CKC Facebook group, or tag us on Instagram @counterfeitkitchallenge or use #counterfeitkitchallenge.
I’ll be back on the 4th, for our Product Forgeries. Until then, have an artful day!
As a design team member over at the Counterfeit Kit Challenge group I play along with as many of our monthly inspiration challenges as I can. The Forgery on the Fourth project is definitely one I enjoy! That is where we see a scrap product we like and set out to recreate it with supplies we already own. So let’s go ahead and dive in to what I have for you this month.
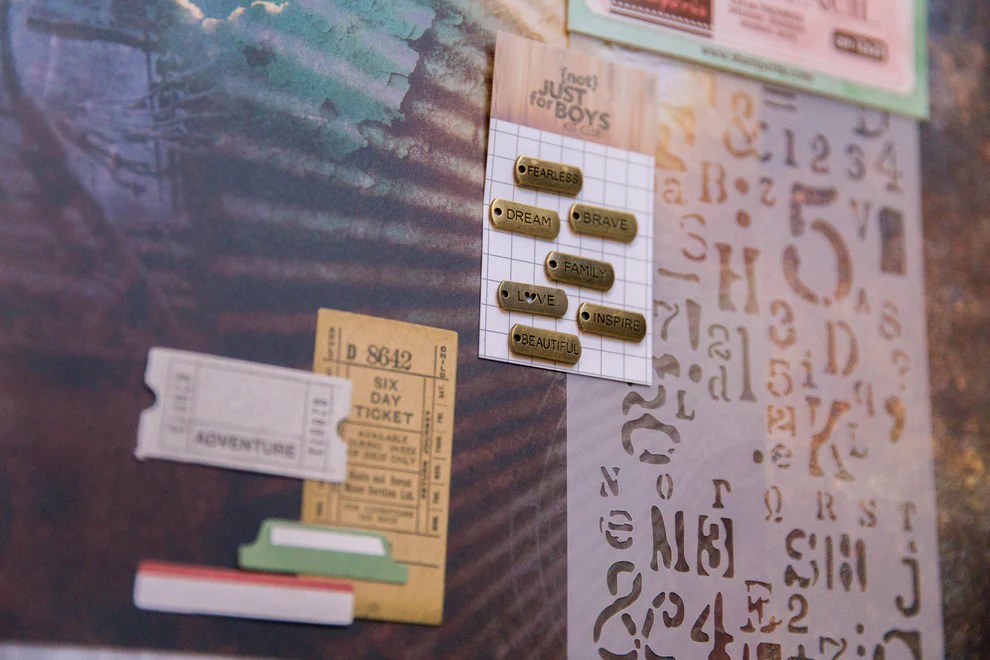
Each month I enjoy finding inspiration in our Counterfeit Kit. Some months ideas pop instantly. Sometimes I have to dig deeper. And, like this month, sometimes I have too many ideas for the time I have. I needed to pick and choose. Even limiting myself to three items kept me very, very busy. Let’s take a look at the inspo to see where I went. Our inspiration is the Intrinsic Limitless kit from Not Just for Boys. I did pull from some of the add-ons to this kit as well.
I did pull from some of the add-ons to this kit as well. In fact, those fabric stars where part of the add-ons. Plus they were a popular item with the team this month! I knew that the sewing technique and the fabric they used would make it a bit tricky to do at home, especially at that size! I altered it up to fit my needs: non-fraying fabric plus sewing that didn’t require my machine. That way I could sit and stitch while I watch TV, lol. Despite my less than perfect blanket stitch (pointy corners stump me!) I think they came out well.
Next up I wanted to tackle those charms. My first thought was to make them from clay. But I don’t have any clay and I was not about to go out and buy some. If I did that I might as well just buy some already made charms. The point is to use what we have on had to mimic the inspiration. So I pulled out shrink plastic and metallic ink. It has been a while since I’ve worked with shrink plastic, but it was just as satisfying as I remember!
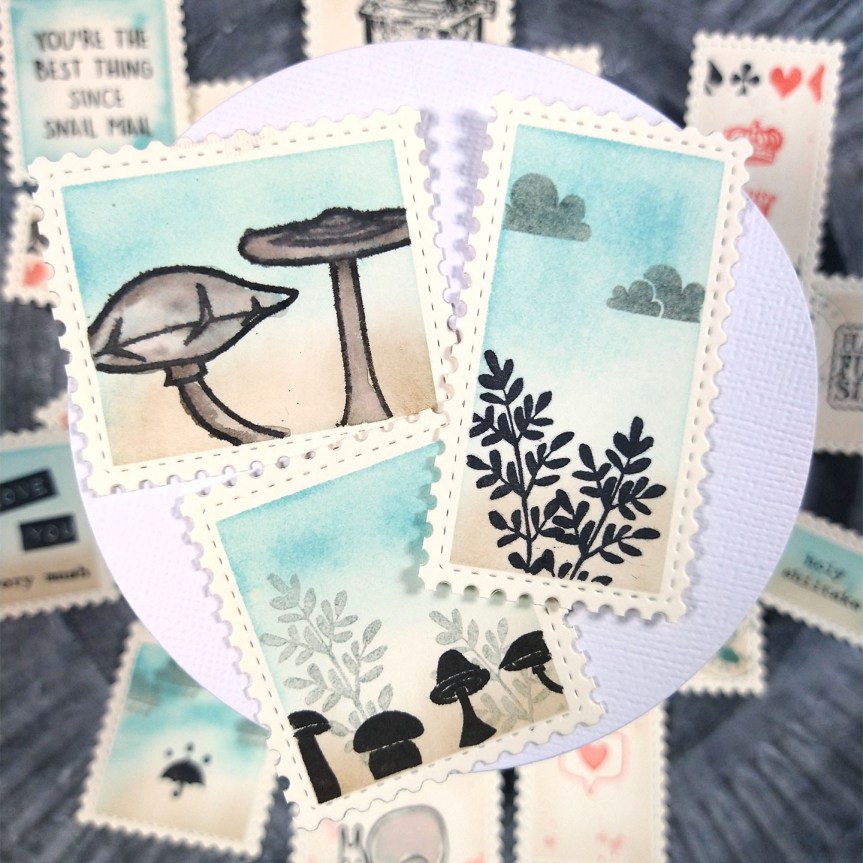
The final idea is one that I based my entire kit around this month: postage. I have been loving the trendy postage theme out in the crafty world lately. I have a few products that are clearly postage related. Yet as you can see from my makes, you can use just about anything to create these little gems. It helps to start with a great postage die. I used the Waffle Flower Postage Collage die. Waffle Flower makes many postage products; this one is sized for A2 cards. I threw in plenty of other supplies from my stash to create postage, from a nature theme to an Alice in Wonderland theme.
That is where I had to stop with my makes. I had too many ideas for my energy to hold out. I was very tired by the time I finished all these. It took me a couple of days to get through everything but it was fun. If you want to see details on how to create these, my video is up. Each make is in its own section so feel free to jump around to just what you want.
For more creative ideas, the CKC blog has more forgery examples to check out. I hope this gave you some ideas on how you can recreate your favorite product ideas with supplies you may already have on hand. Don’t forget to show off your stuff over on the CKC Facebook group, or tag us on Instagram @counterfeitkitchallenge or use #counterfeitkitchallenge.
Until next time, have an artful day.
Supplies Used *Affiliate links may be used at no additional cost to you.
As a design team member over at the Counterfeit Kit Challenge group I play along with as many of our monthly inspiration challenges as I can. The Forgery on the Fourth project is definitely one I enjoy! That is where we see a scrap product we like and set out to recreate it with supplies we already own. So let’s go ahead and dive in to what I have for you this month.
Since we always start our forgery projects with inspiration, here is the image we are working with this month. It is the Balboa kit from 2014. This kit no longer exists, which a perfect reason to pull inspiration from it and make our own version!
There were many ideas I could pull from this. I ended up focusing on three things.
The Chalkboard pattern papers. I thought I had some in my stash, but didn’t find it when pulling my kit. So… I’ll just make it!
The fancy pins. In fact, I think my mock version is even better than the real thing. Stay tuned for why!
That “Hello” word. A nice thick chipboard word covered in colorful spatters? Yes please!
Here is a quick look at the finished items. But let’s go over them briefly one at a time.
Chalkboard Paper
This process is really easier to see in action. I’ve got the video tutorial linked below for you.
I punched out a nearly 2 inch circle and cut it in half. Then I cut that half in half. That left me with a quarter of a circle. I used that to trace the curved edges. With a white gel pen I was able to trace a cruve in each corner of a black piece of cardstock. Remember to use the smooth side if you have textured cardstock. Then with a ruler I could connect each of those curves with stright line. Repeat that process to create a second border. Then realize there are smudges of white gel pen and make more purposeful smudges and marks to make them blend in.
Decorative Sewing Pins
Recreating these pins is awesome. I’ve used real sewing pins for projects in the past. They create two problems: danger of being poked and excess bulk on layouts. My version solved both those problems. You can make these using twist ties! Peel off the paper portion of the tie, but leave about 3/4 of an inch of the paper intact at one end. This is where you can glue on enamel dots. Once the glue is dry, trim away any excess paper using a pair of fine scissors and you have your mock pins! They are a major budget saver as well.
Just a note: the one on the right end was made using Nuvo stone drops instead of enamel dots. While it did work, these weren’t my favorite.
Word Art
Finally, I made the Hello word. This was easy to do on my Cricut. But you can also use dies. I just don’t have any word dies this size. I cut 4 layers of the word, then stacked and glued them. Once dry I simply splattered them with some watercolor. Done!
You can see all these ideas in action in my makes video below.
For more creative ideas, the CKC blog has more forgery examples to check out. I hope this gave you some ideas on how you can recreate your favorite product ideas with supplies you may already have on hand. Don’t forget to show off your stuff over on the CKC Facebook group, or tag us on Instagram @counterfeitkitchallenge or use #counterfeitkitchallenge.
As a design team member over at the Counterfeit Kit Challenge group I play along with as many of our monthly inspiration challenges as I can. The Forgery on the Fourth project is definitely one I enjoy! That is where we see a scrap product we like and set out to recreate it with supplies we already own. So let’s go ahead and dive in to what I have for you this month.
Since we always start our forgery projects with inspiration, here is the image we are working with this month. It is the Lil’ Man collection from Bella Gypsy. You can find this digital kit over at Pickle Berry Pop. Since it is a digital kit, that gives us the perfect reason to create our own version of physical products!
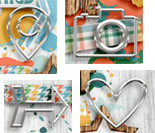
I honed in even further on some of this collections elements for today’s projects. What do you think I’ll be making from each graphic? I’ll tell you know that the third one is my favorite!
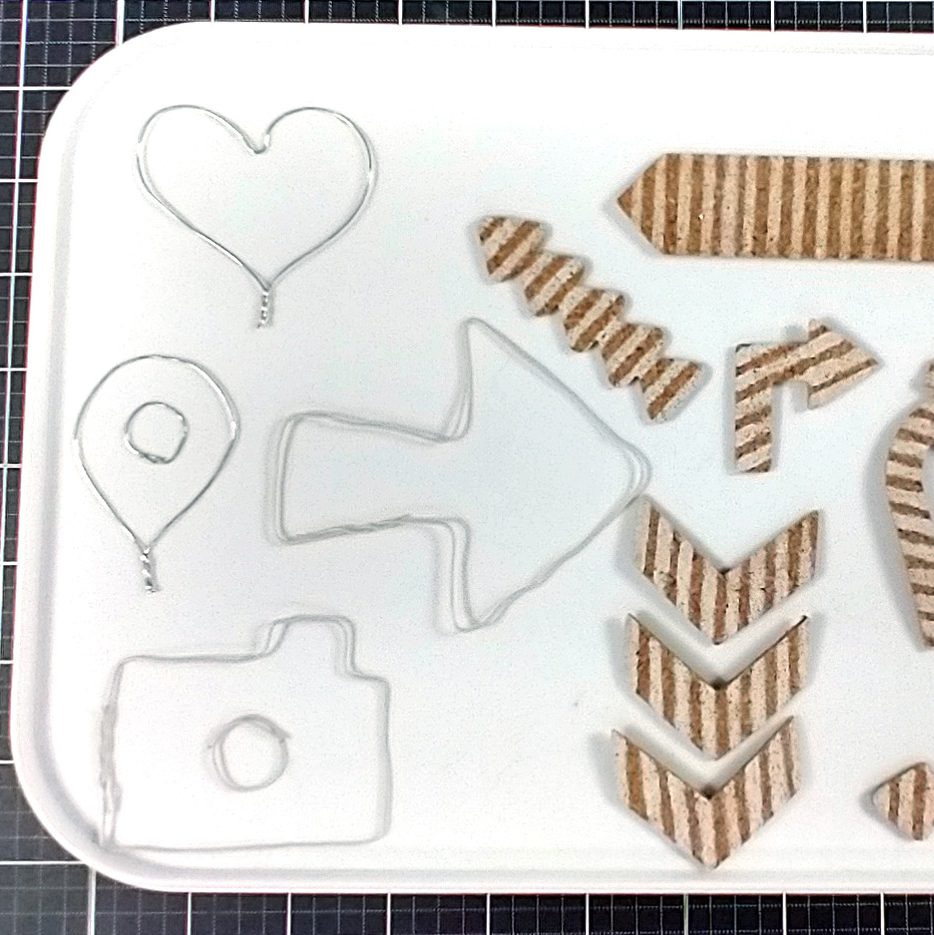
I started off easy with die cut and stenciled cork embellishments. Pigment ink is the key to stenciling these items. The opaque ink will show up crisp on the cork!
Next up I played with wire. This was a bit of a struggle with some of the ideas and easier with others. After checking them out, would you attempt this one?
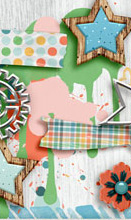
For sure, this last idea was a super new one to me. Not only was it really fun to create, but it worked beautifully! I made paint splatter stickers! Acrylic paint can be hard to work on cardstock. The wet nature of the paint takes a long time to dry and it can really warp paper. The solution? Make them on a non-stick surface ahead of time. Let them dry. Peel them up and put them on your project like you would a sticker! Any size, any color. Plus it takes the fear out of mixed media. Only use the ones you love!
These were just a few of the paint splatters I created. To see even more, check out the video.
For more creative ideas, the CKC blog has more forgery examples to check out. I hope this gave you some ideas on how you can recreate your favorite product ideas with supplies you may already have on hand. Don’t forget to show off your stuff over on the CKC Facebook group, or tag us on Instagram @counterfeitkitchallenge or use #counterfeitkitchallenge.
Moving through 2025 I want to provide more informational content. Starting off the year I want to take a look at Media Mats. I’m starting here since you will see me use inks, paints and sprays on my projects on a regular basis. You will also see the various mats I use to keep my space clean, make cleanup easier and help me get the job done faster.
I created a video explaining many things on these mats. However that video is now fixed and can’t be changed. In fact I have now thought of one idea I missed already! Here I have the opportunity to update and correct information based on feedback!
Let’s start with that video. I’ll move on to a chart that you can download for free. Finally I’ll share many details of each mat category and the various qualities.
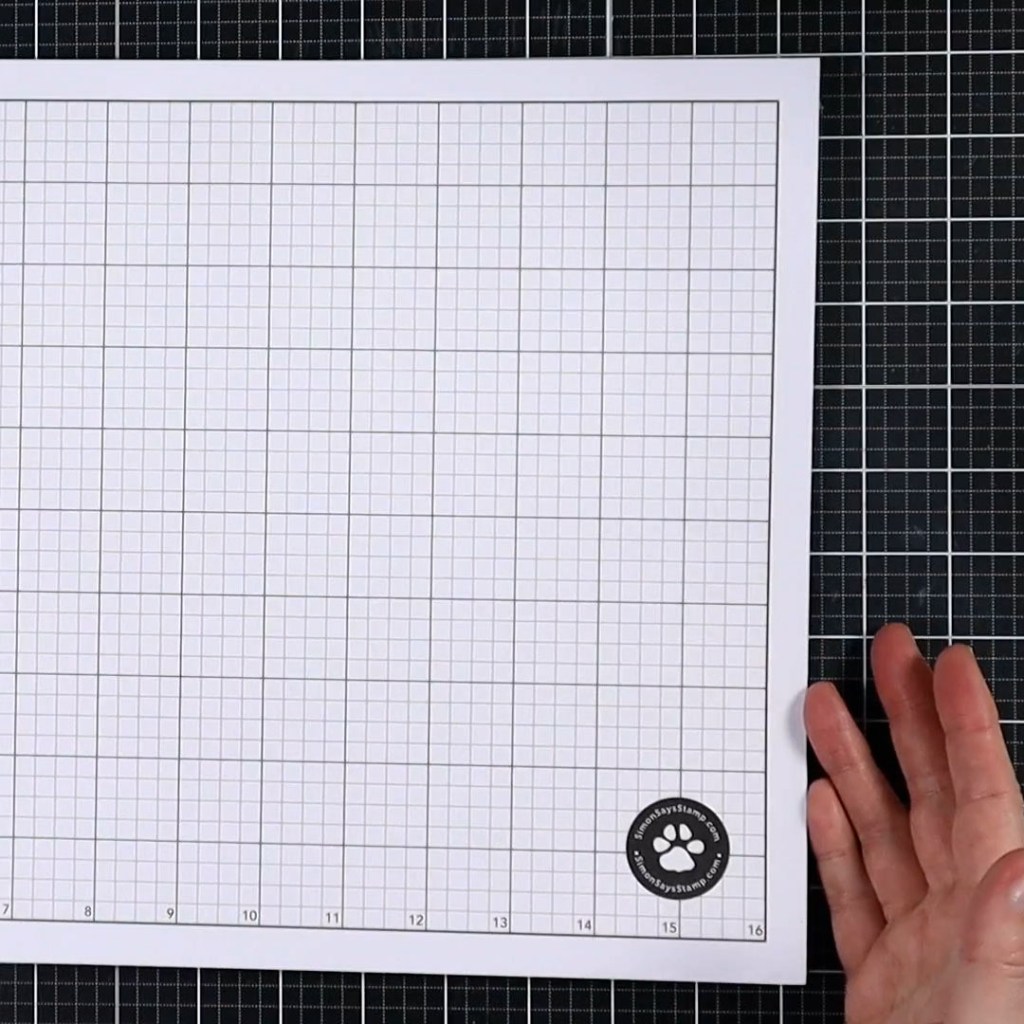
From scratch paper to specialty mats you can purchase. Paper sheets are a cheap and disposable way to make cleanup easier. Larger mats with grids can be purchased and the grids are very useful
★ Best uses: ink blending; catching messy mediums to throw away
Pros
Free or cheap
Readily available
Disposable so no further cleaning is needed.
Cons
Creates a lot of trash
Can’t handle very wet mediums
Laminated Paper Mats
The provide many of the same qualities as glass mats at a fraction of the cost. However, getting larger sizes requires going to an office store. Sizes around 13in x13in are available for home use. Consider a machine like the Minc which can be used both for craft techniques and for medium-size lamination.
★ Best uses: any mediums; smaller projects
Pros
Can be very inexpensive if you have a machine.
Machines have other uses such as storage dividers, preserving memorabilia, die cutting shims, toner foiling, etc.
Cons
Need a machine or access to an office supply store to make one for you.
Not heat stable
Splat Boxes
Free when you repurpose a shipping box or pizza box.
★ Best uses: sprays and spatters
Pros
No cleaning
Good for sprays and splatters
Free if you reuse a box!
Cons
Needs to dry in between uses (or line with disposables such as paper towels)
Bulky to store
Not for most mediums
The Craft Mat
One of the original craft surfaces produced by Ranger with Tim Holtz. The original brown color lacked the ability to see the true color of mediums. A newer white version solves that.
★ Best uses: All mediums, smaller projects
Pros
Reduces media waste (scrape it up and put it back in the jar)
Slick surface is easy to clean. Plus it is easy to take to the sink for deeper cleaning.
Great for paints & pastes
Lightest weight
Heat resistant (but thin!)
Low cost
Can have multiple on hand
Cuttable to have multiple smaller mats
Cons
Creases & cracks (store rolled up)
Not big enough for scrapbook layouts
Hard to tape things down to it due to it’s slick surface.
Slips and slides around with movement like ink blending. Difficult to tape still due to that slick surface.
Silicone Mats
Likely originating in the kitchen industry. In my opinion, the most overrated of the bunch. Has a slightly grippy surface, but not grippy enough to keep things from slipping. Easy to take to the sink for cleaning.
★ Best uses: keep ink pads still when ink blending
Pros
Repurpose from kitchen baking mats
Affordable
Cuttable to have multiple smaller mats
Most mediums (except alcohol inks)
Can work as a palette also
Other uses: ink pad grips
Good heat resistance for drying projects with a heat tool, or to protect surfaces while heat embossing.
Cons
Not as grippy as marketed
Picks up lint, dust, pet hair VERY easily and hard to clean that off. Store it inside a bag to keep it clean.
Due to lint, often needs a hose down in the sink.
Photopolymer Mats
One of the most expensive options “per square inch” and limited uses. However, it is very good at what it does!
★ Best uses: ink blending & stenciling
Pros
Most grippy
Long lasting
Fairly easy to clean.
Now come in versions that offer stamps on one side and the grip mat property on the other.
Cons
Expensive for its size
Larger sizes not available (ie 12×12)
Can’t use alcohol products (Sharpies included)
Stains over time
Picks up lint & dust VERY easily. Must clean often to maintain grip.
Can’t handle heat or cutting.
Sticky Mats
Slightly better at hold power than photopolymer mats, but not nearly as long lasting. The sticky adhesive wears out over time. There may be ways to reapply adhesive but this requires some special products.
★ Best uses: ink blending & stenciling
Pros
Holds things in place well
Easy to find
Fairly inexpensive
Can repurpose other things like older Cricut mats
Cuttable to have multiple smaller mats
Can be large enough for scrapbook pages
Cons
Sticky wears out quicker than you might think
The mat itself can slide around. Can tape it down. (DON’T add tape to sticky zone.)
Not great for pastes. (However, can mask off exposed sticky to use pastes anyway.)
Must be wiped with a lint free cloth like a chamois.
Store with plastic cover (usually included) to prevent collecting dust & lint.
Self-Healing Mats
Originally from the sewing industry for rotary cutters. Great size options. Decent price. Good for many mediums. Plus the added bonus of being able to use it as a light-duty cutting surface.
★ Best uses: general table protection
Pros
Lots of size options
Self healing (craft knives okay!)
Helpful grids
Light-ish weight
General craft store availability (can also check sewing department for other brands)
Heat resistant (not proof)
Mid-range price
Can be cut down to multiple other sizes.
Cons
Not as smooth as glass (cleaning pastes is harder)
Can gouge if cutting on it
Few color options
May cloud with alcohol cleaners and inks (but not too bad)
Can stain depending on mat color
Glass Mats
My favorite of the bunch with one big downside as a YouTuber: it reflects lighting very easily. This is the heaviest of the bunch so best to set it and forget it.
★ Best uses: all mediums, cutting
Pros
Reduces media waste (scrape it up and put it back in the jar)
Long lasting
Most have grids
Knife resistant (check brand first, surface grid printing can interfere)
Can be pretty
Can have magnetic properties
Very smooth for easy cleanup
Heat resistant for heat embossing.
No staining
Cons
Expensive
Heavy
Can break if dropped. Best left in place
Glare if filming
Some adhesives need alcohol to remove.
Due to it’s thickness, creates a lip on your work surface that can be irritating.
I’ve decided to dive into the hot foiling trend. I never expected to actually do it. The cost of a foiling machine, the cost of new foiling plates, the space to store it all and getting caught up in the latest and greatest were all a bit overwhelming. And yet. And yet I was feeling a sense of FOMO. It was almost akin to the early days of die cutting; it was the latest and greatest. But would it be an expensive fad to fade away? Die cutting ended up being a staple crafting method. I believe hot foiling is as well.
My shifting thinking toward hot foiling collided with a ridiculously cost saving Black Friday deal. I accidentally ran across a hot foiling machine for a discontinuing price of $25. I was stunned. And also sold! The next step was how to go about adding some hot foiling plates to my stash in a reasonably affordable way.
Enter another collision of events. I had been subscribing to the Freckled Fawn memory keeping kit and cancelled it back in November due to poor customer service. I thought I would take a break from subscriptions for a while again. However, the Spellbinders kits have been in my periphery for a while. When I found the hot foil machine, signing up for a monthly foil plate subscription just seemed to make sense. I could slowly add to my supplies and also some monthly happy mail. I may even try to keep the goodies a surprise if I can manage to avoid all the social media reveals!
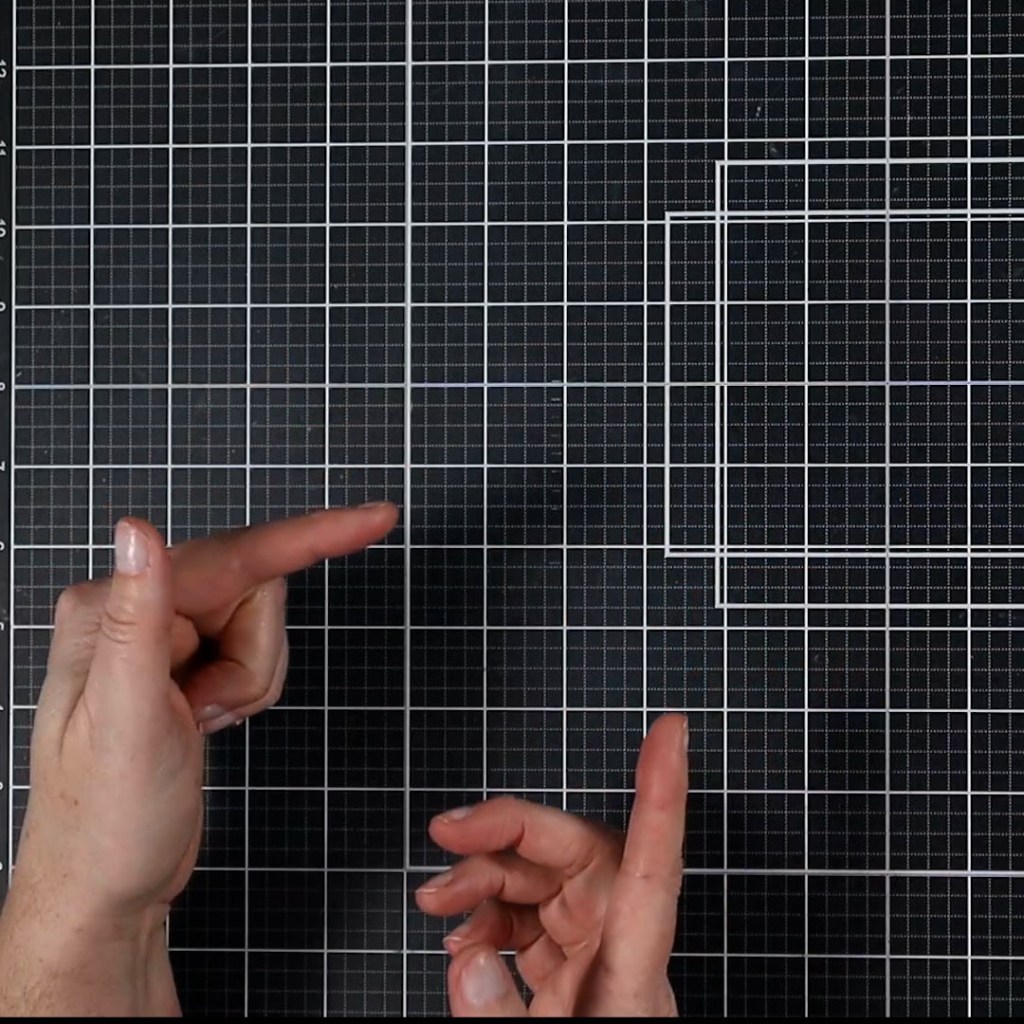
So, on with my first happy mail goodies. I received the December “kit” near to Christmas and held off making the unboxing video until after the holidays. So here is what the December set involved.
On the left you can see the outlines of all the pieces included: The larger floral corner, two sentiment plates and the coordinating three dies to cut out the pieces. The center shows off how things will look when used as designed. To complete the monthly kit there is a roll of hot foil. This time it was matte gold. How can you have shiny foiling that is also matte? I don’t know the magic they use, but the results are beautiful!
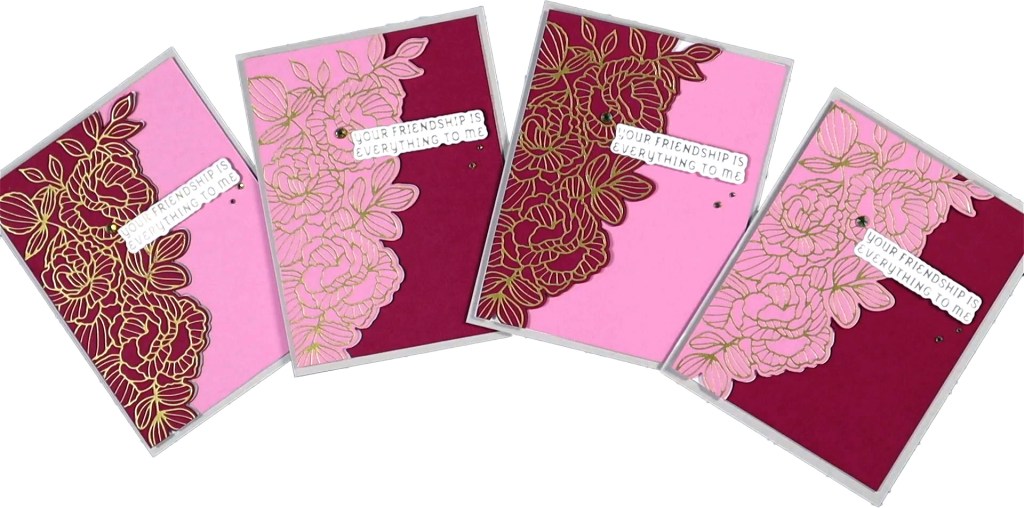
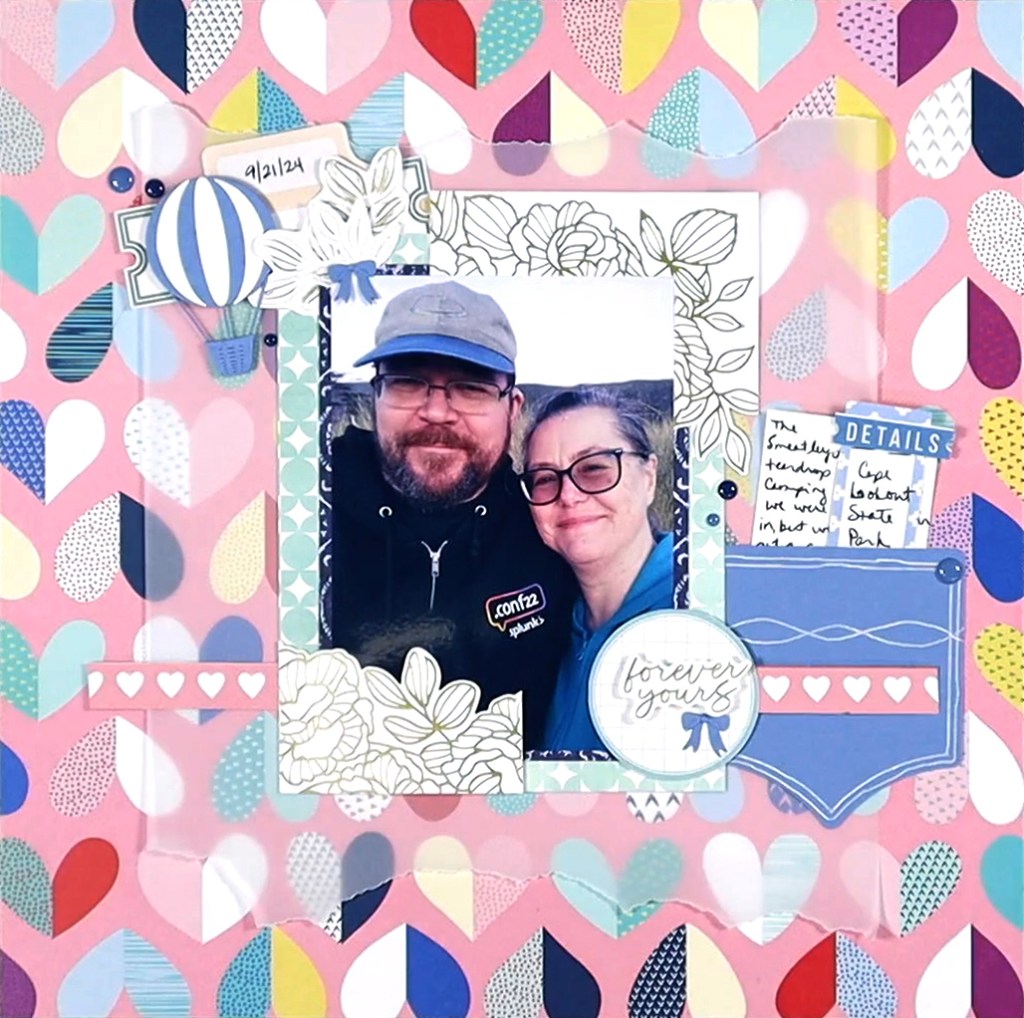
I had a learning curve to overcome when setting to work. After a few mistakes I got the hang of it and the results were amazing. I quickly got ideas on projects and made it happen. I created a set of cards for Galentine’s Day as well as a scrapbook layout using some scraps.
Neither of these images do justice to the shine of the foiling. You should watch the video to get the full effect.
I hope you’ll join me later in the moth as I unbox and explore the January glimmer products. I’m looking forward to adding more shiny goodness to my projects this year.
Join me all month of advent as I open each day of the Spellbinders Crafty Advent Calendar. Some days I will create a project and some days I’ll just show off the goodies. No matter what, I know I will use each and every product at least once this month. So much fun awaits!
If you missed previous days, be sure to go back and see the first seven days as well as days 8-14. If after seeing all the goodness you’d like to grab one of these calendars, they are on discount right now (as of 12/11/24) over at ACherryOnTop.com**. For now, let’s dive into the next section of fun.
Day 22: Pink Sequins
Day 23: Floating Cat
Oh my goodness! This cat is so dang cute. If you remember back on the 6th we got a very cutesy bee that I said was not my style? Yet today I’m in love with cute? I think the difference is that while the bee is big-eyed and anthropomorphized, this cat is more cat-representative and in a silly situation. So, yeah, cute vs cutesy is a thing for me.
Now, my daughter said the cat should be in a box. Thus, I made it so! (I wonder how many people will get cats as Christmas gifts this year??) At any rate, the box was easy to make. I cut two squares of the same size. One became the box base. The other I trimmed at an angle on the two sides, and I trimmed off a bit of the bottom. This creates perspective for the front box flap. I glued it flat down at the top and popped up the bottom edge with some foam squares for dimension. The two side flaps were simply slivers of cardstock. A bit more ink shading where things over lapped and voila, box!
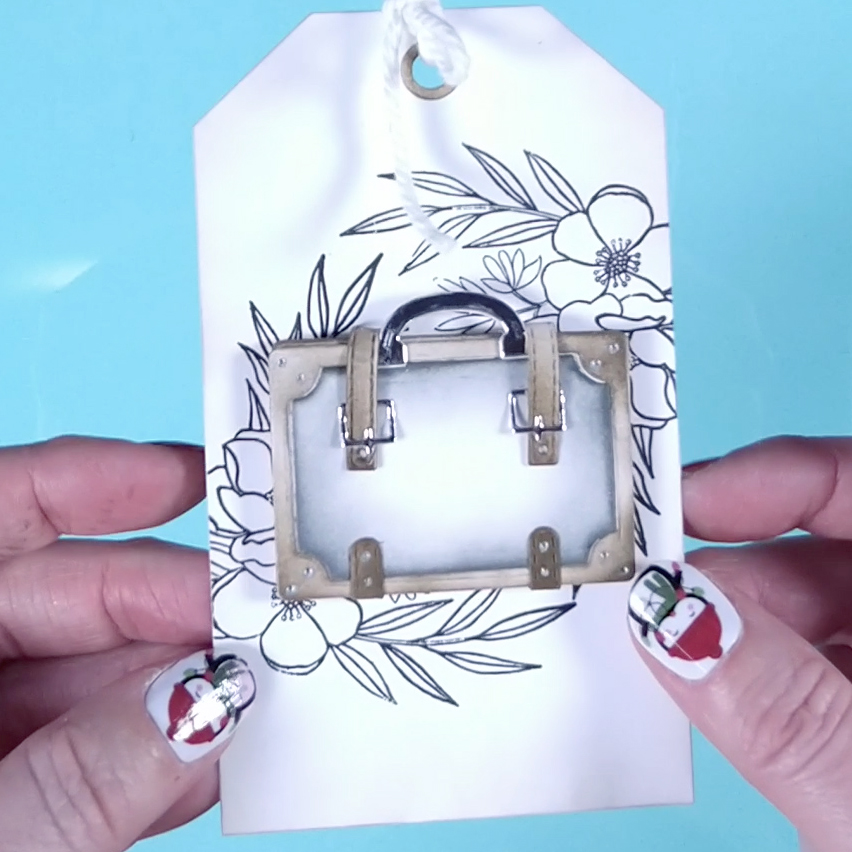
Day 24: Luggage set
What a fun die set! You know I had to do a bit extra for this one. The still photos do not say it all. You really have to watch the video to get the whole experience!
** I use affiliate links when possible. When you shop using my links I earn a very small commission at no cost to you. I appreciate your support of my work in this small way!