Okay, this one is for some of my friends who may be reading this. Those of you who don’t think you are scrapbookers. I challenge you to do a scrappy thing. Print some 4×6 photos. Make some 4×6 cards out of some pretty paper, any paper. Write some notes on that paper about your photos. Slide them into a photo album that has individual 4×6 photo pockets. Done. Now don’t you feel like a scrapper?
Remember, photos only tell part of the story. Add your words, it makes the story more complete and preserves it for the future. You never know who may look at your photos down the road!
Remember to post your project to your favorite online gallery and leave a comment here with a link to your post. I’d love to see your project!
Saturday May 1st, 2010 is National Scrapbooking Day. Every year in May scrapbookers and crafters celebrate the hobby. Many online sites have activities to follow along with for the day. I’ll be playing along with My Pink Stamper and Club Creating Keepsakes with their activities. I will also be having a couple of friends over for some in-home scrapping fun. And, I will be posting challenges and my project to match the challenge throughout the day on Saturday. I have 8 challenges planned, so I hope there are readers out there who would like to play along. If you decide to do a project based on my challenge, I’d love to see it. Post it to a gallery such as Flickr, Picasa, Club CK or another favorite and leave a comment on the challenge post with a link to your gallery.
Do you have a favorite online site that is hosting NSD challenges? I’d love to know about it. Leave a comment on this post and let me know about it!
These past couple of months have been the beginning for me of trying to get my work out in the public eye. In an earlier post I said I was able to have one layout featured on a popular blog. That is a start! I’ve also tried to get a short design team position as well as entering a card making contest. Neither adventure turned into anything, but it sure was interesting trying. Here are some of the projects I used for the two contests.
If you have ever thought of publishing your work, don’t be afraid to try. The worst thing that happens is that you spend a little time and money on your work and they say no. Its not the end of the world!
Here was one of my entries for a Cricut-based blog’s short-term design team. I took a shape from the Storybook cartridge and turned it into a photo frame by cutting and gluing multiple layers of cardstock together. The final layer had the frame cut out of it and decorated with pattern paper.
The card making contest had 5 themes to enter. Here are three of my 5 entries…
My scrapbooking life changed a few years ago when I purchased a new tool. Now I don’t think I could live without it. It is my portable photo printer. I hadn’t purchased a photo printer before this because I had a hard time finding the size I wanted and because the cost per print was much higher than what I was used too paying. I wanted to be able to print 4×6 and also 5×7. Most didn’t do the larger size. This printer is an HP Photosmart A616 and I love it. Not only did I get those print sizes that I wanted, but this particular printer can do 4×12 panoramic prints as well.
Printing at home costs more per print, but I find in the end it actually costs me less. This is true because I only print the photos I really want when I want them. No leftovers, no unused photos, no duplicates lying around. I use Photoshop Elements to crop & correct my photos before I print and if I am using small sizes I can arrange multiple photos on one sheet of paper. This means less cropping trash going into the garbage.
I found that this printer was freeing because my photos were actually holding me back from scrapping. I would have a pile of digital prints that I had to wade through. I had to decide which ones I really wanted to print. I had to wait until I had enough favorite saved up to upload to a printing site (or burn to a CD for in store printing). Then I got this pile of photos back and felt overwhelmed that I had to scrap them all right away. It was just too much for me. Having my own printer & editing software meant I could have my photos in whatever size I wanted when I wanted them. It actually made it easier for me to create!
I don’t know what printers are on the market today, but if you have been thinking about a portable photo printer go searching and see what you can find. You just might find what you are looking for.
I’ve known about Big Picture Scrapbooking for a couple of years now. I took some classes last year and really enjoyed them. When I got their newsletter recently I saw a class that I just had to join. And I am making my kids do it with me. The class is called Everyday Adventures and it is based on the book How to be an Explorer of the World by Keri Smith. It is supposed to be exercises in seeing the extraordinary hidden in the ordinary. I’m curious to see where it leads us.
Our pre-class assignment was to make Goggles of Enhanced Perception. So here we are decked out in our goggles.
We created our own journals to record our findings for the 20 exercises throughout the class. The kids decorated small spiral bound notebooks. I made mine from scratch using brown cardstock, white & black markers and watercolor pencils from Stampin’ Up. The chipboard accents are from my stash, covered with white embossing powder and inked with alcohol ink (Tim Holtz).
And here is my Day 1 exploration. The assignment was to sit and make a list of 10 things you hadn’t previously noticed about the place when you first sat down. I sat in my doorway and did the assignment while watching my kids ride bikes. I decided to draw all my decorations instead of using the basic scrapbook supplies I thought I would use. I am not a skillful drawer but I think it turned out very pretty anyway. I may just keep up the hand drawn accents throughout the journal.
So I recently scrapped a secret. It was interesting to make a page and not give away what was happening! The story is this… My friend has become a cat/kitten foster parent. She got her first batch of kittens several weeks ago. We had a chance to go and visit the mama with her little babies. My daughter has been wanting a cat for a while now, but due to some problems we’ve had with pets in the past we weren’t sure we were ready. But my husband and I were talking about the kittens and were coming to the conclusion that we could adopt them and try the pet thing again. So as my daughter was cuddling these little cuties it was in the back of my mind that they may be coming home with us. We didn’t tell our kids any such thing because we didn’t want to get their hopes up in case we changed our minds. As I was making this layout we still had not decided whether or not we would take them. All my journaling had to play around what I was really thinking and feeling in order to keep this secret.
Have you ever scrapped a secret or surprise? You should give it a try, it is an interesting experience.
I thought I would have a video for you for this post but I haven’t quite figured everything out yet. I am working on video and would love to share those with you when they are ready.
In the meantime I have a project to share. I read the My Pink Stamper blog everyday and love Robyn over there. She is energetic and fun. While our styles are very different, with hers being self-described as “so super cute” and mine shying away from cute, I still get a lot out of her videos. So, I thank her for sharing all the time and effort she puts into things. She had a challenge posted yesterday to make a project using green, pink and black. Since I wanted to send a spring card off to someone, I decided to make a card for my challenge. So here you go…
Cricut cartridge: Pagoda (branch cut at 2.5″, flowers at 2.5″ and “spring” mat at 5″
Tatter Angels (Glimmer Mist in Cherub Pink)
Tip: to get the flowers colored with glimmer mist, cut them out of Very Vanilla. While they are still on your cricut mat, protect your mat with scratch paper and then spray them with glimmer mist while they are still in place. Allow to dry while you complete the other steps of the project.
I am in love with a bunch of scrapbooking goodness right now. Some of them I discovered in scrap classes at Creating Keepsakes Convention back in February such as the paper below from Cosmo Cricket. (It is just a rainbow of prettiness.) Some of these things grew on me over time such as stitching. Some of them I just decided on day that I really liked such snails and mushrooms. Regardless of where my love came from, they make me happy and I thought I would share!
I used many of my favorite items on a layout just about… my favorite items! It was a good excuse to put everything pretty on one page. I had fun just playing with products. Here is what I made. It is a double page 6×6 spread for my Pieces Of Me Album. I’ve said it before and I’ll say it again. I think it is important to record your own life as well of that of your kids (for the majority of you who scrap kids and grandkids!).
You’ll notice on the left side there is a little tag sticking out. Well that actually is a tag book that I made that is a big list of my favorite things. Take a closer look…
So go make a page about your favorite things!
P.S. I will have my first video tutorial coming up on how I made the cute little mushroom on my page. So keep an eye out for that!
I have been reading Creating Keepsakes magazine for years now. I started by reading back issues from the library and when those ran out I broke down and got my own subscription. This magazines, other magazines and blogs are filled with inspiration. Sometimes I find I am spending more time reading than scrapping. But all that time is not wasted. Ideas are being logged by my brain, sometimes without my even knowing it. For example I just created this layout.
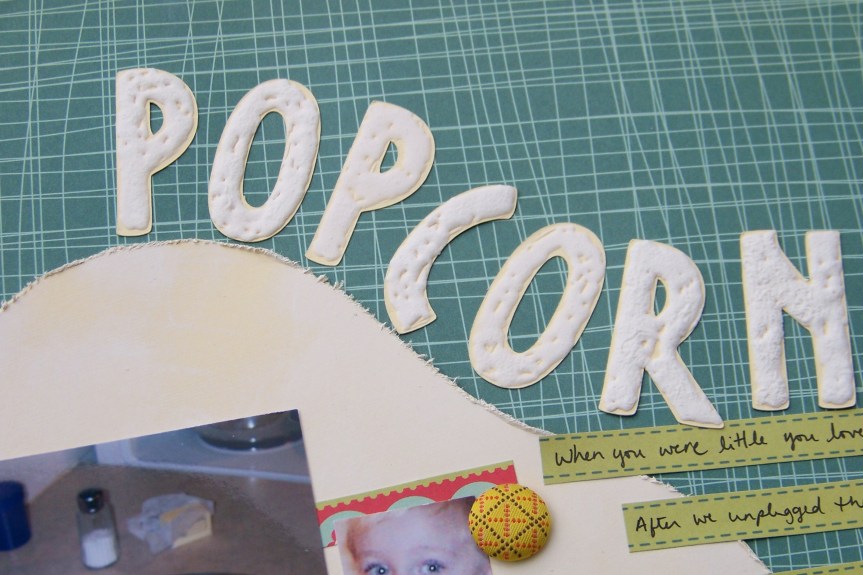
Popcorn Layout
I had fun cutting out cardstock in the vague shape of popcorn for the background, inking edges to mimic butter and adding a fun title. Now here is where the lingering inspiration comes in.
I created the title using Liquid Applique by Marvy. This is a glue like substance that you smear over your project, in this case letters I had cut out with my Cricut (Opposites Attract cartridge). Let the applique dry over night and then heat with a heat gun. The product then gets puffy and, well, popcorn like!
Puffy title created with Liquid Applique by Marvy.
I was pretty excited that I had come up with my very own technique! Well, the more I thought about it, the more I became sure that I had seen something almost exactly like this in a Creating Keepsakes issue. So it wasn’t an original idea, but it turned out to be a good idea!
If you ever feel like you are “wasting time” reading about your hobby more than doing your hobby, don’t worry! All that data is going into your brain, swirling around, combining with other ideas and it will eventually come out somewhere in your work. So you have my permission to pick up a magazine and go read.
Over the years I have learned that any paring of memories and photos means scrapbooking to me. I bet there are tons of people out there who don’t even know they are scrapbookers by that definition! It just goes to show that there are a lot of ways to preserve our personal histories. I just so happen to really enjoy the design aspect of making layouts and playing with interesting papers and other goodies. My style may not be your style. But I think we can learn from each other anyway.
I tend to create very clean and simple layouts. I like when things match well. I am fairly literal with my embellishments. If the page is about swimming then you better bet there will be waves on my page. I like symmetry. When I am feeling wild I may tilt a photo on it side. Now that is adventurous! LOL. But it works for me.
It is funny that I am such a clean and simple girl since many of the layouts I am attracted to are more artsy and layered. For a while I tried to make layouts that resembled the ones that I drooled over in magazines. And it didn’t really work! Somehow, I realized that I shouldn’t be doing that. I should let my art take its own path and be okay with that. Yet I don’t let my style keep me in a box. I am able to play with techniques and products and not feel like I HAVE to create something amazing. I can allow myself to just play and see where the process takes me. And when something less “me” comes out I am amazed and fascinated by that process.
What is your style? What styles are you drawn to? How has your style changed over time? Leave me a comment. I’d love to hear about your process!