It’s not too late!

Here in the United States the Thanksgiving holiday is just a day away. If you are anything like me you had grand plans on sending out heartfelt handmade mail to friends and family, but then you realized the actual date and knew that there was no way things would make it on time. Don’t fret! I have a solution for you: Make one lovely card, take a good photo of it and then send individual messages to loved ones including a photo of your card. This is more personal than the social media blast of “Happy Thanksgiving” yet still takes advantage of the speed and ease of technology.

With that I hope you have a peace filled November no matter where you are in the world or what holidays you do (or don’t) celebrate. I know we all could use extra peace right now.

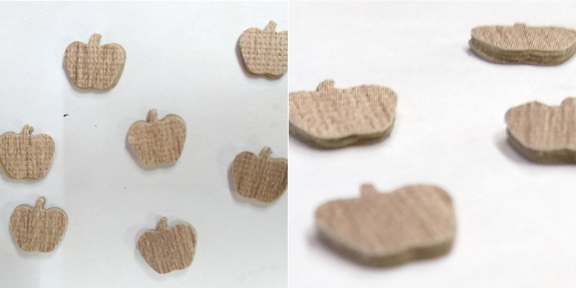
And if you are looking for some inspiration for making that special holiday card, I have this video to share.

Vicki Boutin Storyteller Collection

Ok. If you could hear me right now, you’d hear a squee of happiness. I am in LOVE with the Vicki Boutin Storyteller collection. Let me tell you all about it with this video that walk you through most of the collection.

Next up, let me show you how I added some goodies to this already abundant supply to create scrapbooking magic. Included is a tutorial on upcycling fabric into scrapbook embellishments!

And I’ve dug in and created one mixed media layout (so far!!). Check it out.

I’ll be back later with more video goodness.

Deja Vu take 2!

Well here we are in November and that means I got to work on new kit builds for the month. First up I have my kit build based on Shimelle’s Best of Both worlds project. Her inspiration had a definite fall vibe. I didn’t go there. I went directly the the Vicki Boutin Storyteller pieces in her kit and planned my kit based solely on that collection. She what I used in my video.

My second kit for the month is my Counterfeit Kit Club challenge and this is where the Deja Vu comes in yet again. Last’s months CKC challenge used an inspiration piece which was all too familiar with me and I talked about how I approached that kit build here. Well, this month the CKC projects features an inspiration kit that I actually own. So I needed to think outside of the box again. This isn’t a bad thing for me. In fact that is part of what I really love about the CKC challenges. It gets me to look at my supplies differently, which exercises my creative muscles!

Be sure to watch to the end of the video as I show a unique way to use Nuvo drops to create embellishments! (PS I have a template for you if you want to try this technique for yourself. Download it directly right here.)

SCT Sampler Kit, September 2020

I played with my SCT Sampler Kit for the month of September to create a slimline card. I haven’t done a slimline card in a long while so it is fun to see this card size on a hot trend this year.

This months kit included a stencil from Echo Park so I am getting a little inky. And if you watch to the end of the video I have an envelope making tutorial using the We R Memory Keepers envelope punch board. Links to products are in the video show notes if you want more information.

And before you head off, here is a peek at the final card & envelope.

First YouTube Hop

So this has been a month of firsts for me. I first participated as a guest designer for Counterfeit Kit and participated in the designer project hops there (and I still have more coming!). But today I have my first YouTube only hop hosted by Sara Scraps.

This hop is all about “What Does School Look Like for You?” With the world events this year school is looking very different for many of us. So why not enjoy some inspiration from different points of view on how to document these strange times?

Here is my take, and below I listed links to access all of the other 40 — Yes 40! — YouTubers on this four day hop. Enjoy!

Day 1: Thursday, September 10, 2020
โ€ข Sara Scraps, our host, starts off the fun with her video and a giveaway! Sara Scraps-. Follow the day’s fun from there.

Day 2: Friday, September 11, 2020
โ€ข Khristina Sorge will begin our Friday HOP on her channel. And you can follow her links for Fridayโ€™s fun.

—> Day 3: Saturday, September 12, 2020 (videos go live at 9am EST)
โ€ข Alice Boll
โ€ข Kathy Sonnier McElfresh
โ€ข Nicole Bingaman
โ€ข Jody Compton
โ€ข Vanessa Bell
โ€ขJacqie Malzahn
โ€ข Moira O’Reilly
โ€ขRoni Sue Scrapper
โ€ข Misty Murphy—> You are here with me.
โ€ข Miranda Webber

Day 4: Sunday September 13,2020
โ€ข Christy Harriman will start off the day and you can follow her links from there.

Forgery on the 4th

What does that mean you ask? Well, let me tell you! The Counterfeit Kit Challenge group offers ways for you to use up your stash. By giving us an inspiration kit to work from, the challenge lets us all shop our stash and use what we already own to build wonderful kits.

But what if there is a product in the inspiration kit you really wished you had but don’t already own? You can produce a forgery! Let me show you how I forged two items from the inspiration kit.


And here is the short version if you prefer to get your inspiration this way.

Our inspiration comes from the Scrap Room kit club. They offer fun kits that are on the affordable side so if you want to support them, please do! However, if your budget needs an alternative don’t be shy about DIY! Go ahead and mimic the inspiration you see in the world. Here is the inspiration

VISIT THE SCRAP ROOM FOR MORE INFO

First up I replicated some wood veneer apples that I really liked from the inspiration kit by layering punched elements of cardstock and wood grain pattern paper. Simple!

“WOOD VENEER” APPLE EMBELLISHMENTS

Next up I mimicked a sheet of pattern paper by simply stamping & doing a tiny bit of water coloring. It took some time but it wasn’t hard.

PATTERN PAPER FORGERY

SCT Kit August 2020

I’ve got another SCT Kit for you. Today’s video focuses on what to do when designs go wrong. Let’s face it, we all have days when things just aren’t working. Instead of tossing it in the trash, I kept working and was able to take a step back and pay attention to the design principles that were making my project come out poorly, and find ways to use those principles to rescue my project

Homemade SVG files

I’ve got a new YouTube video up showing the process I went through to create my own SVG cut file. Because I don’t own illustrator, I used an open-source graphics program called Inkscape. You can watch my adventure on my latest YouTube episode.

I ran into a few troubles with this process. I have basic graphics skills so that part was no problem. The challenges came when trying to understand the software itself and how svg files translate into machine-specific cutting software. To begin, the graphics software on my mac was a bit buggy and caused significant user frustration. Plus, it was not very intuitive. I decided to watch a two-hour long tutorial before I could get a hang of the controls.

Once I had those controls problems figured out the actual image creation went smoothly. It was just a matter of welding together some rectangle and text shapes. Voila, lovely graphic simply saved as an svg file type instead of an jpg file type.

How it behaved in the Cricut cutting software and the Silhouette cutting software was yet another story. Find out in my video how it all played out.

If you would like to have this svg file for your use, please visit my freebies page. The video will give you tips on how to make this cut file work if you are using Cricut or Silhouette cutting machines. If you have another cutting machine you’ll have to experiment on how to get it to work in your software.

CKC 2016 #5, final

I got fewer layouts done this year than I normally would. The difference was twofold.

  1. I didn’t pack kits for each layout like I would normally do. This meant I was spending more time browsing through supplies to come up with ideas (see post #3 and #4 to see how my thought processes played out).
  2. The scrap space was full and I had to share a table with other people. That meant I was chatting more with people. It was a good trade off as I had fun getting to know some people who turned out to be really local to me!

Itย is okay that the quantity wasn’t there. I’m happy with what got made and I had a good time. Scrapping is so much more for me than just the final product.

DSC_8991


For this layout it was all about theme. The photo represents characters from a WiiU game called Splatoon. That gameย is all about paint. So, yes I used painting techniques for this layout. Ink puddles and ink splatters were the focus. I wanted a lot of contrast and happened to have a bold, black alpha for my title. I went with that and matted my photo in black as well. Then I added red as another smaller, yet still high contrastย element toย finished it off. These high contrast pieces actually help the colors pop more than they would have otherwise.

Had I planned things better I would have used watercolor paper as the base for this layout. This cardstock did not hold up well to all the water I put on it and it buckled. It isn’t the fault of the paper; that just isn’t what it was meant to do. But again, I went rolled with what I hadย on hand. Like I said at the start of this post, it isn’t always about the finished product!

RECIPE

  • cardstock: Bazzill
  • ink: Ranger
  • large font: Studio Calico
  • small font: Simple Stories
  • stickers: Me & My Big Ideas, Simple Stories
  • epoxy stickers: Eyelet Outlet
  • cork stickers: Hello Forever
  • washi tape words, enamel dots: random stash

CKC 2016 #4

So I have all these photos full of purple. Where to go with the color scheme? I don’t want more purple. So I look through my supplies, embellishments mainly, to see what I can decorateย with and pull colors from those items. I grabbed that die cut that reads “you are my greatest adventure.” (This kid of mine loves to DO things, so I’m often dragged along into her world. So, yeah, she is my adventure.) Pink embellishment? Pink and purple color scheme! I kept the purple smaller with just a strip of patterned paper, rhinestones (her character is named Amethyst after all) and a bit of twine (Honestly, I just needed a filler for the awkward whiteย space at the bottom.) The star pattern paper offers some neutral contrast and provides a bit of theme (the character is famous from a TV cartoon). I grabbed a couple more pink itemsย to create my visualย triangle and threw it all together.

DSC_8995

There is some tonality difference between the main die cut sentiment and the brighter white of the “this!” word and star paper. That might bug some people but I don’t mind. I think the wood veneer actually helps pull in the color from that one die cut and makes it work okay.

So when you are stuck with photos, look to embellishments to find your color scheme and pull together items that helps everything flow.

RECIPE

  • pattern papers: Stampin’ Up (purple), unknown (rest)
  • gems: Queen & Co. (goosebumps), Want 2 Scrapย (rhinestones)
  • wood veneer: Studio Calico, Scraptastic Club
  • letters stickers: American Crafts
  • ink (to color letters): Ranger
  • die cuts, tag, twine: unknown stash