Today I’m taking a tried and true technique and turning it into two different Christmas craft projects. And it you have kids, they can certainly play along.
I have an svg freebie for you of that Christmas tree available in this file download. Bundled together you will get the svg as well as a pdf copy of the instructions for the greeting card. (For the svg along click here.) If you make these projects and post them to Instagram, please tag me @craftysouppics and use the hashtag #craftysoupsharing and we can start seeing each other’s work!
Christmas is on the horizon and I’m busy planning for the holiday. I realized that I had photos from last year hanging around that I hadn’t scrapped yet. So why not tackle those now and share some tips and tricks with you on some festive elements you can add to your Christmas layouts?
In this video I show three ways to use Nuvo drops as embellishments for layouts. 1) Spell out words with the liquid. 2) Create little ornaments to sprinkle around your page. 3) Create frames for photos. (How-to details in the second video)
I love the shine the drops add to this layout. It totally reminds me of frosting on cookies! And that is a bonus tip. You can create some die cut gingerbread or sugar cookie style cutouts and then “frost” them with Nuvo drops!
In that first video I mentioned having already created my frames. In this second video I show you a kit build and then toward the end of the video I feature how to create these frames. Since creating this video I’ve realized that if you create your frames on a nonstick craft sheet instead of parchment then you are likely to get a smoother end result. However the craft sheet can be harder to see through (depending on your brand) and will make working a bit harder.
Here in the United States the Thanksgiving holiday is just a day away. If you are anything like me you had grand plans on sending out heartfelt handmade mail to friends and family, but then you realized the actual date and knew that there was no way things would make it on time. Don’t fret! I have a solution for you: Make one lovely card, take a good photo of it and then send individual messages to loved ones including a photo of your card. This is more personal than the social media blast of “Happy Thanksgiving” yet still takes advantage of the speed and ease of technology.
With that I hope you have a peace filled November no matter where you are in the world or what holidays you do (or don’t) celebrate. I know we all could use extra peace right now.
And if you are looking for some inspiration for making that special holiday card, I have this video to share.
Ok. If you could hear me right now, you’d hear a squee of happiness. I am in LOVE with the Vicki Boutin Storyteller collection. Let me tell you all about it with this video that walk you through most of the collection.
Next up, let me show you how I added some goodies to this already abundant supply to create scrapbooking magic. Included is a tutorial on upcycling fabric into scrapbook embellishments!
And I’ve dug in and created one mixed media layout (so far!!). Check it out.
Well here we are in November and that means I got to work on new kit builds for the month. First up I have my kit build based on Shimelle’s Best of Both worlds project. Her inspiration had a definite fall vibe. I didn’t go there. I went directly the the Vicki Boutin Storyteller pieces in her kit and planned my kit based solely on that collection. She what I used in my video.
My second kit for the month is my Counterfeit Kit Club challenge and this is where the Deja Vu comes in yet again. Last’s months CKC challenge used an inspiration piece which was all too familiar with me and I talked about how I approached that kit build here. Well, this month the CKC projects features an inspiration kit that I actually own. So I needed to think outside of the box again. This isn’t a bad thing for me. In fact that is part of what I really love about the CKC challenges. It gets me to look at my supplies differently, which exercises my creative muscles!
Be sure to watch to the end of the video as I show a unique way to use Nuvo drops to create embellishments! (PS I have a template for you if you want to try this technique for yourself. Download it directly right here.)
In October the Counterfeit Kit Challenge kit build inspiration piece for the month was the Shimelle Best of Both World kit from last month. I did create a kit from the BOBW project already! So I took a second look at a familiar inspiration piece. I took this project in a different direction and created a smaller kit with richer tones and a teen vibe.
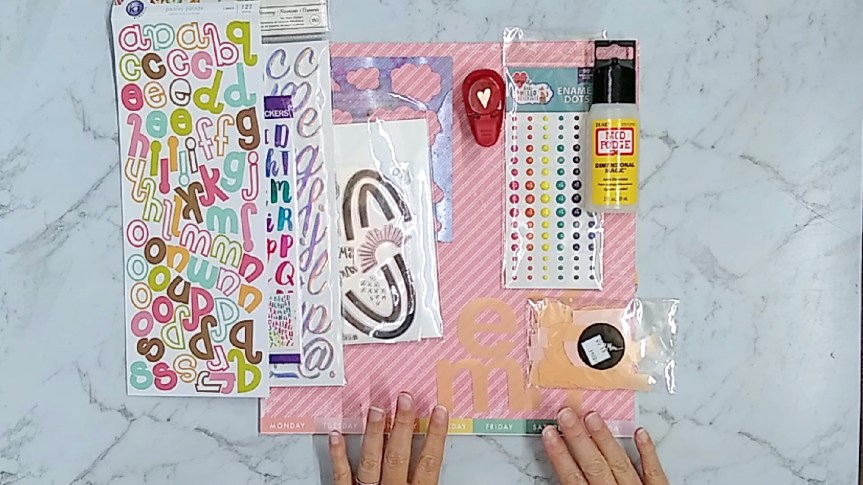
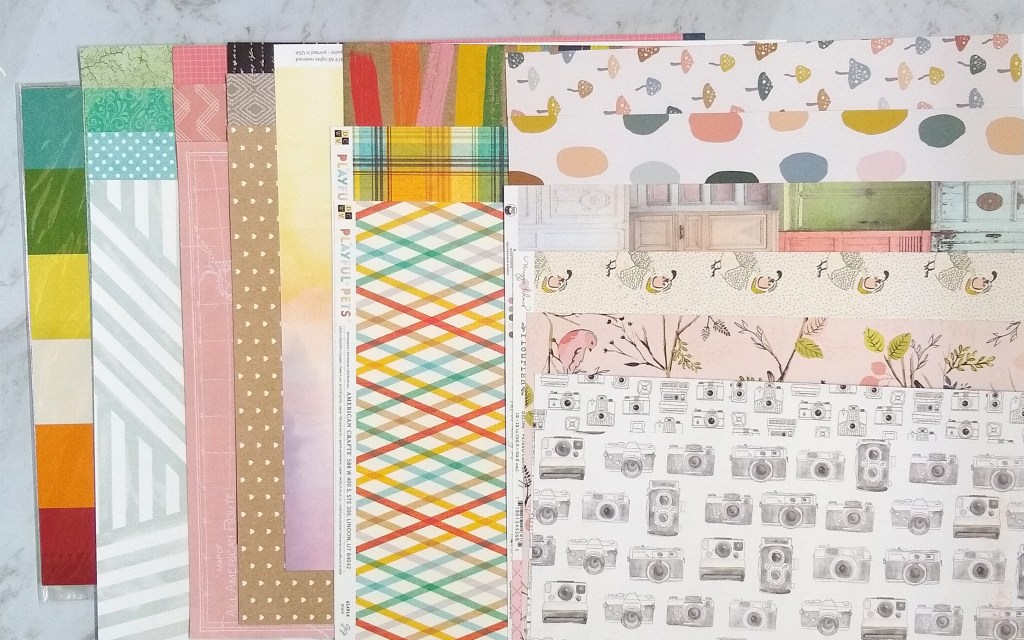
Here is a comparison of the two kits. Kit #1: A softer color palette with more whimsical icons.
Best of Both Worlds Kit, September 2020 Pattern Papers Best of Both Worlds Kit, September 2020 Embellishments
And here is kit #2 I created from the same inspiration image this time around. This has a richer color palette with bold pops of black, a smattering of sparkle, and a teen vibe icons.
Hello All. I’ve got my Best of Both Worlds kit build for October 2020 live on YouTube today. I was away camping this weekend and while I filmed the video before we left I couldn’t get to editing it until we came home.
This kit is on the larger size. It mixes and matches elements of fall, cozy home themes and rustic textures.
I plan to be back in a week or so showing the copper heat embossing embellishments I will create as layering elements for my layouts, so stay tuned for that video.
And here is the gist of the kit in photo format.
Pattern Papers + CardstockEmbellishments including stamps, copper embossing powder, twine, cork, crepe paper, stickers, die cut ephemera, and cutaparts.
I played with my SCT Sampler Kit for the month of September to create a slimline card. I haven’t done a slimline card in a long while so it is fun to see this card size on a hot trend this year.
This months kit included a stencil from Echo Park so I am getting a little inky. And if you watch to the end of the video I have an envelope making tutorial using the We R Memory Keepers envelope punch board. Links to products are in the video show notes if you want more information.
And before you head off, here is a peek at the final card & envelope.
So this has been a month of firsts for me. I first participated as a guest designer for Counterfeit Kit and participated in the designer project hops there (and I still have more coming!). But today I have my first YouTube only hop hosted by Sara Scraps.
This hop is all about “What Does School Look Like for You?” With the world events this year school is looking very different for many of us. So why not enjoy some inspiration from different points of view on how to document these strange times?
Here is my take, and below I listed links to access all of the other 40 — Yes 40! — YouTubers on this four day hop. Enjoy!
Day 1: Thursday, September 10, 2020 • Sara Scraps, our host, starts off the fun with her video and a giveaway! Sara Scraps-. Follow the day’s fun from there.
Day 2: Friday, September 11, 2020 • Khristina Sorge will begin our Friday HOP on her channel. And you can follow her links for Friday’s fun.
Today I’m back with my Guest Designer post for the first layout challenge that the Counterfeit Kit team has for September. If you haven’t seen the kit I built from supplies on hand for this project, please check it out. The layout prompt this time is to use a grid. I’ve got two examples for you.
First off here is my layout process video featuring a central grid block of pattern papers used to highlight a single photo.
Next up I have a grid built using stitched bakers twine on an embossed white cardstock. The grid is expanded in areas to accommodate larger elements like a big title block and inked highlighting of the embossed words on the paper. Check it out.
I hope you enjoyed my examples of using a grid. Don’t forget to check out the full time design team’s takes on this project.


