Glimmer of the Month subscription, month ’25

I’ve decided to dive into the hot foiling trend. I never expected to actually do it. The cost of a foiling machine, the cost of new foiling plates, the space to store it all and getting caught up in the latest and greatest were all a bit overwhelming. And yet. And yet I was feeling a sense of FOMO. It was almost akin to the early days of die cutting; it was the latest and greatest. But would it be an expensive fad to fade away? Die cutting ended up being a staple crafting method. I believe hot foiling is as well.

My shifting thinking toward hot foiling collided with a ridiculously cost saving Black Friday deal. I accidentally ran across a hot foiling machine for a discontinuing price of $25. I was stunned. And also sold! The next step was how to go about adding some hot foiling plates to my stash in a reasonably affordable way.

Enter another collision of events. I had been subscribing to the Freckled Fawn memory keeping kit and cancelled it back in November due to poor customer service. I thought I would take a break from subscriptions for a while again. However, the Spellbinders kits have been in my periphery for a while. When I found the hot foil machine, signing up for a monthly foil plate subscription just seemed to make sense. I could slowly add to my supplies and also some monthly happy mail. I may even try to keep the goodies a surprise if I can manage to avoid all the social media reveals!

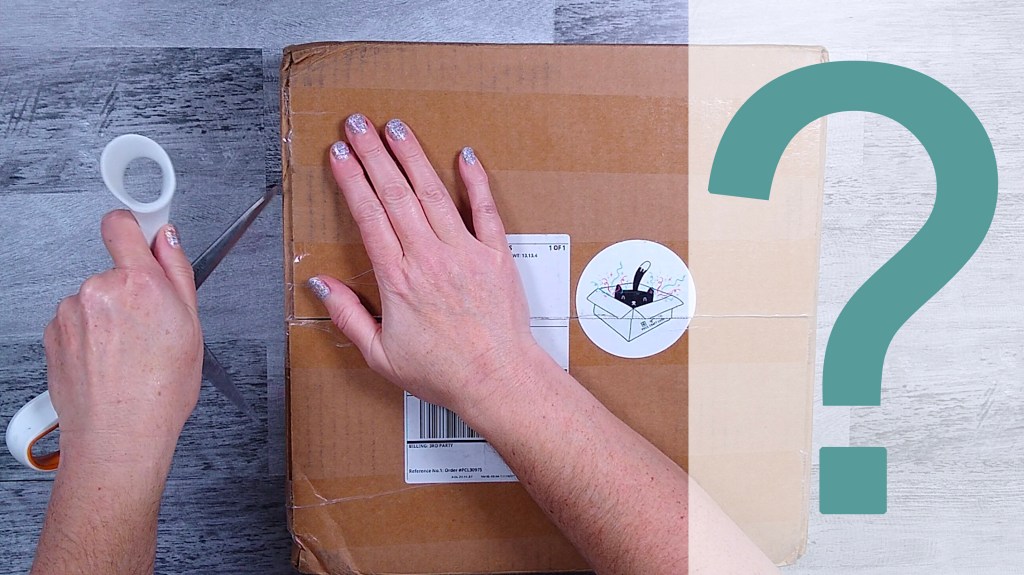
So, on with my first happy mail goodies. I received the December “kit” near to Christmas and held off making the unboxing video until after the holidays. So here is what the December set involved.

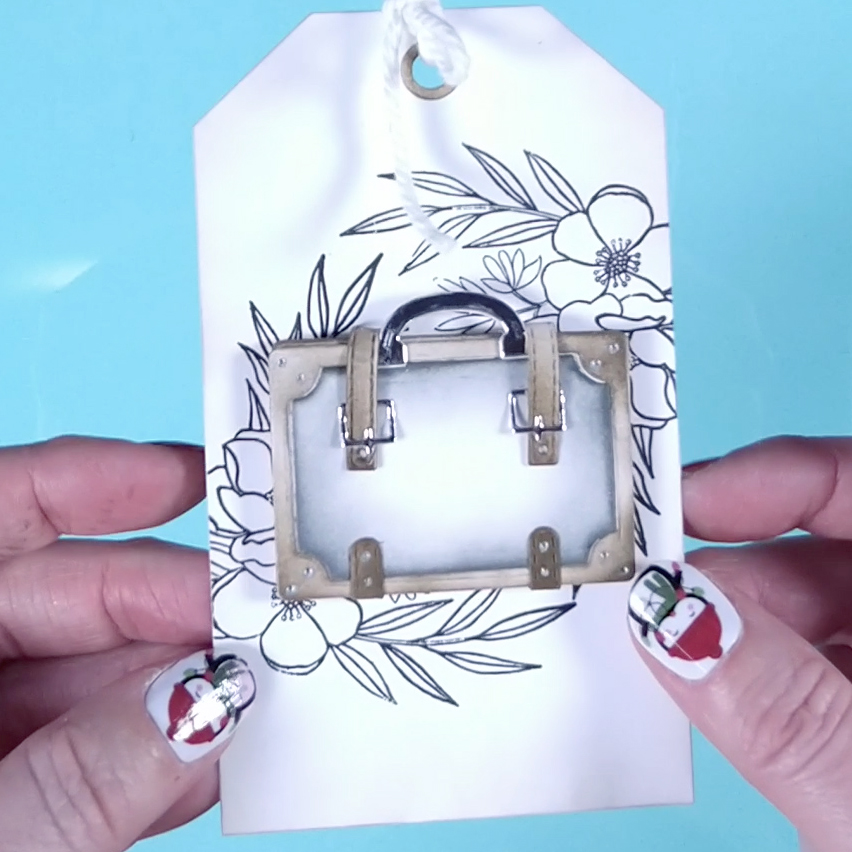
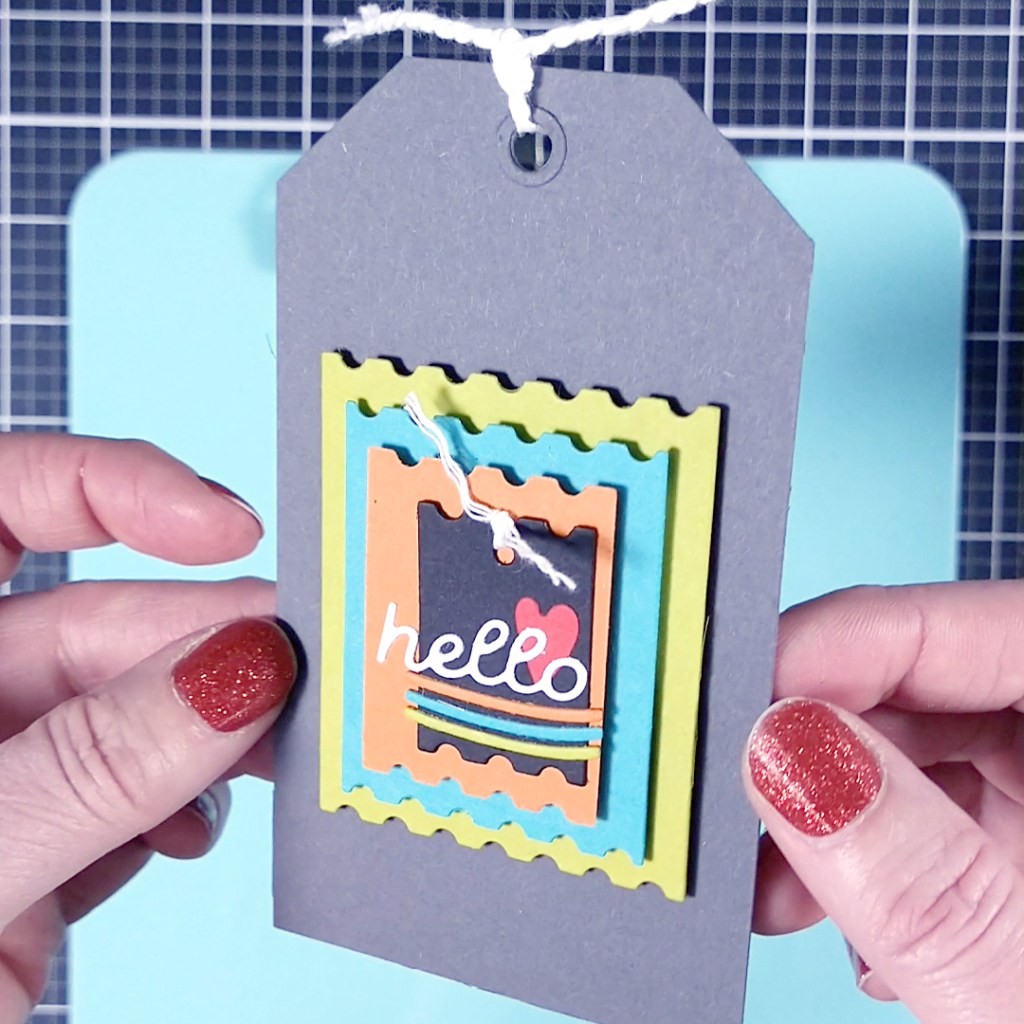
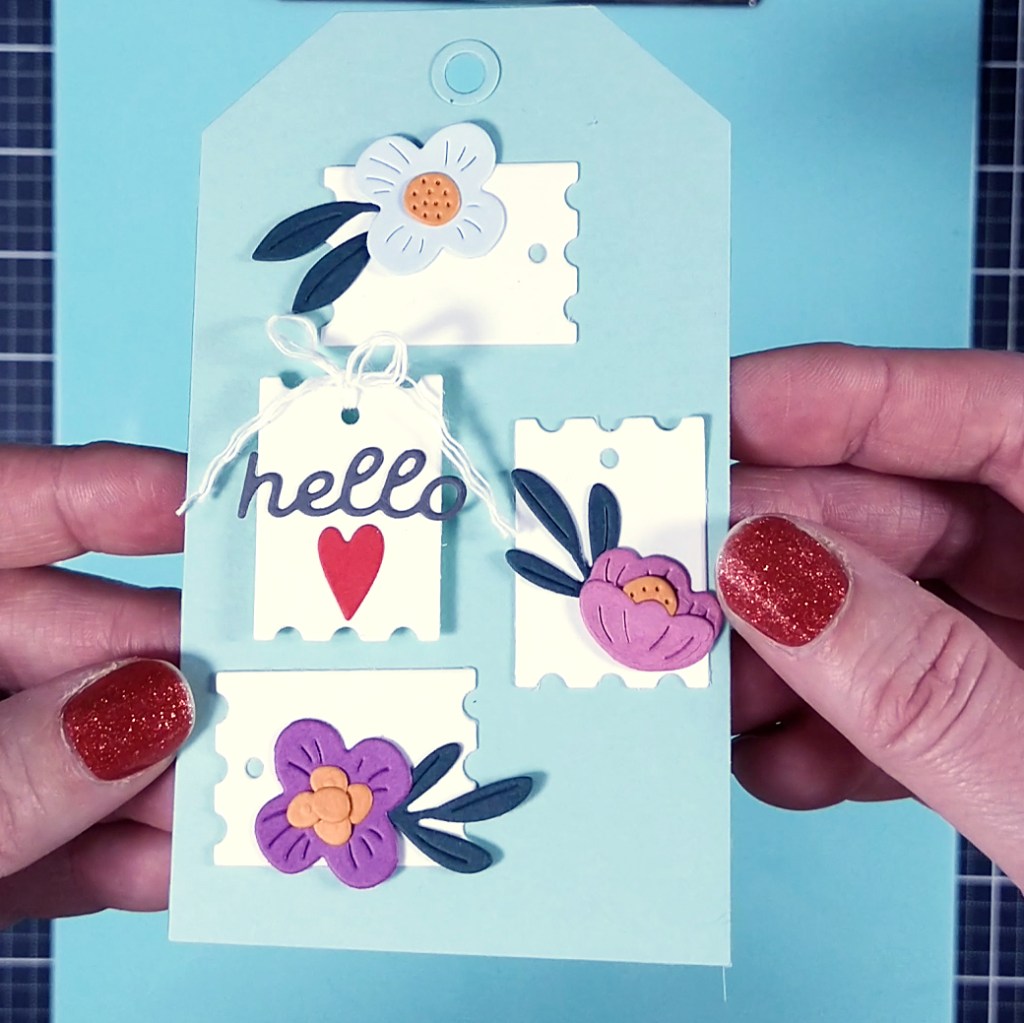
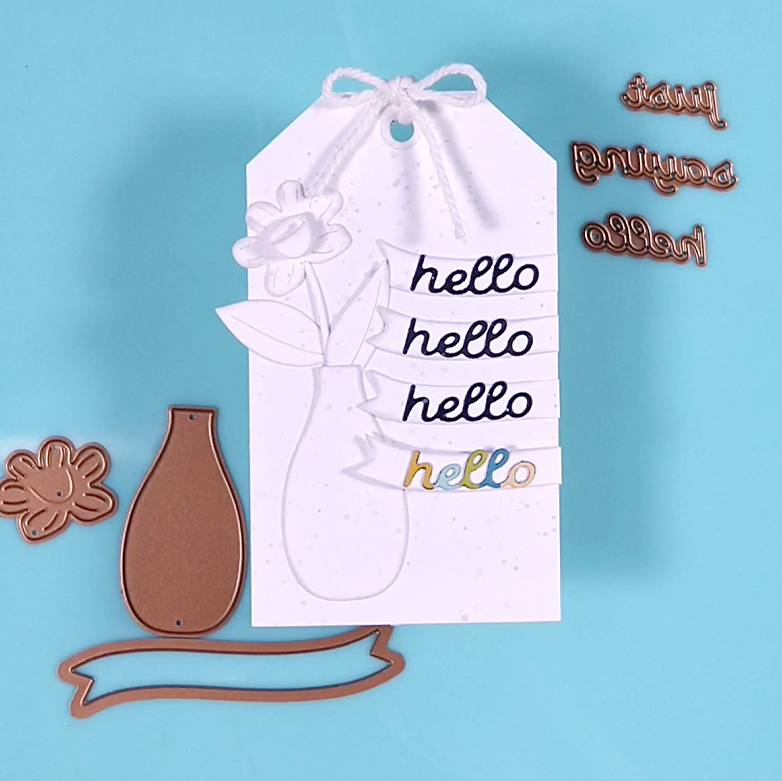
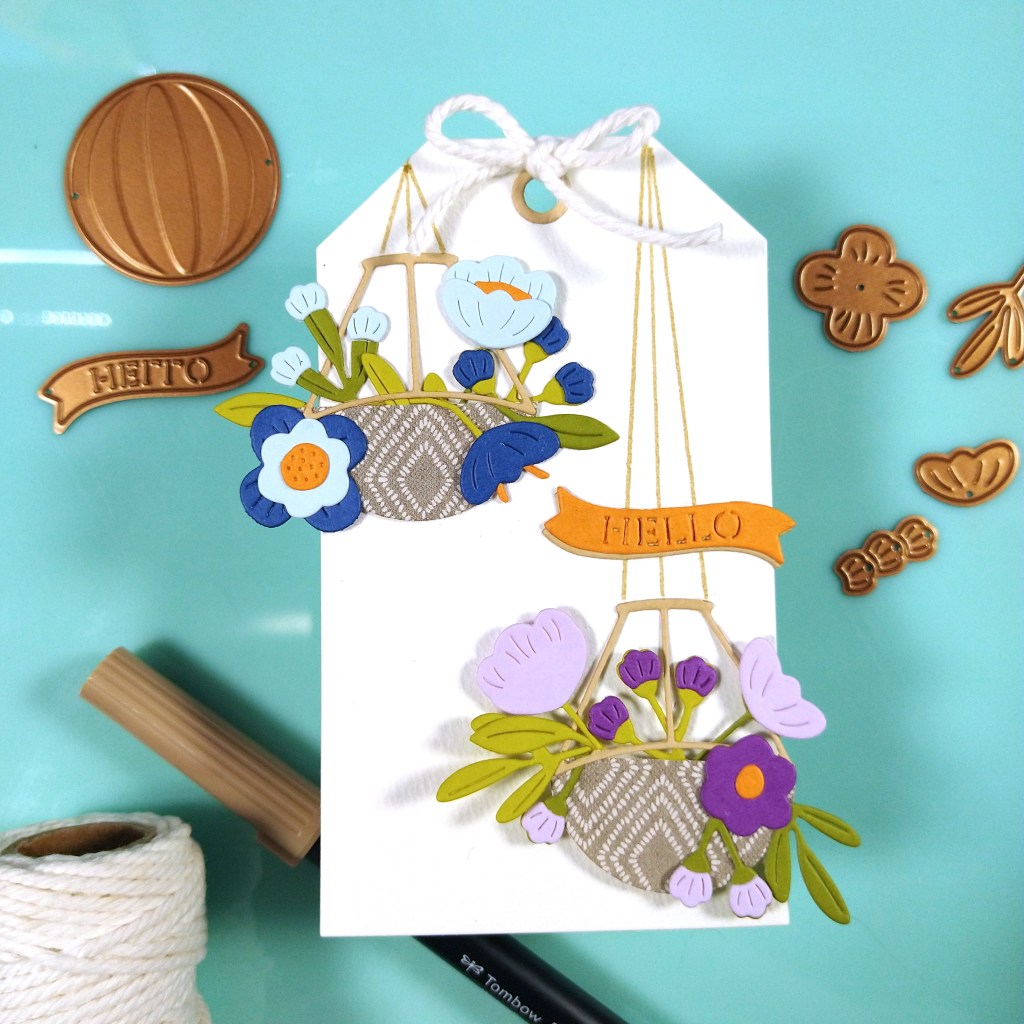
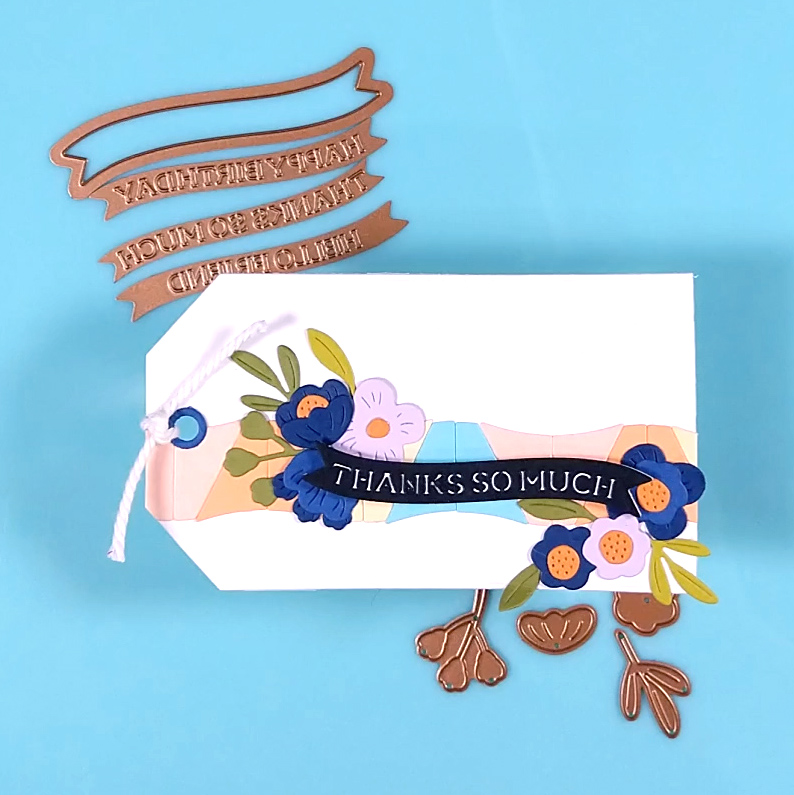
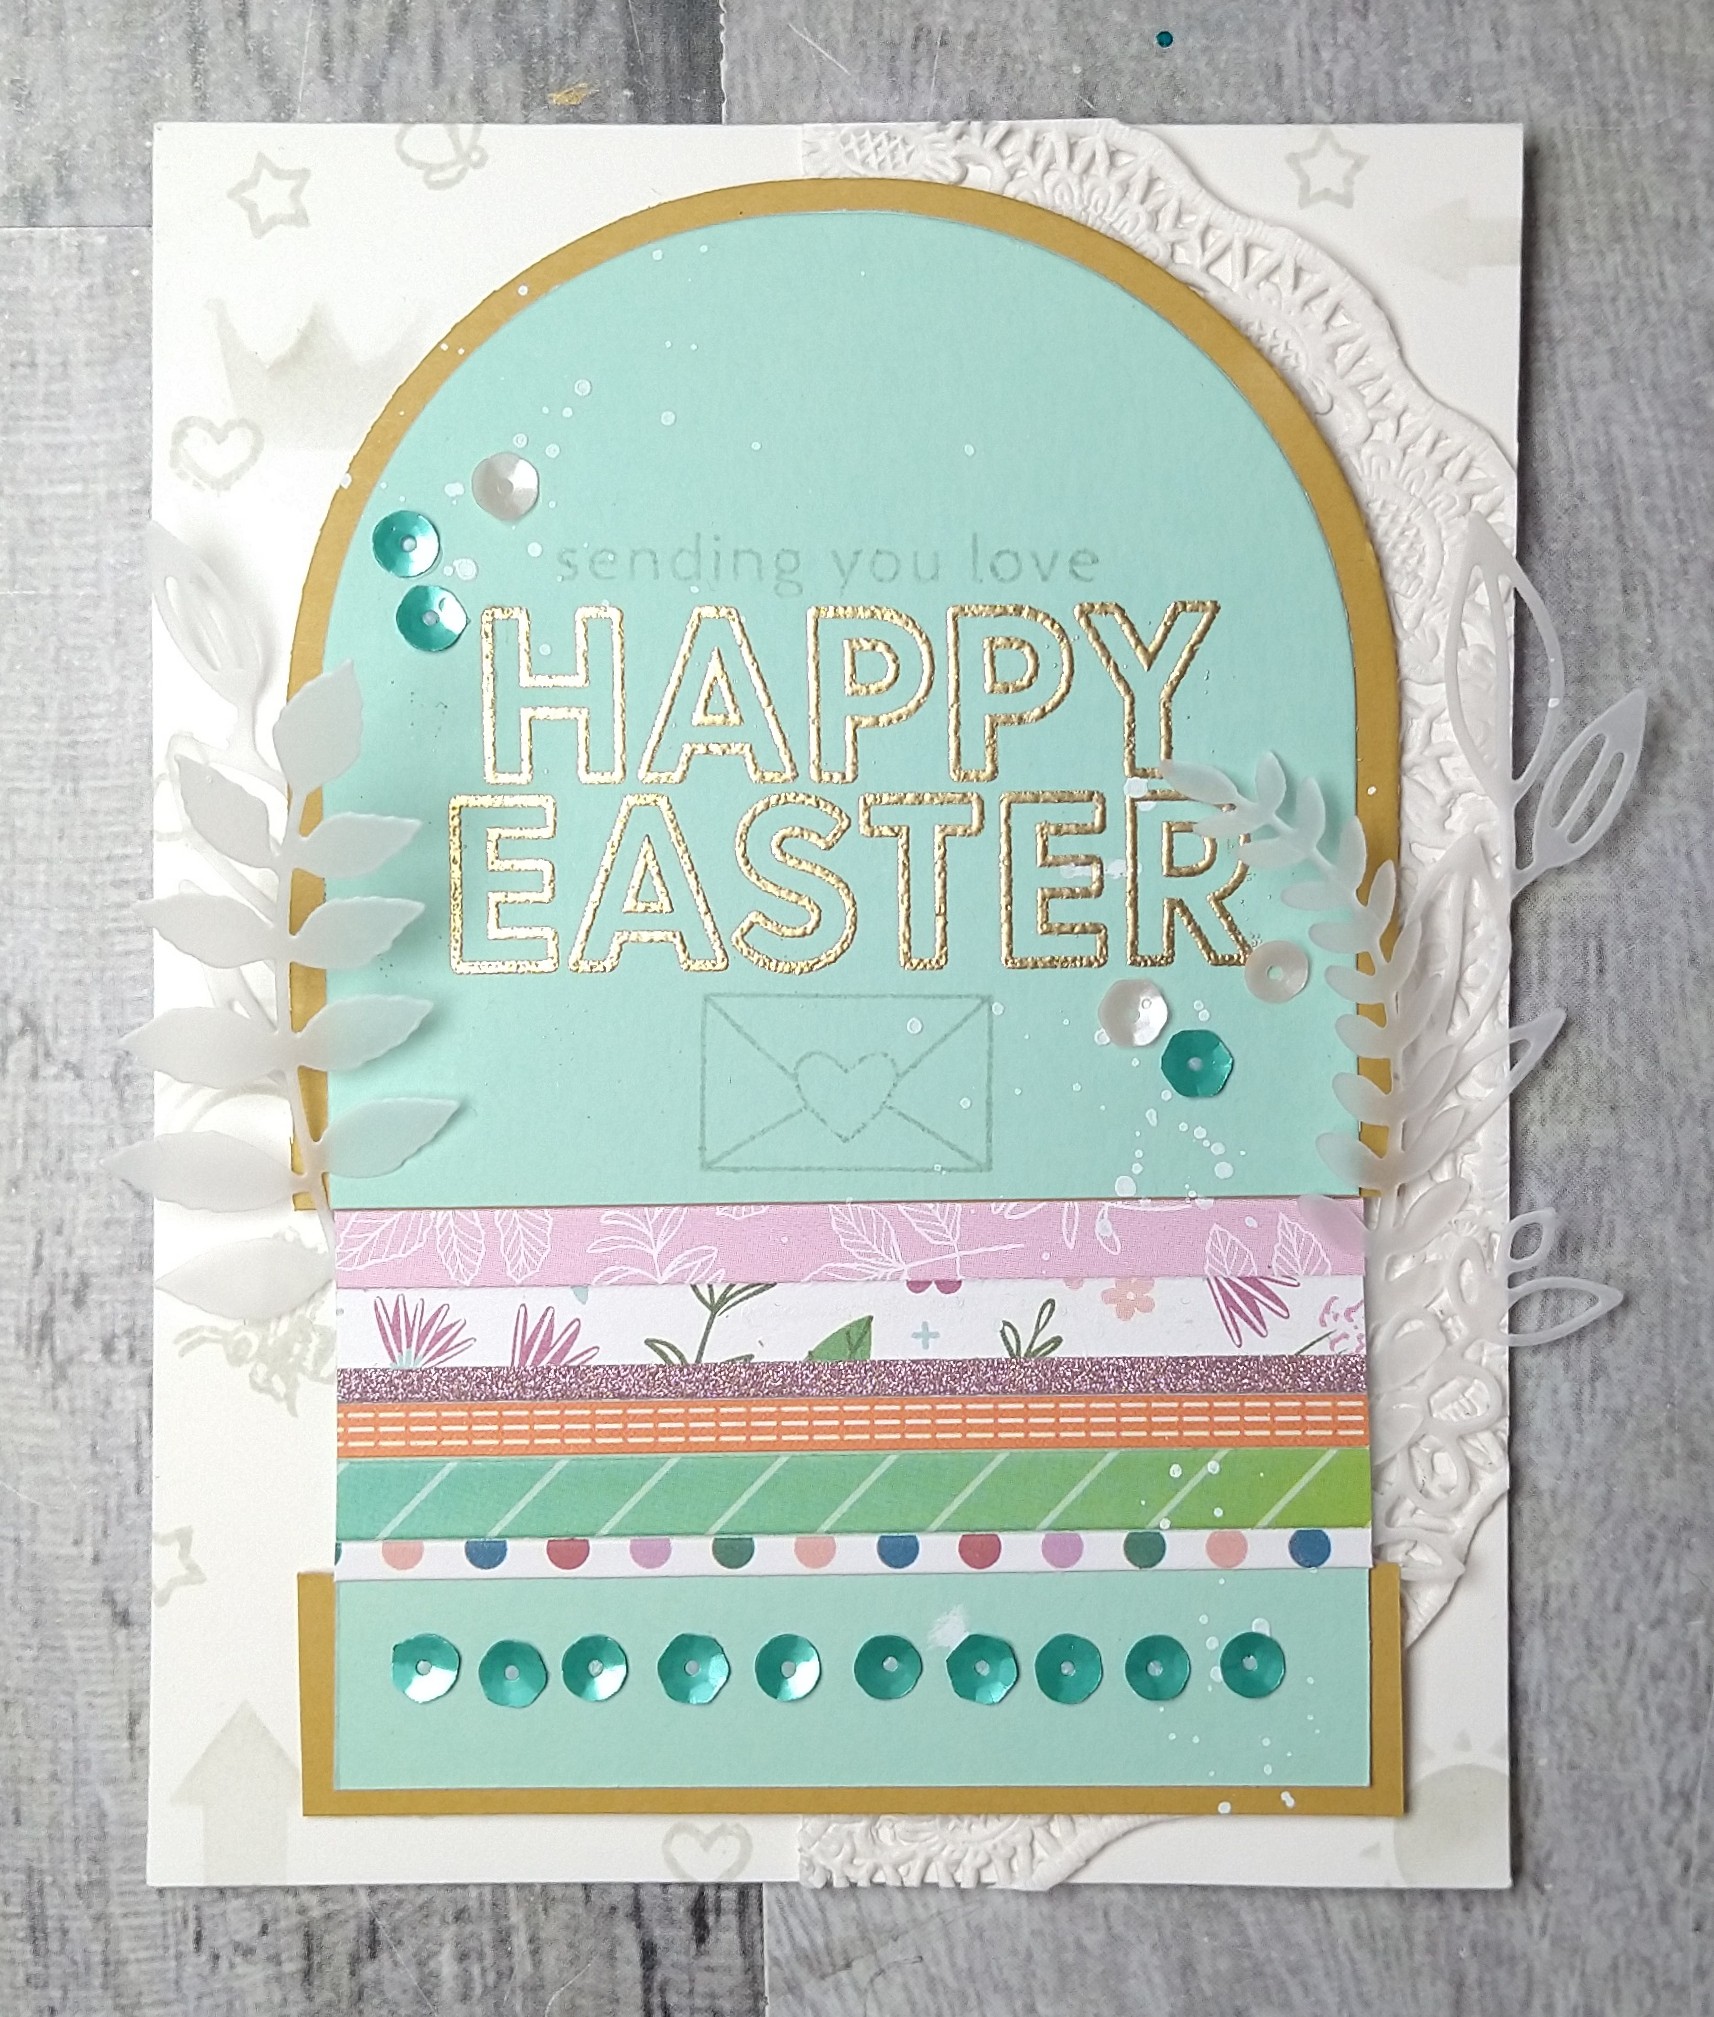
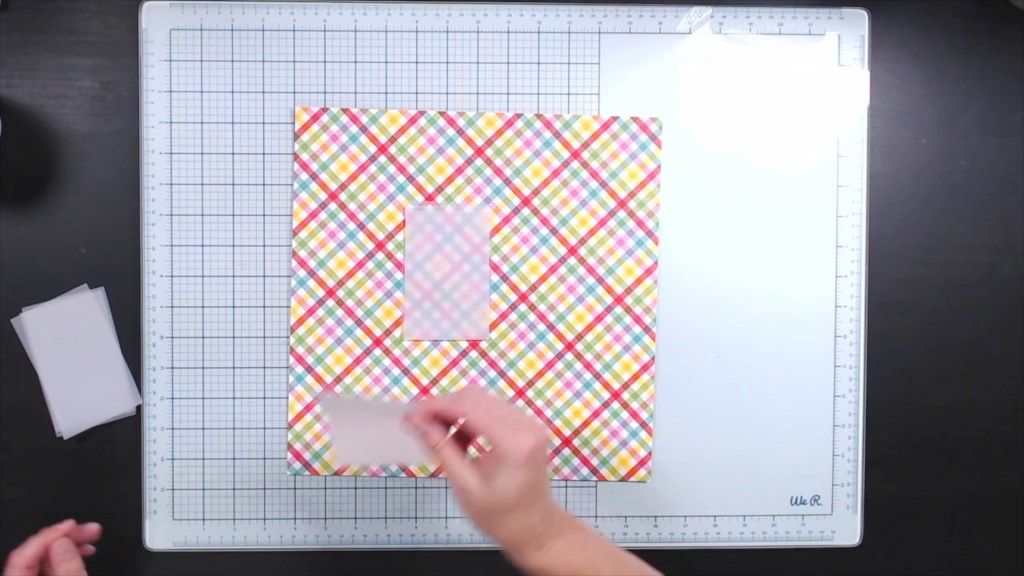
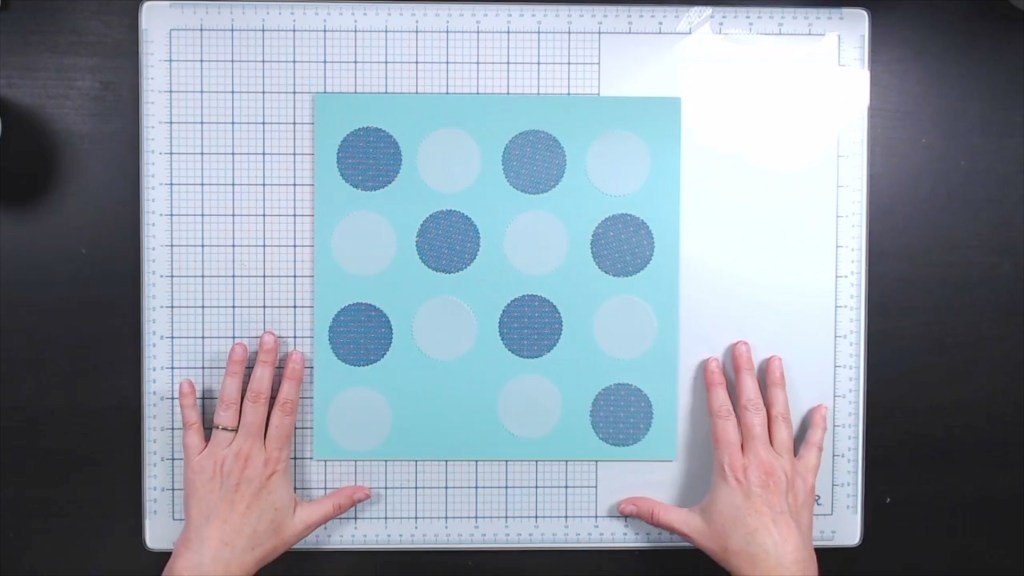
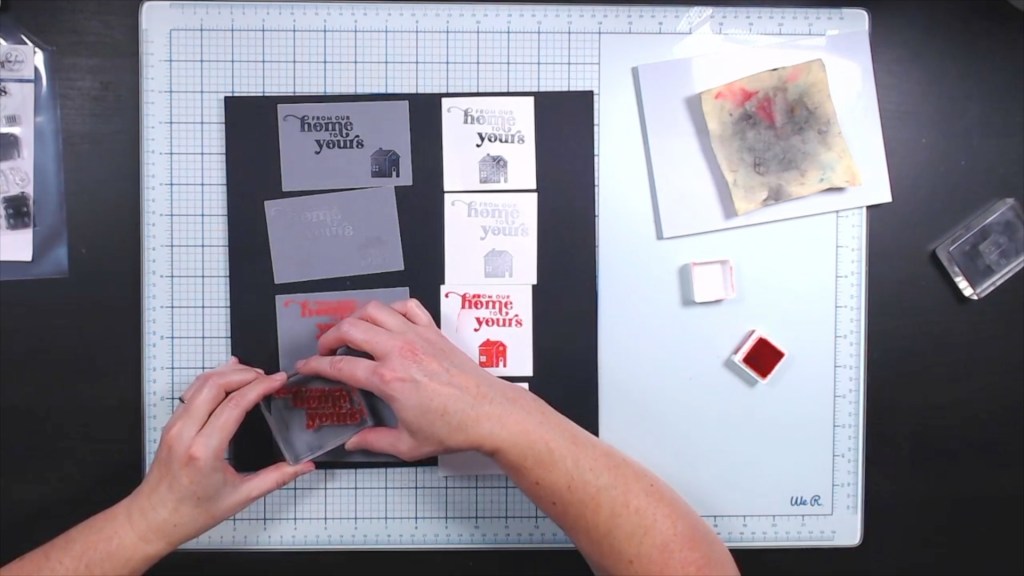
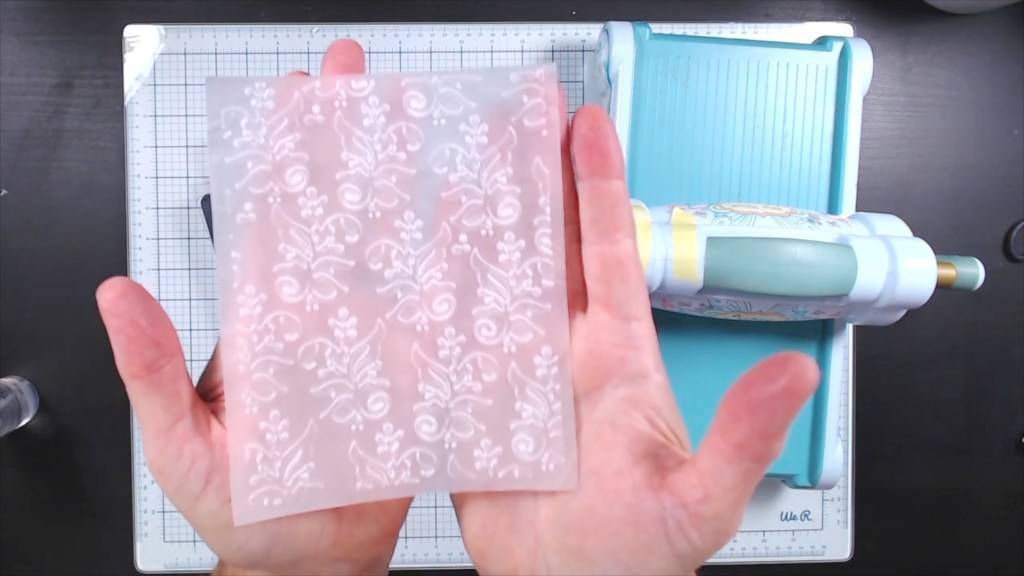
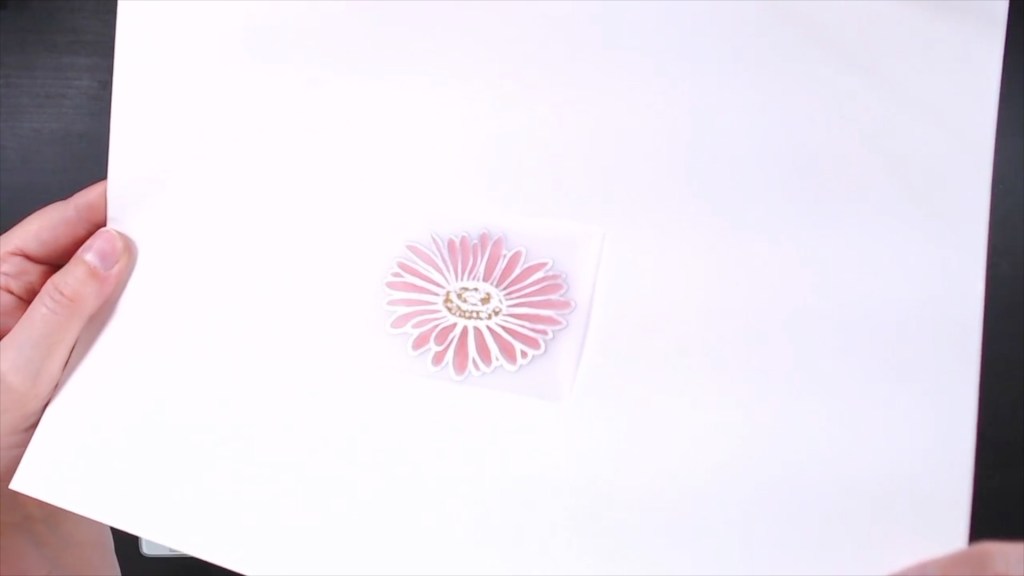
On the left you can see the outlines of all the pieces included: The larger floral corner, two sentiment plates and the coordinating three dies to cut out the pieces. The center shows off how things will look when used as designed. To complete the monthly kit there is a roll of hot foil. This time it was matte gold. How can you have shiny foiling that is also matte? I don’t know the magic they use, but the results are beautiful!

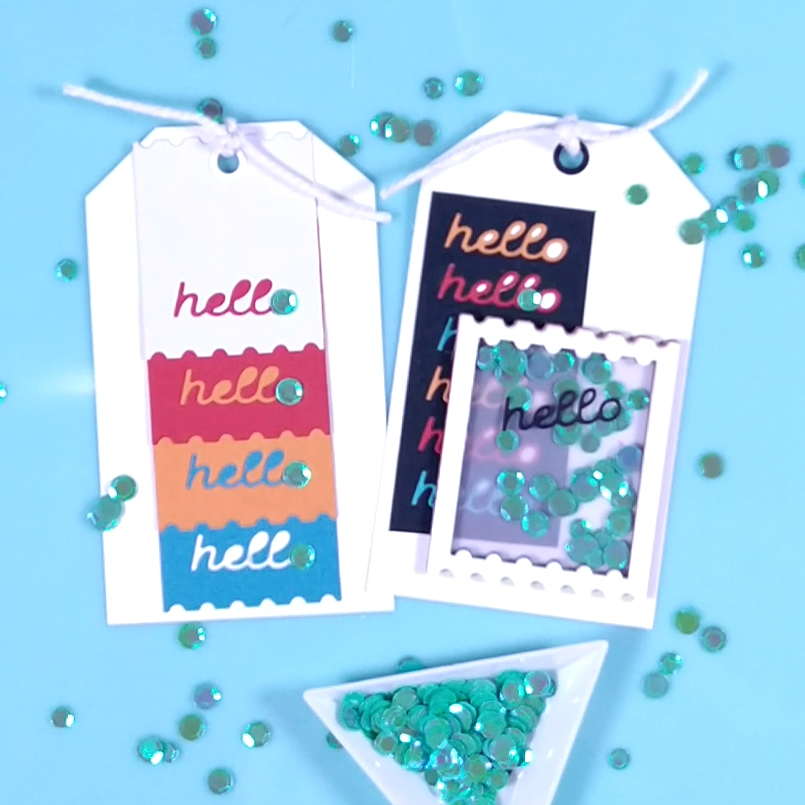
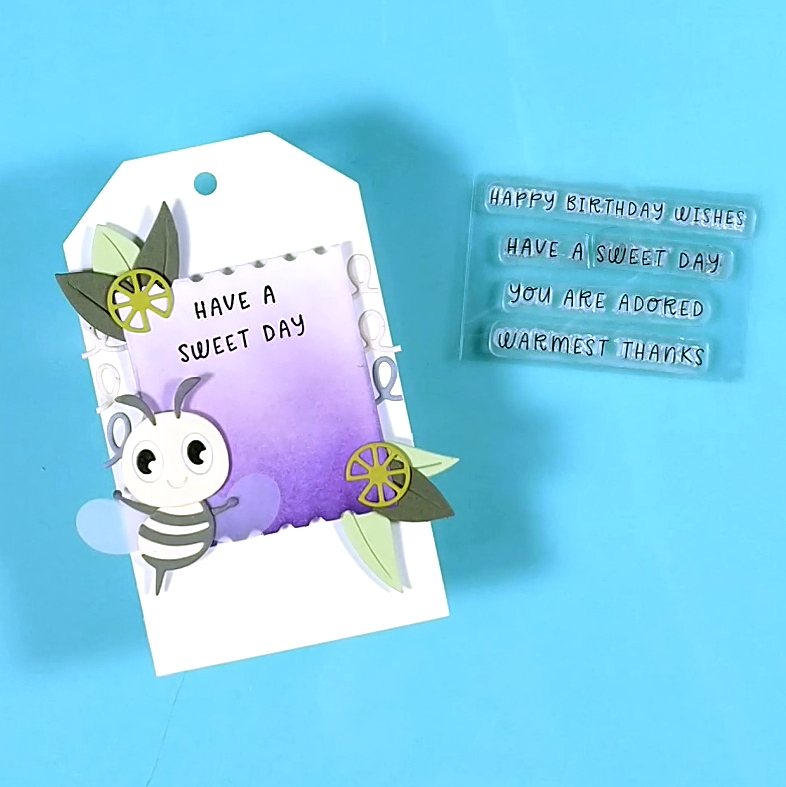
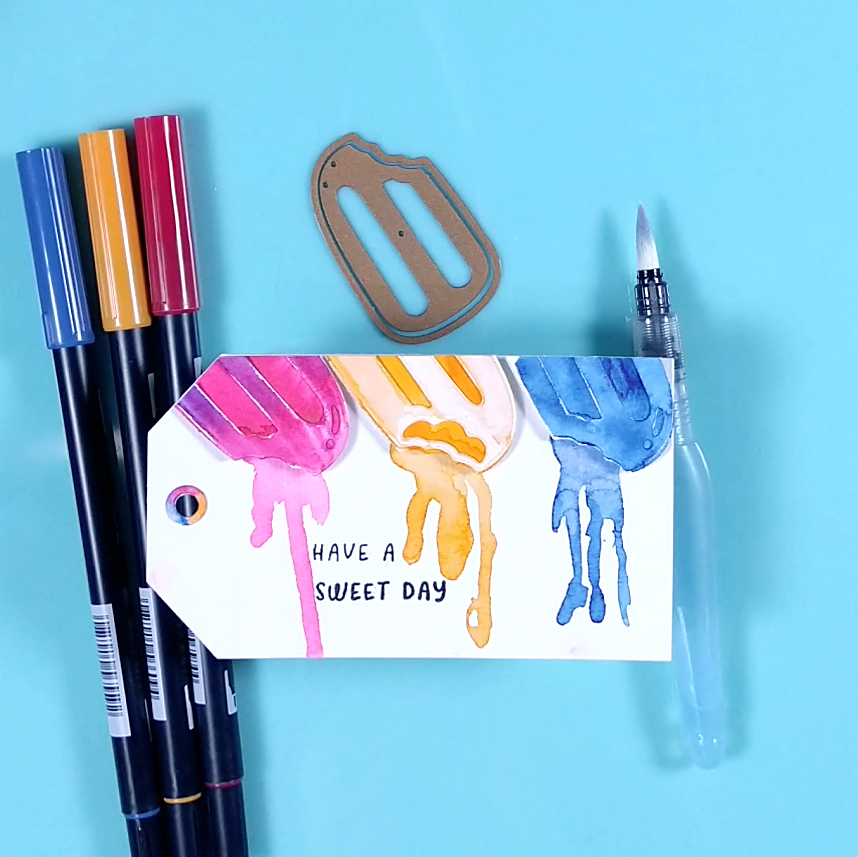
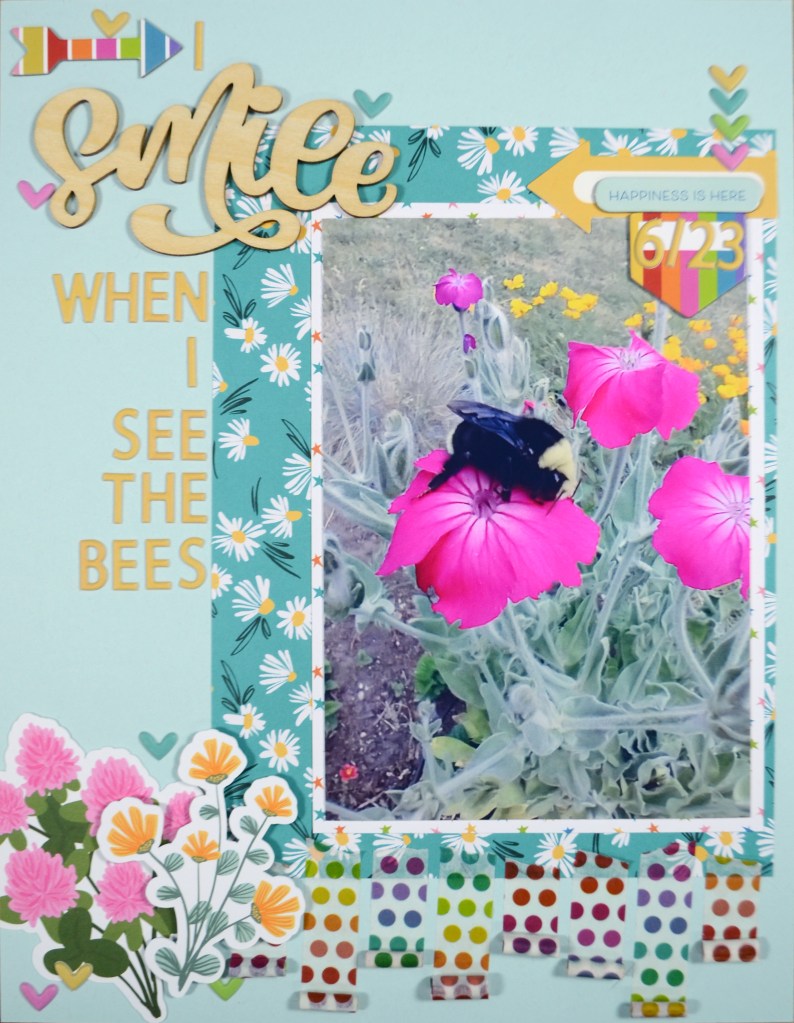
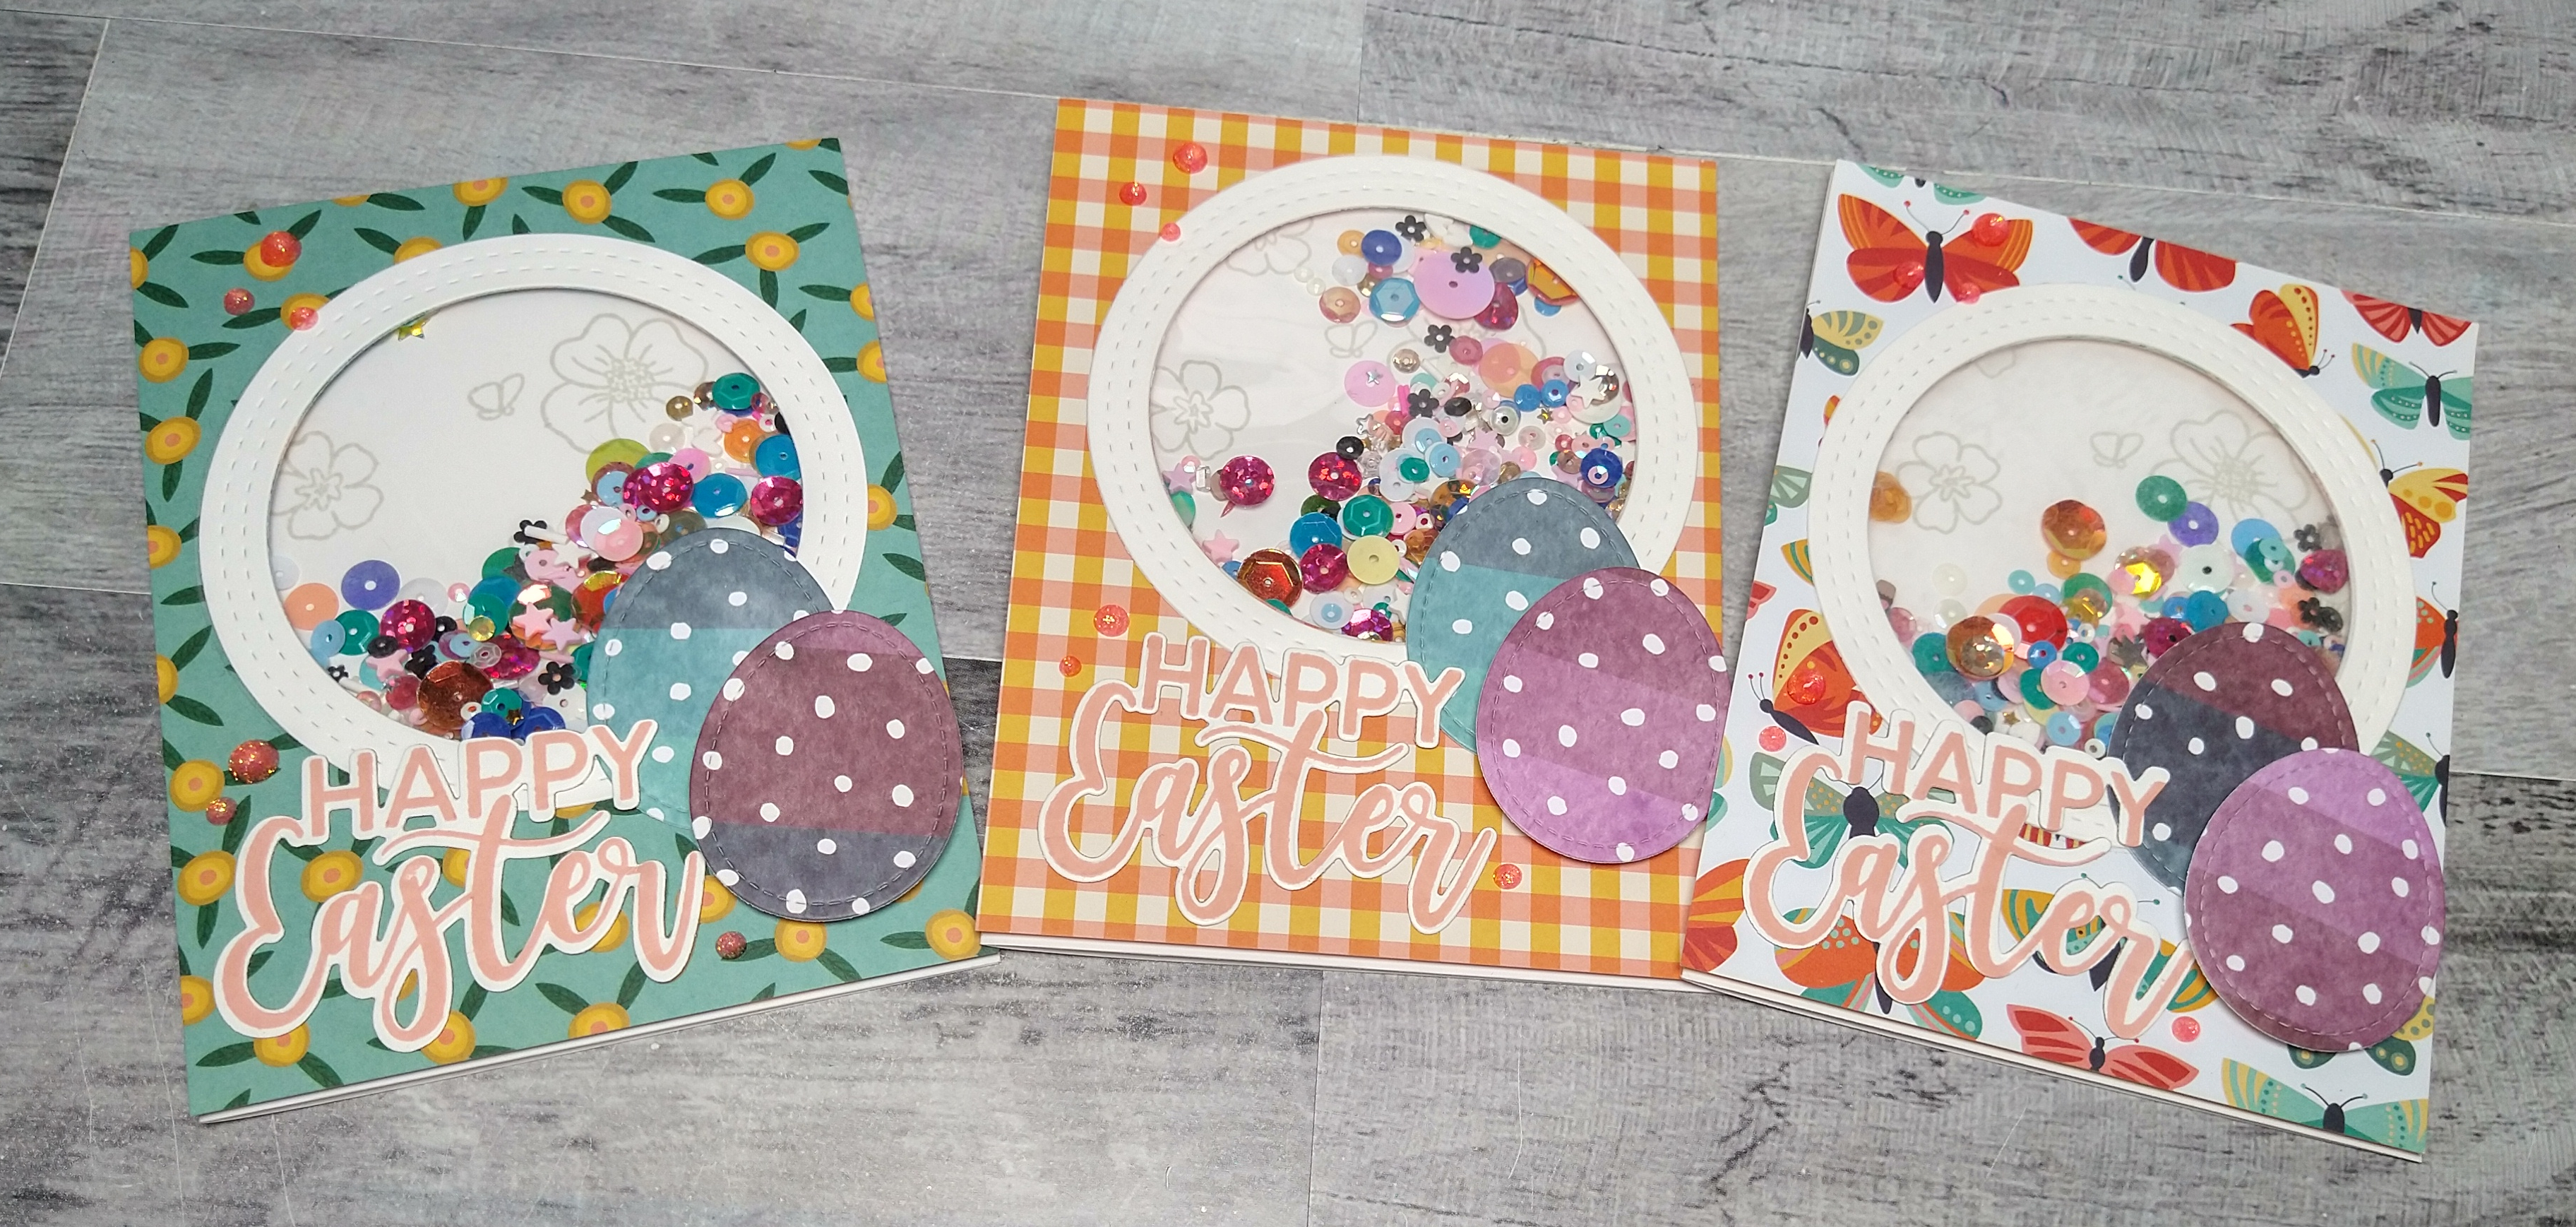
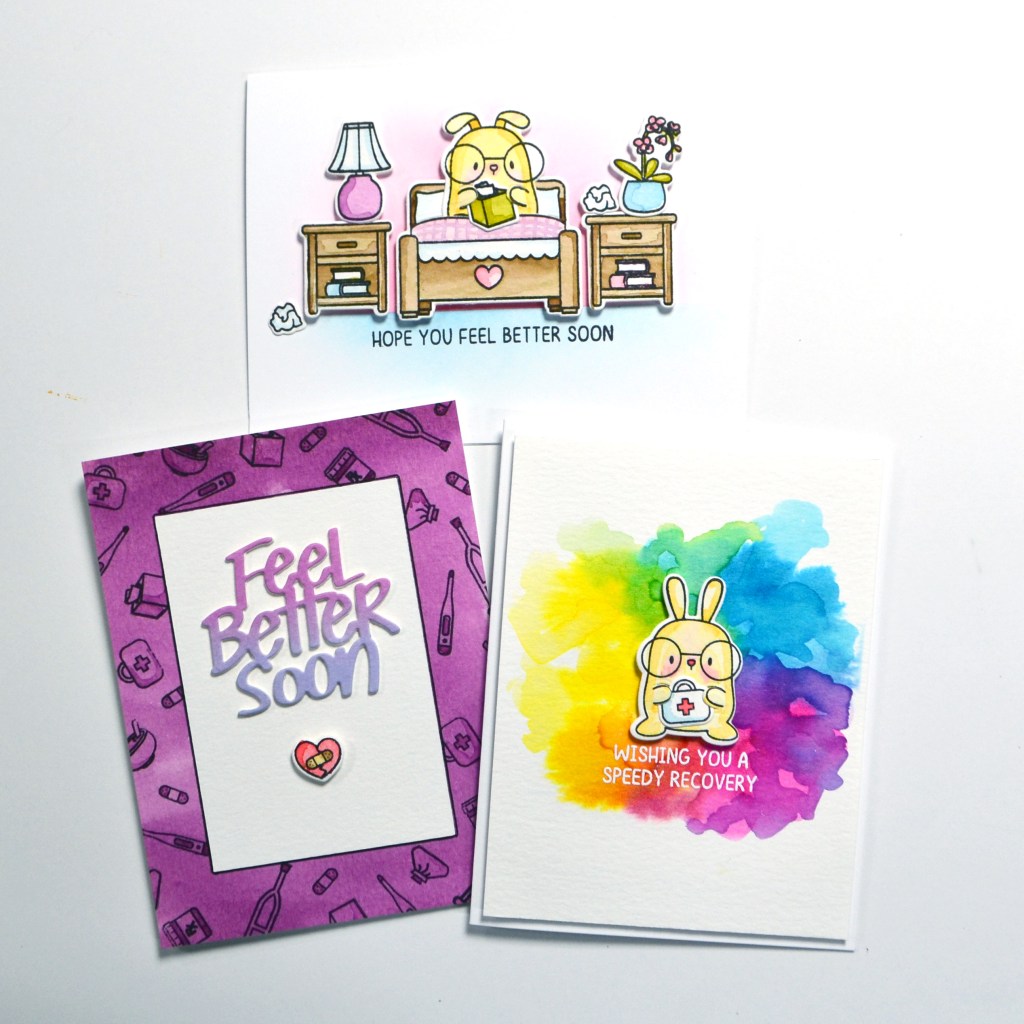
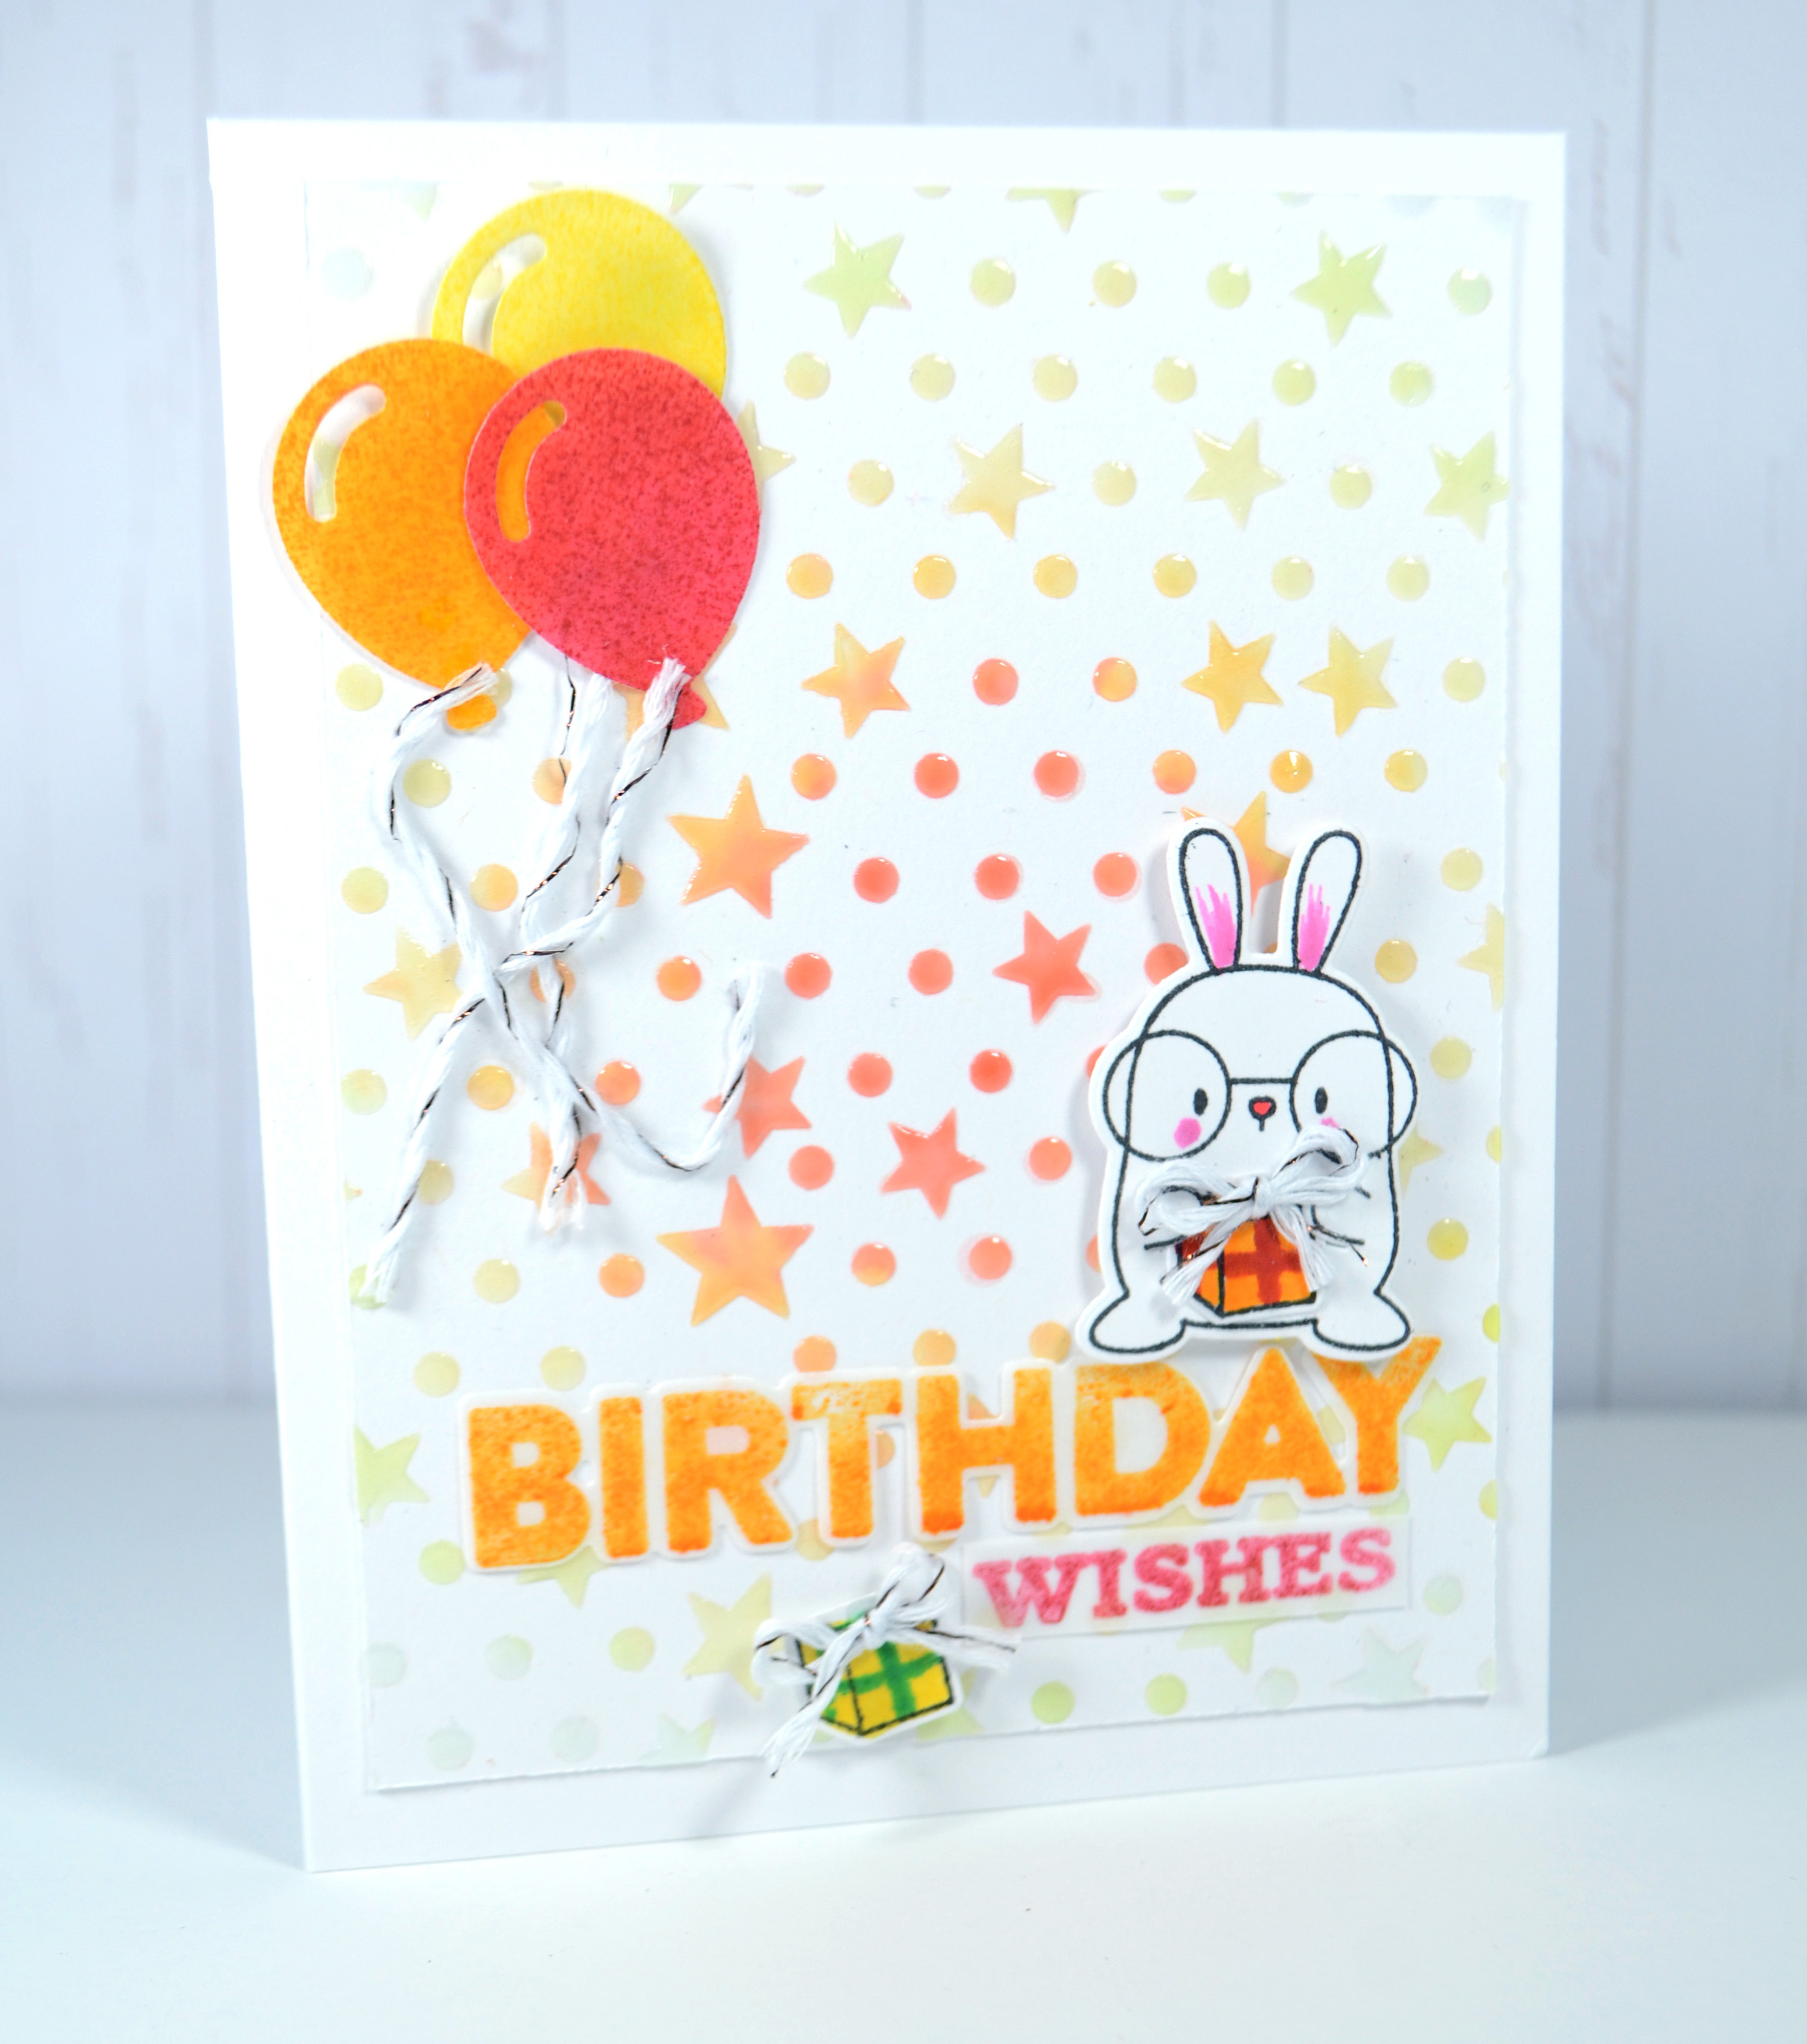
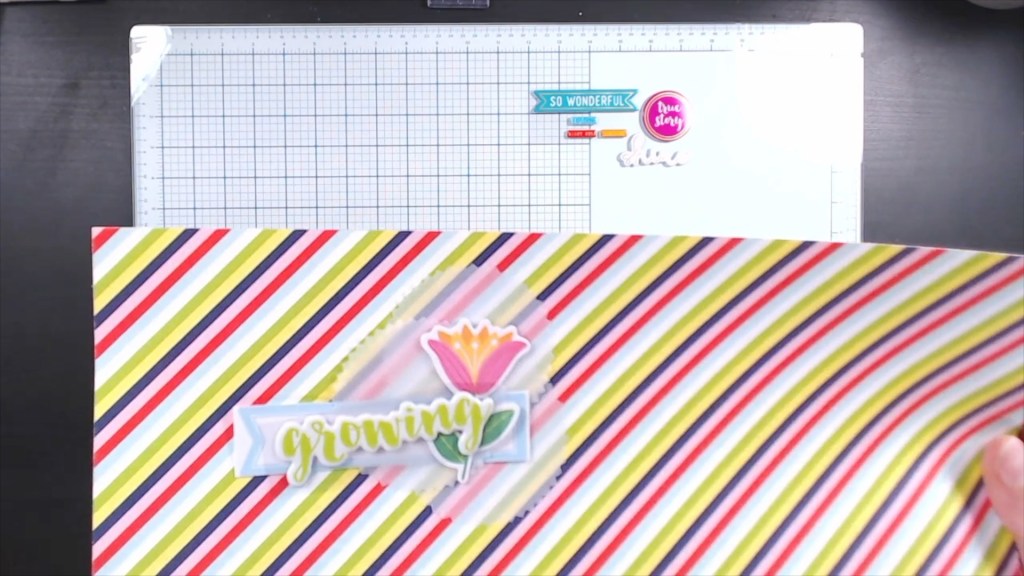
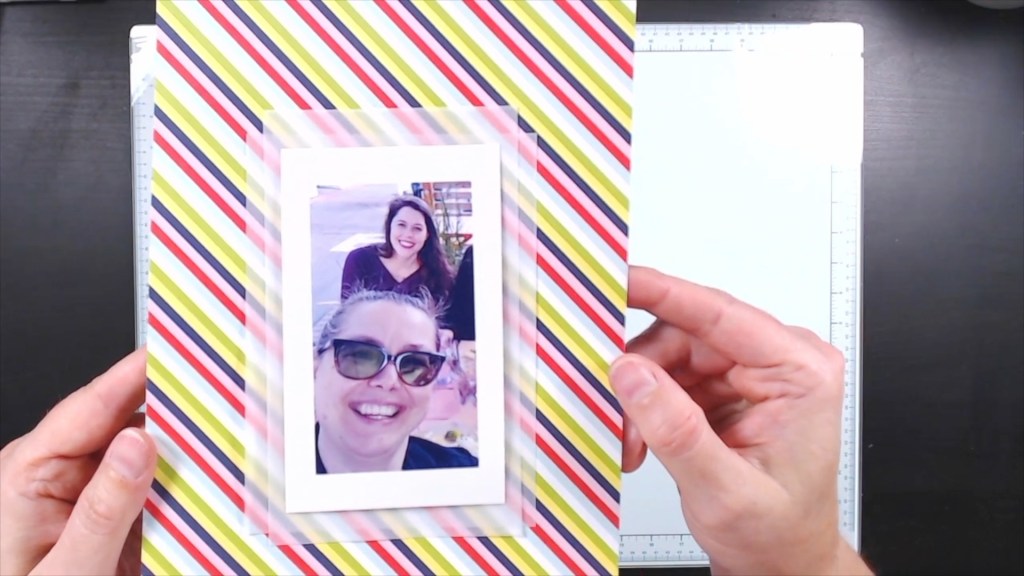
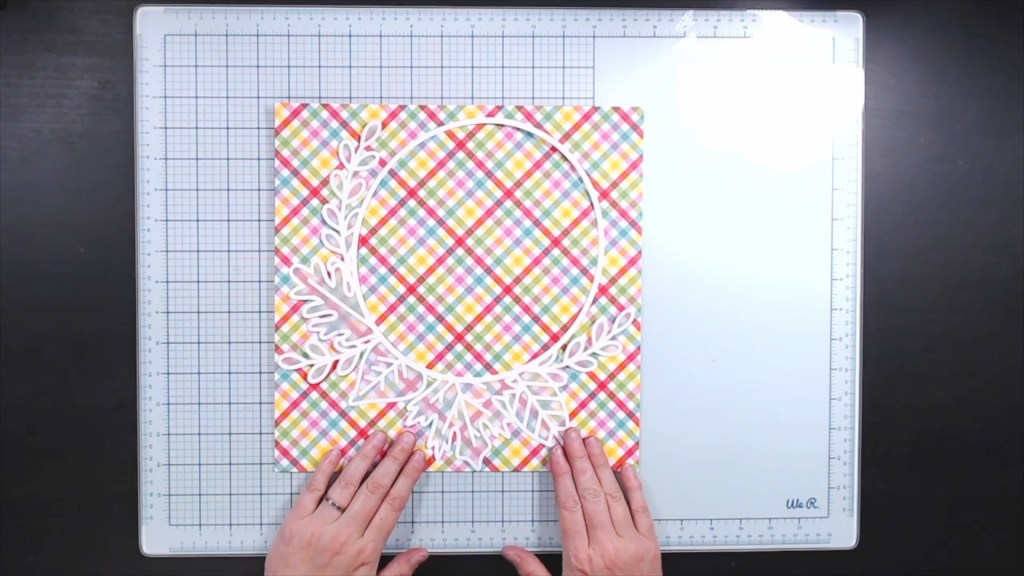
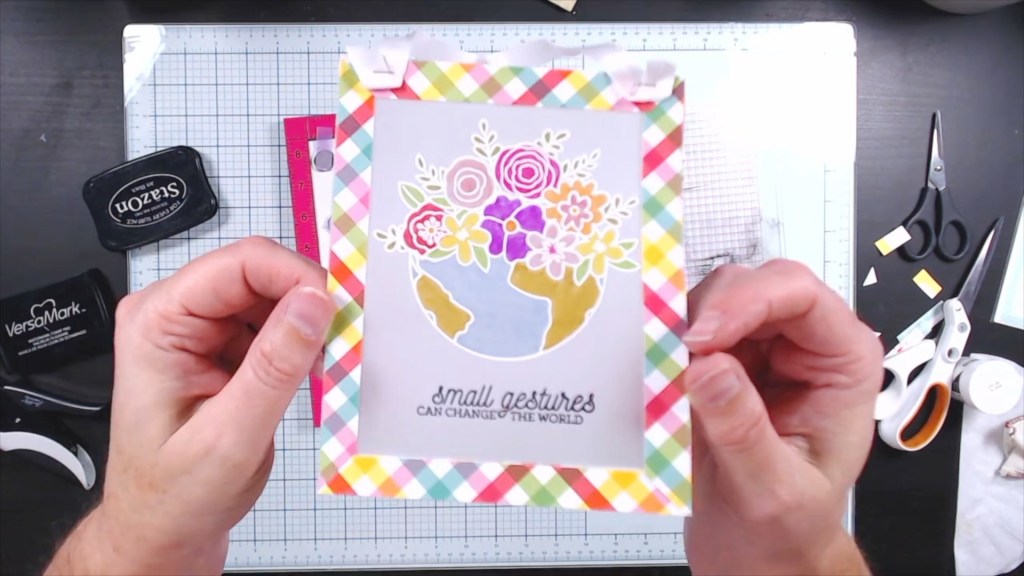
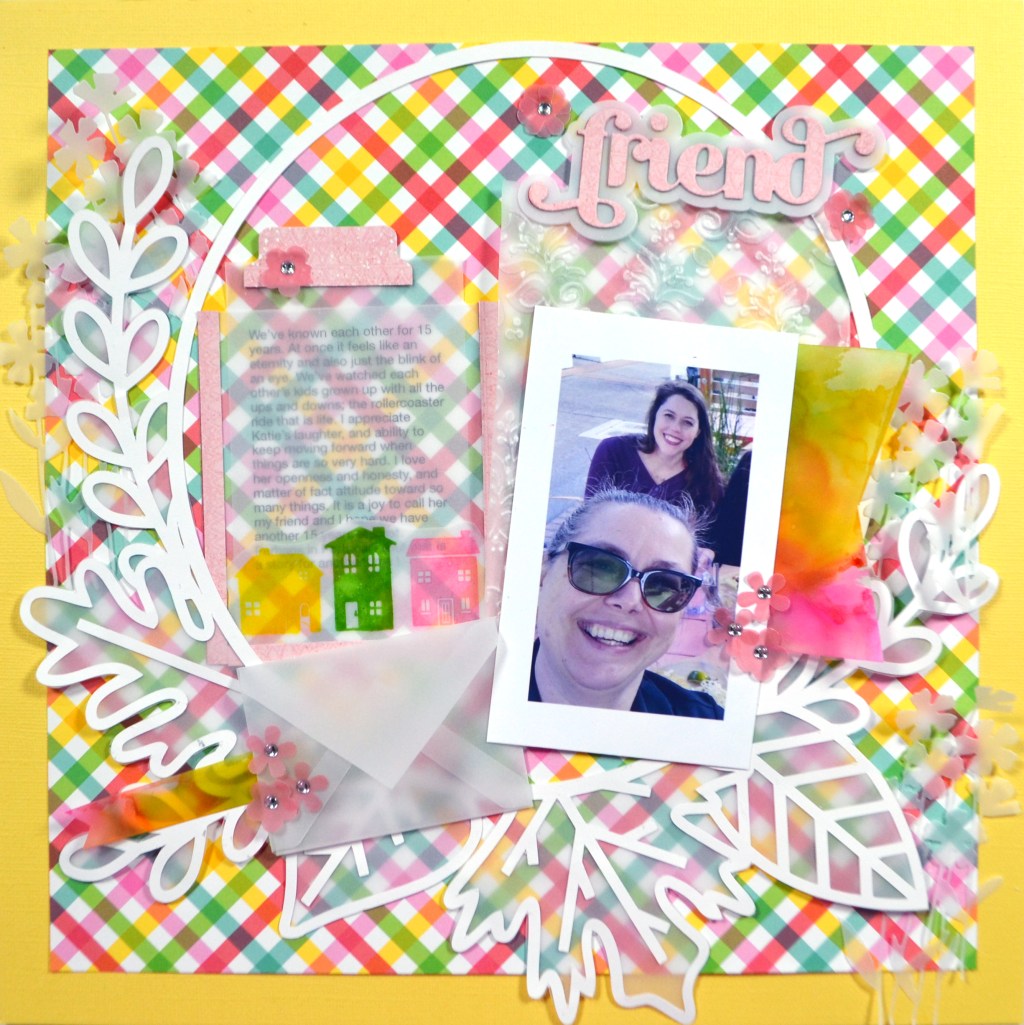
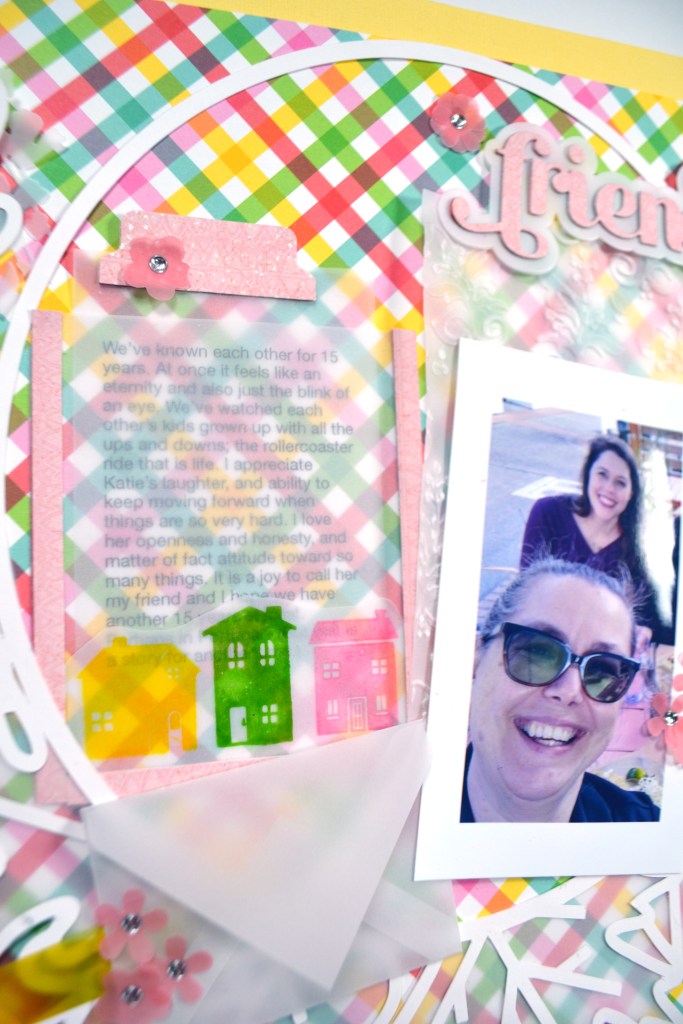
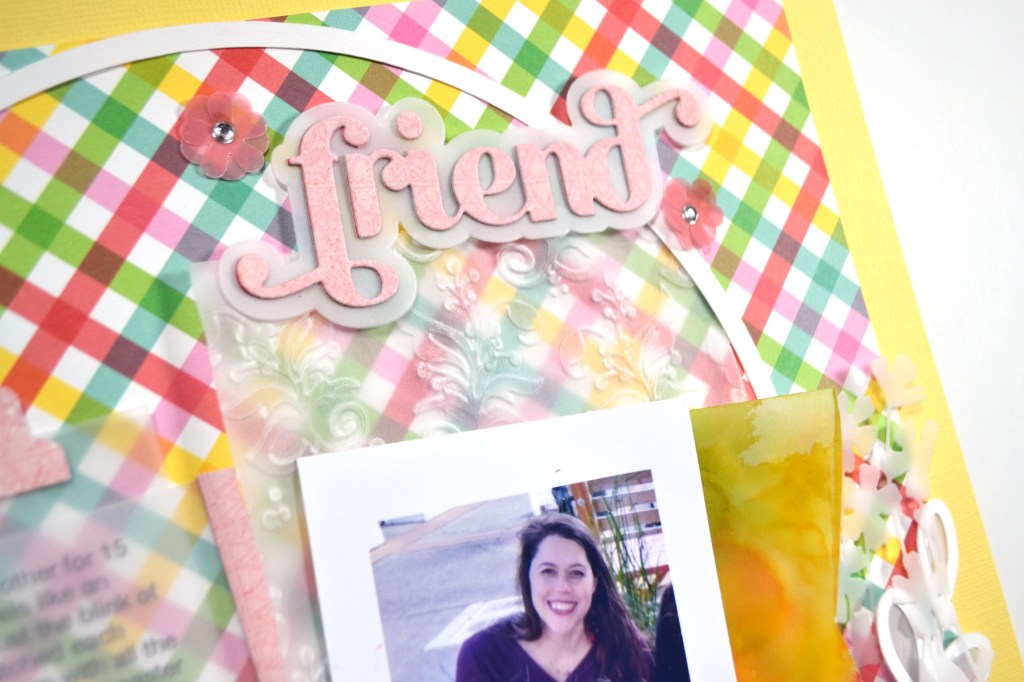
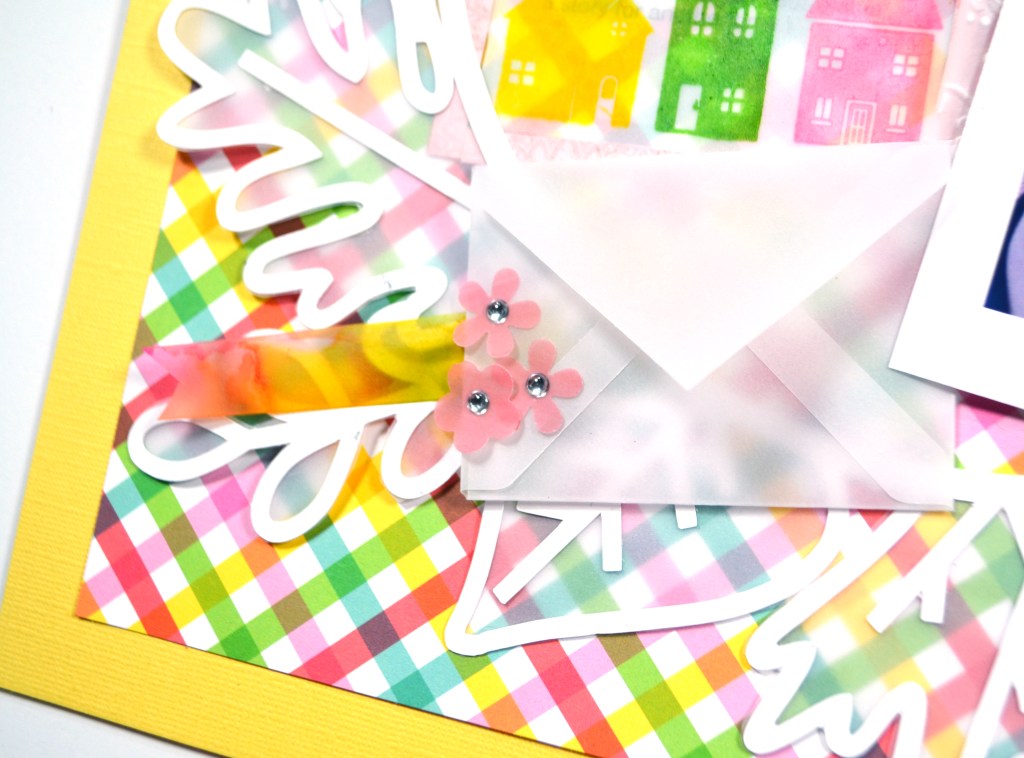
I had a learning curve to overcome when setting to work. After a few mistakes I got the hang of it and the results were amazing. I quickly got ideas on projects and made it happen. I created a set of cards for Galentine’s Day as well as a scrapbook layout using some scraps.

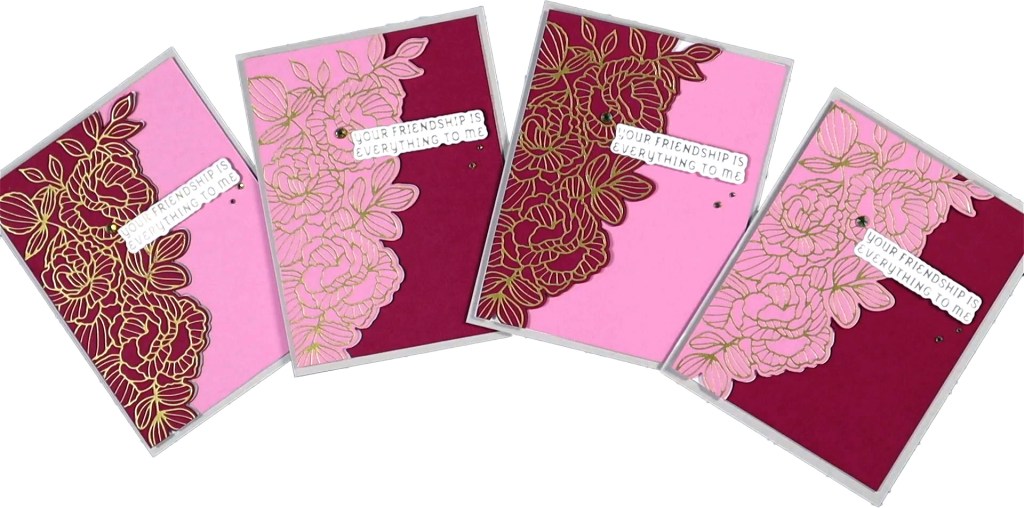
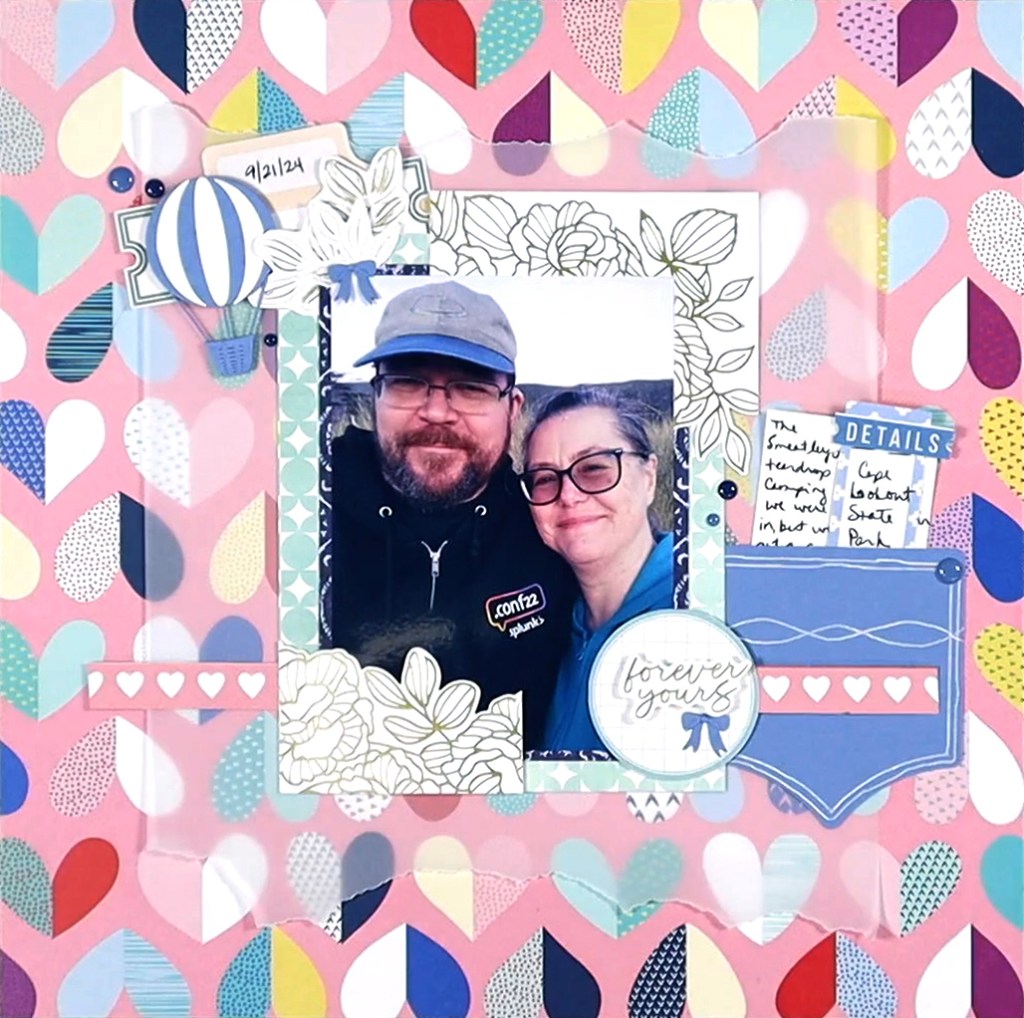
Neither of these images do justice to the shine of the foiling. You should watch the video to get the full effect.

I hope you’ll join me later in the moth as I unbox and explore the January glimmer products. I’m looking forward to adding more shiny goodness to my projects this year.

Until next time, have an artful day!

Spellbinders Advent, Bonus critter ideas

During my daily Advent opening and project I managed to create this menagerie of critters on day 14.

Since I was creating videos in the shorts format for those daily projects, I asked if people wanted a longer format of creating these guys. The resounding answer was YES. So here is that video.

You may notice that I made some changes to these guys during this second version. That just means there is flexibility to creating. Here is a closer look at all the new guys.

I mentioned in the video that I have a printout of instructions for creating these guys. Right now this is a rough draft corrected version of the document. However, I wanted to get this out now. You can always come back for the final version next week. I hope you find this document useful.

Critter Instruction Sheet

NOTE: CORRECTED download now available.

You can download this pdf file to print and store with your dies for future reference.

That is it for this one. Hope you have an artful day!

Spellbinders Advent Day 22-24

Join me all month of advent as I open each day of the Spellbinders Crafty Advent Calendar. Some days I will create a project and some days I’ll just show off the goodies. No matter what, I know I will use each and every product at least once this month. So much fun awaits!

If you missed previous days, be sure to go back and see the first seven days as well as days 8-14. If after seeing all the goodness you’d like to grab one of these calendars, they are on discount right now (as of 12/11/24) over at ACherryOnTop.com**. For now, let’s dive into the next section of fun.

Day 22: Pink Sequins

Day 23: Floating Cat

Oh my goodness! This cat is so dang cute. If you remember back on the 6th we got a very cutesy bee that I said was not my style? Yet today I’m in love with cute? I think the difference is that while the bee is big-eyed and anthropomorphized, this cat is more cat-representative and in a silly situation. So, yeah, cute vs cutesy is a thing for me.

Now, my daughter said the cat should be in a box. Thus, I made it so! (I wonder how many people will get cats as Christmas gifts this year??) At any rate, the box was easy to make. I cut two squares of the same size. One became the box base. The other I trimmed at an angle on the two sides, and I trimmed off a bit of the bottom. This creates perspective for the front box flap. I glued it flat down at the top and popped up the bottom edge with some foam squares for dimension. The two side flaps were simply slivers of cardstock. A bit more ink shading where things over lapped and voila, box!

Day 24: Luggage set

What a fun die set! You know I had to do a bit extra for this one. The still photos do not say it all. You really have to watch the video to get the whole experience!

Day 25: Merry Christmas to all who celebrate!

To see the rest of this series, visit these pages.
Days: 1-7
Days 8-14
Days 15-21
Days 22-24 (you are here)


** I use affiliate links when possible. When you shop using my links I earn a very small commission at no cost to you. I appreciate your support of my work in this small way!

Spellbinders Advent Day 15-21

Join me all month of advent as I open each day of the Spellbinders Crafty Advent Calendar. Some days I will create a project and some days I’ll just show off the goodies. No matter what, I know I will use each and every product at least once this month. So much fun awaits!

If you missed previous days, be sure to go back and see the first seven days as well as days 8-14. If after seeing all the goodness you’d like to grab one of these calendars, they are on discount right now (as of 12/11/24) over at ACherryOnTop.com**. For now, let’s dive into the next section of fun.

Day 15: Embossing Folder

Day 16: Sentiment Die Set

Day 17: Nested ticket/postage edged die set

I had way too much fun with this nested set. I was supposed to keep the day’s project simple. But. Nope. I had to make all the things.

Day 18: Sequins

You know I had to do it at some point. Today I made a shaker! And a bonus card too for other sequin ideas.

Day 19: Sentiment Stamp Set

I was rushed for time today. So my exposure is bad on my filming (and still image capture!) But I did make really good use of many leftover bits that I have been saving throughout the series. I cut a new tag and did some ink blending. Besides that and the stamping, everything else was done.

Day 20: Random Dots Stencil

Day 21: Popsicle

I admit that some of the included pieces kind of puzzled me. In fact, they felt like a puzzle as I was trying to layer them all together. I think in the end there are options, LOL.

To see the rest of this series, visit these pages.
Days: 1-7
Days 8-14 (you are here)
Days 15-21
Days 22-24


** I use affiliate links when possible. When you shop using my links I earn a very small commission at no cost to you. I appreciate your support of my work in this small way!

Spellbinders Advent Day 8-14

Join me all month of advent as I open each day of the Spellbinders Crafty Advent Calendar. Some days I will create a project and some days I’ll just show off the goodies. No matter what, I know I will use each and every product at least once this month. So much fun awaits!

If you missed days 1-7, be sure to go back and check them out. For now, let’s dive into day 8. If after seeing all the goodness you’d like to grab one of these calendars, they are on discount right now (as of 12/11/24) over at ACherryOnTop.com**.

Day 8: Vase & Flowers

While I loved this vase, I knew everyone out there would make a vase with flowers in it. I definitely like to show other ways to use supplies. So today I used the vase as a rainbow background for a cluster of flowers.

Day 9: Sequins

Today we got the sequins I knew would come at some point. Each year Spellbinders has included 2 packs of sequins. I really like this style of sequin as it has no hole and that makes gluing them down so much easier! While most people would make a shaker that doesn’t require glue, I made a disco ball instead.

Day 10: Sentiment Die set

Today’s three sentiment dies read “just saying hello” when stacked together. However, you can always split them up into different word groups.

Day 11: Embossing Folder

Yes! We got an embossing folder in our advent box. It is a small one, but a mighty one. I enjoyed using an inking technique for this one that I learned from Jennifer McGuire.

Day 12: Lemonade Glass

Unfortunately my camera’s exposure settings were off and my video & graphics are a bit blown out. I’ve tried to correct it as best as I can. You’ll have to trust me that this tag is more fun in person!

Day 13: Multi-lingual Sentiment Stamp Set

Finding ways to use sentiments so that they stand out as a featured item is a bit tricky for me. I’ve come back to my much used idea: repeat stamping.

Day 14: French Bulldog

I was inspired on day 9 by Mostly Paper Crafts‘ YouTube channel. She turned the honey bee die we got on day 6 into an entirely different critter. I usually see different ideas in dies, but the bee did not click with me. That is, until I saw her video. Then… when we got today’s little bulldog a flood of ideas hit me. So here they all are, LOL. All these critters were made with a combo of the bee and/or the bulldog pieces.

To see the rest of this series, visit these pages.
Days: 1-7
Days 8-14 (you are here)
Days 15-21
Days 22-24


** I use affiliate links when possible. When you shop using my links I earn a very small commission at no cost to you. I appreciate your support of my work in this small way!

Spellbinders advent is back! Recap Day 1-7

Days 1-7

Join me all month of advent as I open each day of the Spellbinders Crafty Advent. Some days I will create a project and some days I’ll just show off the goodies. No matter what, I know I will use each and every product at least once this month. So much fun awaits!

Here I will collect each week of the project and post pictures and videos to share the fun and inspiration. If after seeing all the goodness you’d like to grab one of these calendars, they are on discount right now (as of 12/11/24) over at ACherryOnTop.com**.

Day 1: A Hot Air Balloon

Day 2: Floral Stamp

Day 3: Flower Set

Day 4: Sentiment Banners

Day 5: Doodled Borders

I’ll admit I’m not sure how much use this little squiggle die set. But I had fun with it today and that is what matters right now. ๐Ÿ˜Š

Day 6: Honey Bee

If you’ve followed me for a while, you probably know that cutesy is not my style. I’m super excited about this bee. I’m sure plenty of people are though! At any rate I made use of the bee but he’ll likely sit unused after this. That is okay. I’m still loving my Advent Calendar!

Day 7: Floral Stencil

No time for a project today. But I got a quick video in and gave info on what I’m doing with all these tags that I am making during this series. Stay tuned for that blog post coming very soon.

By day 10 I was able to finally do a makeup project for day 7. I actually made something Christmas themed!

To see the rest of this series, visit these pages.
Days: 1-7 (you are here)
Days 8-14
Days 15-21
Days 22-24


** I use affiliate links when possible. When you shop using my links I earn a very small commission at no cost to you. I appreciate your support of my work in this small way!

Another Update

Yesterday I updated you on what I’ve been working on as part of my CKC design team life. Today I’m back with the other projects that have been keeping me busy in the craft room.

Community Project

Each year I create and donate Easter cards to a senior meal program. The cards go out to the seniors who are home bound and they accompany the Easter meal delivery. I’ve had such kind comments from the folks getting these cards that I’m glad to keep doing this project. I am happy to bring people a little joy through paper and ink!

Craft Shopping

I’ve been running low on certain supplies and needed a restock. Also, the February release from Concord & 9th had a few things in there that made me ooh and ahh. In fact, the Easter cards above were created from a new Turnabout stamp set. If you have never used a Turnabout, it is fun! After aligning the stamp, you ink, stamp and rotate it up to 4 times to get a background pattern. (Images from the C9 website.) This set is not an Easter set. However, with the right colors this background can mimic jelly beans or even Easter eggs. I love supplies that have this kind of flexibility!

If you want to see what else I got in my crafty shopping boxes, I do have a video.

Freckled Fawn^^

My latest FF subscription boxe reached my house and I dove into as soon as I could. Check out the unboxing and project video if you want all the details.

I played with the washi tape in the kit and made up a new washi technique. I plan on doing an small addendum to my popular 10 Ways to Use Washi video. I won’t have 10 new ways, but 3 or 4 to share!

Disaster in the Craft Room

The most recent event was the breaking of my Gemini II machine. I reviewed this machine back in March of 2023. Had I really understood then what I know now, I would have been more careful! Luckily my husband did a little surgery on it and it is now working. However, the issue lead me to create a video as a word of caution to any Gemini II ownersโ€“or potential owners. If you want to know more about what happened, check out that video.

Event Crafting

And finally, I’ve been doing some crafting inspired by the SBC Fest over at Scrapbook.com^^. They offer free online class events each year. While you don’t have to use their products, they do offer shopping lists and bundles should you want to. The bundles are even available after the event so you can take the class first and really see if you want to own those products later. I only bought a couple of small stamp sets and have worked on the projects largely from my own supplies. Here is what I’ve done so far.

That wraps things up for now. I have been doing some sewing this month as well, but I don’t have pictures of those projects yet. Maybe this will encourage me to document that process next!

I have just a couple more things coming to you for March, so until then, have an artful day!


^^Disclaimer: I offer affiliate shopping linked products when possible. This shopping won’t cost you anything extra, but I get a small kick back from the companies for sending business their way. It is an easy way to tell me “Thank You” for the content I provide. I appreciate you using my links!

Freckled Fawn
They sell products individually, or in subscription kits. The kit subscriptions are a build-your-own bundle style. You pick and choose which of their standard items you’d like shipped to you each month. They carry items from wood veneer all the way up to 12×12 scrapbook papers. Take a look and see if there are any goodies you wan to add to your craft room! And… if you use the code craftysoup you’ll get 8% off your order!

Mystery Box Monday

Hello, hello! I am excited to bring back my Mystery box Monday series. I did this series back in 2020 and since it did not get a lot of views back then I had retired it. But I missed it! This project was just some weird creative fun and I am happy to be back to it.

So, what is Mystery Box Monday? I have a “grab-bag” style box of supplies that I purchased from Piece Craft Love as part of a clearance sale back in Dec ’22. Since the box is a grab-bag, that means all the supplies in the box are a mystery. Who doesn’t like a good mystery? The box comes at a steep price reduction because the supplies are unknown. Does that make the box worth it? We will find out!

I’m going to reach into this box and pull out three items. Much like that cooking show with the mystery basket ingredients, I have to put those items to use on one crafty project. Will these ingredients work together? Or will it be a recipe for disaster? Let’s find out…

Here is a peek at the mystery items I pulled out of the box this time around: A metal stencil doodling set, a zoo themed chipboard set from Graphic 45, and Echo Park travel themed rosettes.

Several thoughts ran through my mind as I looked at these.

  • Travel + zoo themes? Hmm.
  • Graphic 45 is not my go-to.
  • Cool metal stencils. Those are easy to use. Maybe I could to embossed impressions with them?
  • Can I remove the chipboard pieces from the rosettes? That would mostly eliminate the travel theme?

That final thought is where I started my project. If I could just have simple rosettes then they would become more flexible in style usage. Once that was done, they reminded me of flowers which goes with the butterfly stencil. The buttons on the Graphic 45 Chipboard could be used to give new centers to the rosettes to take them off in their own direction.

Okay. Flowers and butterflies. Now what? My train of thought led down a path that landed on making a batch of Easter cards for a senior meal program that I made cards for last year. Now is a good time to get started. So off I went with the supplies.

I ended up using spray mist through the petal-like stencil to give my rosettes more of a floral foundation; though in the end much of the imagery was covered up! Still I think that background foundation gave these cards more interest. Now using more than just a couple tiny pieces from the chipboard felt more honest to the spirit of this Mystery Box Monday challenge, so I popped up my easter greeting on chipboard tags. I used tags with florals. I also used a tag with animal strip print. But by covering up much of the tag, the prink now looks more like woodgrain (the light blue card on the left). That was a good use of the zoo theme!

If you want to catch all the silly fun behind this project, check out the video!

So that is it this time around. I hope you join me for future Mystery Box Monday goodness. Until next time, I hope you have an artful day.

Cards, cards and more cards!

While scrapbooking is my go-to craft form, making cards isn’t far behind. The oddest thing that I have realized this past couple of years is that I have a hard time with taking scrapbooking classes. Don’t get me wrong, I LOVE the classes; I just have a super difficult time trying to fit my photos and stories onto a pre-designed layout. Does the theme work? Do I have the right number of photos? I have a nice stack of finished layouts just waiting to be used. Hmm. What is a crafter to do?

Enter card classes! Oh during the pandemic I fell in LOVE with card classes. I get a box of supper fun goodies. (I love collecting craft supplies as much as using craft supplies!) I get classes to put those goodies to use. If the sentiment on the card isn’t for an event that matters to me I can change it. Ditto with the color scheme. And the best part is I then send them away! No guilt about stuff sitting around waiting for me to do something with them.

Well I spend another fabulous weekend event making cards on September 30-October 2 2022. I have had cards on the brain ever since. I wanted to share a photo gallery here since this is what is occupying my time and energy right now. Can’t let the blog get too quiet, right?

Oh I have a few more cards to share, but first I also have a few more cards to make! Yes, more cards! I didn’t even finish half of the classes that were offered on the 30th. I still need to go back and complete cards shared by Simon Hurley (half done), Honey Bee, Crafter’s Companion (partly done), Brutus Monroe, and Your Next Stamp. That is a lot more goodness to come.

In the mean time, I took all my box supplies and mixed and matched manufacturer products. Jennifer McGuire had shared her ideas for doing exactly that in a video that was shown during the event. While my designs are never JG level, I do always mix and match out of the simple desire for certain element. I was inspired by Jennifer McGuire, but it was also World Card Making day challenge time. The Scrapbook and Cards Today Magazine team put together 5 challenges (see 1, 2, 3, 4, 5) all with prizes; if you scroll to the bottom of challenge 5 you’ll notice an extra prize for entering every challenge. I just had to enter them all of course. ๐Ÿ˜€

I hope to come back by the end of the month with more card shares from the rest of the classes as well as the rest of the ideas that are buzzing around in my brain.

Until then, have an artful day!

The World of Vellum

Vellum is a product that I love and try to keep a stock on hand at all times. I want to share my love of vellum with you with two videos. The first is all about ways you can use vellum and the second is putting together a layout using a handful of the items I created in the first video. Plus the second video has an additional little vellum technique that you may find handy. As always, if you want the blog version, please keep reading!

Vellum Techniques Video
Layout process video using vellum

So let’s take a gallery journey through the techniques I mentioned. While each photo is captioned, the gallery system’s captions are a bit hard to read, so let me list it out more clearly.

  1. Layered Dimming
  2. Pattern Making
  3. Cluster Layering
  4. Photo Mats
  5. Stamping
  6. Heat Embossing
  7. Backing Cutfiles
  8. Printed journaling
  9. Alcohol Ink (No expensive Yupo “paper” needed)
  10. Embossing Folders
  11. Pockets
  12. Windows
  13. Shakers
  14. Envelopes
  15. Home decor — Votive Holders
  16. Home decor — Stained Glass Window technique + project

Once I had created a pile of goodies out of vellum I turned to creating a layout. If card making is your thing, these ideas totally work for that too! Now, not all the things I created are going to work on one project so the process of finding what will work, and especially giving up on what won’t work, is interesting. I tried really hard to get stamped flowers on my project and they just weren’t working. The flowers got lost in the amount of pattern shining through the vellum. In the end I colored vellum with a marker (that is your bonus technique!) and punched out solid colored flowers to sprinkle on my project.

Layout using vellum

Don’t forget that vellum can be tricky to attach since you can see the glue right through it! If you need ideas on how to overcome that, I’ve got you covered there too! This post shows off vellum attachment ideas. Of course you can take the short cut right to the source video.

I hope this post gave you lots of ideas for incorporating vellum into your paper crafting projects, and even some home decor. I’ll be back soon with more ideas. Until then, have a artful day.