Last time I showed you some tip-out elements to make for creating interactive layouts. Tips out are simple small paper elements that are adhered to the page in a way that they can tip or flip open to reveal more space. I’ve been obsessed with this technique for a couple of weeks now, so I’m bringing that obsession right to you!
Layout 1: Uses one of the tip outs I made with only a bit of adjustment to it.
Layout 2: Creates a tip-out from scratch using slightly different techniques! I had lots of lots of journaling and a few more photos, all while still allowing “white space” on the front of the layout.
I hope you enjoy these interactive layouts. Until next time, have an artful day.
I love learning, creating and sharing. That is why I offer freebies up to you each month. I have both a layout sketch (in printable pdf as well as editable psd) and an electronic cut file (in svg). This month I was inspired by a photo I took out my kitchen window of a lovely fall tree.
You can see all the details in my reveal video, or read on for the short version.
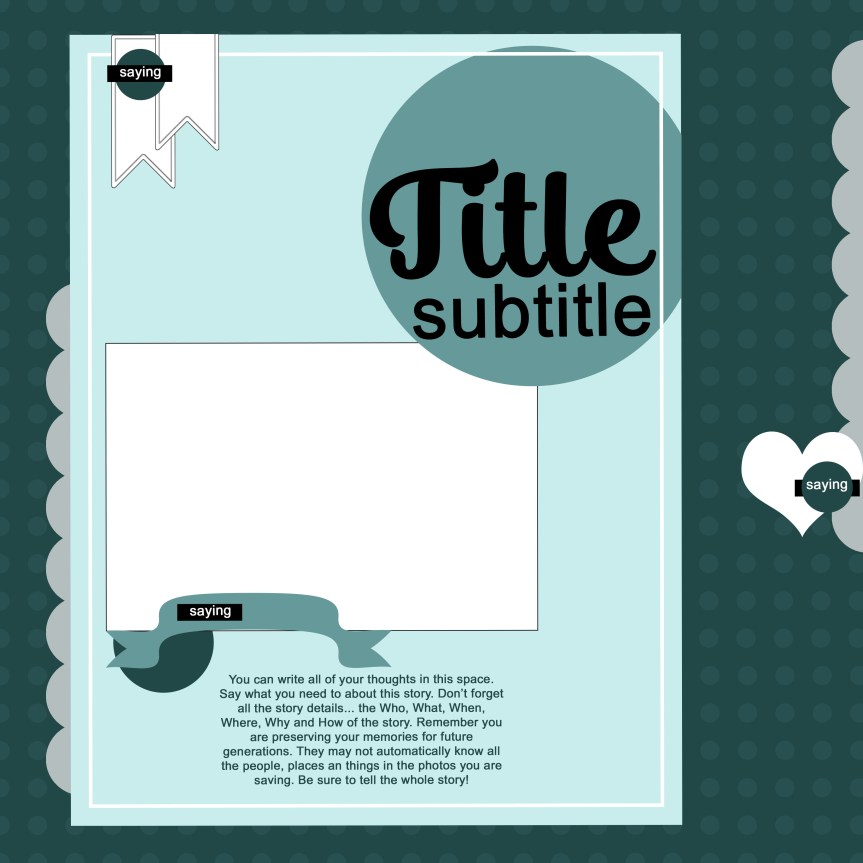
Here is a closer look at the sketch and the project I created based on this sketch. This one is in 8.5×11 size format.
If you don’t do 8.5×11 sizes, I also have the 12×12 expanded version of the sketch for you. Notice it is pretty simple with the base 8.5×11 added to a 12×12 and then extra embellishments included with that.
So that large title block I designed specifically to fit my cut file for this month.
While I did cut that title at a small(ish) size, it is designed to fit a full 12×112 layout if you want to go large with it.
Or… head over to my Freebies Page to peruse the catalog of files I have offered in the past. And if you have any ideas for sketch or cut files, I’d love to hear your ideas. I can’t make promises but I can take suggestions!
As a design team member over at the Counterfeit Kit Challenge group I play along with as many of our monthly inspiration challenges as I can. The Forgery on the Fourth project is definitely one I enjoy! That is where we see a scrap product we like and set out to recreate it with supplies we already own. This month, I’m also one of the Master Forgers tasked with the mini kit and project segment. Since both challenges involved me making things to add to my main kit, I’m sharing both here at once.
As a reminder, we are being inspired by the October Kit, Herbstzauber (NOTE: the kit has been removed from the company site so please check out their main site listed next…) offered by a german company called Scrapbook Werkstatt.
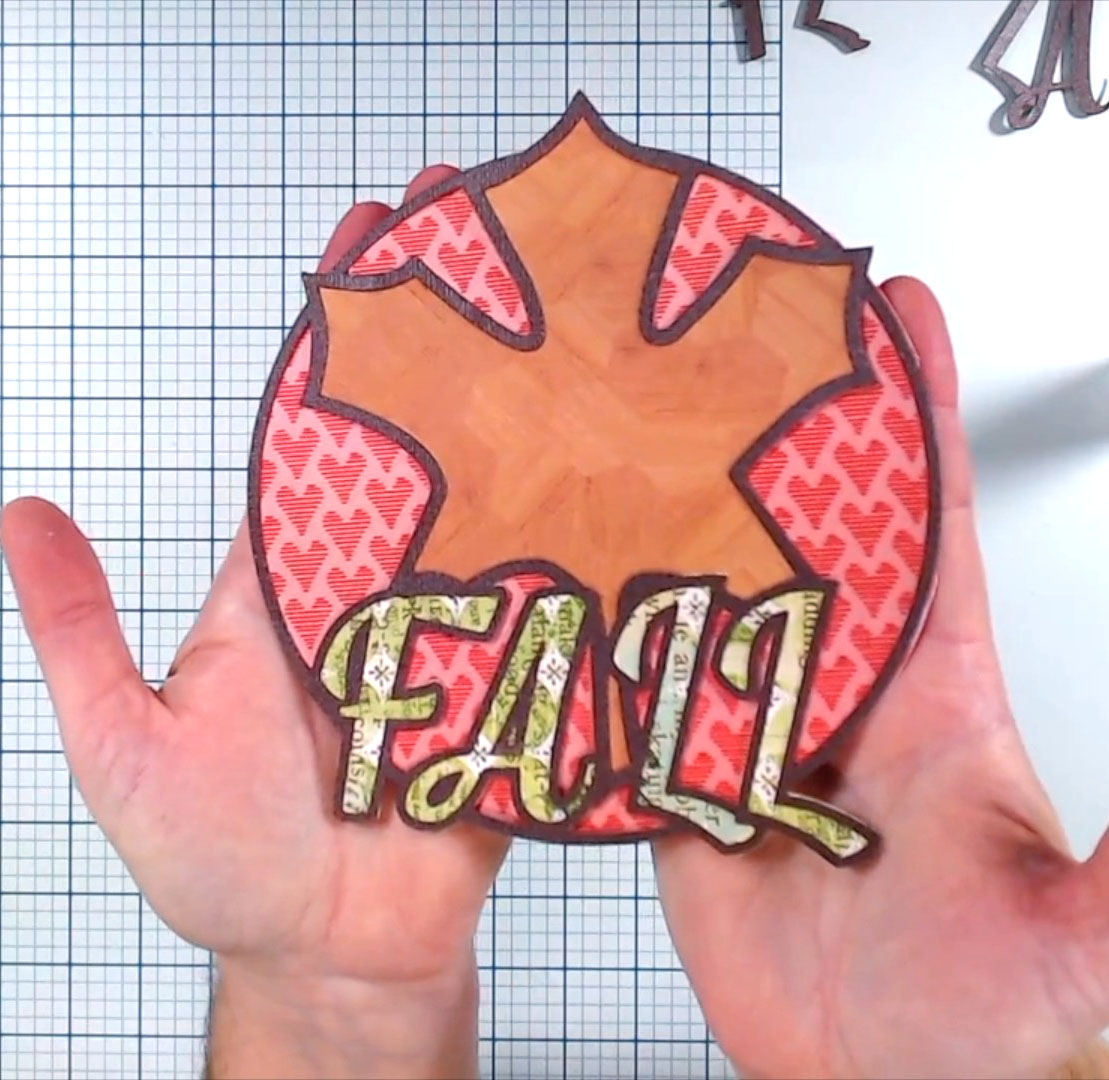
If you know me, then you will know that I love wood elements, including those buttons tucked on the far right side. So that was they natural place to go for my forgery.
Video episode about making wood button embellishments.
The mini kit task was a perfect opportunity to pull some scraps from my paper that had elements inspired by our host kit this month and create some interactive layer items for my kit. Having these pre-made will make creating layouts just a little bit faster.
So that is it for this time around. I will be back very soon putting those tip-outs to use on some layouts!
For more creative ideas, the CKC blog has more forgery examples to check out. I hope this gave you some ideas on how you can recreate your favorite products with supplies you already have on hand. Don’t forget to show off your stuff over on the CKC Facebook group, or tag us on Instagram @counterfeitkitchallenge or use #counterfeitkitchallenge.
^^ Disclaimer: I offer affiliate shopping linked products when possible. This shopping won’t cost you anything extra, but I get a small kick back from the companies for sending business their way. It is an easy way to tell me “Thank You” for the content I provide. I appreciate you using my links!
Wowza. Another new month is here. This last part of the season has just whipped by and I don’t feel like I’ve given my previous kits enough love. Sigh. But time progresses and so do I. With that, lets move on to my new kit as part of the design team for the Counterfeit Kit Challenge project. If you are new to CKC, we take an inspiration kit each month and proceed to replicate it, or as we say, counterfeit it. This is a free, friendly group that helps inspire you to use up supplies you already own. We are not about needing to buy the latest and greatest thing (though we won’t stop you if you enjoy new crafty goodies😉 ).
Let’s welcome our guest designer Machelle Willing to the team for November. She’s been around the CKC block before so she will bring her experience to the team again this month.
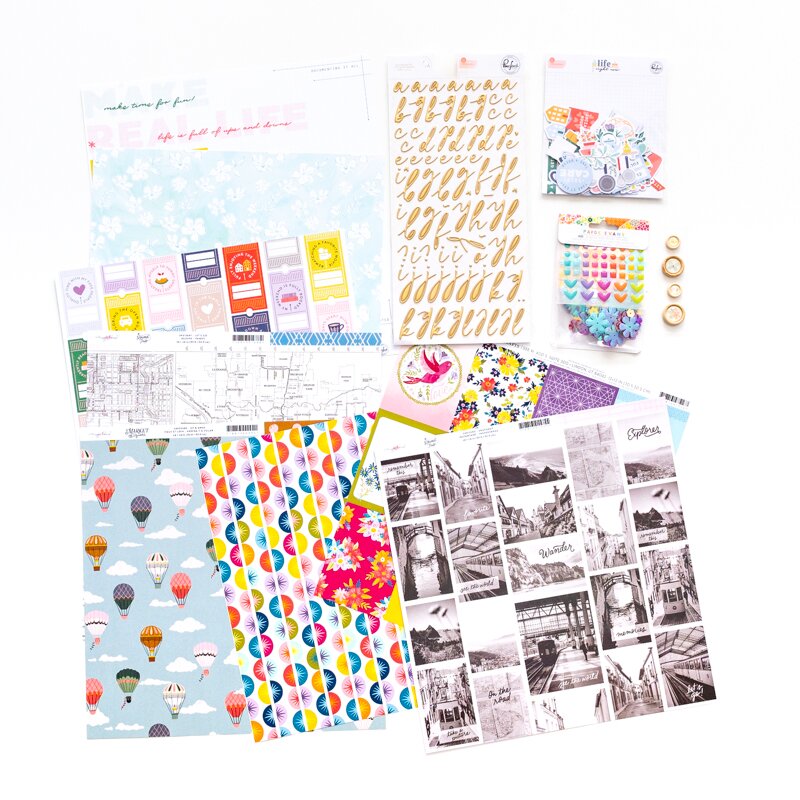
Our inspiration kit this time around is the October Kit, Herbstzauber (NOTE: the kit has been removed from the company site so please check out their main site listed next…) offered by a German company called Scrapbook Werkstatt. This kit is centered around product by PinkFresh Studio, Maggie Holmes and Paige Evans, all of which I have used in the past. I had to dig in my stash to see what I may have still had on hand from these pieces vs what I’d need to replicate.
Before we get to my kit, let’s peek at most of the inspiration pieces.
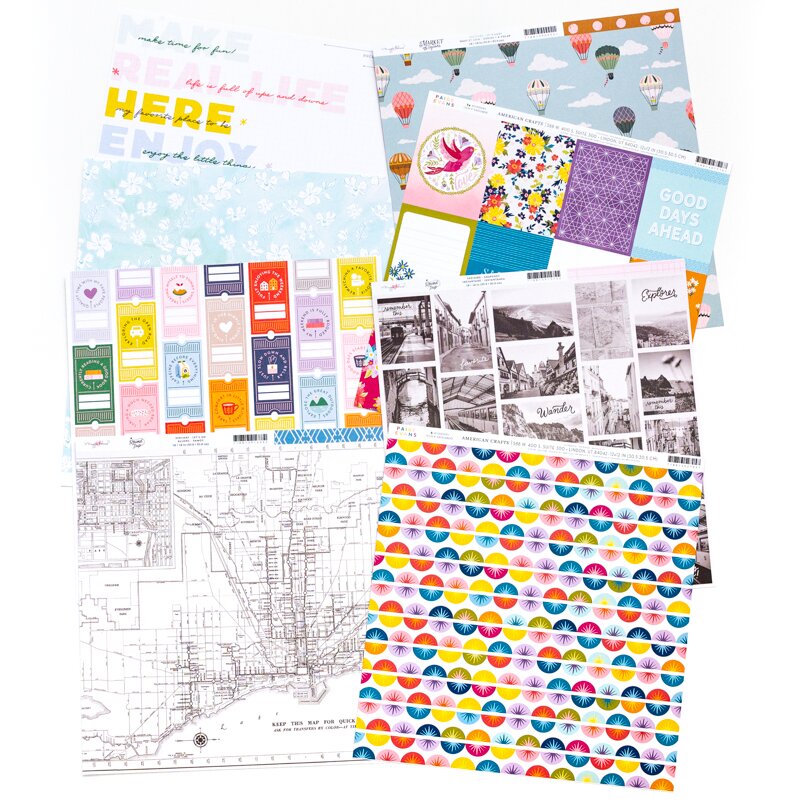
For my build I started with the same PinkFresh paper line and it turns out that I had a partial sheet of the ticket style print to tuck in my kit. I added in a map print based on the inspiration. Next came a jumbo text print from Shimelle to take the place of the word print from PinkFresh. Then a bunch of decisions had to be made to get to the final paper selection (see the video below for all the details!)
Next up was embellishments. As last month was a jumbo embellishment month, I kept things calmer this time. I drew very heavily from the inspiration in pulling these bits together. Notice I’ve got blank wood buttons in my kit. I bet you know I’m going to dress those up somehow for the Forgery on the Fourth project at CKC. Just a little hint for you!
Okay. That is my kit. Now… there is a tradition over at CKC of titling our kits just like companies do. I had a hard time finding the right name. I’m going to call this one Across the Seasons since I brought in more springy purples and green as well as richer autumnal yellows and blues.
If you want to see my thoughts behind my kit choices, check out my kit build video.
I hope you can follow along with the other designers and see how they interpreted their own kits.
Have fun kit building and don’t forget to show off your stuff over on the CKC Facebook group, or tag us on Instagram @counterfeitkitchallenge or use #counterfeitkitchallenge.
I’ll be back on the 4th, for our Product Forgeries using those blank buttons. Until then, have an artful day!
** Disclaimer: I offer affiliate shopping linked products when possible. This shopping won’t cost you anything extra, but I get a small kick back from the companies for sending business their way. It is an easy way to tell me “Thank You” for the content I provide. I appreciate you using my links!
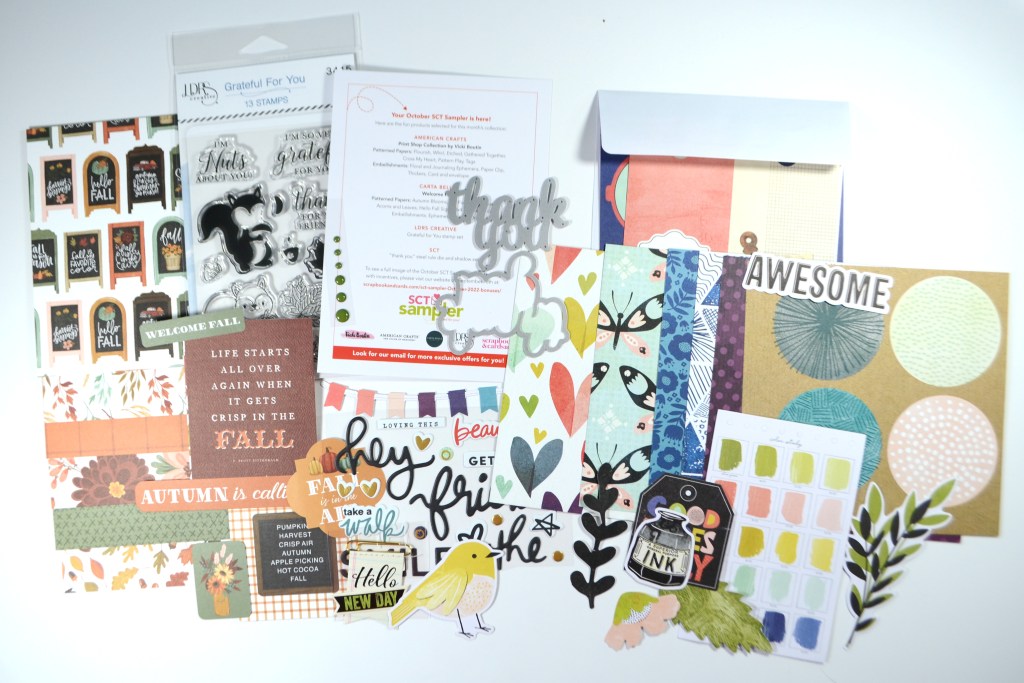
I know I never got September’s unboxing posted. Oh boy. But you can still catch that over on my YouTube channel! I’m just going to go ahead an move on with October…
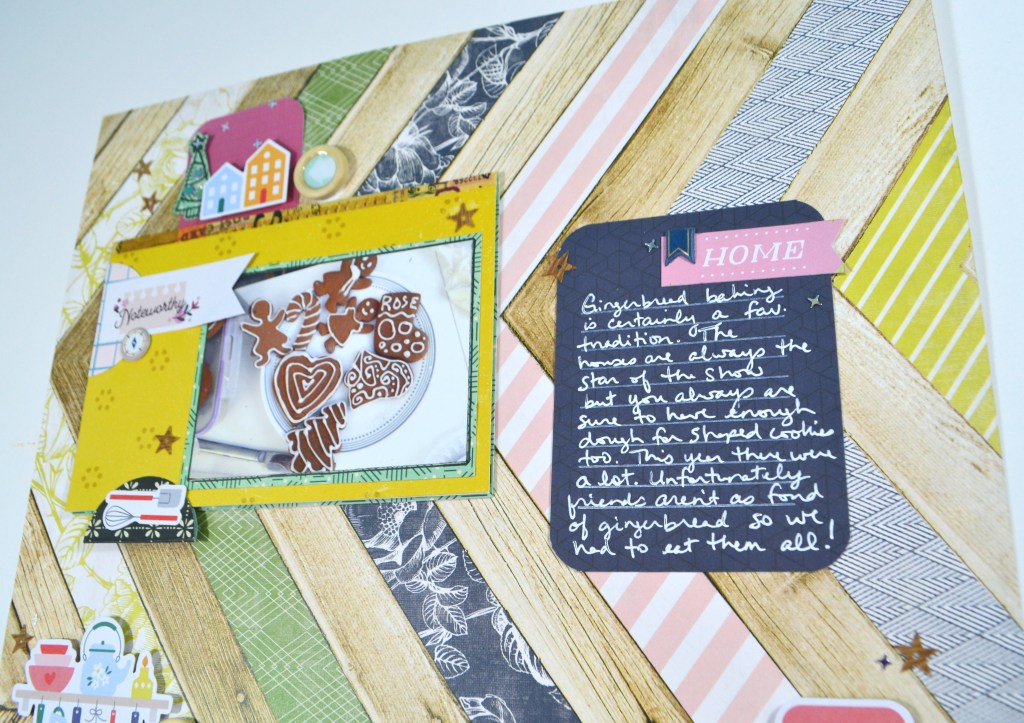
I wouldn’t want to leave you wondering just what to do with these supplies. So I usually make a project as soon as my box arrives. That way I am sure to use it instead of just showing it off. This time around I made a layout about the rascally squirrels in my yard.
I incorporated several stamping techniques including watercolor stamping and a “hightlight” stamping technique. If you want more information on those (and more!) you can watch my YouTube video to get a better look at the kit products and my project.
If you want more info on these kits, check out the links and info below.
SCT sampler kit information Please note: you can not order the current kit. Instead you sign up for a future beginning date for your kits. Kits currently run between $14 per month (1-year commitment billed every 4 months) to $17 per month (4-month commitment billed fully). Extras not shown in the video include a private Facebook group with video shares each month, a cut file download to match the theme word and discounts for prominent online scrapbook shops.
I hope you enjoyed taking a look at what these little kits have to offer as well as seeing it put into action with a project. I’ll be back soon with more crafty goodness. Until then, have an artful day.
** Disclaimer: I offer affiliate shopping linked products when possible. This shopping won’t cost you anything extra, but I get a small kick back from the companies for sending business their way. It is an easy way to tell me “Thank You” for the content I provide. I appreciate you using my links!
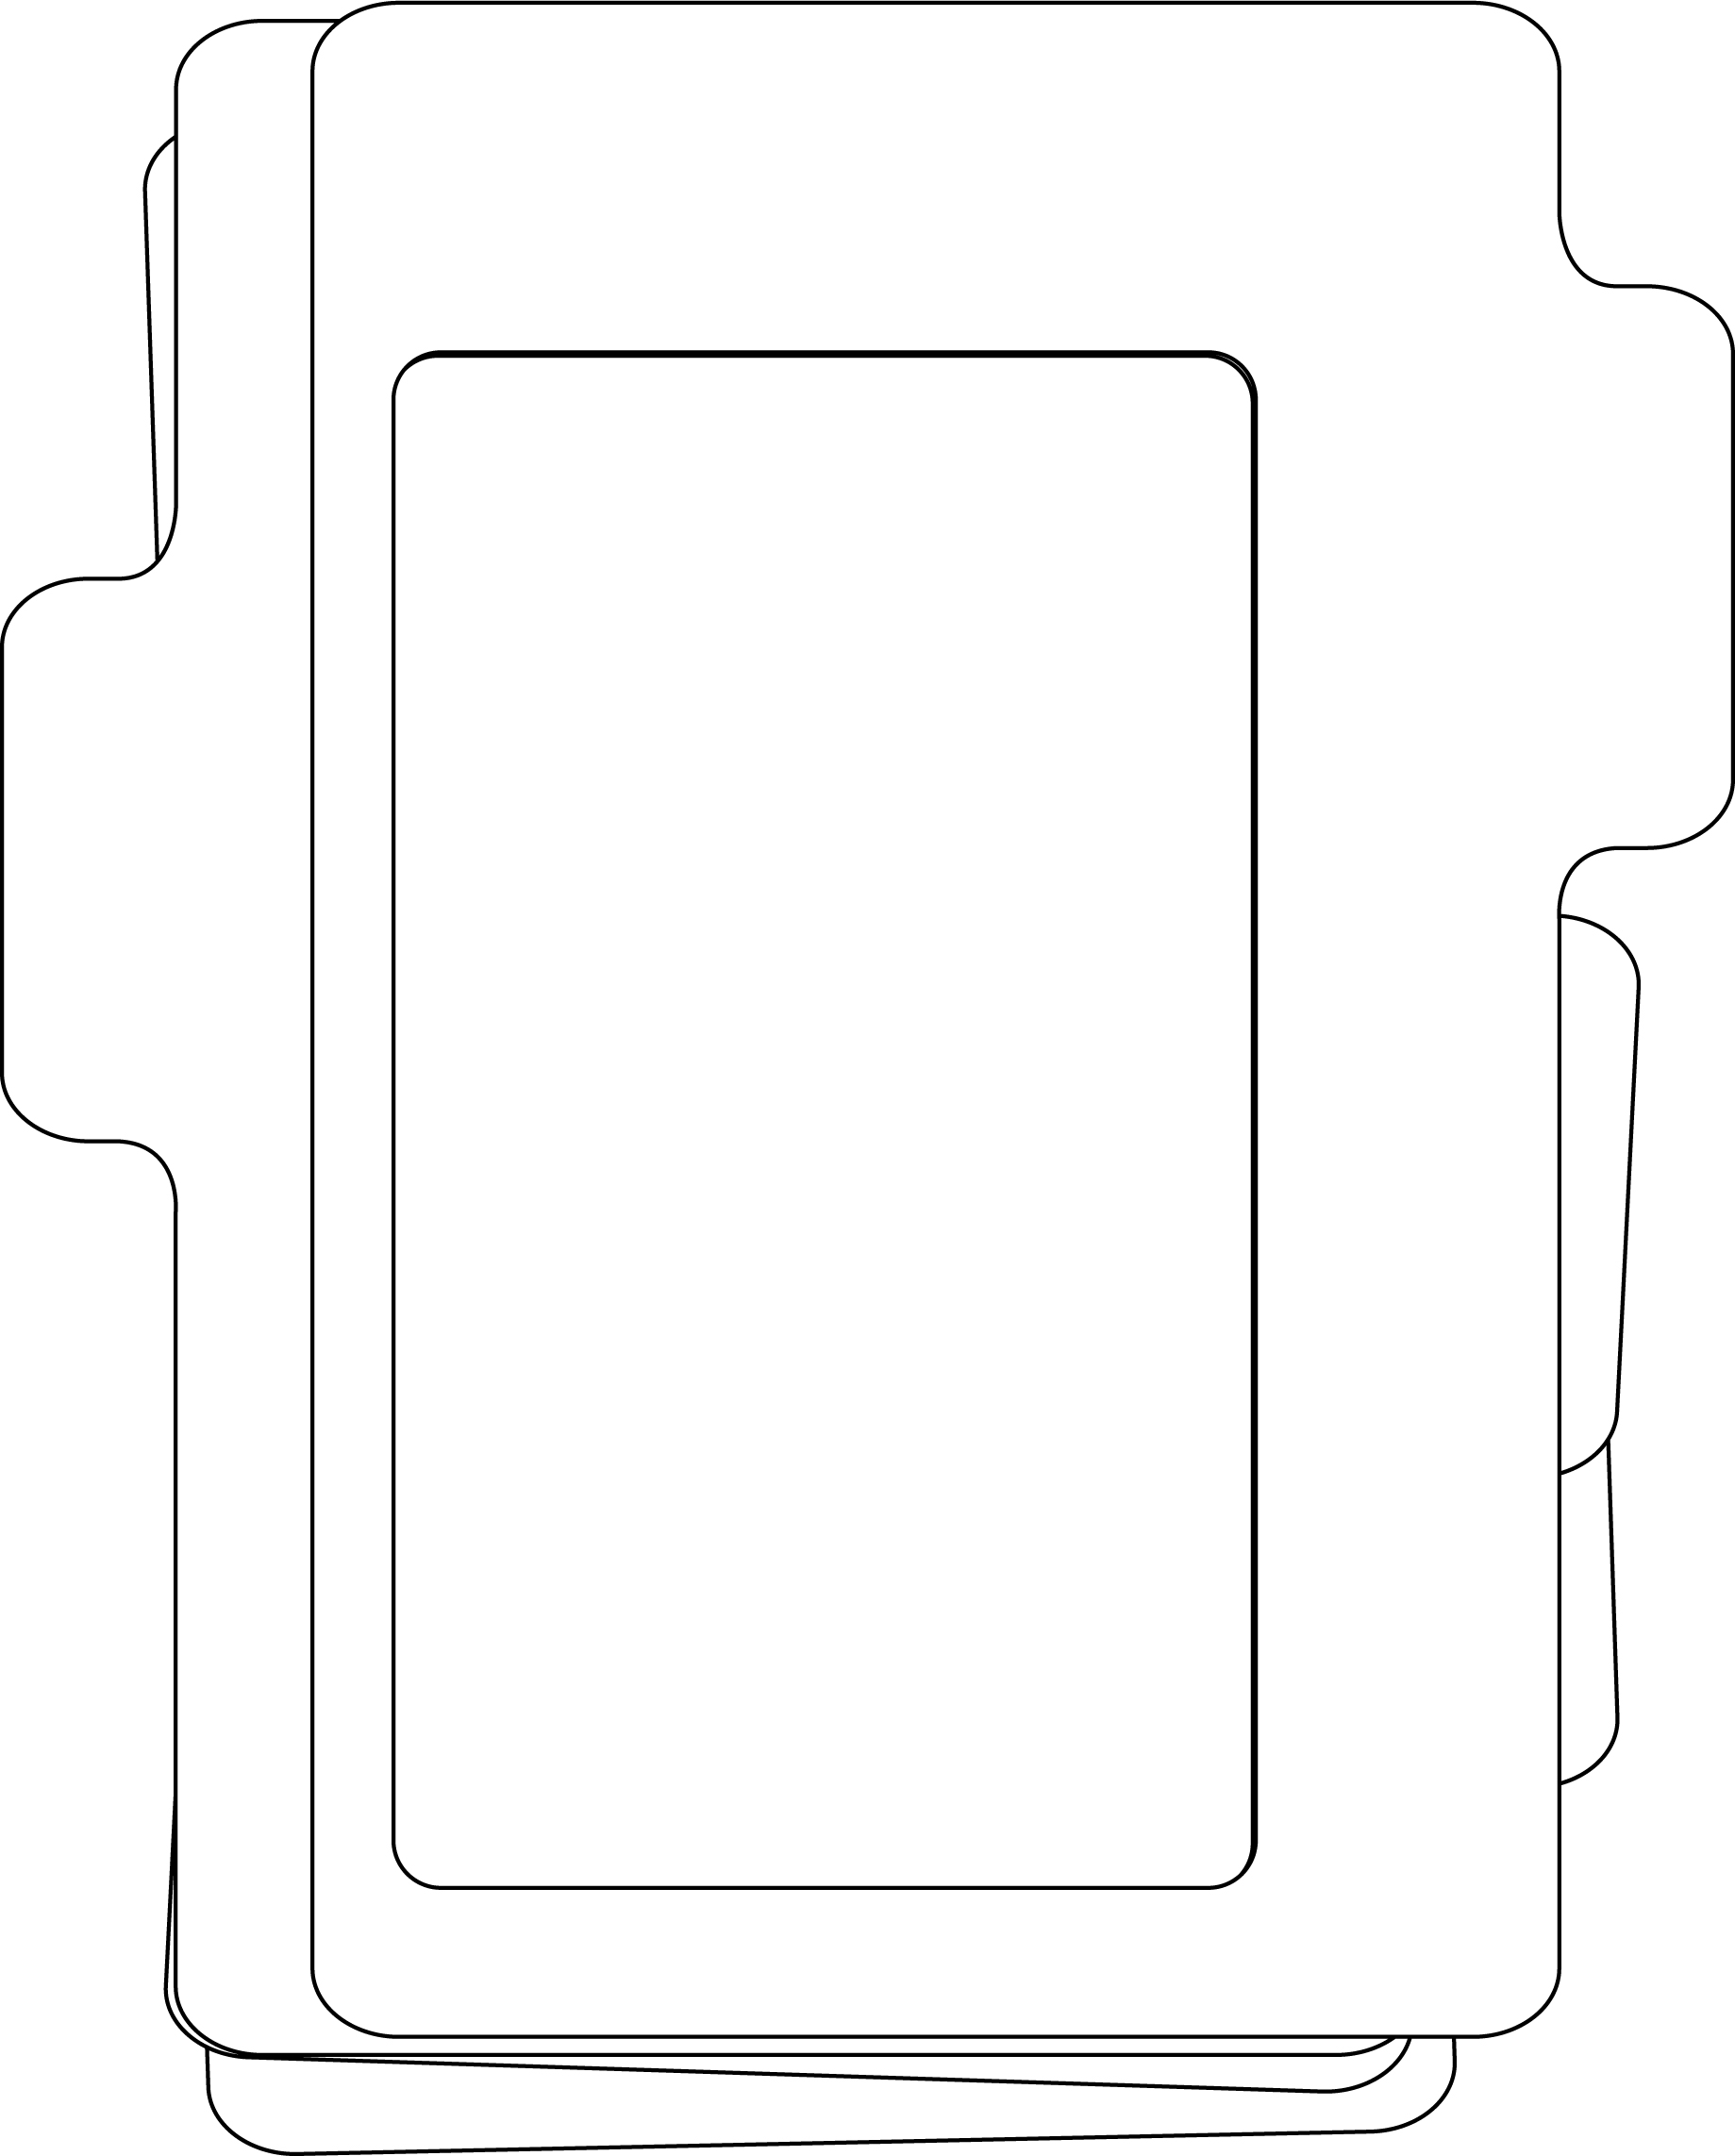
It is challenge time over on the Counterfeit Kit Challenge blog. Our challenge this time is to “Go Big or Go Home”! So I am putting together my layout using a large photo frame. I created the frame as part of my design team work over at the Counterfeit Kit Blog for the Forgery on the Fourth project. (It’s at the bottom of the post so be patient and scroll down!) But here is a quick peek at the frame.
And here is how it made it onto my layout!
Here is the full process video if you’d like to see the layout come together.
I hope you can check out the other designers takes on this challenge! Don’t forget to show off your stuff over on the CKC Facebook group, or tag us on Instagram @counterfeitkitchallenge or use #counterfeitkitchallenge. We love to see your work!
Disclaimer: I offer affiliate shopping linked products when possible. This shopping won’t cost you anything extra, but I get a small kick back from the companies for sending business their way. It is an easy way to tell me “Thank You” for the content I provide. I appreciate you using my links!
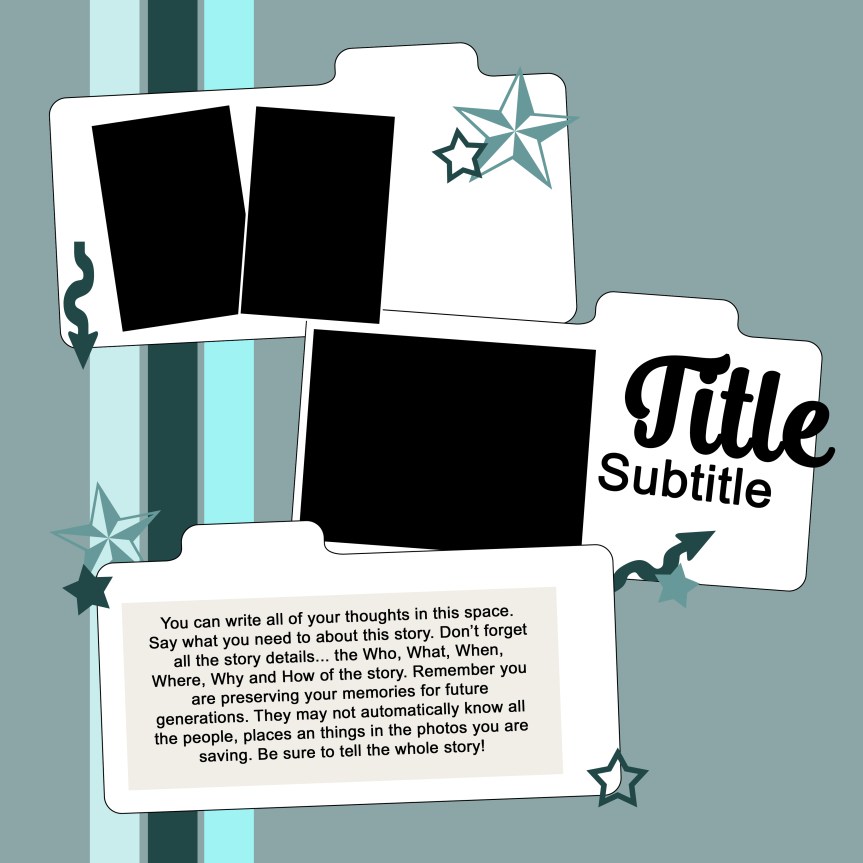
I love learning, creating and sharing. That is why I offer freebies up to you each month. I have both a layout sketch (in printable pdf as well as editable psd) and an electronic cut file (in svg). This month I was inspired by an organizational project I was working on. I needed my own specifically sized file dividers and I turned to Illustrator to get what I needed. Plus, it can make fun layouts as well!. You can see all the details in my reveal video, or read on for the short version.
Here is a closer look at the sketch and the project I created based on this sketch.
If you are a cut file lover, I’ve got you covered! I’ve actually got two files for you, the frame on the left, and the file cards, folder and tabs on the right. The video talks about how to use the first file card to layer over the file folder if you want to layer it will different pattern papers.
The photo frame on the left was described as part of my design team work over at the Counterfeit Kit Blog. It’s at the bottom of the post so be patient and scroll down! Plus I used the finished frame in a recent YouTube video, so you can check it out there as well.
OR… head over to my Freebies Page to peruse the catalog of files I have offered in the past. And if you have any ideas for sketch or cut files, I’d love to hear your ideas. I can’t make promises but I can take suggestions!
** Disclaimer: I offer affiliate shopping linked products when possible. This shopping won’t cost you anything extra, but I get a small kick back from the companies for sending business their way. It is an easy way to tell me “Thank You” for the content I provide. I appreciate you using my links!
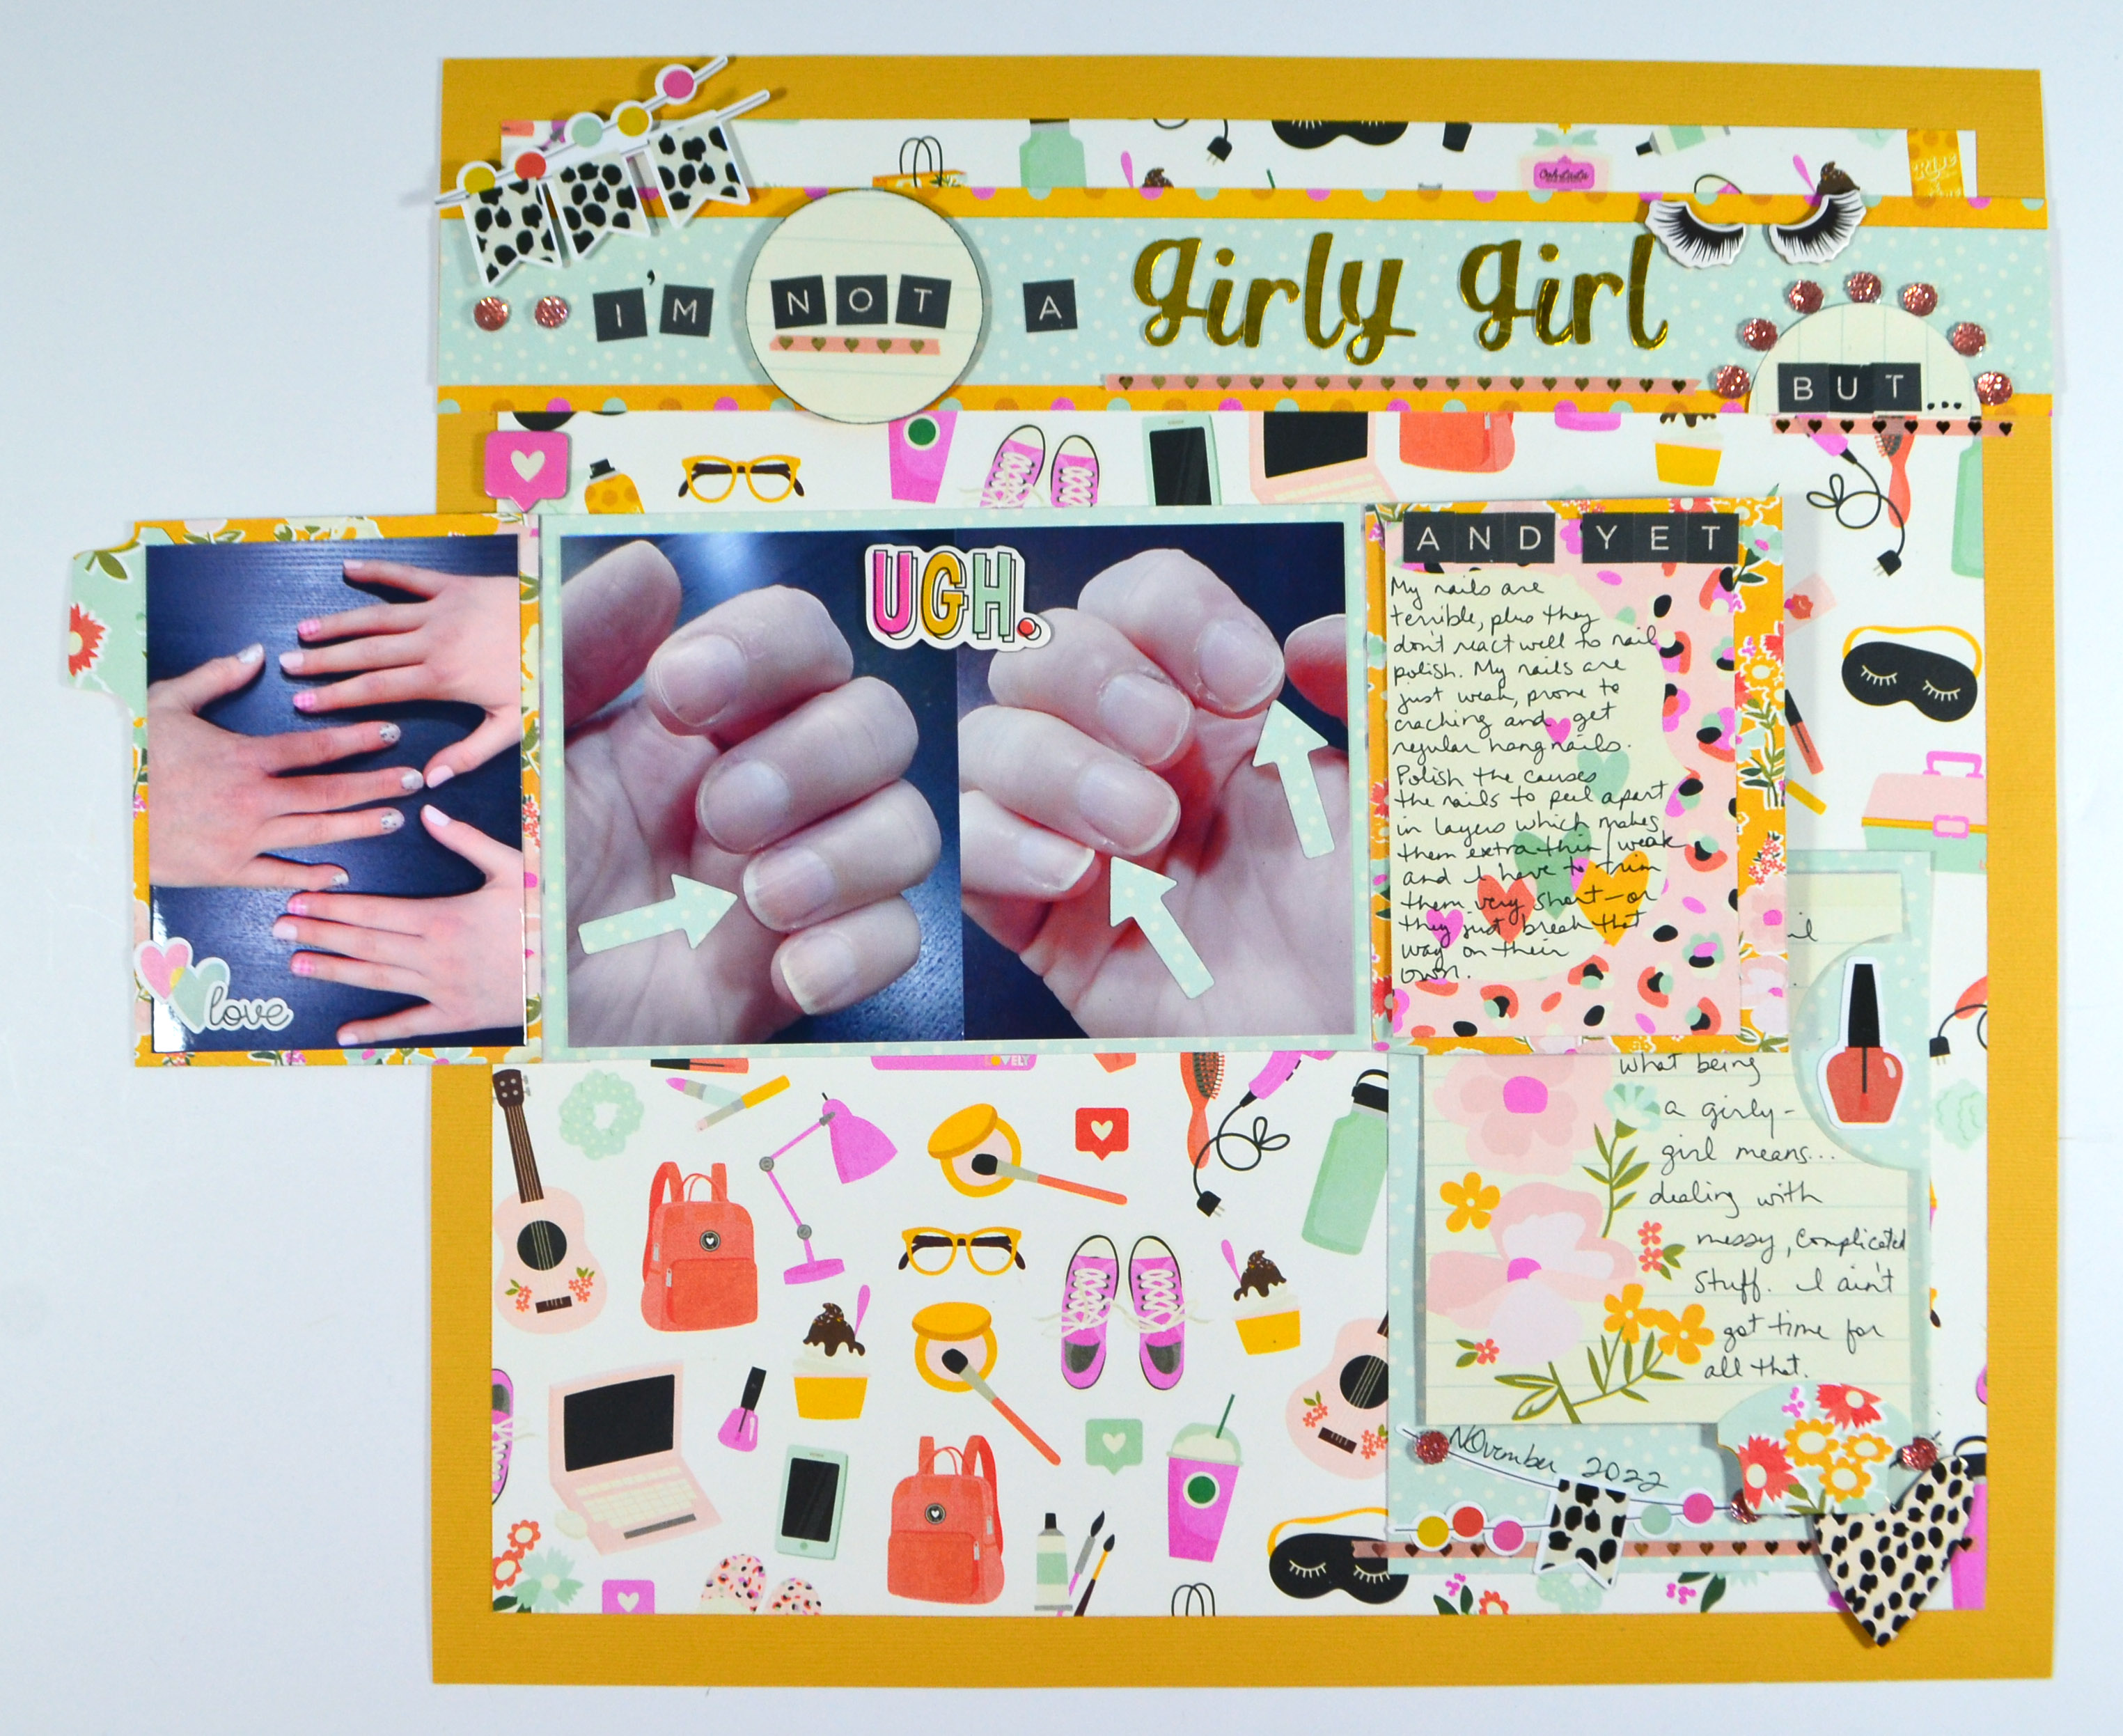
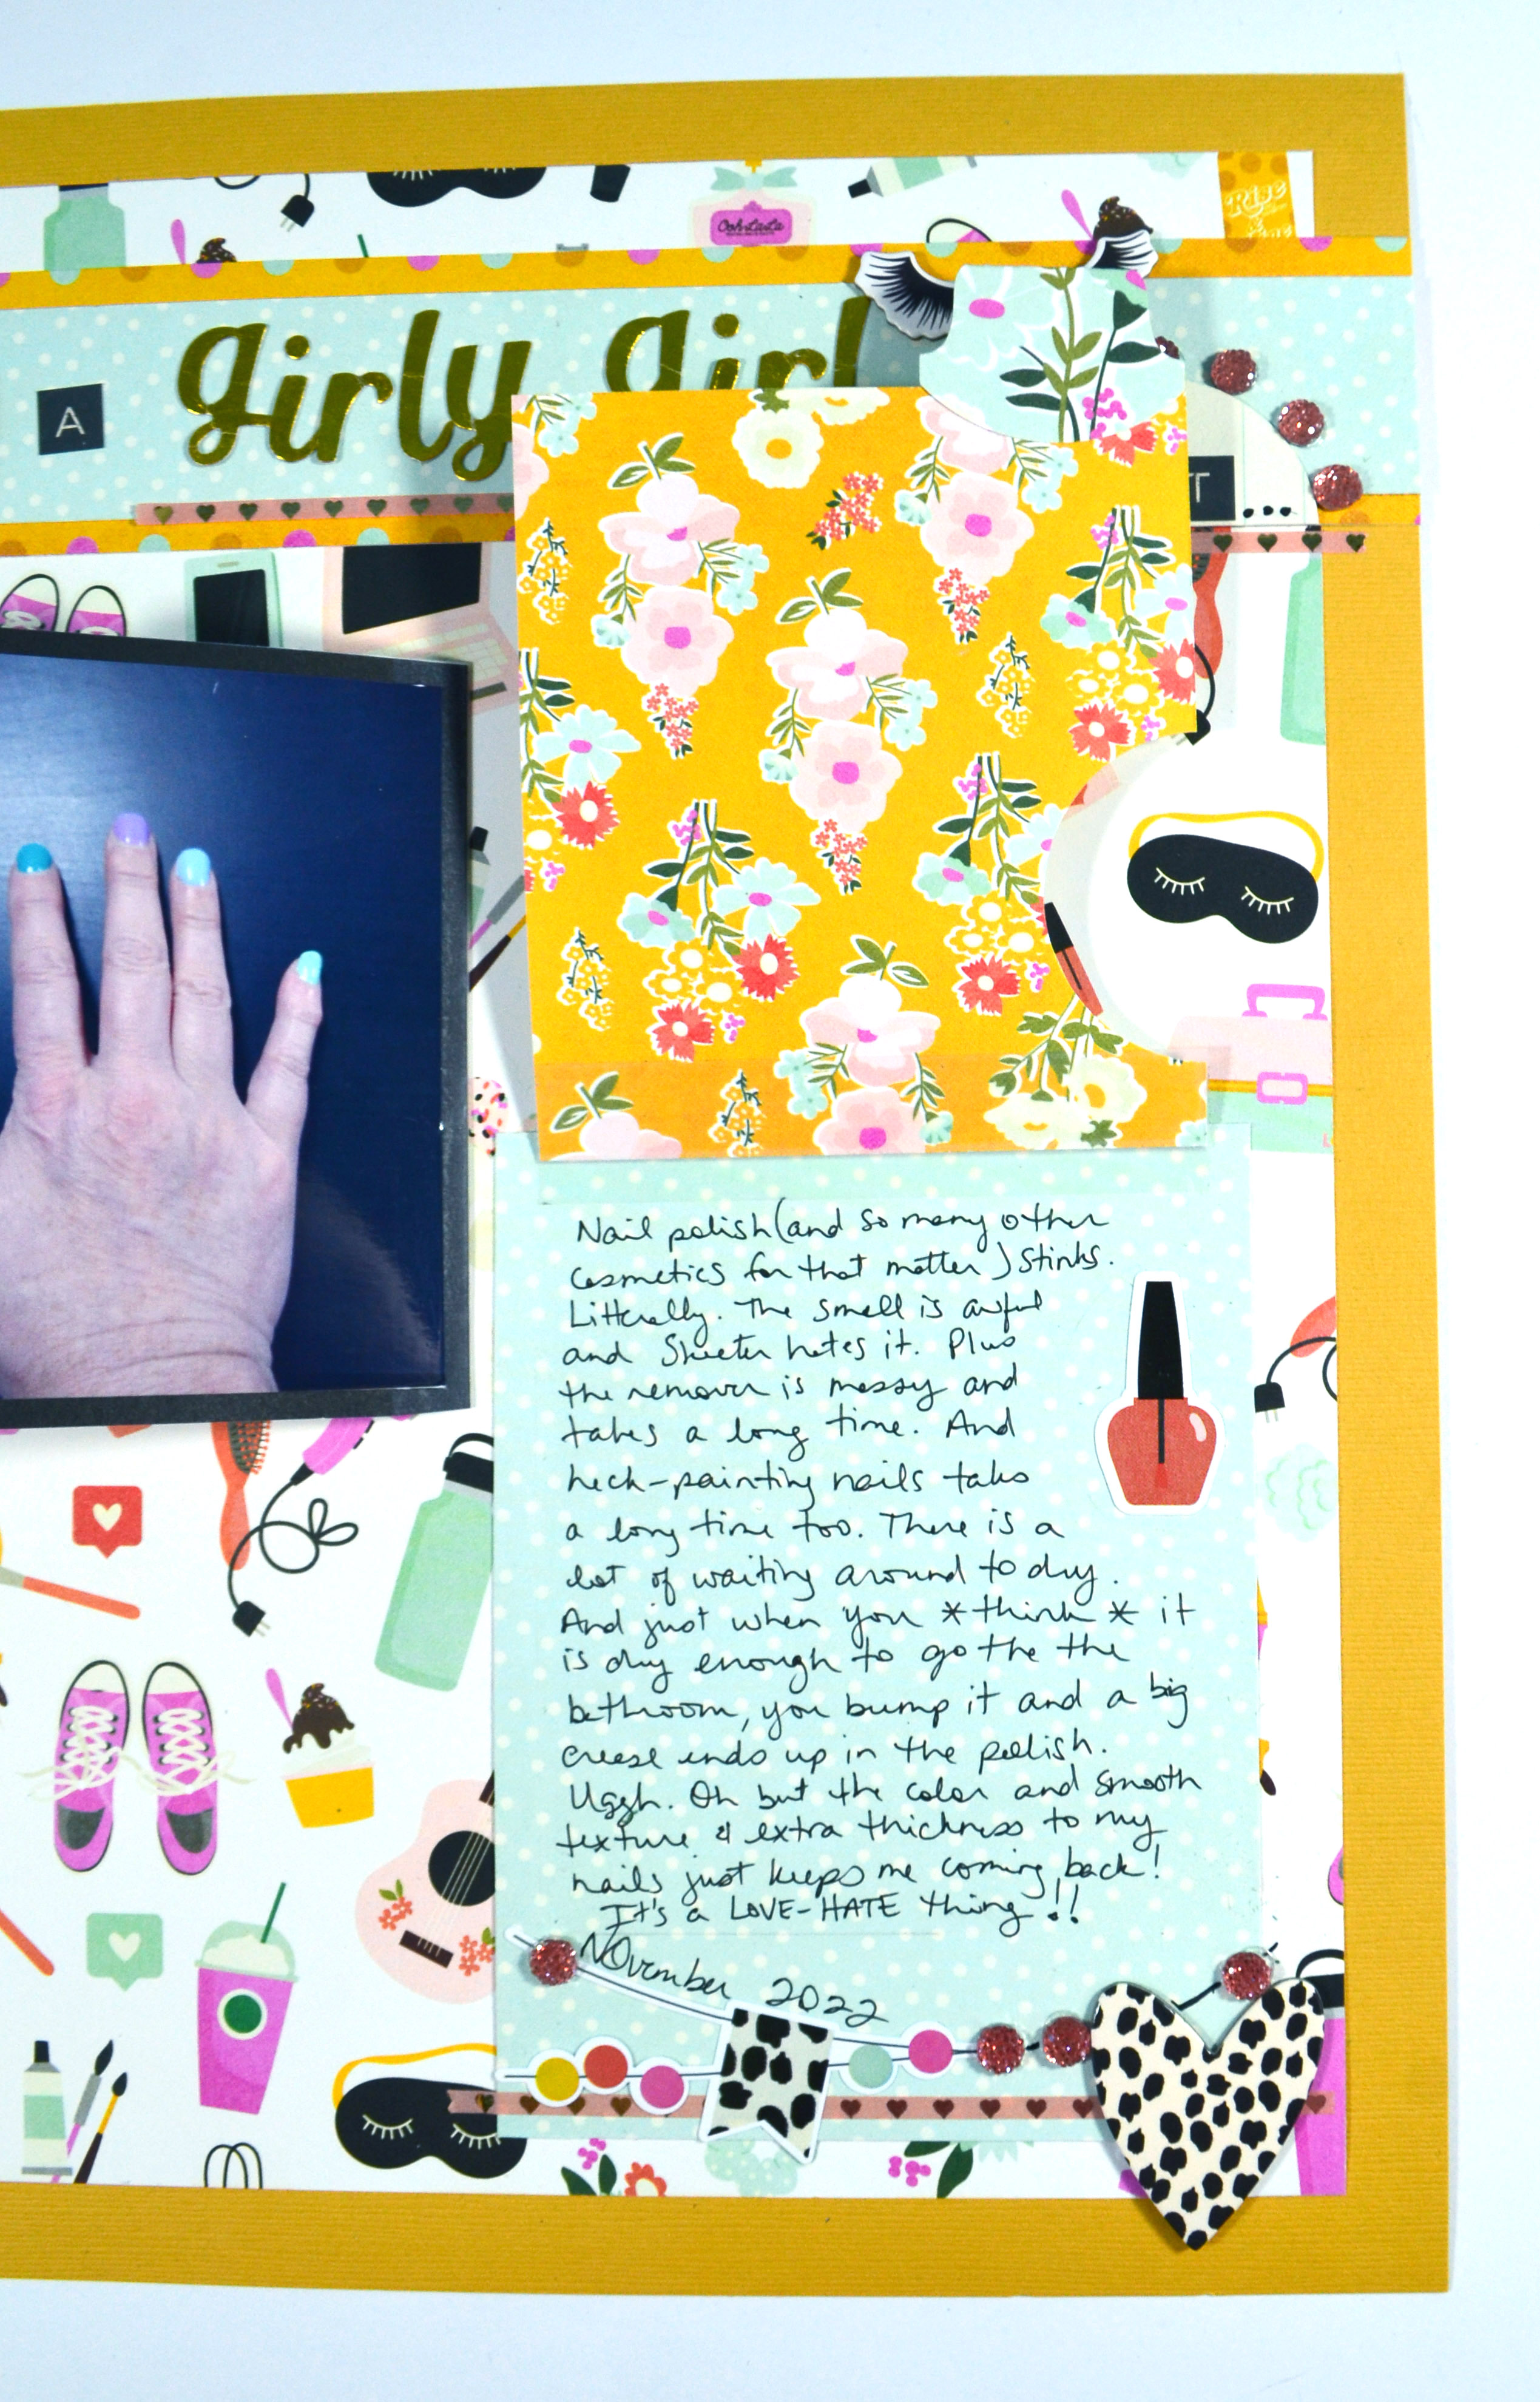
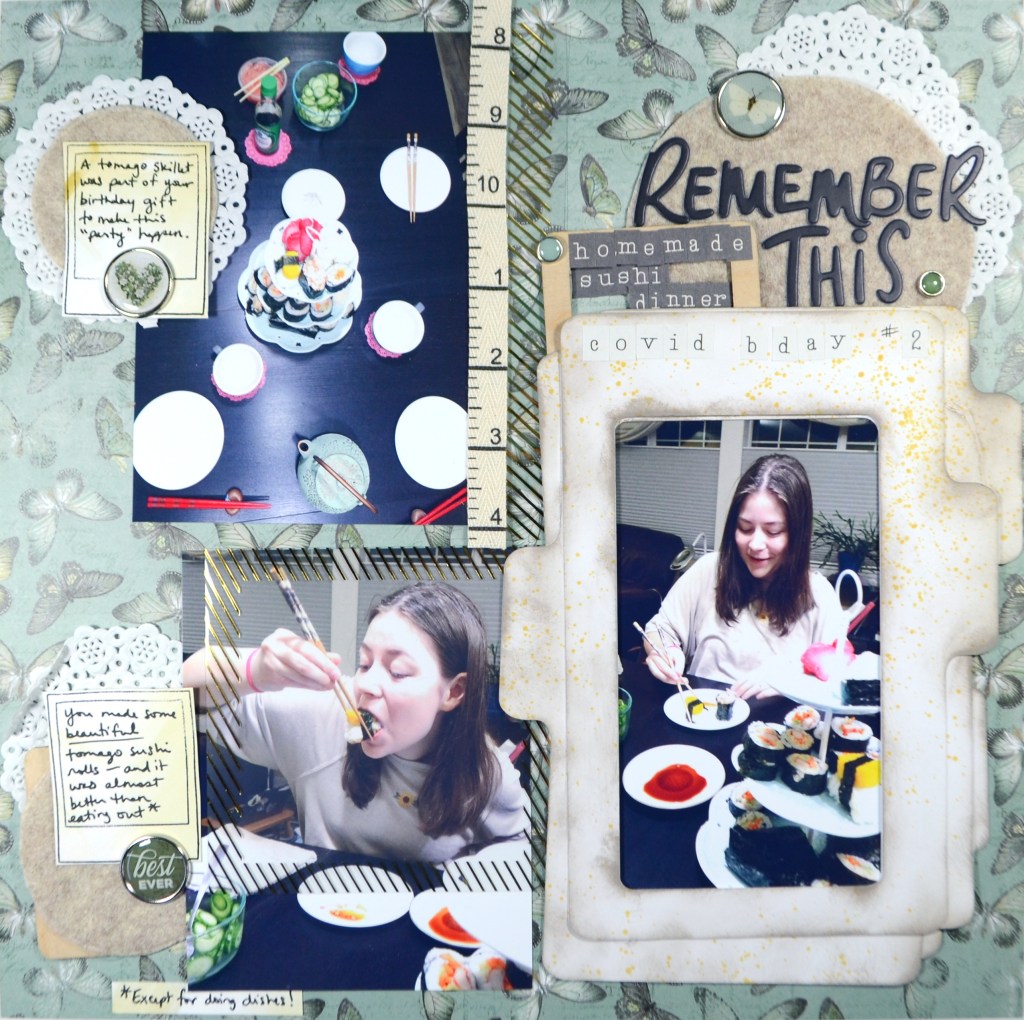
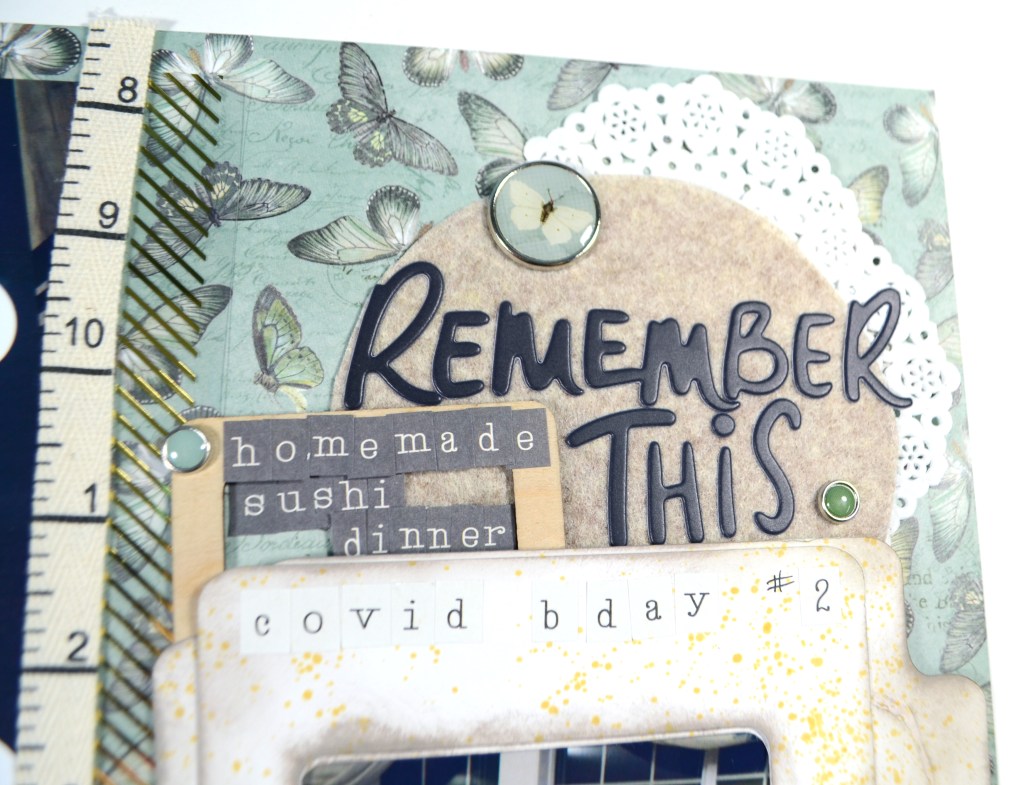
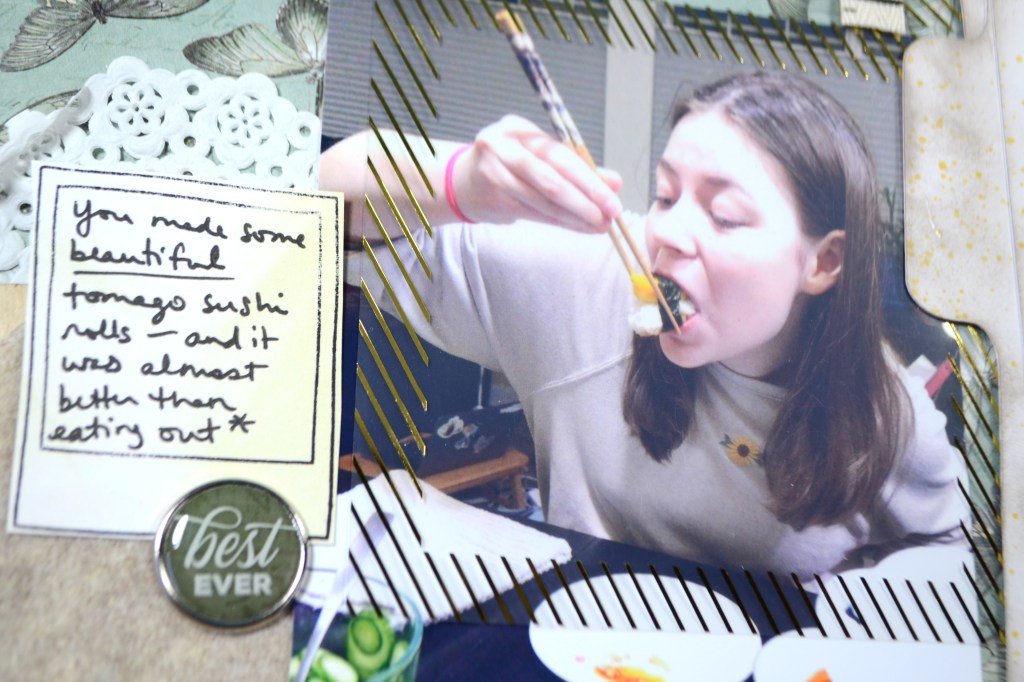
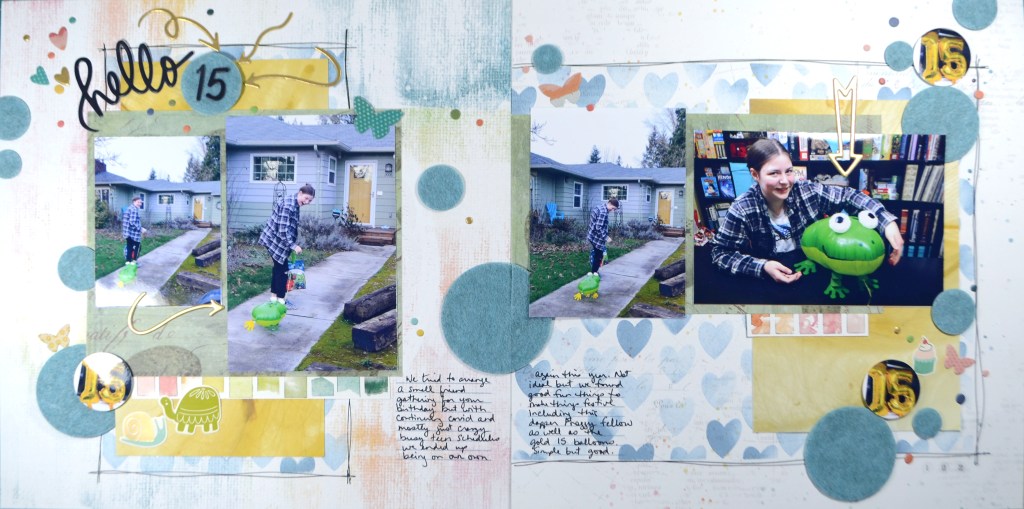
The elements I’m picking up in this sketch are the photo and paper block. I’ll mix that up with some stamped “paper” that I create. I’ll pull in more circles inspired by the title block. Finally I’ll use some birthday photos inspired from the overall theme of the sketch.
Notice the blue hearts enclosed in doodled borders? That is my mixed media background that acts in place of a pattern paper layer from the sketch. I don’t have a lot of paper in my layout this time around, so this is one way I get more out of my kit. I also use fewer embellishments and let those die cut felt circles carry a lot of the energy of the layout.
If you’d like to know more, all the details are in the video!
I hope you can check out the other designers takes on this challenge! Don’t forget to show off your stuff over on the CKC Facebook group, or tag us on Instagram @counterfeitkitchallenge or use #counterfeitkitchallenge. We love to see your work!
** Disclaimer: I offer affiliate shopping linked products when possible. This shopping won’t cost you anything extra, but I get a small kick back from the companies for sending business their way. It is an easy way to tell me “Thank You” for the content I provide. I appreciate you using my links!
Wowza. Another new month is here. This last part of the season has just whipped by and I don’t feel like I’ve given my previous kits enough love. Sigh. But time progresses and so do I. With that, lets move on to my new kit as part of the design team for the Counterfeit Kit Challenge project. If you are new to CKC, we take an inspiration kit each month and proceed to replicate it, or as we say, counterfeit it. This is a free, friendly group that helps inspire you to use up supplies you already own. We are not about needing to buy the latest and greatest thing (though we won’t stop you if you enjoy new crafty goodies😉 ).
Let’s welcome our guest designer before we dive in….Nikki Ihus. Nikki and I know each other from various crafty circles, and she even was a part of my YouTube going through a growth spurt back in the early days. I’m excited to have her join the team this month!
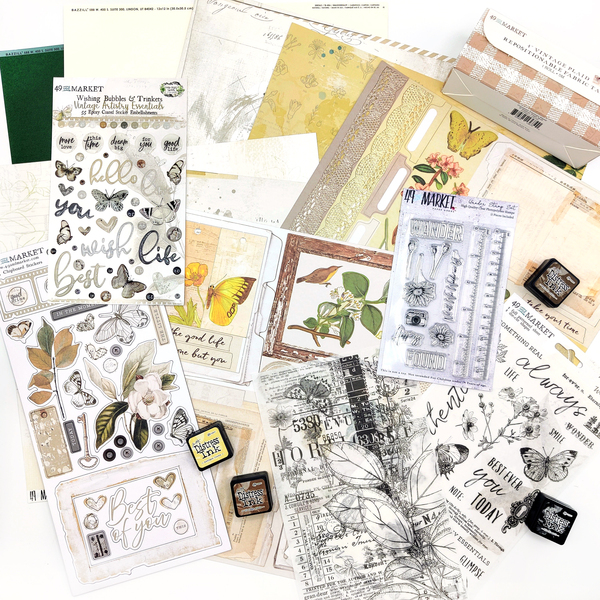
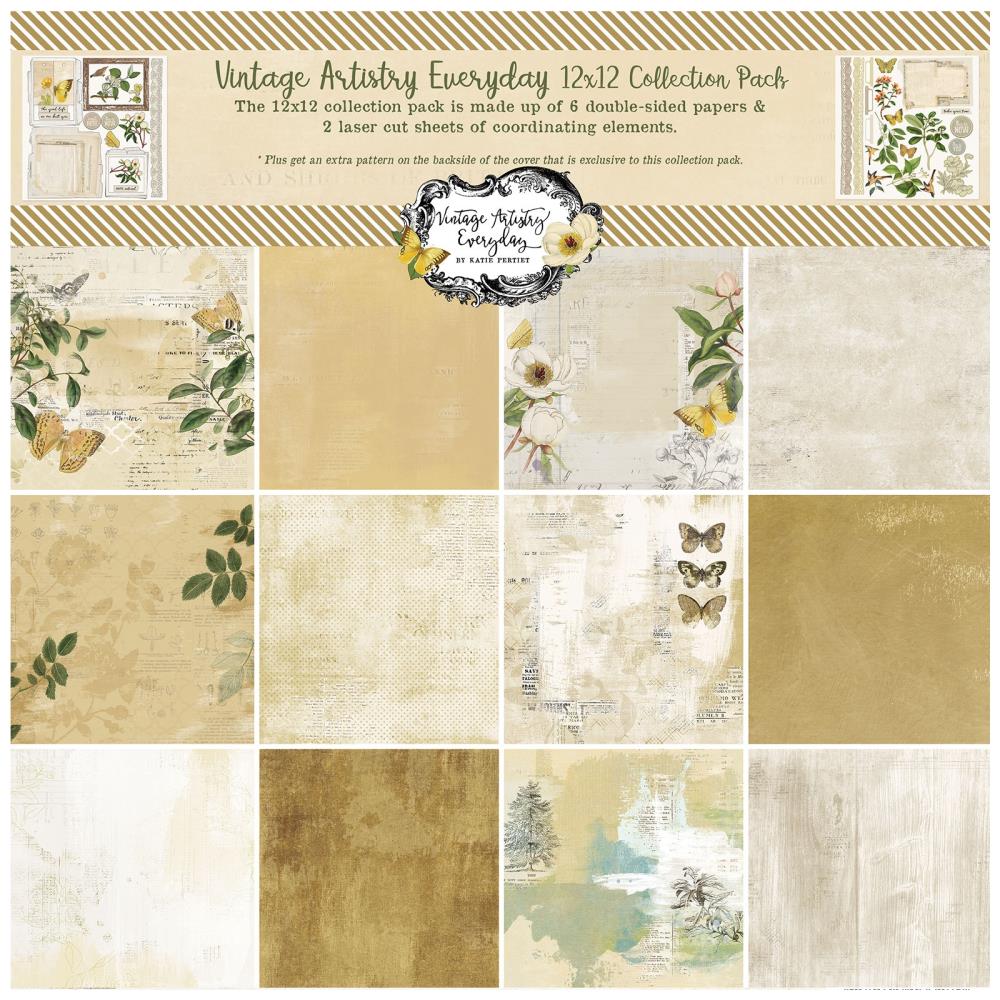
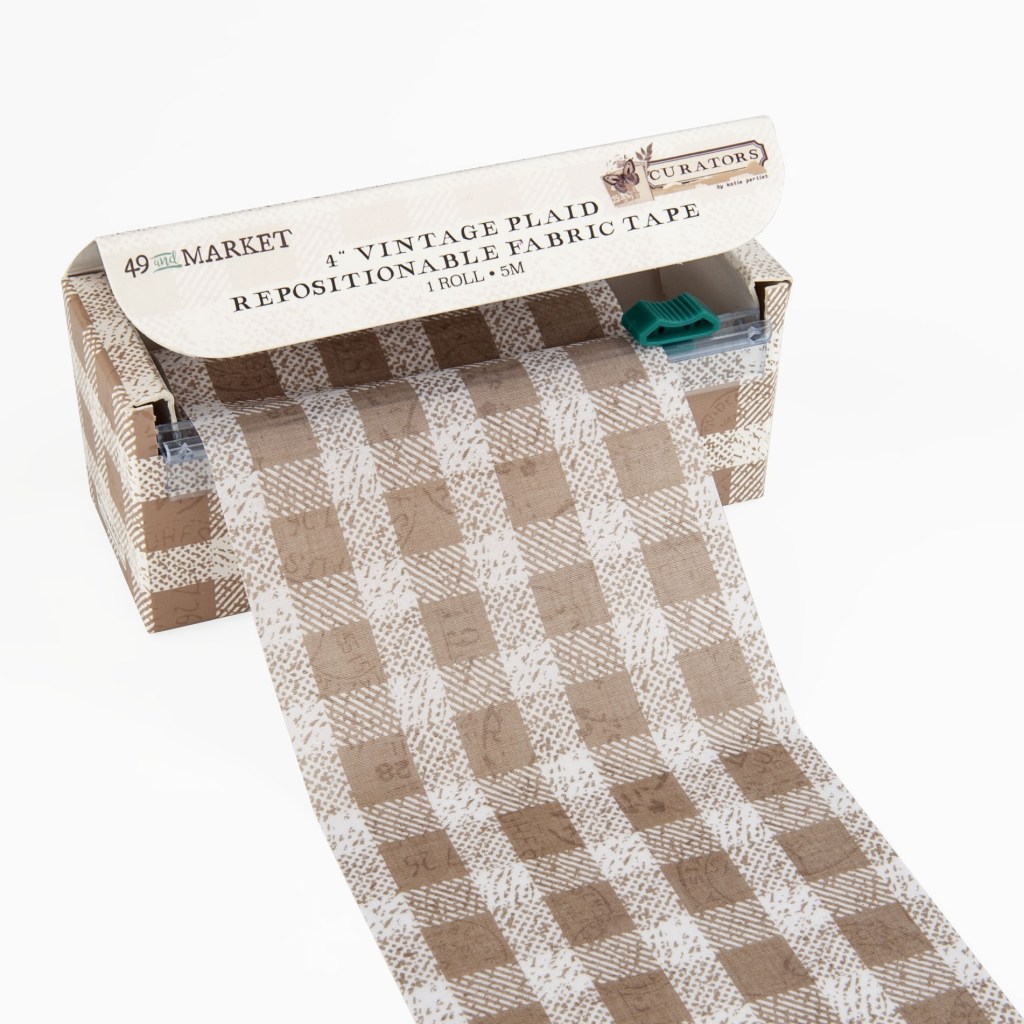
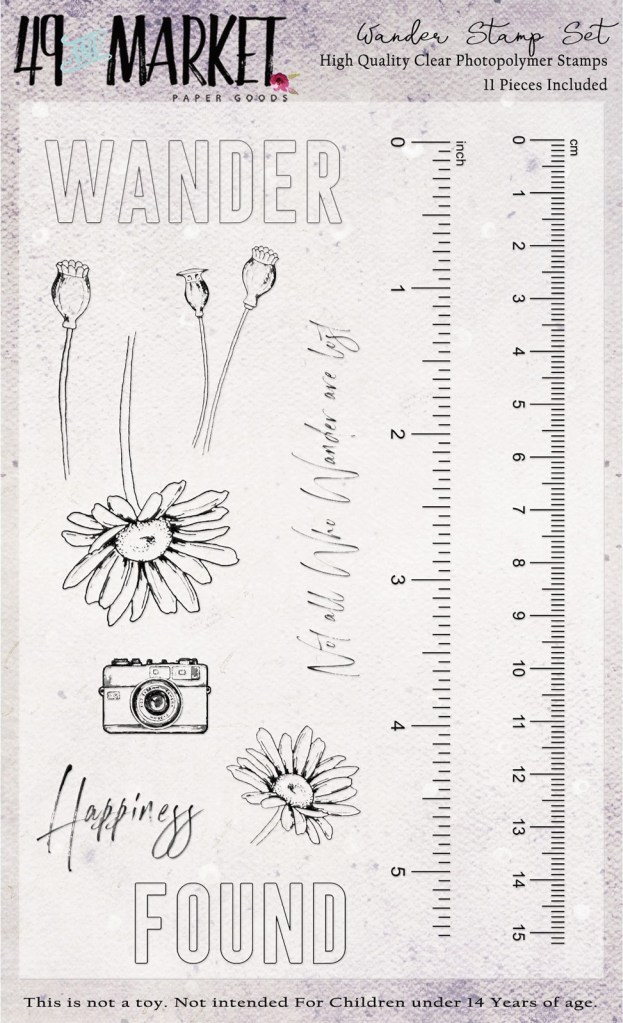
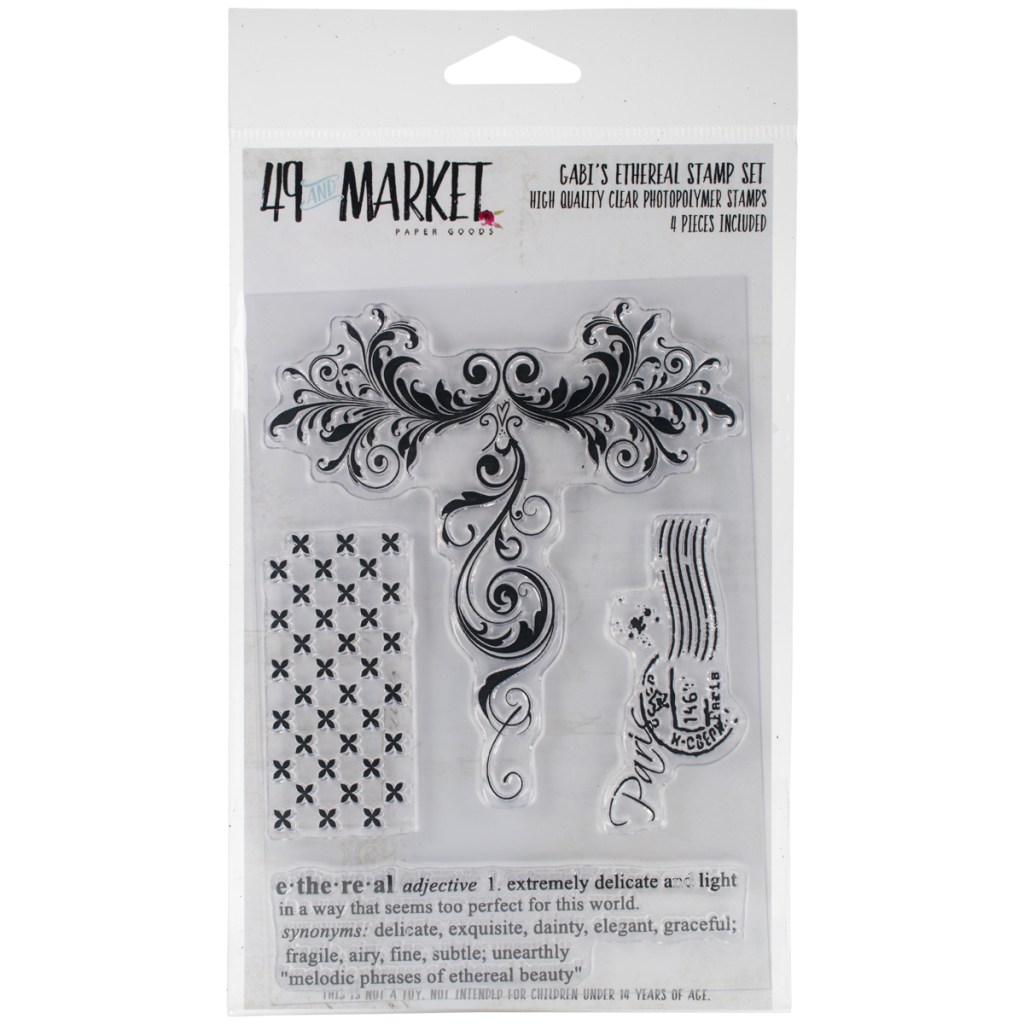
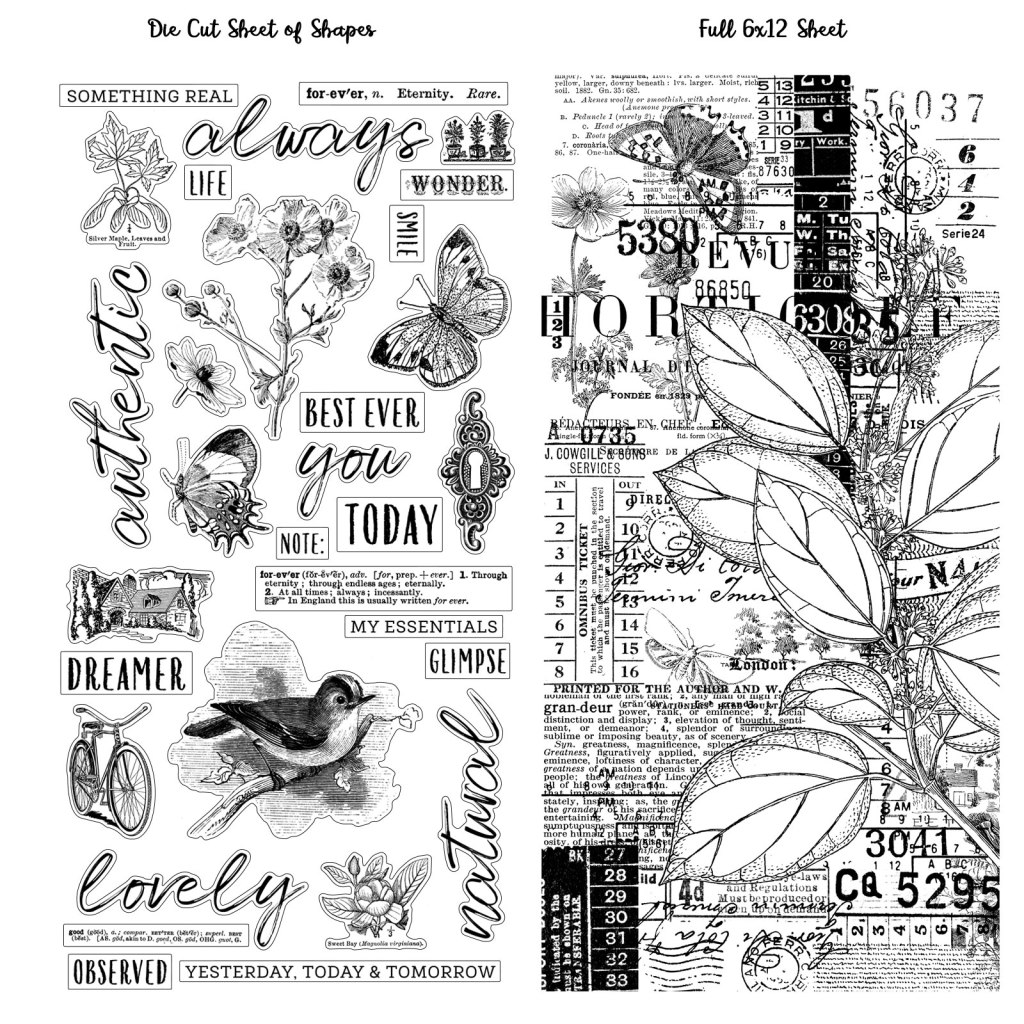
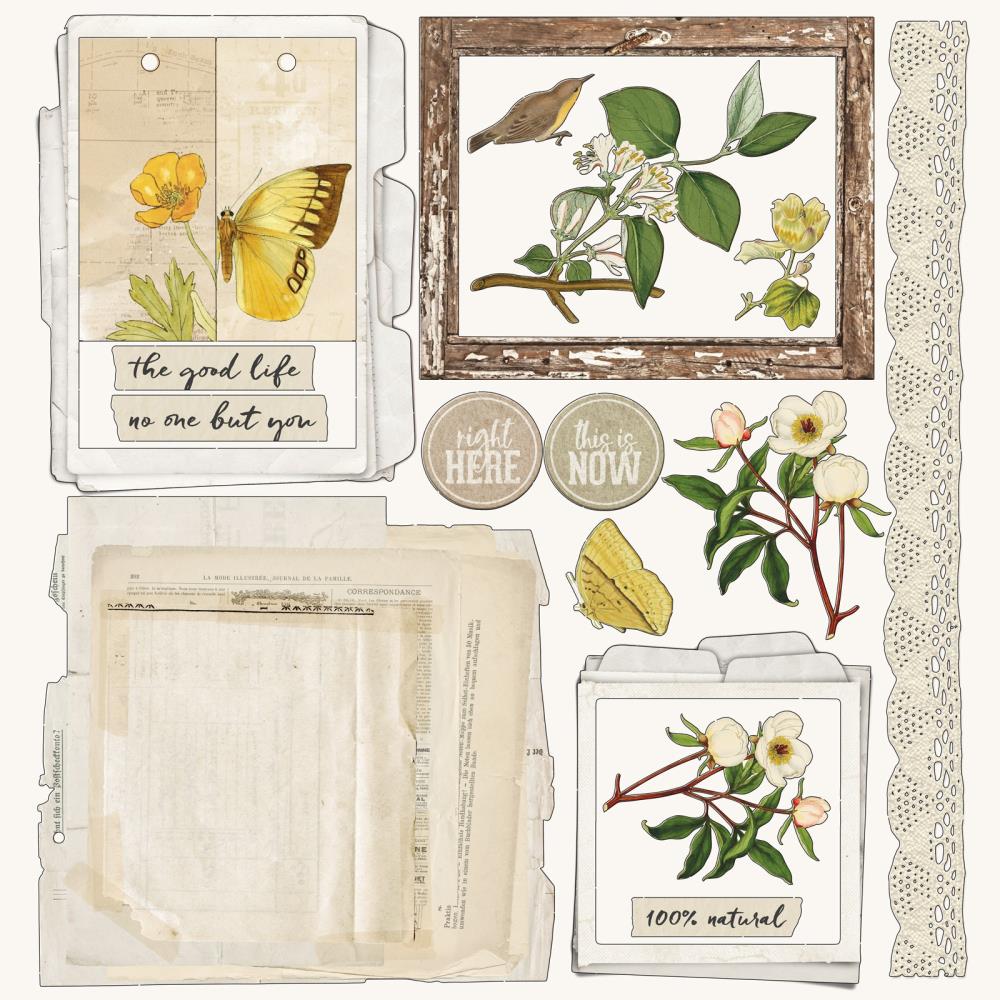
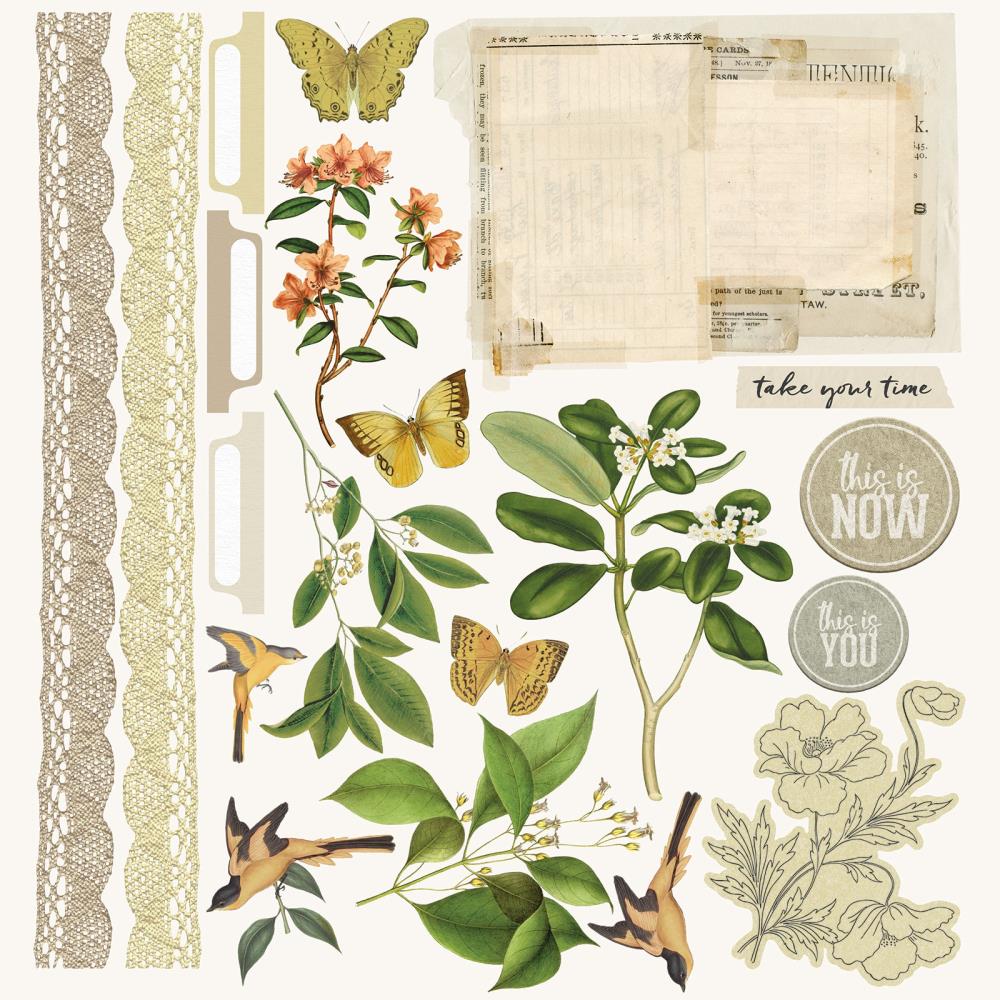
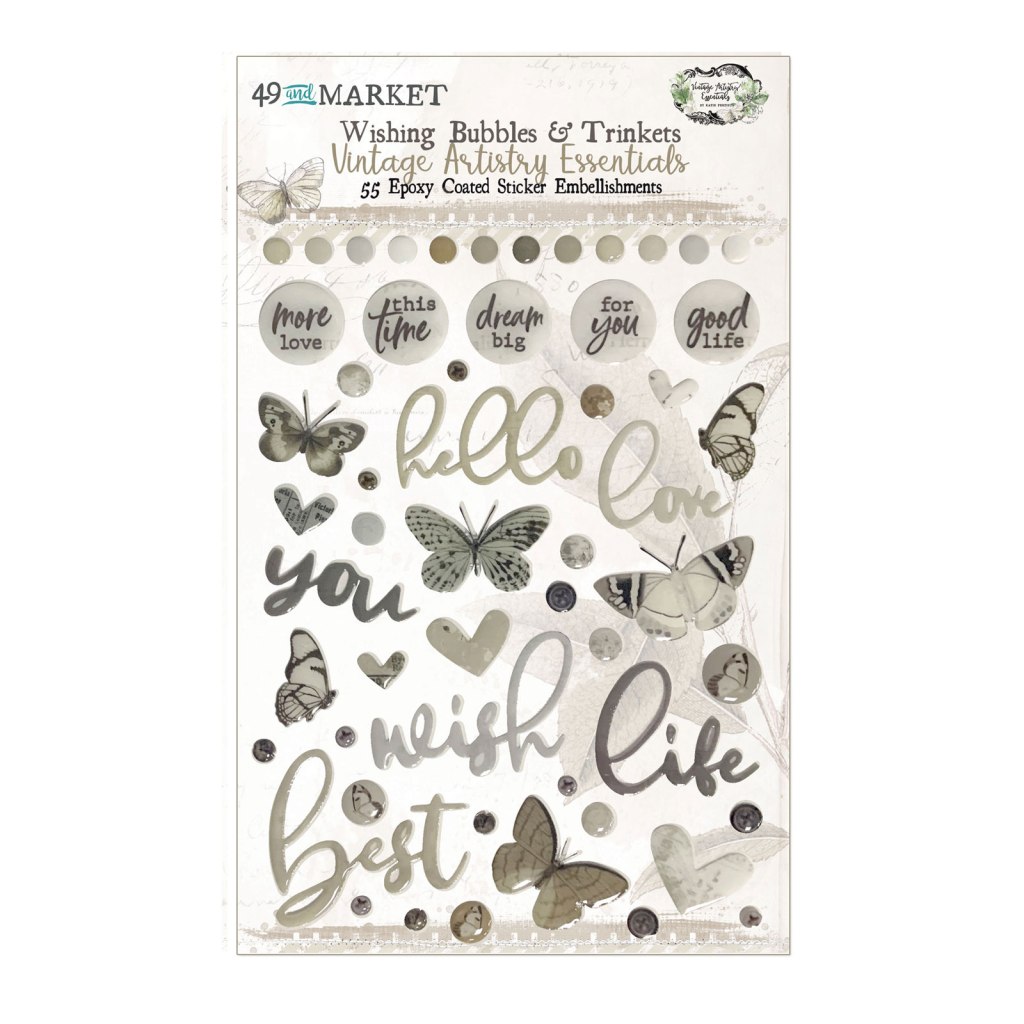
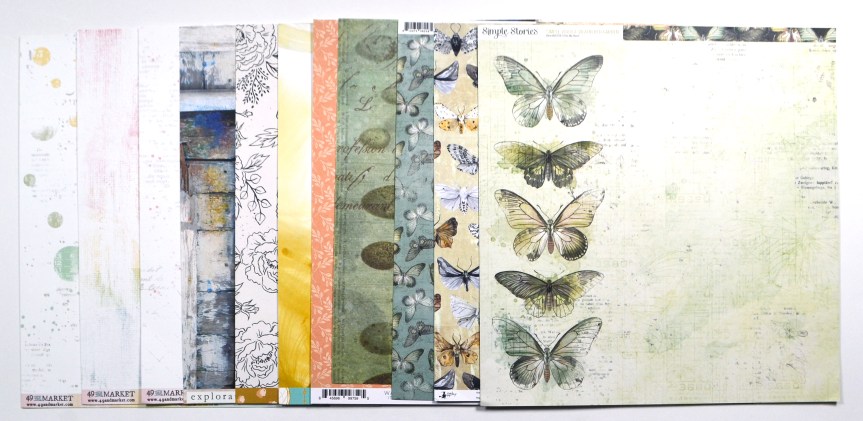
Our inspiration kit this time around is the August Cherry Box** offered by A Cherry On Top Crafts** website. This kit is centered around product by 49th and Market that has a very neutral color palette, and vintage vibe with a nature feel. I’ll admit that the neutral color palette had me guessing for a while, but as you’ll see I figured out how my style would mesh with the inspiration kit!
Before we get to my kit, let’s peek at most of the inspiration pieces.
For my build I started with my own 49th and Market stash, which definitely has more color to it. But I picked out the papers with the most neutral overall look. I then added in papers from Simple Stories and others that had more color but kept a bit of a vintage vibe. And butterflies. There were lots and lots of butterflies.
I only chose 11 papers this time because my kits have been too big for my busy schedule lately. Also, October is a LOAD month (more on that here) which means I am creating a layout a day on a very wide variety of topics. I’ve found that in past LOAD months, my one CKC kit often only works for a couple of layouts. So I wanted to keep my kit small to allow more room for other creativity in my variety of story telling.
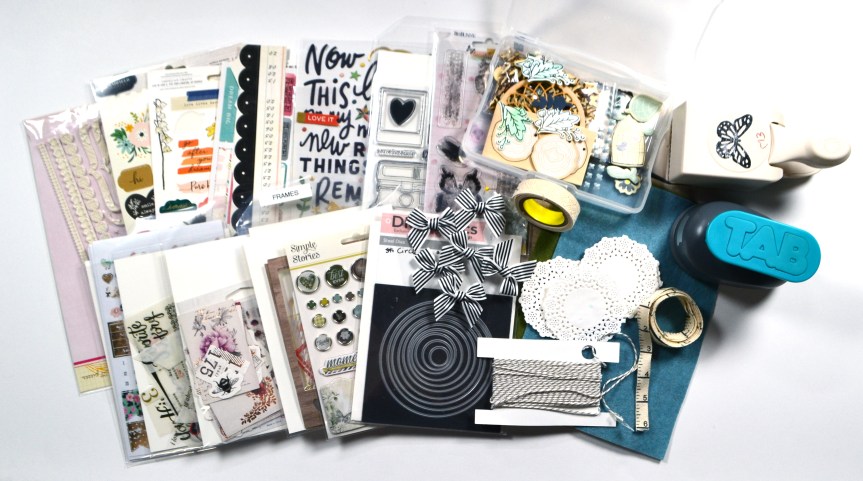
However, the small kit idea melted down after I started pulling embellishments. If you watch the video, you’ll see just how much of a madwoman I was! Well, through a long process I did narrow it down to still-a-rather-large pile. I think that means this months my layouts will be more along the lines of lots (and lots) of embellishing layers instead of paper layers.
Okay. That is my kit. Now… there is a tradition over at CKC of titling our kits just like companies do. So I’m calling mine MAD HATTER both for my lack of rational control in pulling items and for the vintage styling that Alice in Wonderland often encompasses.
If you want to see my entire mad thought process, check out my kit build video.
I hope you can follow along with the other designers and see how they interpreted their own kits.
Have fun kit building and don’t forget to show off your stuff over on the CKC Facebook group, or tag us on Instagram @counterfeitkitchallenge or use #counterfeitkitchallenge.
I’ll be back on the 4th, for our Product Forgeries. Until then, have an artful day!
** Disclaimer: I offer affiliate shopping linked products when possible. This shopping won’t cost you anything extra, but I get a small kick back from the companies for sending business their way. It is an easy way to tell me “Thank You” for the content I provide. I appreciate you using my links!
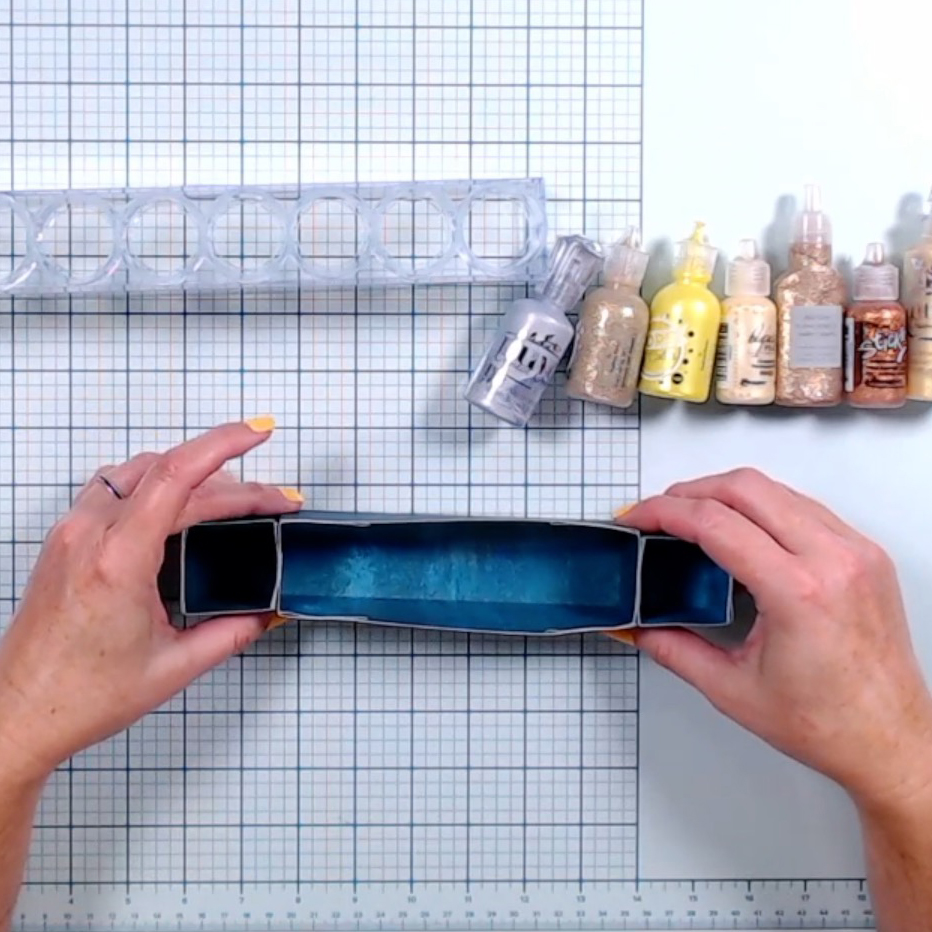
I love learning, creating and sharing. That is why I offer freebies up to you each month. Usually I offer both a layout sketch and and cut file, however this time around I’m working on a bigger, specific project. I am reorganizing my ink pads and other color products into an up-cycled CD “bookcase”.
Eventually all the colors of ink pads will share shelves with these little organizers for other color products! Since I needed to create many of these organization boxes, I decided to create a cut file and share it with you. (Links to the files below.) The video has all the details on the cut file, but if you don’t own a cutting machine, read on for a manual version of this project.
For the Manual Version
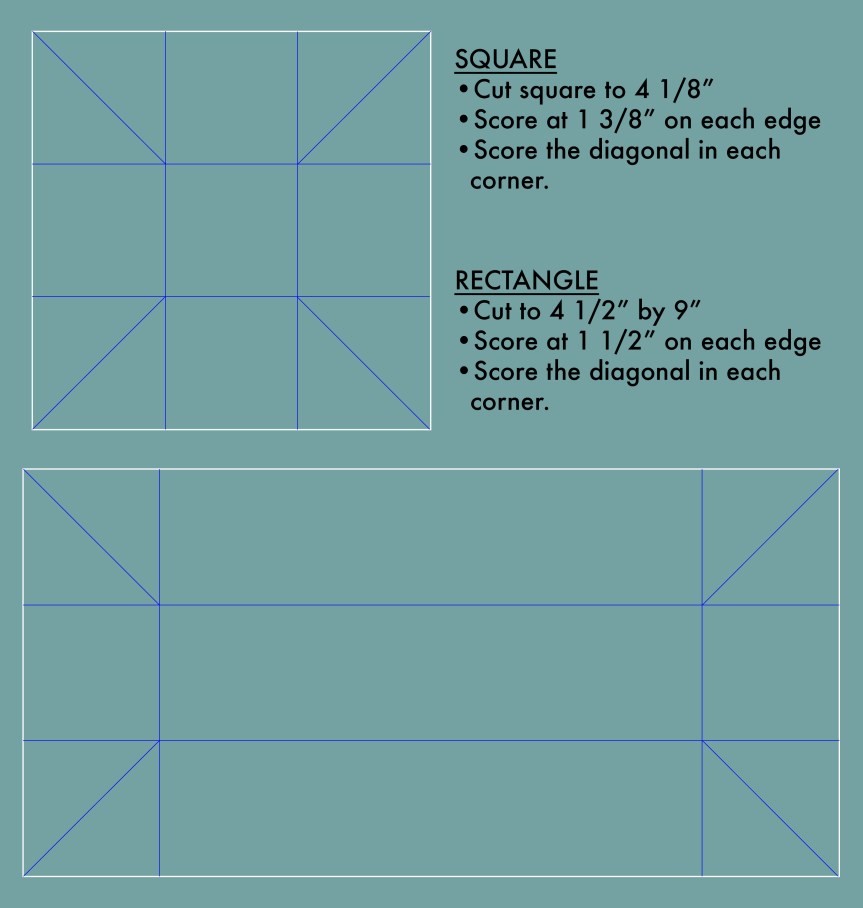
You will need to cut and score your boxes following the guide below. White lines are cutting and blue lines are scoring. The squares are cut slightly smaller than the rectangle to allow for stacking and gluing them into the rectangle. They can also be glued to the ends of the rectangle, or to each other for an array of configuration options (see pics below).
The video has a few tips and tricks to assembling these boxes, but really it is pretty straight forward. Fold along all the score lines. The corners will form little flaps. Tucks those flaps into the box and glue down to the sides of the box. Make however many boxes you need!
Get the Cut Files
I do offer a raw svg file for these cuts. However… in order to use the files with both cutting and scoring properties on a machine, you’d need to do some file manipulation to the svg. I do cover those manipulations in the video. But, if you want to skip the manipulation steps, then use the links below to access the Cricut or Silhouette brand specific files. Sorry, I don’t have access to other machine options; you’ll have to use the svg file and figure out how to manipulate it in your software. The video tells you WHAT to do, just not HOW to do it on all software. All links are right here for your conveniences, or you can pop over to my Freebies Page to see what other goodies I offer.