CASEd Chritmas cards

I subscribe to the Splitcoast Stampers YouTube channel. Most of the time the projects over there are not my cup of tea. But this recent video had me so excited. Mix watercoloring + technique tips. And bam. I’ve just CASEd (Copy And Share Everything) my Christmas cards for this year. The presenting artist’s skills are certainly more advanced than mine, but I think I I’m learning quite a bit as I go. Check it out.

ornament1

ornament2

I used twinkling H2O’s watercolor paints for the ornaments to add some sparkle. Picking up glimmer on camera can be tough and my photography skills aren’t at that level anyway. So just imagine the subtle shine these ornaments have!

Check out the video and see if you can level up your watercolor painting skills.

DCWV cone wreath

I received some paper stacks from DCWV to make projects, including one to make seasonal cone wreaths. As Thanksgiving approached I decided to quickly try to put together the fall wreath.

cone wreath 3

I had to cut my own circle base from chipboard. There is one base included but knowing I will need to make 4 wreaths total I just started this one with my own chipboard. I trimmed all the papers from the stack into their rectangle shapes. After a little playing around, I figured out how to quickly fold each rectangle of paper into a cone and hot glue it together. Each layer uses slightly smaller rectangles. I found the center to be rather deep and didn’t want to decorate down in that hole so I took some leftover chipboard and created a platform to fill in the hole.

cone wreath 2cone wreath 1

And that is as far as I got. Why you ask? The project wasn’t hard and it was starting to shape up to look lovely. But in the end I decided I just didn’t like the colors for Thanksgiving. Too much black. Too much orange. I will save this wreath for Halloween next year. I may try some other papers in greens and browns and golds to make a Thanksgiving wreath some other time. But for now, this project remains unfinished.

And that is okay. Go ahead and try things; and then decide you don’t like them. It is all part of the creative process.

I will give the winter wreath a go soon and see if that one fits my color ideals better!


Teacher Thanks in bulk

Remember when I posted my teacher thanks cards? As a reminder here is what I did.

card

This card was a challenge entry but it was also intended for my middle kid to give to her teacher. Only problem? She wanted 5 exactly like them to give to all her teachers. I didn’t have 5 more apple wood pieces or more leaves or more…

What to do? Adapt the idea to something duplicatable (and this original card gets saved for another time). Here is how we made cards in bulk.

teacher2

We kept the circle atop a green vertical strip. But we scaled our card to fit a single circle with the die cut leaves (Tim Holtz tattered leaves) and apple stamp (older Stampi’ Up image). Ink was added to the cork leaves to add some color and dimension. Simple adaptations to satisfy a little perfectionist tendency!

teacher1

Go thank the teachers in your life!

Thanksgiving Place settings

Okay, I realize that Thanksgiving was yesterday. I thought I would share anyway. Go ahead and adapt these and use them for Christmas instead. No biggie.

I used Core’Dinations envelopes and tags, my cutie little Lawn Fawn Turkey stamp and my kiddo to complete these table name tag/place settings/gift “box” (for the ornaments I made earlier here and here).

1supplies


Envelopes were simply inked using Tim Holtz distress inks to add color to the background. Tags were decorated with a watercolor marker technique (Art Impressions have good YouTube videos on how this works).  Once the turkeys were done, we inked the edges for a little more depth and threw on some twine. The final touch was to add each person’s name. I was going to use a rotary text stamp at first but decided to go with hand written names. Then I remembered I had some new India ink that I haven’t played with much. This further reminded me that a young friend had shown me her art marker that was really a water brush filled with ink. Bingo. I pulled out an extra water brush and filled it with my ink to make my own calligraphy brush.

1inkpen

And the results really were pretty. I’m not an expert hand letterer but practice makes perfect and here is a good place to practice.

1done


And here it all is put into action.

placeset1

placeset2


placeset3


Hope you enjoyed.

Caring Hearts Card Drive

Last year I started sending in card donations to the Caring Hearts Card Drive. This event is put on in part by Jennifer McGuire. She and some other lovely ladies collect holiday cards and organize their distribution to nursing homes in the U.S., Canada and Australia. These cards are used to bring cheer to the elderly in nursing homes who don’t have any family to visit for the holidays. I can’t imagine being so lonely and my heart aches. I’m glad that I can do just a little bit of something for someone else. I know when my kids are grown I will spend more time volunteering in person, but for now this is what I (and the kids!) can do.

My students from the card making class I teach helped out with this project too. Together we made 22 cards to send in. Take a look at the lovelies that I just put in the box.

foxcards

foxclose

foxextraclose

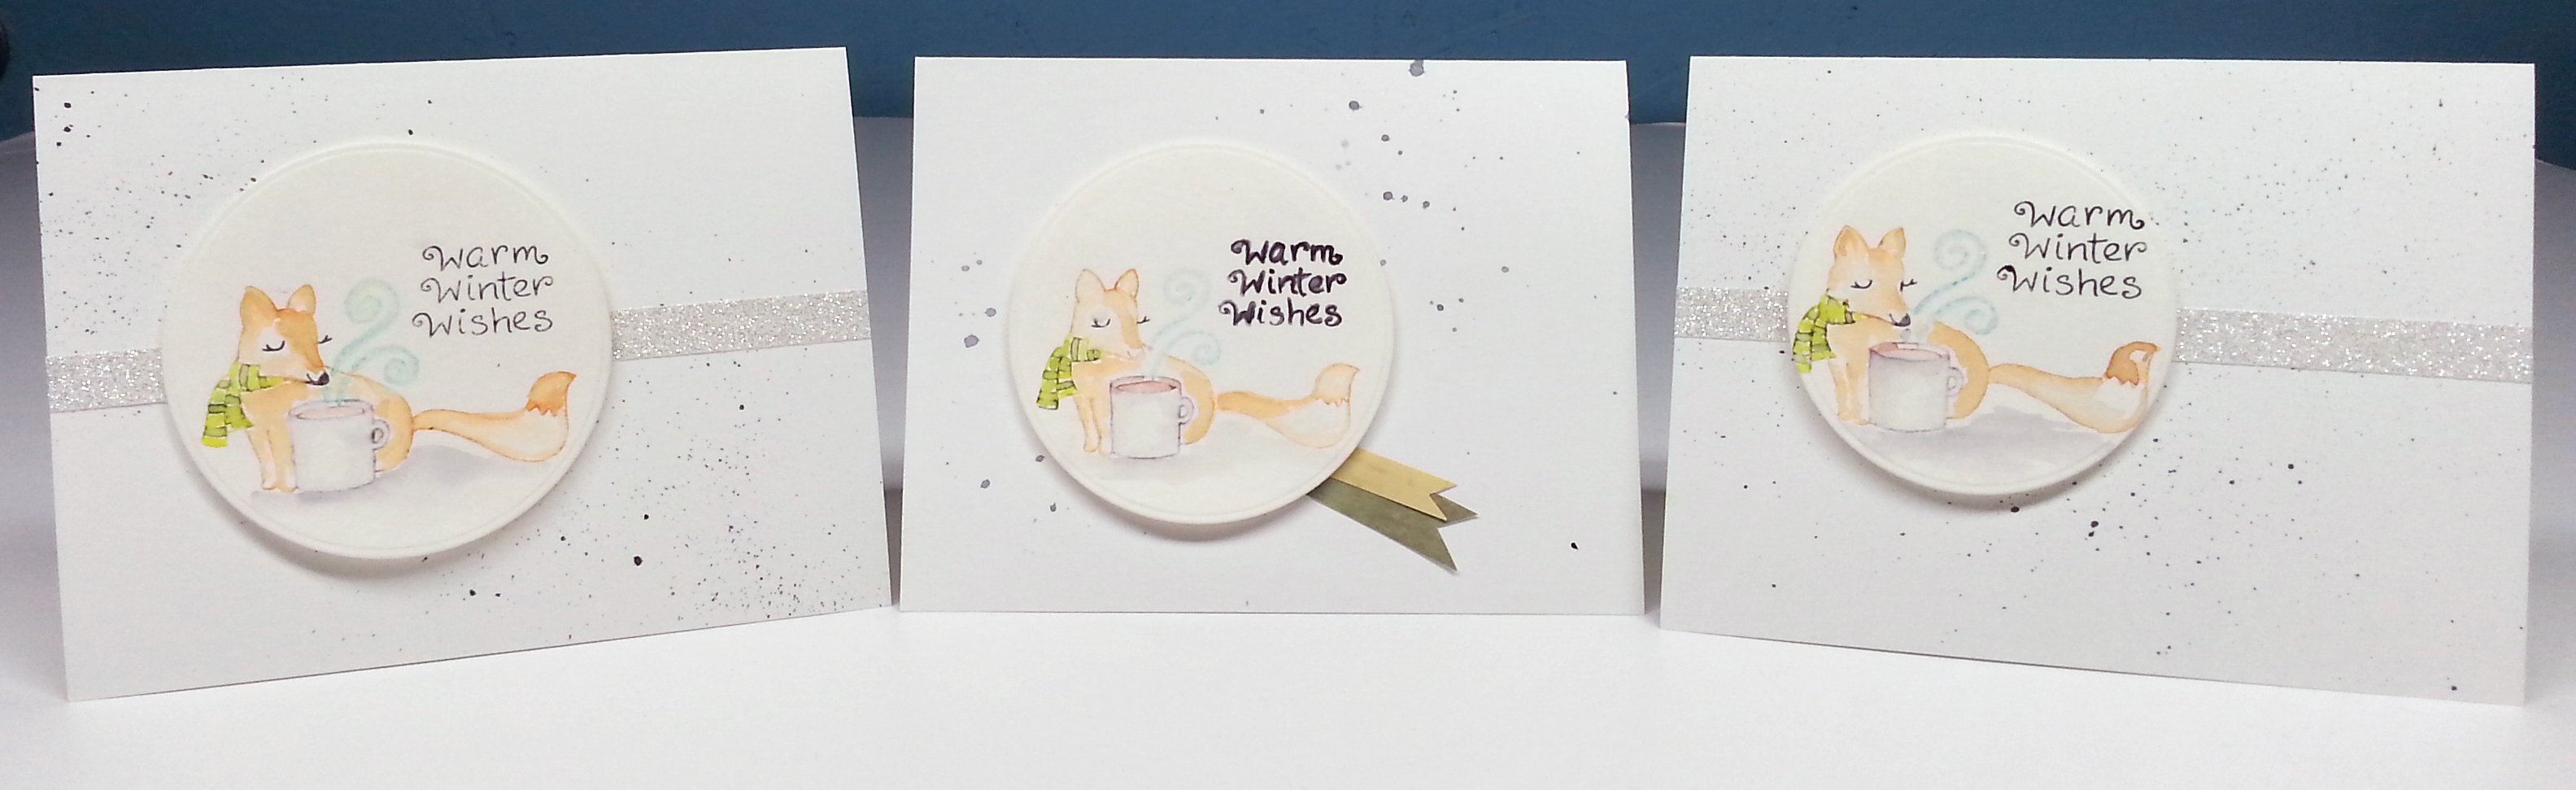
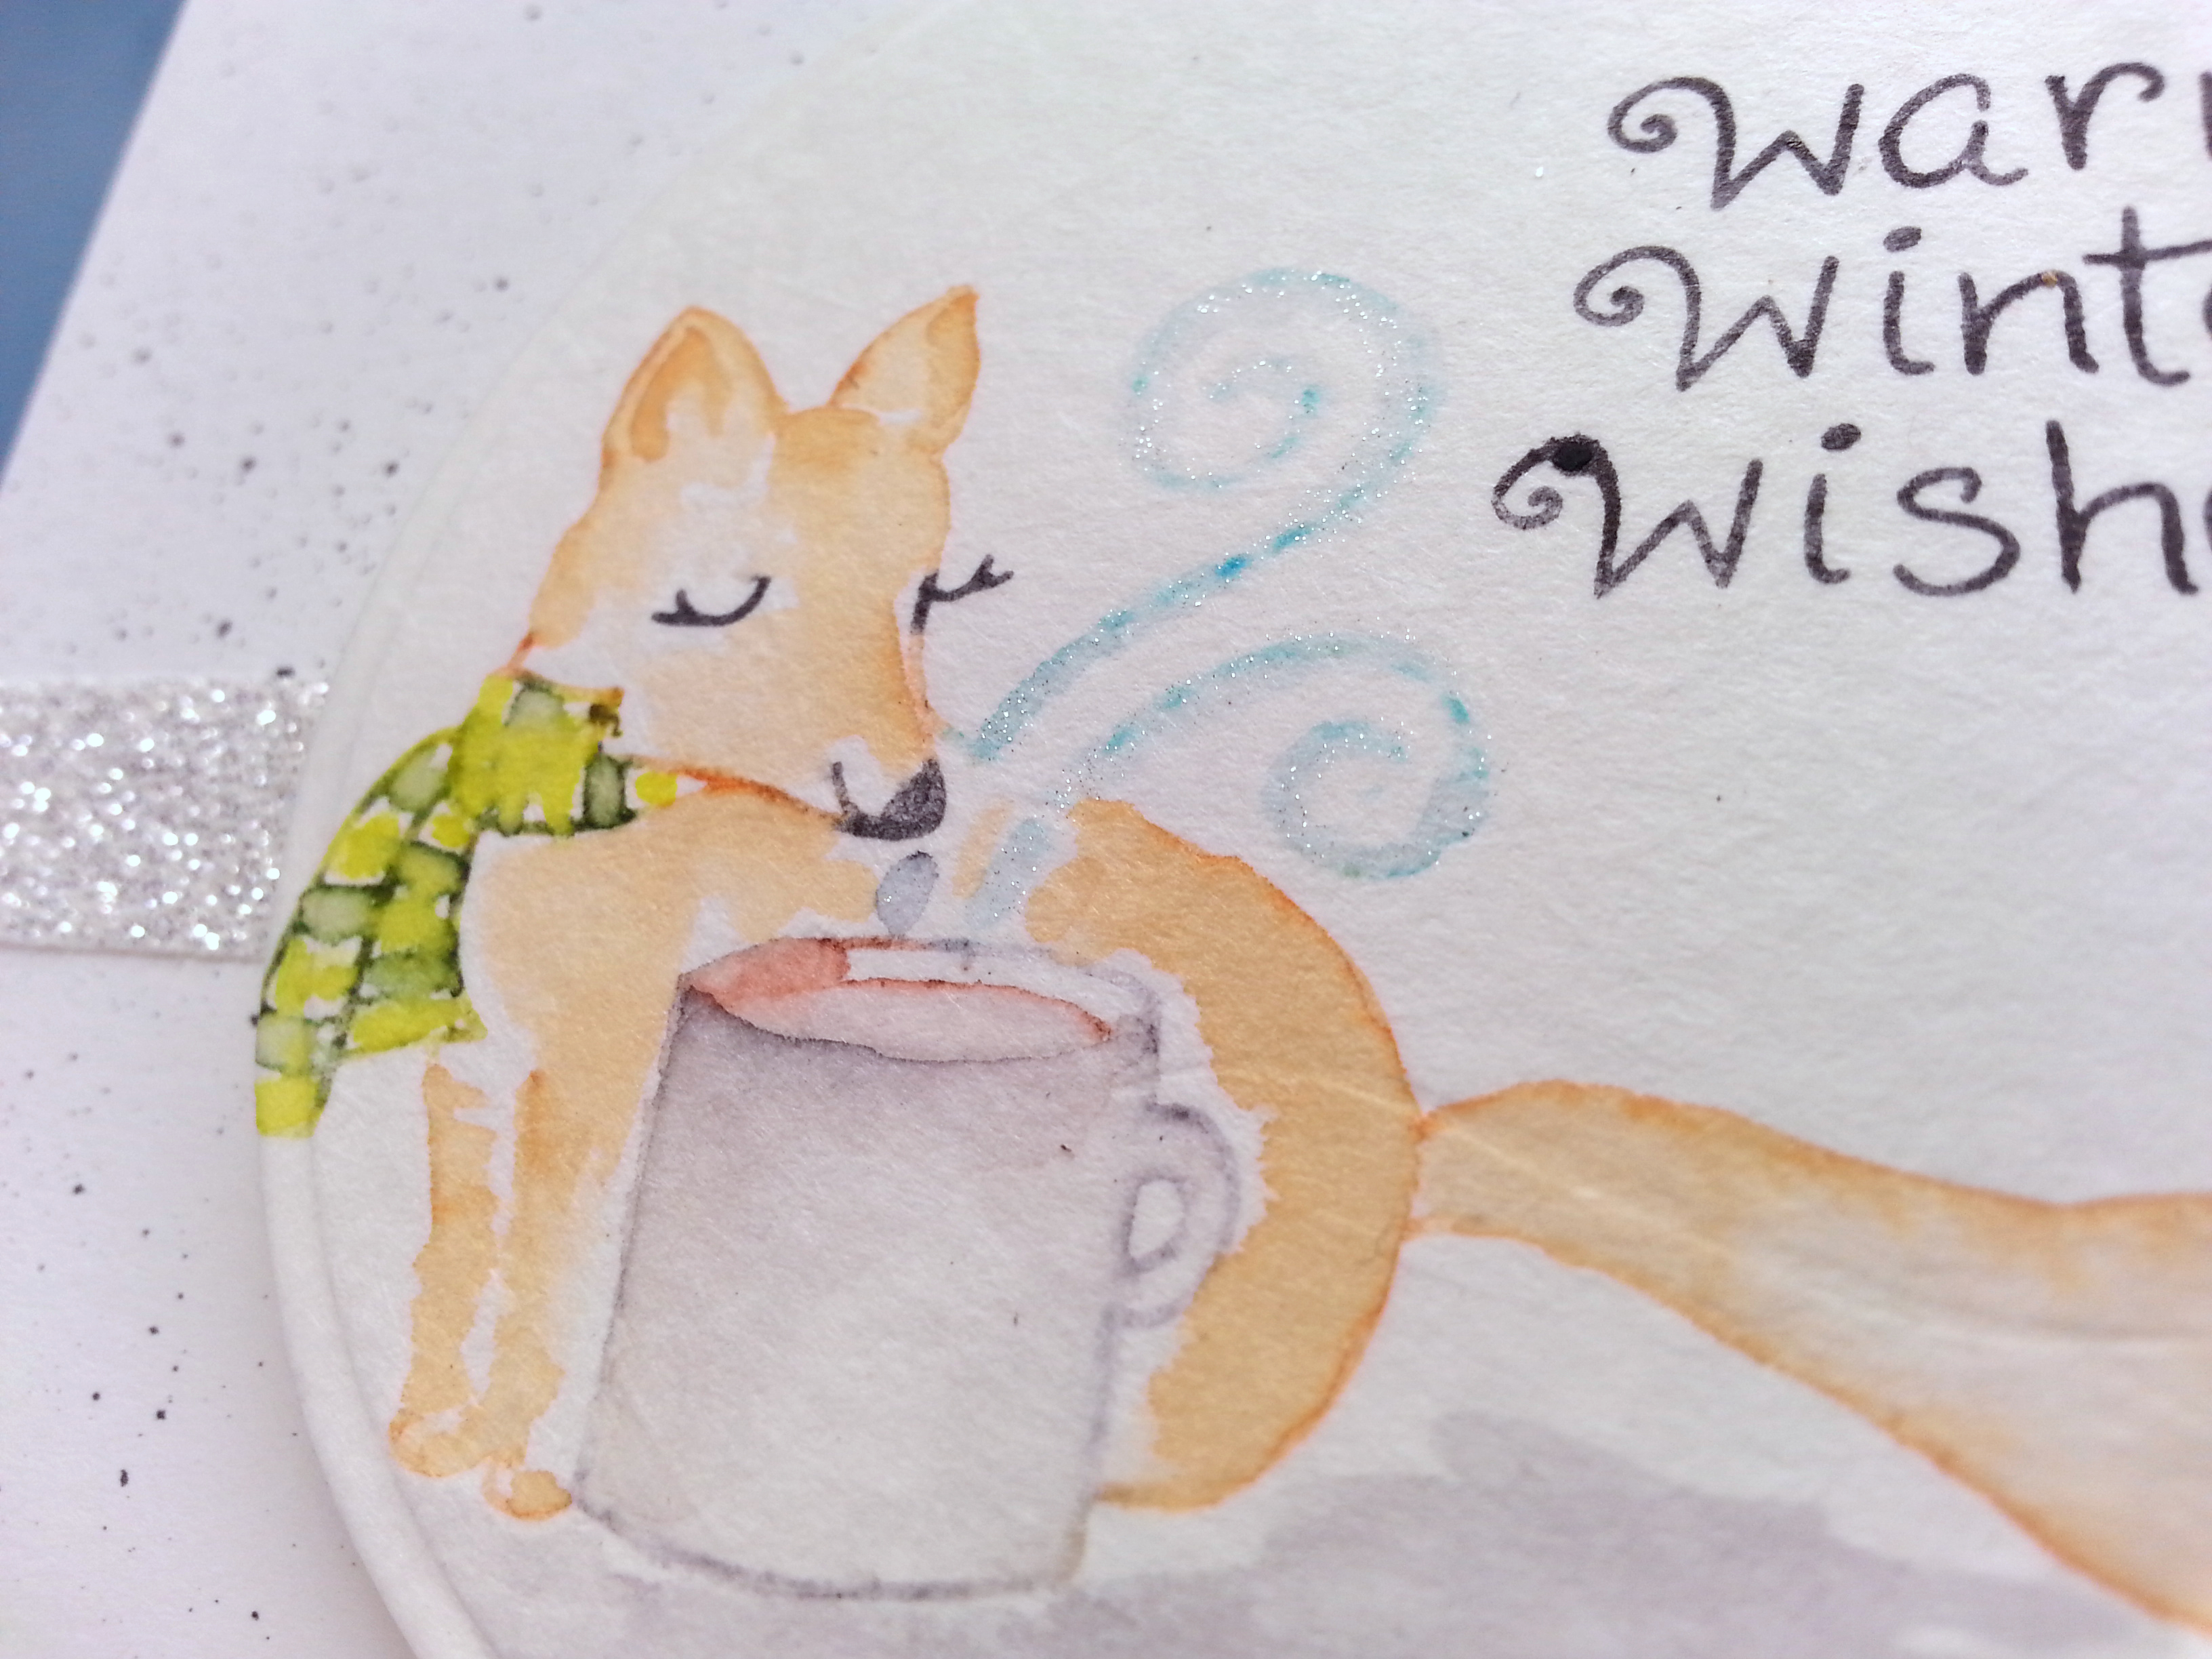
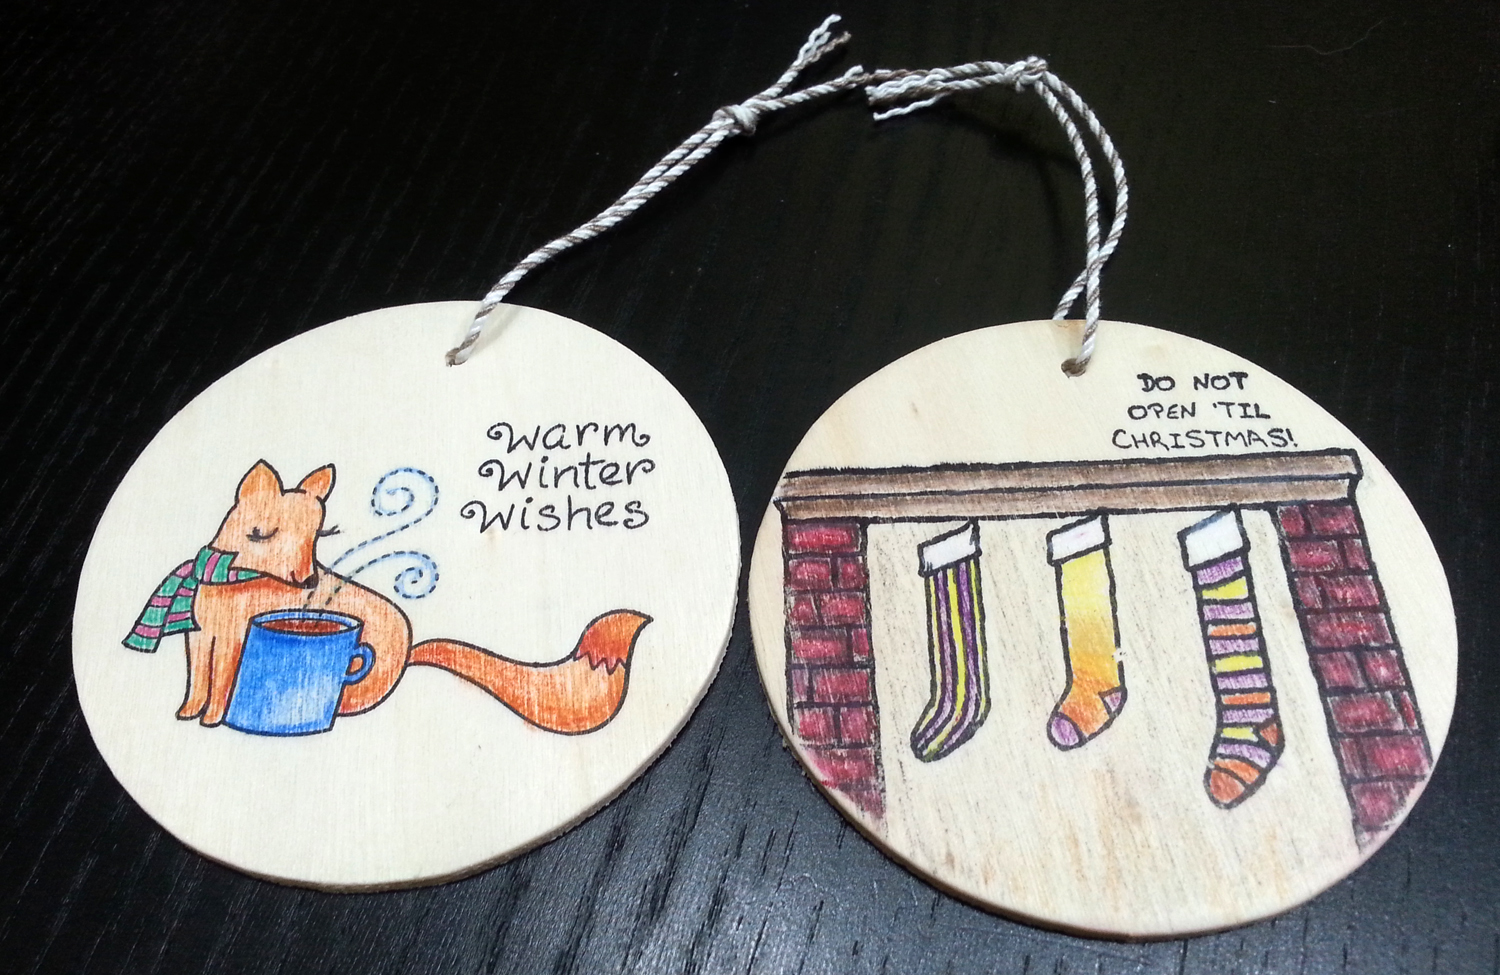
I used the wonderful Lawn Fawn Winter Fox stamp set. This is one of their small format (read affordable!) stamp sets and it is so friggin’ cute. I went with a watercolor technique for this. I inked up the stamp using markers of various colors and with a water brush I started softening the outline and pulling the color into the image. I scribbled a bit of extra ink onto a plastic sheet and picked up that extra color with my brush when needed. I used that extra color to add dimension to her nose, inside her left ear and under her chin. I also added more color to the rim of the coffee mug to make it pop a bit more. I got it a little too wet and my brown coffee color bled a little. But oh well. That is life with watercoloring.  Notice the white around her mouth and each eye, next to her scarf and in between her legs? That white space actually adds dimension and makes the image less flat looking. When going with watercolor, less can sometimes be more. And just to show you what I mean, here is the original cutie.

See how one dimensional it is by itself. But adding water color is like magic! Plus adding some sparkle. That is like magic too. Did you notice in the last photo there is just a hint of sparkle in the steam? I used a Wink of Stella clear glitter brush pen to add that little touch. It is hard to photograph but in person is is just a little detail that adds so much fun.

And now for a serious message…

I encourage you to make some crafty goodness to brighten someone else’s day. You don’t have to donate here, but some ideas include: your local nursing homes, Meals on Wheels program, senior center, homeless programs, Ronald McDonald House (they provide cards to families while children are in the hospital), Boys and Girls club and many more. Take a look around and see where some happy mail can make a little difference in someone’s life. Cards are certainly great, but go one step further. Cards don’t fund these programs to provide all the help these folks need. When you drop off some craftiness also consider making a cash donation. Even just $5. These programs can’t do all they do without good old fashioned money.

I hope you all are surrounded by love and family, warmth and safety as the holidays approach!

Thanksgiving cards

I really liked this month’s DCWV card sketch challenge. I’ve used it for a couple of different projects so far. As a refresher, here is the sketch.

When the sketch came out I first made a teacher thank you card. Then I moved on to Thanksgiving cards. I put together cards to send of to friends and family with some little Christmas ornaments tucked in the package to kick of the winter holiday season. So here is how those came out.

turkey card

I pulled out more DCWV papers and went to work. I took the idea of the three circles and lined them up. The design included a vertical strip to ground the circles and I just turned my strip horizontally. The original sketch had the sentiment stamped on a small banner flag. I made my banner jumbo size. I used a subtle pattern to keep it from overwhelming the card while still letting the small sentiment shine.

Aren’t those turkey’s cute? They are a Lawn Fawn stamp and die set. I’ve been playing with copics again and went to work on those turkeys. I wanted them to have color, not just brown turkeys. In looking at photos on Google Images I was reminded that some turkeys actually have blue heads that lend nice contrast to their bright red snoods (that long flappy skin coming off their faces). I tried to capture that here using tip to tip blending between the red and blue markers. Some of them came out better than others with more distinct colors and less purple over blending. I’m still learning and it was sure fun.

In playing with colors I stamped plenty of turkeys to try different color schemes. I drew the colors from the head into the tail for balance. In blending out these colors it was hard to decide if I should blend them more and make them more subtle or keep them bold. I ended up going with somewhere in the middle of that top left turkey and the bottom right turkey. Doing lots of turkeys gave me the chance to choose my favorites when die cutting them all out.

turkey2


I hope you can go play with some color blending and turkey snoods. It’s fun to say and fun to color 😉

Update & crafting with kids

Remember these guys? I posted about them a few days ago.
ornaments

I didn’t mentioned that I was still working on two more designs. Well I got them finished and look how cute they turned out.
moreornaments

My middle child got really involved with decorating all the stockings on the fireplaces. We’ve made at least 10 of each style of ornament so that means 30 colorful stockings that she worked on. That yellow ombre stocking was our favorite of the batch.So pretty. It is going to be hard to give them all away since they are so fun. (If you didn’t read the last post, these are all gifties for the holidays.)

Which brings me to the second part of my post today. When I bought all these to make my own gifts, I also bought a batch for the kids in my card class. I teach a card making class at my kids’ alternative school. It is so much fun to share my love of crafting with all of these young people. So here is what they look like before young minds get to work on them.
cardclassornaments

I’ve removed the price labels and used my crop-a-dile to punch holes in them for the hanging string. I’m looking forward to seeing what they all come up with to decorate these items.

It just so happens that Jennifer McGuire’s theme this week for her Share Handmade Kindness campaign. What perfect timing since I am sharing these small wood disks for the kids to turn into treasures. Why don’t you go craft with or even for some kids in your life.

Look What arrived

I’ve got some new DCWV stacks in the house. Check it.

lablanc


I’ve already put the Le Blanc stack to use in my teacher thank you cards from a couple of days ago. This stack is a mix of beige on white prints and white-on-white emboss-resist prints. So fun to add your own colors to and make them fit whatever project you are working on.


conewreath


I have a great spot in my living room for seasonal decor. Putting up a wreath for the season will be a perfect way to add a little extra decoration to my home. I will be putting together the wreaths from this kit soon, starting of course with the fall themed wreath for Thanksgiving. I will give you my thoughts once I’ve got that put together.

Teacher Thanks

My kids’ alternative school runs on a trimester system. We are wrapping up our first term before the holidays. I like to give tokens of appreciation to their teachers at the end of each term. Because  their school is run like college for kids, where learners pick and choose from a large listing of classes, they have multiple teachers to say thanks to. I keep term thanks to simple cards and make a bigger thank you at the end of the year to simplify things. Of course thanking our teachers fits perfectly in with Jennifer McGuire’s week 2 of her Share Handmade Kindness campaign. In thinking about design, the sketch challenge from DCWV for November was a perfect fit for one of my cards.

And my take. The first photo shows a bit of my process as I plan a project, laying out items, and even dies as placeholders, to get a sense of scale and color and flow.

planning


I knew I wanted to use an apple image, because it’s just so classic. I wanted to keep the colors simple so the apple would pop. So I used the DCWV La Blanc stack, which as the name suggests is mostly white, and just added subtle hints of color. One tip for you. Notice how my arrow strip points down on the top and up from the bottom? Just take the strip, cut it in half in the middle where the other elements will cover it and rotate each strip to point into the design.

card


sideviewcloseup

All papers from DCWV, card base is Neenah, wood veneers are from Scraptastic. Stamps are Stampin’ Up (small thank you) and Lawn Fawn.

I’ll be back in a few days with some more cards altering this sketch for Thanksgiving cards. In the meantime go check out DCWV’s challenge and Jennifer McGuire’s campaign!

Christmas Ornaments

We have a tradition, that was started by my husband’s grandmother, to give christmas ornaments to friends on Thanksgiving. Last year we stamped inked images into sculpy clay rounds.

This time, when I saw Jennifer McGuire’s video on stamping & coloring wood rounds I knew I had to C.A.S.E. this idea. I made a guess at how many ornaments I need this year and decided a simple wood blank from JoAnn’s would be the most practical choice. Turned out I miscalculated. Once I got home and made a physical list of people I’d like to give these little gifts to, there are nearly 50 ornaments I need to make. With an assembly line method and some help from the kids I know we’ll get through these all on time! So far I’ve come up with three stamped designs. There is the front art and a holiday sentiment stamped on the back. Using my crop-a-dile I punched holes in the rounds and added string. Stamps (older sets) and color pencils are from Stampin’ Up. I do have to say that my color pencils aren’t nearly as creamy smooth as the Prismacolor pencils appear to be in the video. New color pencils sound nice but it is hard to buy something new when I already have some, even if they aren’t as smooth.

ornaments