I participate in the month-long LayOut A Day challenge in February, May and October. Since May just came and went, I wanted to show you what I’ve been up to. I did indeed create a layout every day. Some days it had to be Project Life on my phone since I was running short of time (or almost forgot!) but most days were traditional layouts. I even filmed and posted a layout every weekday over on my YouTube Channel. And even when some of those layouts were not stellar, I posted them anyway. I just wanted to give you a brief look at just some of my projects projects before we head into Junes business.
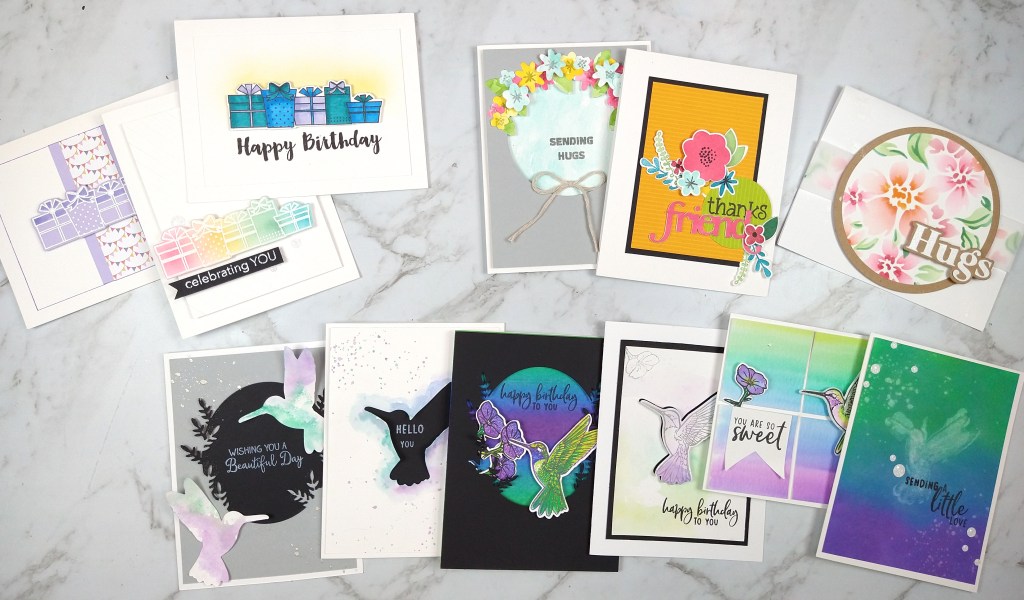
You’ll notice that there are not 31 layouts shown. I don’t have photos of everything, particularly weekend layouts. But this represent a good portion of them. I’ve broken things down into categories. And the final category features my favorites of all of these, so if you want to see what I consider the best of the best, then head to the bottom 🙂
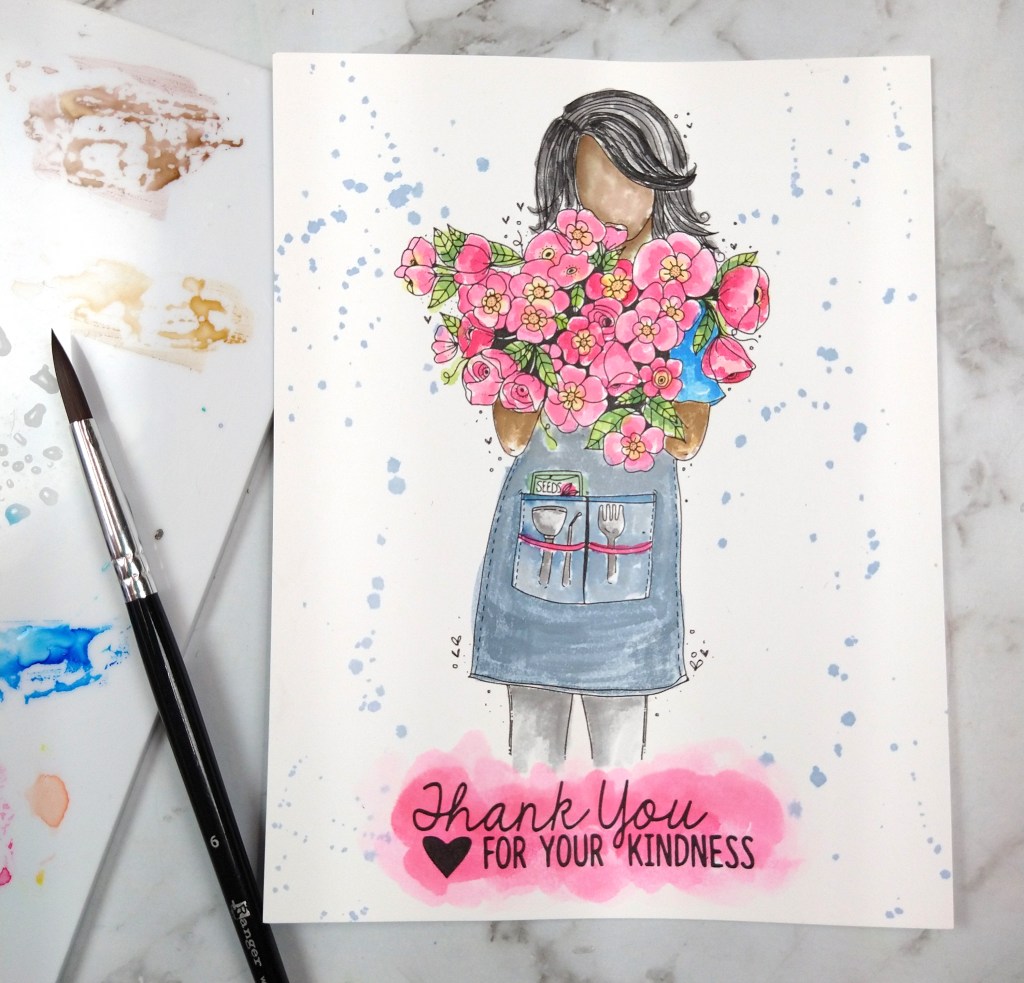
Okay, I’ll admit that my mojo feels like it is back. But I wanted to give one final look at something I do when I’m not quite feeling it and that is to just play. Play with something new. Or play with something old and try to figure out how to use it in a new way. This past week I played with two unrelated things in unrelated ways.
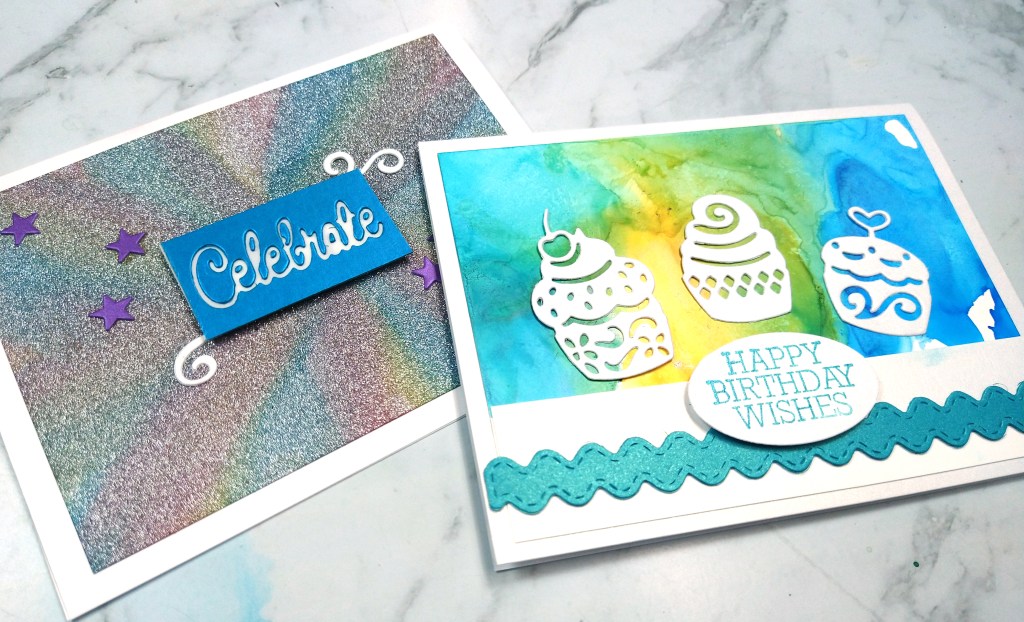
First off I was inspired by a ScrapHappy session over at ScrapHappy.org (you can find a video for every week day in April over on the ScrapHappy YouTube channel full of playful ideas). The topic was alcohol ink and I have been meaning to play with those again. I had bought a class kit with different “papers” to try and I had bought my own Yupo “paper” from my local craft store. And those things have just been sitting in my new materials bin. So thanks to Alice’s session, I got those out and played. And technically that is a fourth mojo booster for you — take a class or find a less formal demo video to play along with.
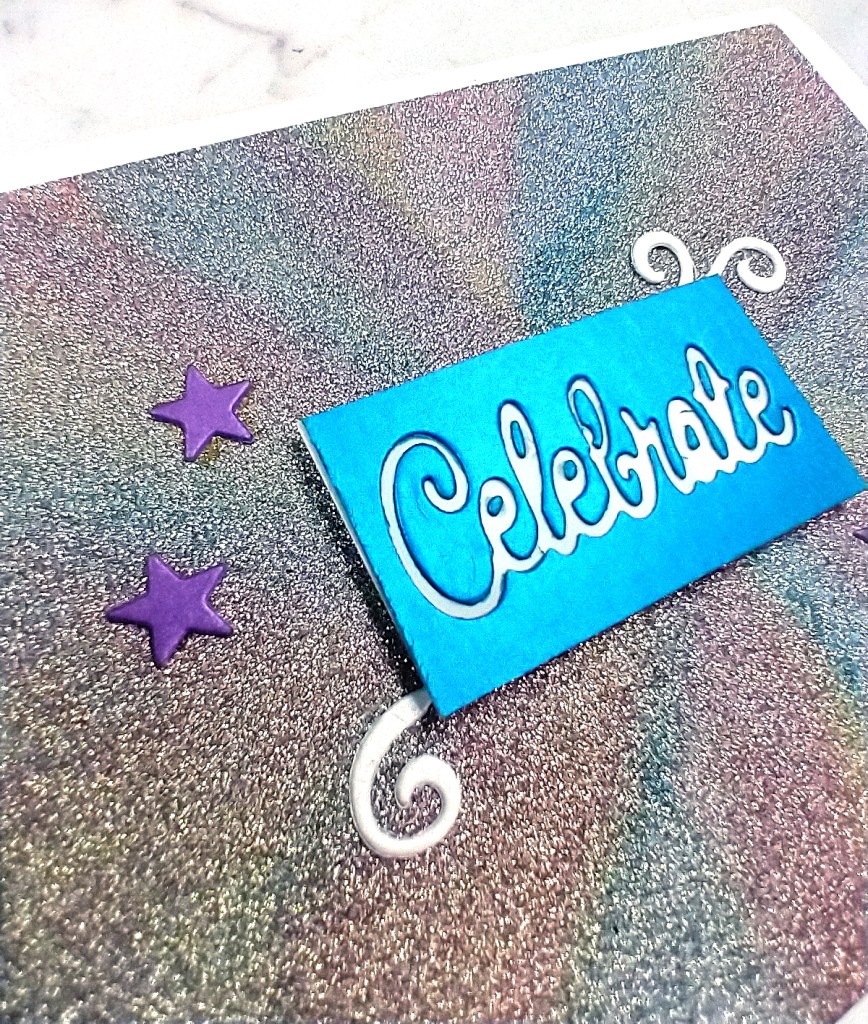
So check out the pretty colors I created with my inks. Now, was it all a success? No. With some things working and some things not working (for me!) I can better hone in on what I like in order to make wiser choices next time. For example, in these items, the alcohol ink on the glitter paper got toned down way too much and became more pastel. While the look is nice, it wasn’t what I wanted. I like alcohol inks for the in-your-face color they can offer. So I made that work with a different technique.
Okay, moving on to the second item I played with and that was sequins. I actually started this project for my YouTube channel right at the beginning of my mojo dip and I didn’t get it posted on the schedule I had planned. So I had to take a step back and think about where the project was going. I took a look at my pile of sequins and I took a look at some projects and I asked myself a question – where else could I put sequins besides just sprinkling them on the side. And once I had a question I was able to experiment. And I managed to get the one technique I was the most excited to try to actually work. But it took some playing and some experimentation. And that could have ended up with a frustrating moment, but if I had given up I would never have experienced the success. So sometimes if you keep going and keep pushing, you can break through. Can you tell which technique I’m talking about in my video?
It is unusual for me to be feeling low in the springtime. I was really surprised that my creativity sort of vanished. And it did so after coming off an exciting card making event that had me super jazzed. So, where did “it” go? I don’t really know and while tracking down a cause could be helpful, turning to tactics to move past this phase is more productive. Last post I talked about using a sketch as a mojo motivator. This time I going to use a scrappy challenge.
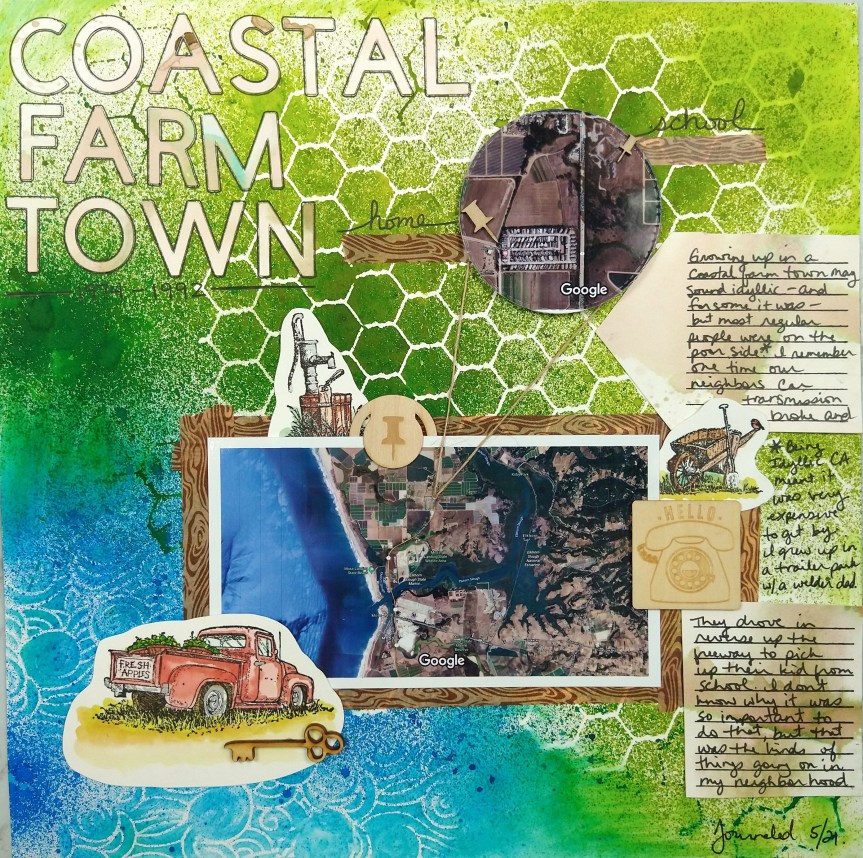
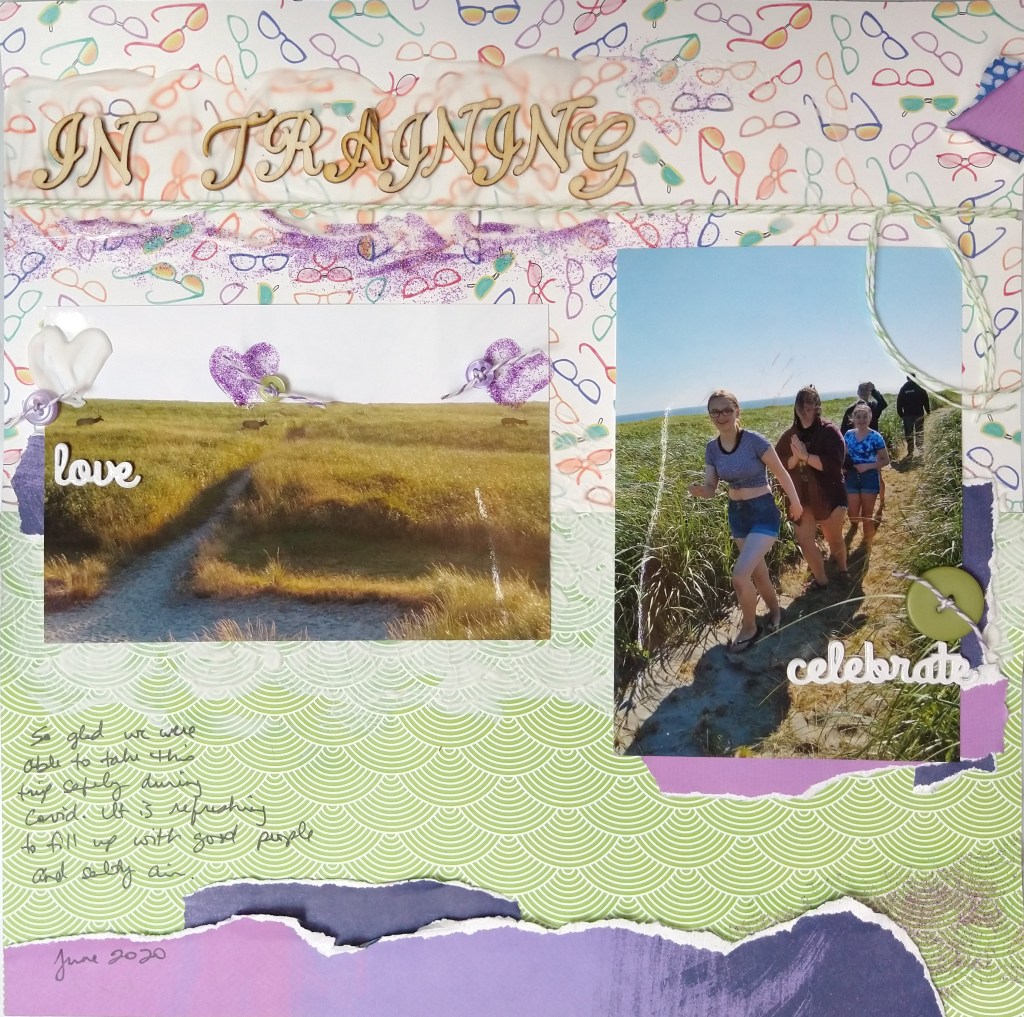
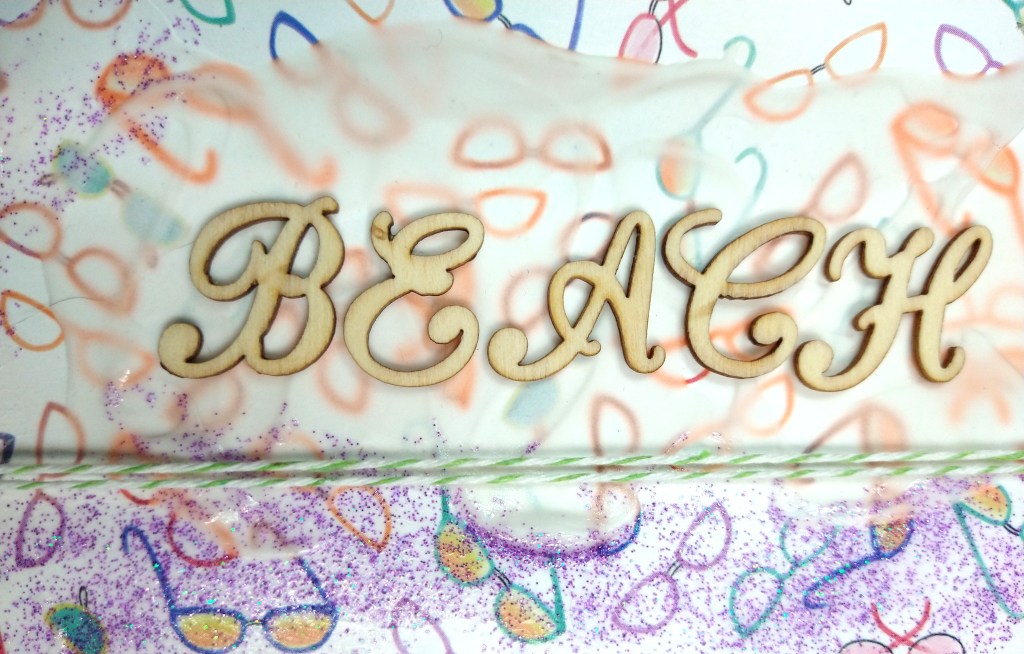
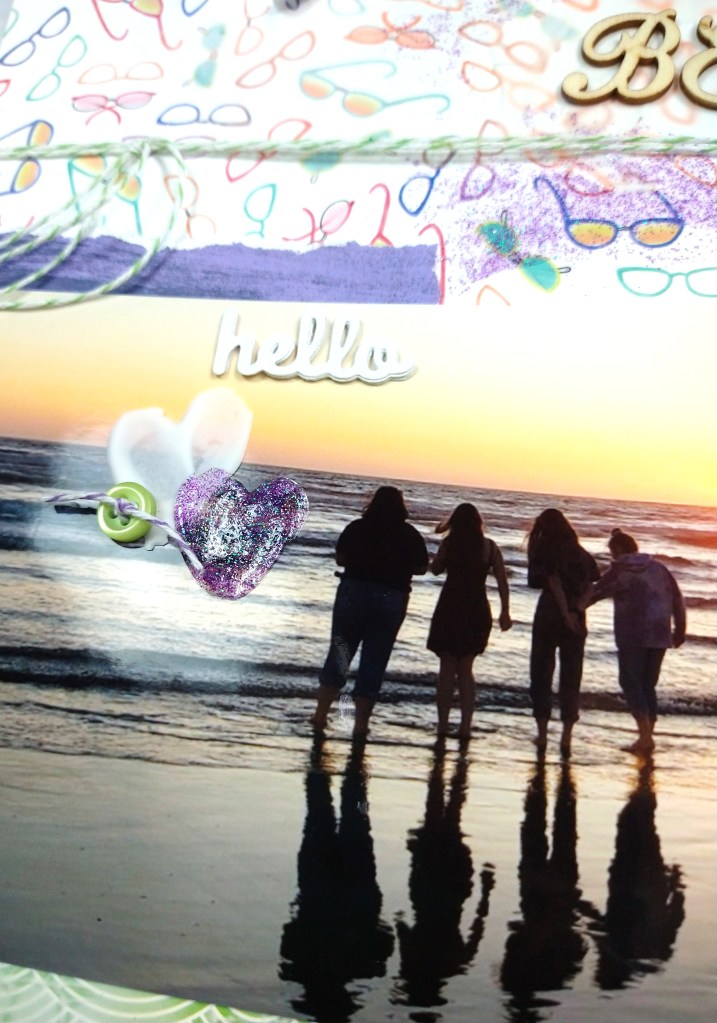
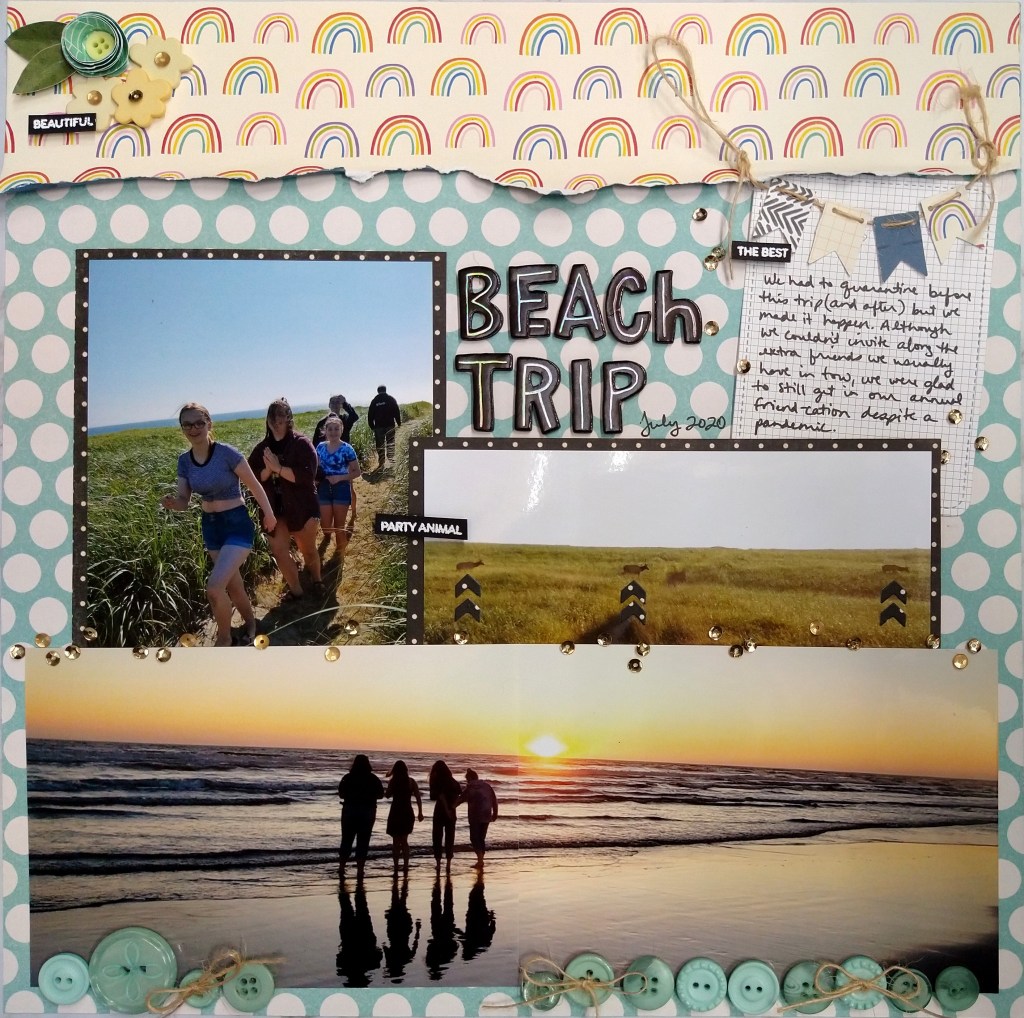
I turned to the Counterfeit Kit Challenge blog for some inspiration. They offer crafty challenges on the 12th and 18th of every month to help boost our creativity. And I really needed that. April 12th’s challenge was titled “Al Fresco” and it was about finding inspiration in the outdoors in some way. I took on that challenge with some mixed media on a double page layout about a beach trip.
Playing with product I haven’t played with in many years, namely modeling paste, did help get my brain going a bit. Plus I combined the product with a new technique I just saw on a demo video. So combining those two gave me a new way to play. Not everything was successful, but it did feel good to experiment.
If you want to see the whole process, you can check out my YouTube episode. Until next time, I hope you find artful ways to be happy!
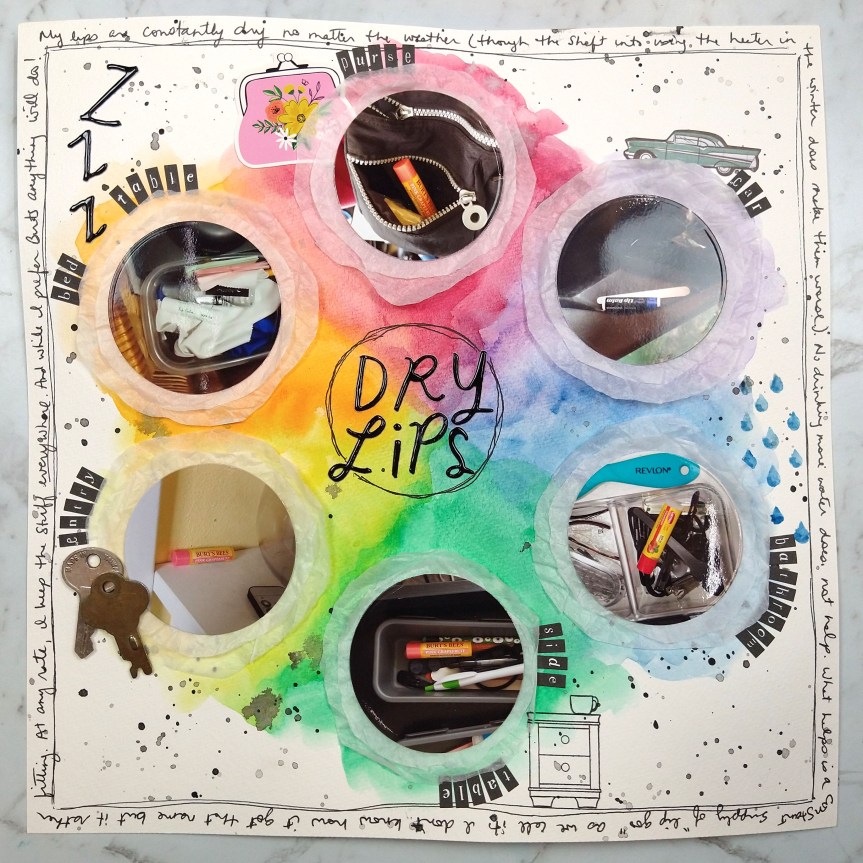
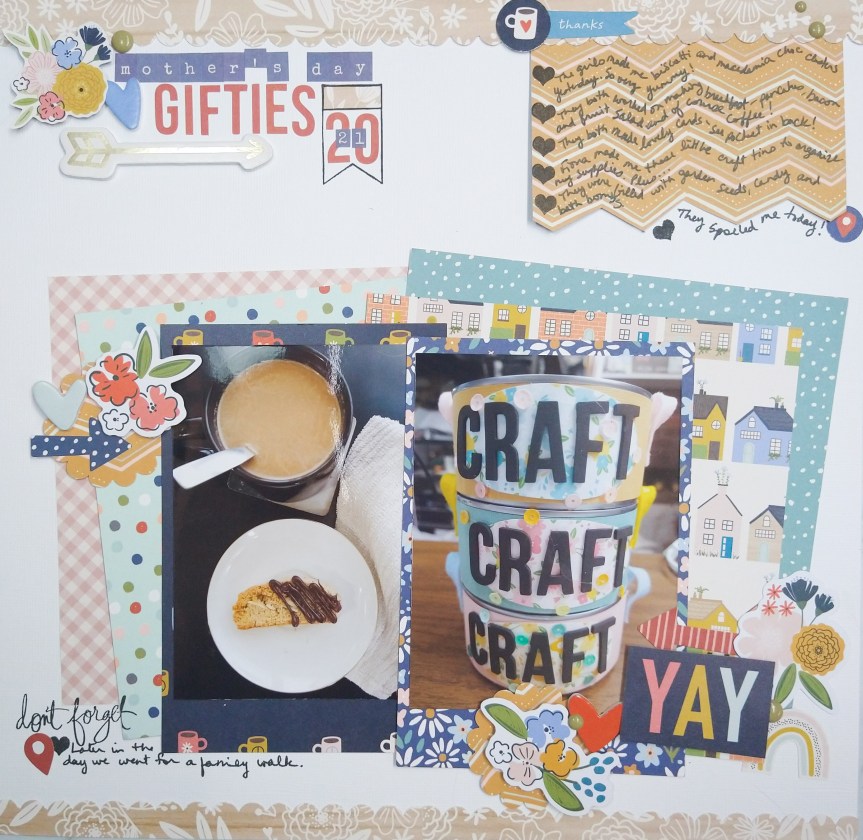
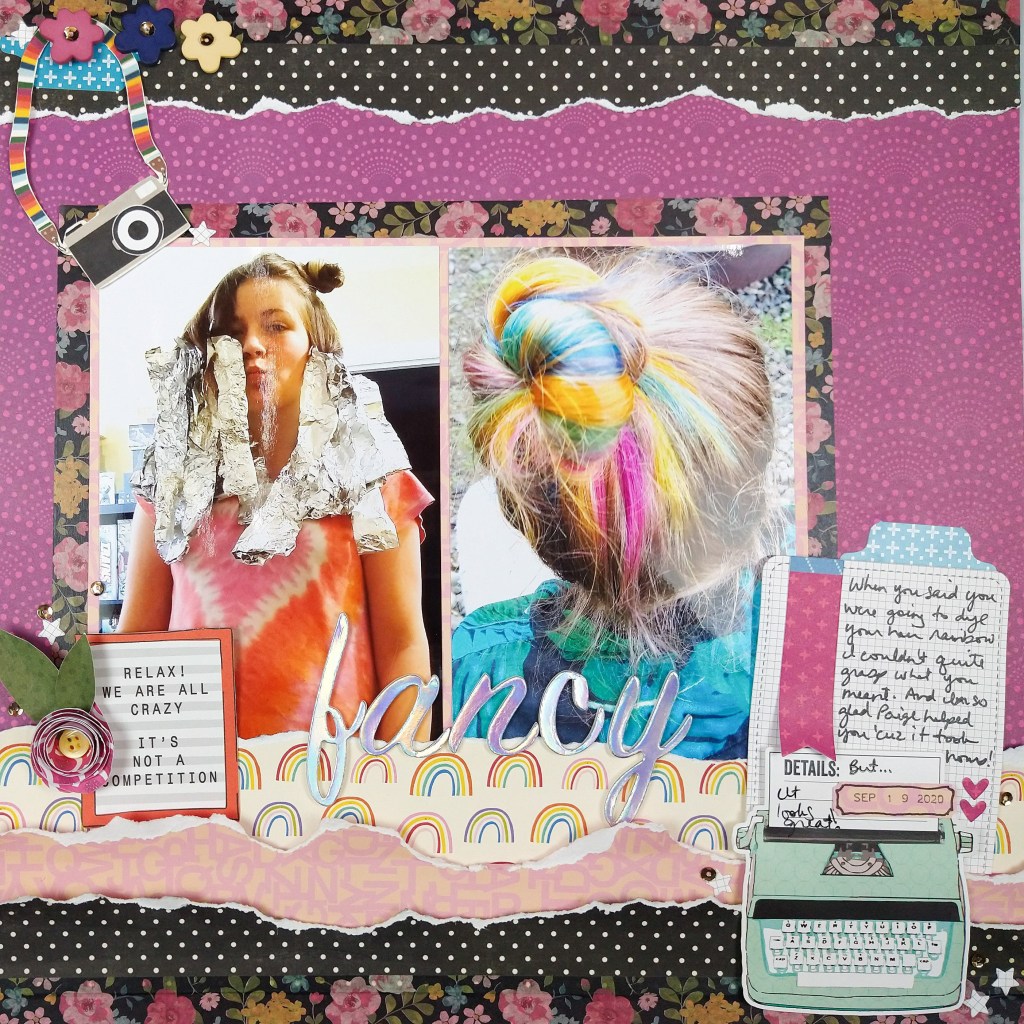
I have to admit that my mojo is missing. In fact the last video I posted to my YouTube channel was not making me happy at all. So for todays project/video I decided to take a step back and use one of my go-to methods for those creative slumps: sketches! I love sketches anyway, but I tell ‘ya, when the magic is gone sketches are a life saver.
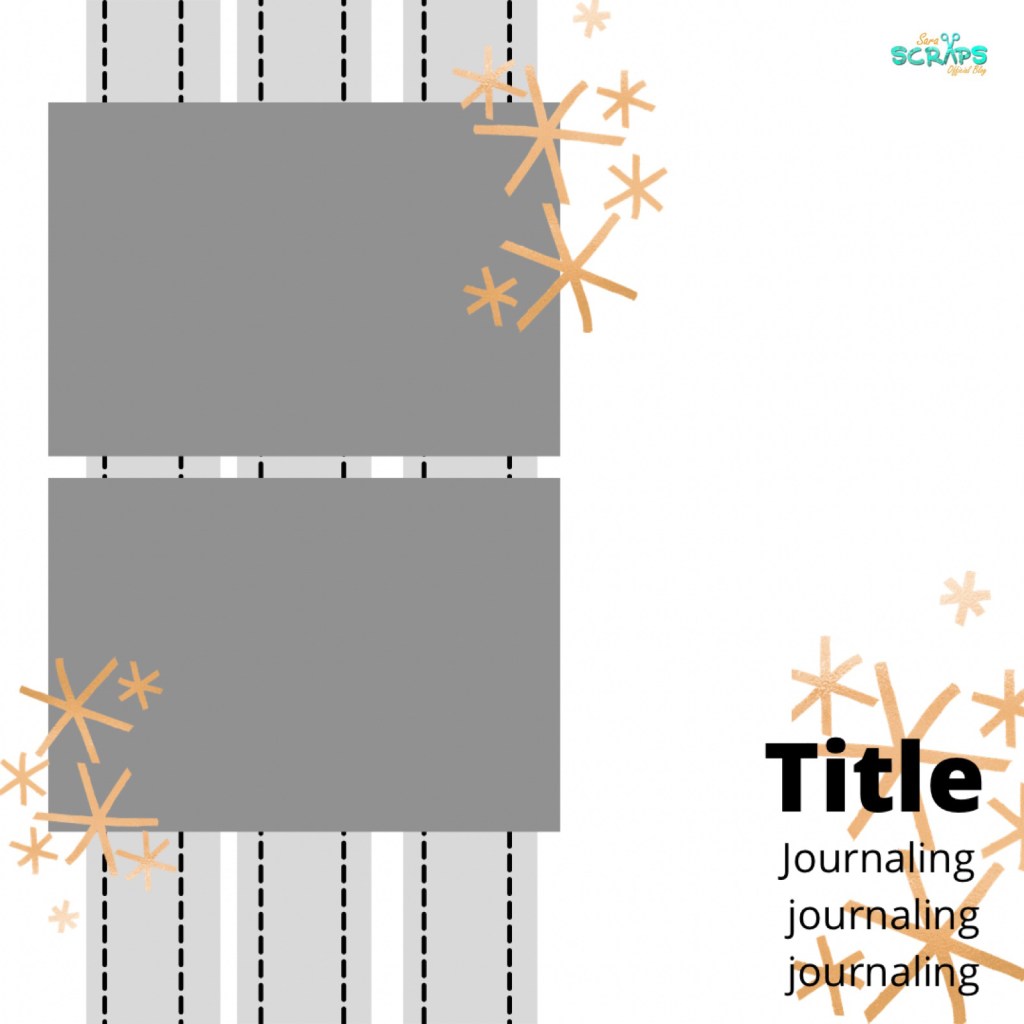
My sketch today is from Sara Scraps for our ScrapHappy.org membership group. Sara is a fun, talented and prolific scrapper so I suggest you go check out her channel.
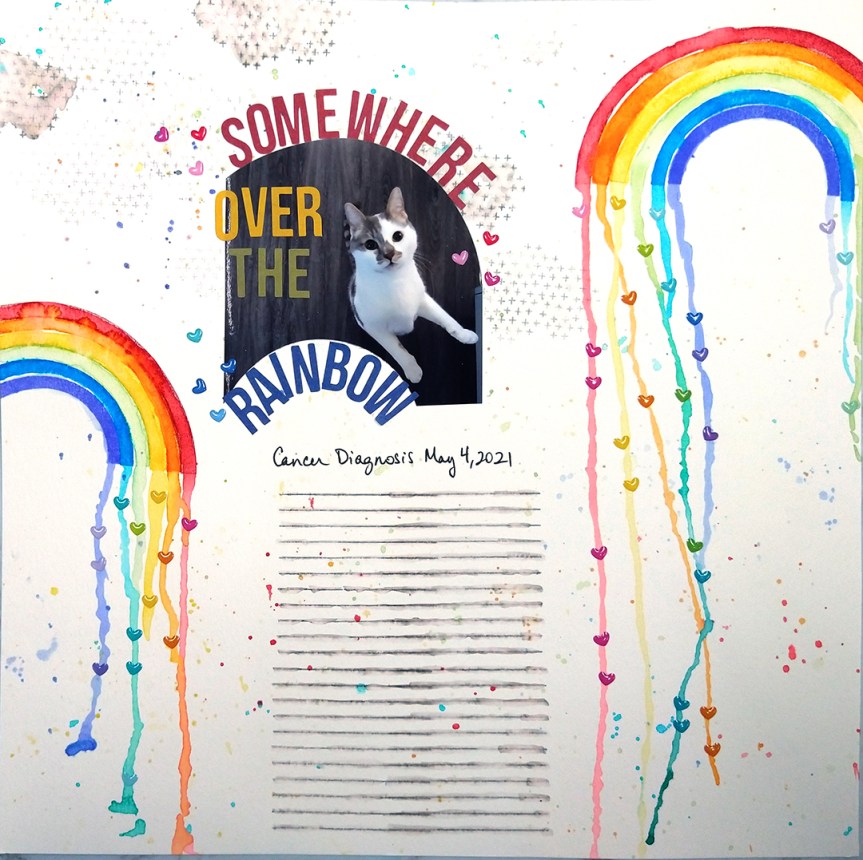
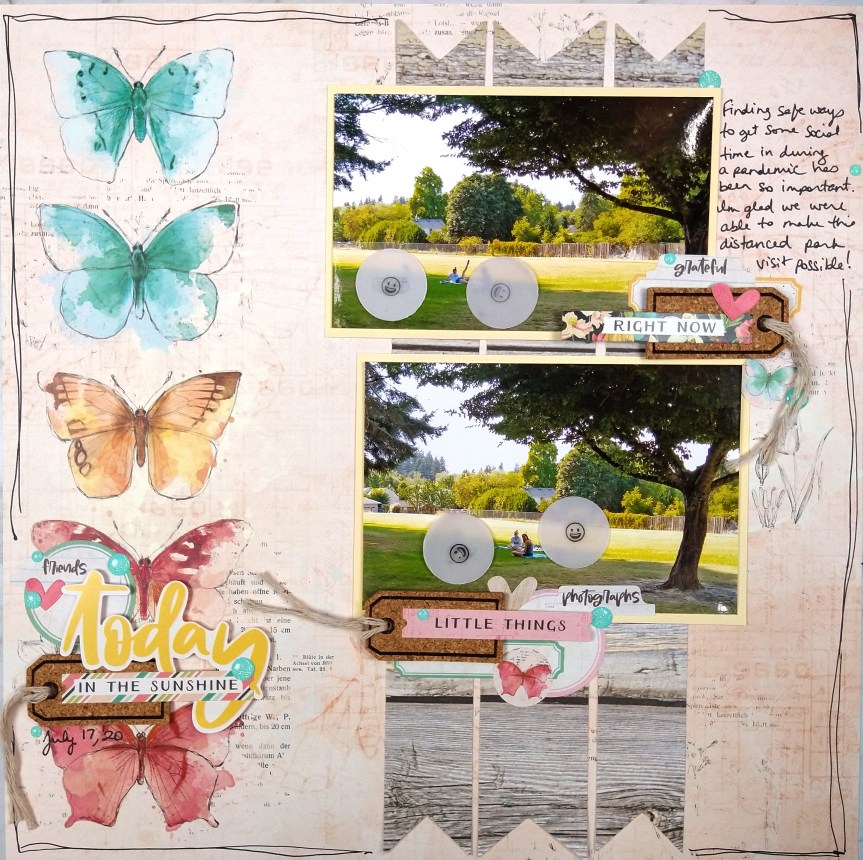
With due credit given, let’s dive into my project. Take a look at the sketch side by side with my layout. I stuck pretty closely to the sketch interpreting the “sparkles” as embellishment clusters. I did move my journaling since my pattern paper was too busy and pretty to cover up. Other than that – and a sketch flip – I stayed true to the idea.
This is the perfect way to get crafting when you don’t feel that creative drive. Just let someone else inspire you to make something pretty. Don’t worry about “copying”. This isn’t copyright land here, it is just crafting. To hear more of my point of view on that idea you can check out the video.
And if you are not a video lover, here are a few closeup views of the project before you go.
The beginning of a month is kit building time and my two typical kits are waiting for me to create with them. Normally I would have a third video project for the week. However, I got my second dose of the covid vaccine and I must say it knocked me out. So I will get that video up as soon as I can. Let me just say as a sneak that it will be sparkly! If you want to see my whole monthly schedule you can check out my schedule page.
So… Let’s take a look at these kit builds shall we?
Kit #1: BOBW
I created my Best of Both Worlds kit first this month, even though the video is posted second. The reasoning why is boring calendar reasons that I don’t need to go into. Why did I even mention it then? Since I had created this kit first it impacted my creation of my second kit. And this project came first since I had the inspiration to build it first!
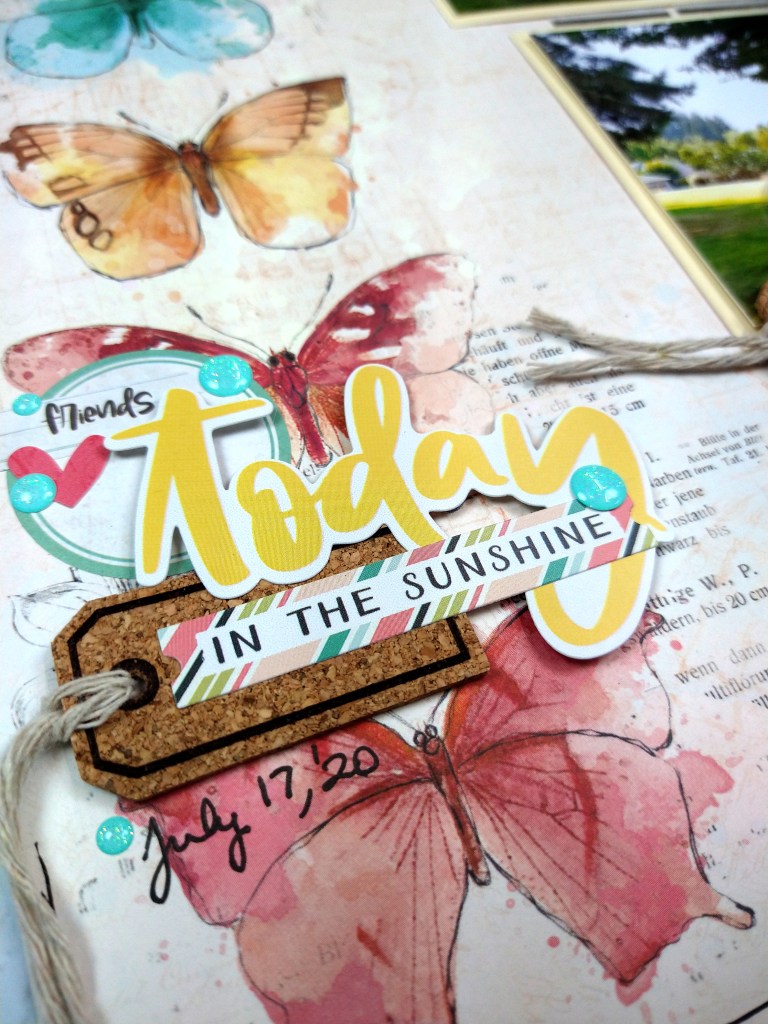
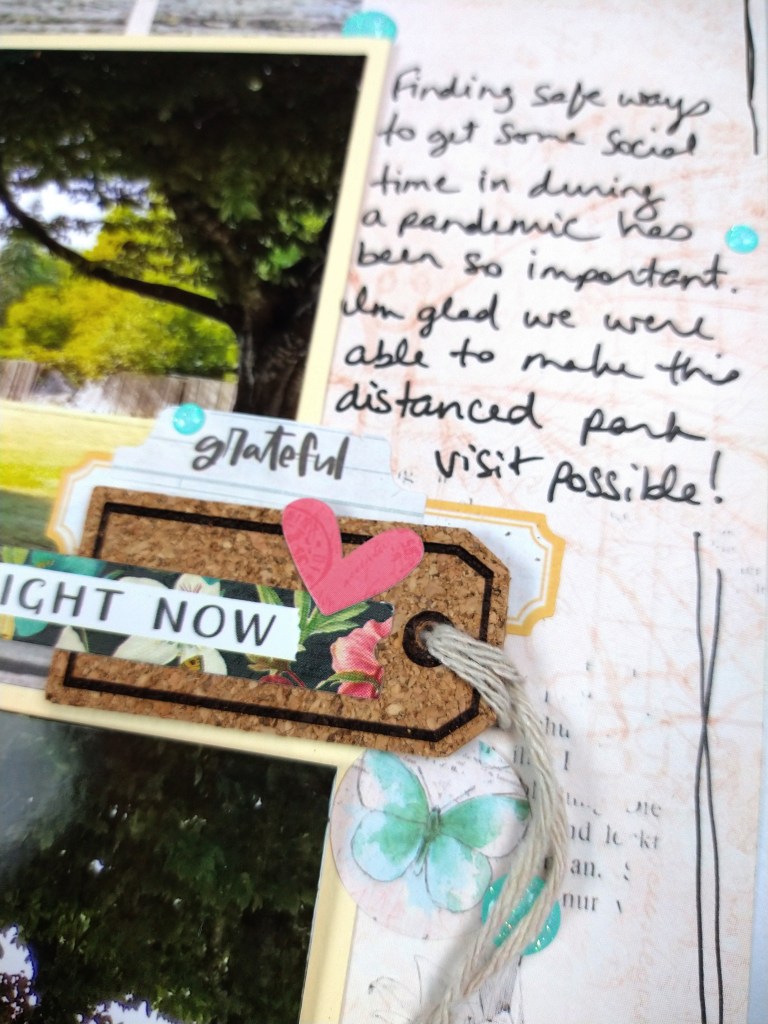
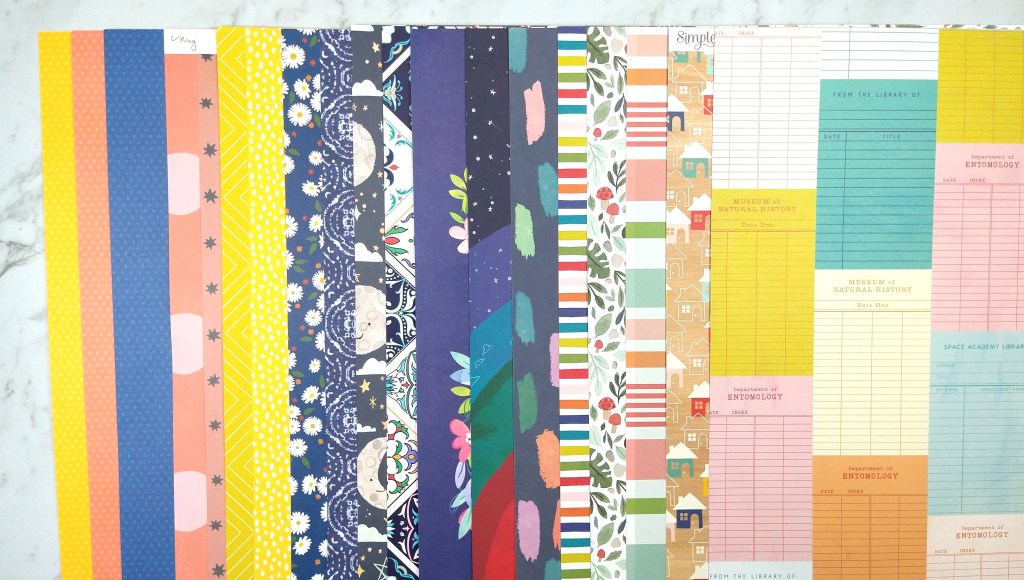
The products Shimelle chose for her BOBW kit included spring vibes in a variety of styles and the pieces from Simple Stories Vintage Cottage collection caught my attention the strongest. So I chose 6 sheets from that collection, added in other Simple Stories woodgrain papers, and a few sheets of color supporting cardstock and called my paper selections good.
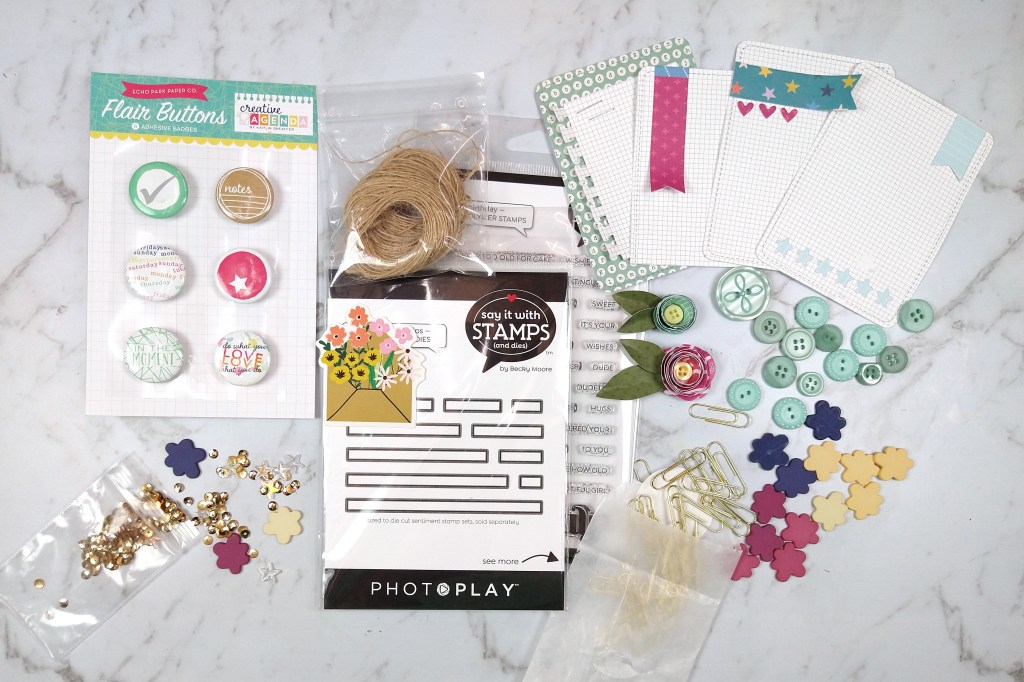
For embellishments and alphas I bought the Cottage collection 12×12 sticker sheet and sticker book. The book has several alphas in there for flexibility. I added to my kit from my stash cork tags and neutral twine for rustic feel. Enamel products in blue glitter dots and liquid Nuvo drops were also a part of this kit. And then since it is Easter time I did add one Easter product (stamp & die set). Finally a floral stamp and die set is in there for creating dimensional flowers.
Kit #2: Counterfeit Kit
I really love playing along with the Counterfeit Kit Challenge. While we all start with the same inspiration kit, all our builds can go in their own direction. I love seeing how everyone interprets the same images and makes it their own! And speaking of making it my own… The inspiration for CKC this month featured the same color palette as the BOBW kit. Since I already used that color palette, I was wanting something different. So I chose to keep the spring, outdoorsy vibe but take it in a purple and green color palette. Normally I will build the CKC kits from my stash but I don’t have many products in those colors in my supplies so I went shopping. And it so happened that I was in a nearby town that has an actual brick-and-mortar scrapbook store! It was a double win. I got new goodies and I got to support my “local” store.
You can see the purple and green coming through. Even the multicolor prints have elements of purple and green. But using the multicolor prints as well it will keep my layouts from feeling to “samey”. Now paper alone does not make for a kit. I also bought purple glitter Nuvo drops, green enamel dots and a purple alpha. Then from my stash I threw in tiny paper clips, buttons, twine, stencils, punches and more alphas that all nature elements. I will be playing with gesso in this kit as well. The last detail of this kit is hard to see in the photo but I created some faux acrylic word embellishments. The video details that process if you want to know more!
I did a lot of crafting in March. That was due largely to a card making event I attended online. Titled “Crop & Create Delivered Cards March 2021”, this event was put out by the Scrapbook & Cards Today magazine, affectionately known as SCT. They’ve done live events for years in Canada and covid saw them shifting to an online event model and I am so grateful. Traveling to Canada is not really in my budget, but doing an online event is. Plus I get to stay in my pjs if I want. Plus my teen can join me for some of the event for no extra cost. Plus I get to sleep in my own bed. Plus I get a box jam packed full of supplies to ooh and ahh over. Plus the online teaching includes live Q&A with the teachers. Plus everything is recorded to go back and revisit at my own pace. Can you see why I’m excited??
SCT will continue to host online events even once covid is under control and that has been a huge silver lining to the difficult year. If you want to get in on their events, they will be opening registration soon for the card event in October as well as a scrapbooking event offered in November. And they mention a “Holiday” event which is new to their line up.
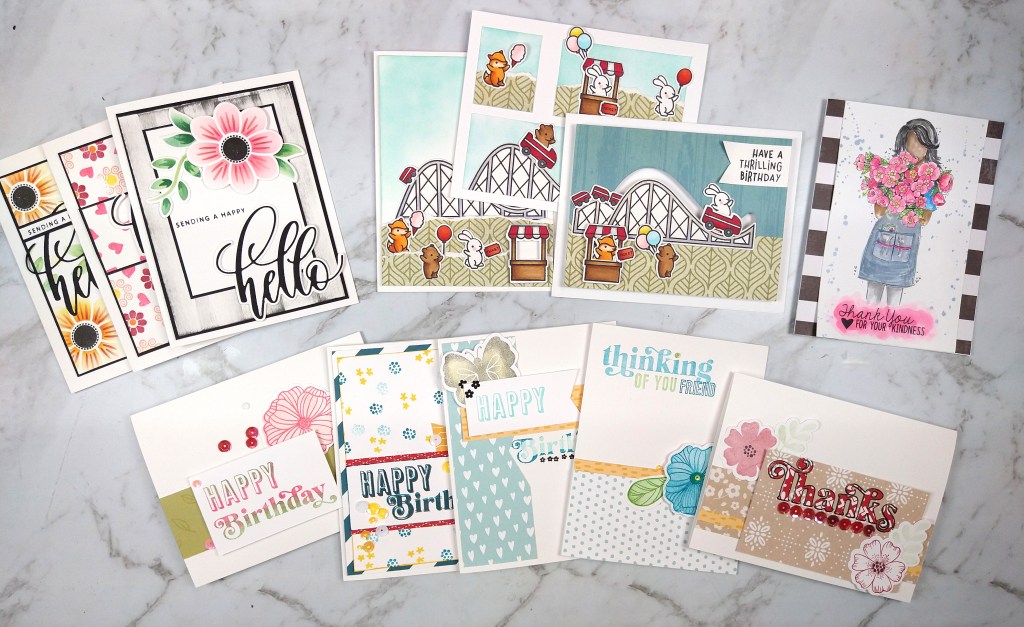
Okay, enough gushing about the fun I had at this event. I did other crafting this month as well! I will just drop a bit of a project gallery for you to peruse. I hope you enjoy and find something I created will inspire a project you make.
So I’ve got three new videos up for you this week. And they will be linked here. But if you prefer text and photos, stick with me because I have that for you to!
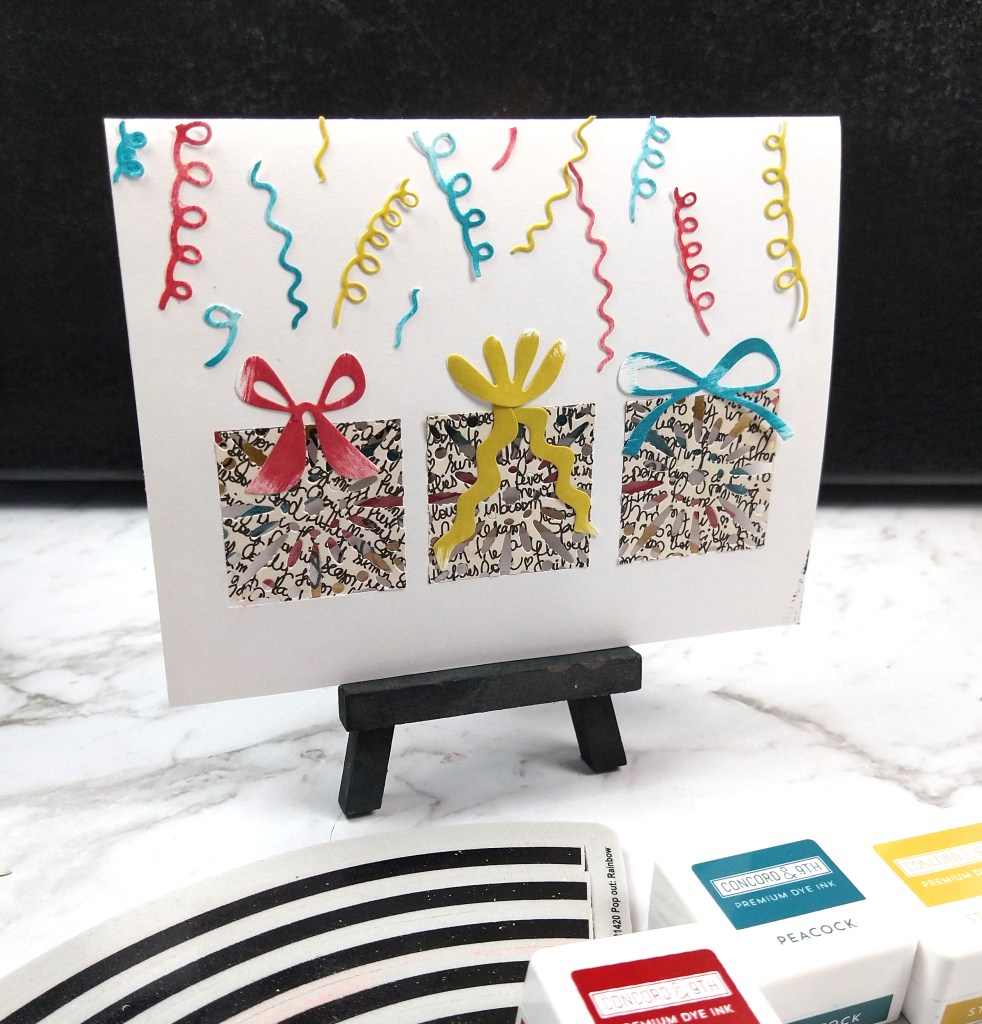
First up I took my mystery box basket of supplies and pulled out three crafty items. The surprise items were two Christmas/winter themed die sets and a rainbow stamp set. So how did I mix rainbows and snowflakes. Like this…
I love thinking outside the box and putting themed products to use in alternative ways! Want to see how those gift boxes were made from a snowflake die? Then watch the video.
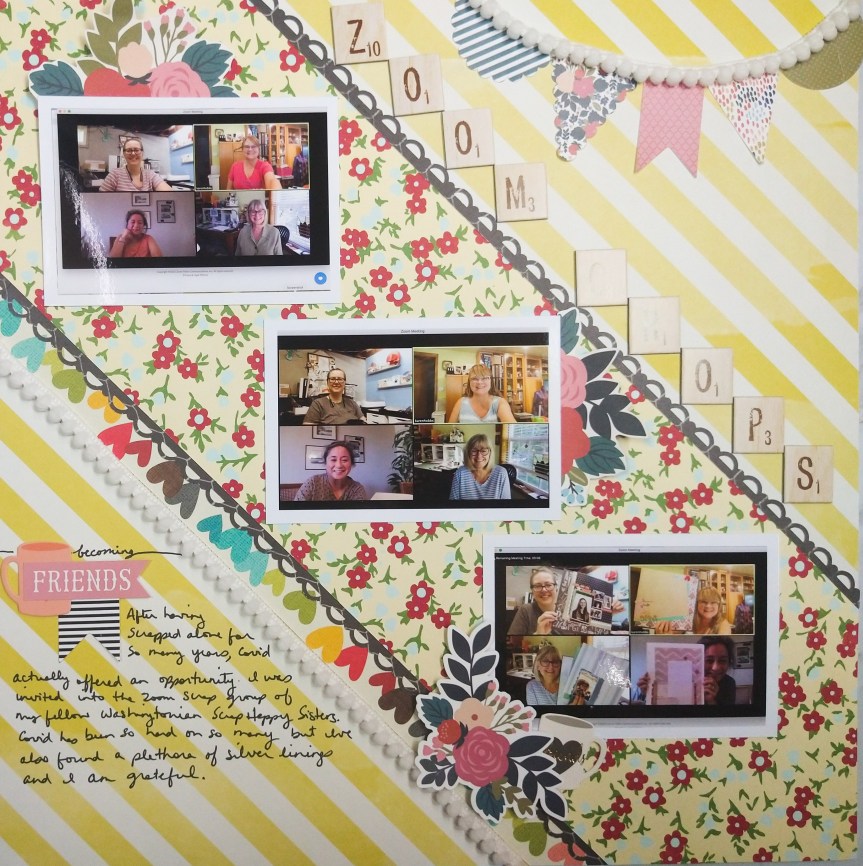
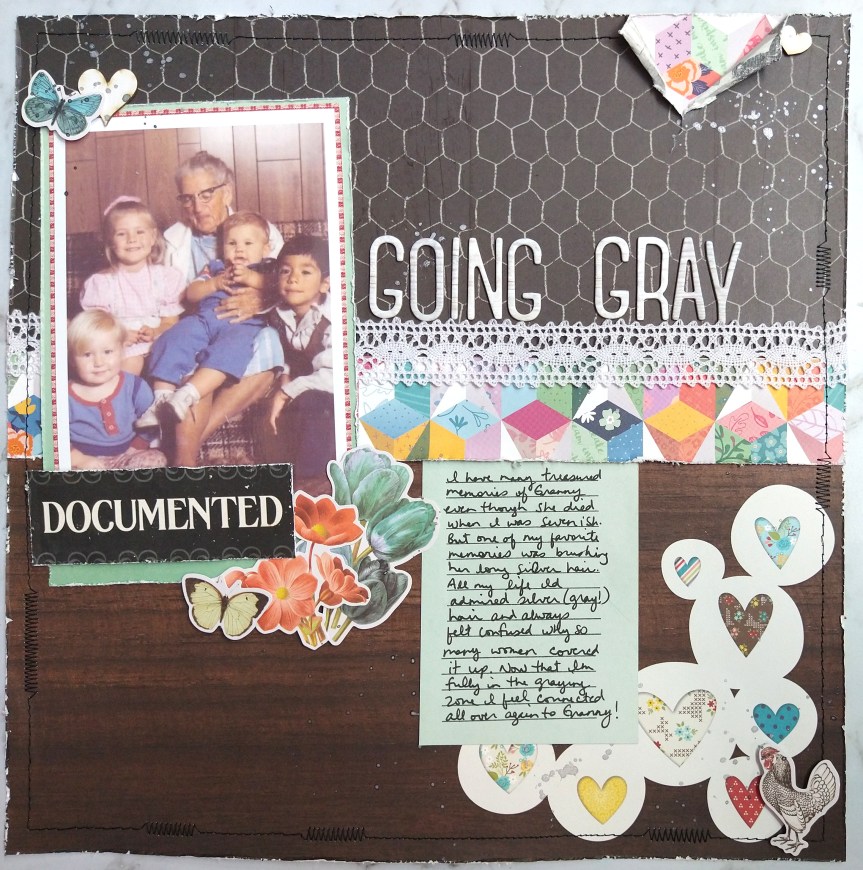
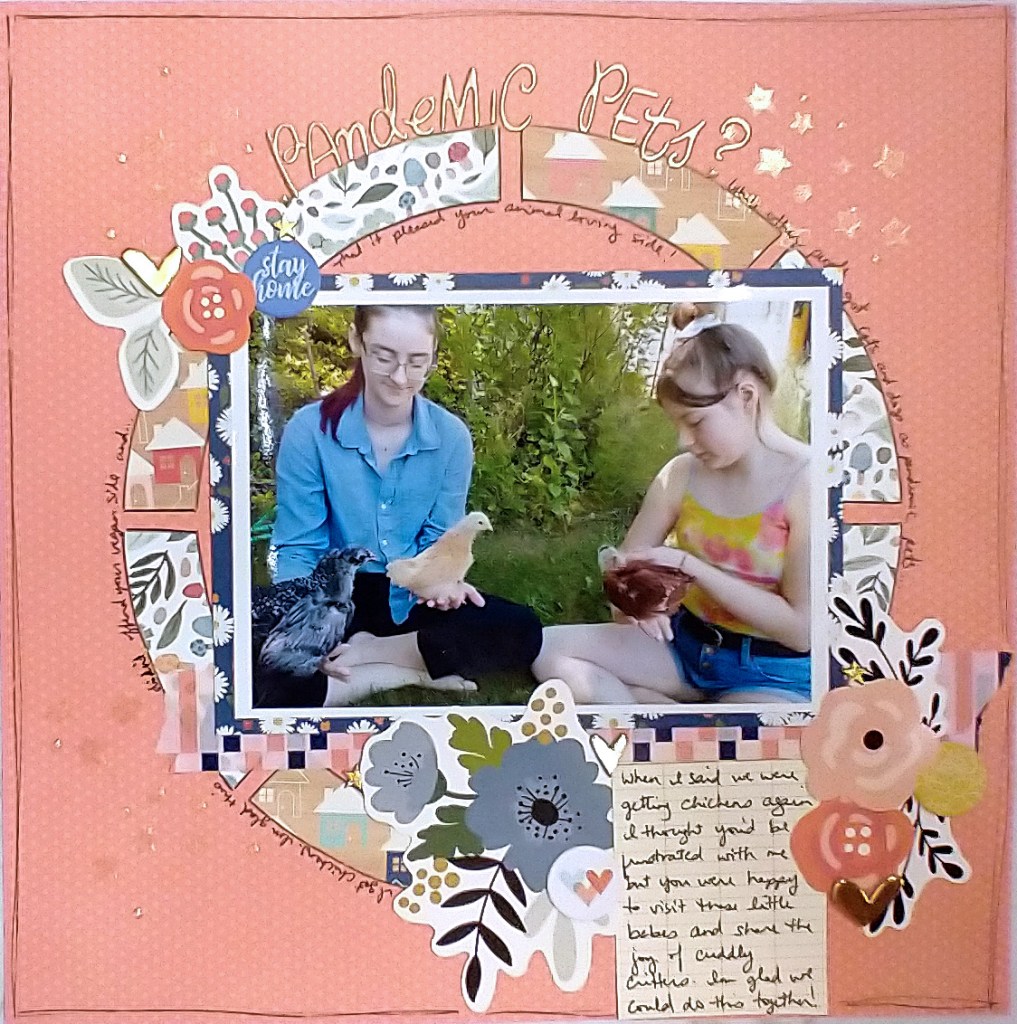
Next up I used my scrapbook kits for this month for layout process videos. My Best of Both Worlds kit got used to create a coral and navy color palette and showed off our pandemic chickens. Plus I took a die cut circle product and used is as a temple to create my own circle design to my page.
You can see it all in action.
Finally, using my Counterfeit Kit Challenge supplies for the month I created a beachy layout with out using beach themed items. Instead I turned to color, texture and ambiance to create a summery feel to this layout.
And of course you can watch me create and hear my tips along the way.
Do you ever pull out a product and just play with it to see what your imagination could do with it? Well this year I’m on a quest to do just that. Once a month I pull out an inexpensive crafty product and play to find as many ways to use it as I can think of. This month I’m playing with washi tape. While this post is titled 10 ways to use washi, I have more than that to show off.
Here is the video showing it off. If you prefer the text and photo method, read on…
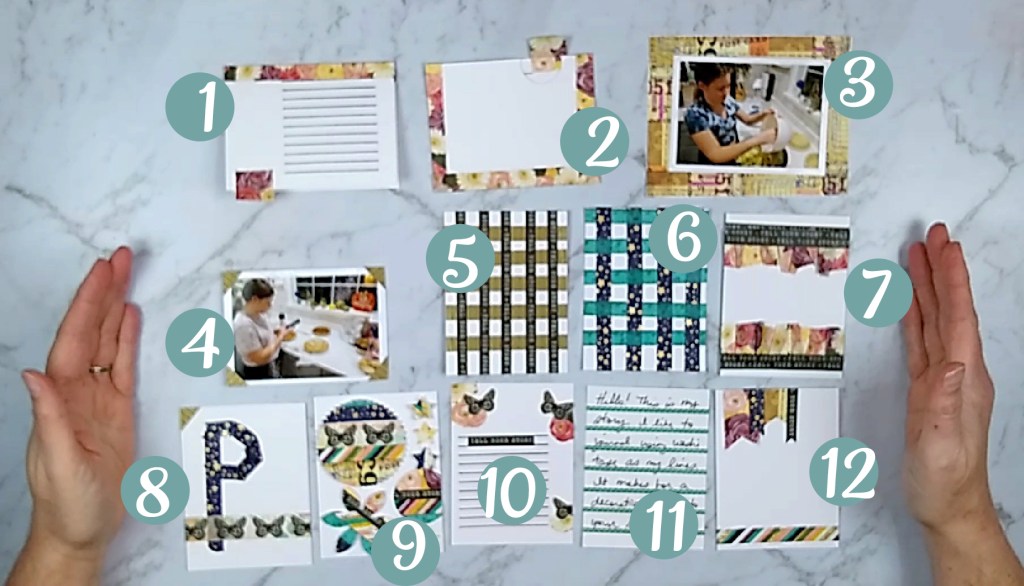
Here is a visual guide to the ways I use the tape in the video. Now some of these tips are best seen live (like creating hinges and pockets) but if you get the gist, then you can go play with your tape! This photo is not in the same order as the video, just an overview of all the techniques.
Spruce up journal cards with washi tape
Create hinges and tabs
Create pockets
Use it for matting photos
Create photo corners
Make stripes and plaids
Do a plaid weave
Ruffle the tape for lots of texture
Create monograms
Makes rows of various tapes tightly packed together and then punch shapes
New month. New kits! I love the beginning of a month because it means I get to pull out scrappy products – either brand new, or more often hidden gems from my stash – and get to work putting them together in pretty kits to play with for the month. By the beginning of the month I’ve played with my previous kits enough that I am tired of them and ready for something new. So the energy from putting together a new kit is a nice refresh at the start of the month.
I don’t build a kit from nowhere. I usually take inspiration from something to get me going. Right now I am playing along with two kit projects to draw my inspiration. So let’s take a look at each.
Shimelle Laine’s Best of Both Worlds kit While she provides a kit that you can buy outright, she also has the flexibility to do it your way. Here is how it works. Visit her shopping list at Scrapbook.com. Add the items on her shopping list to your shopping cart. Leave off any items you already have or don’t like. Add in any extras that you need for your craft supply (it is a full service paper crafty website after all). Boom. Done. Scrapbooking kit created by a designer to coordinate nicely, no commitments to subscription programs and flexibility to make it your own.
But I rarely follow the basics. I just have to be a rebel and go my own way. That usually means looking at her kit, finding what inspires me – perhaps icons, or a color pallet or a certain mood – and then I build my own kit. Often I do this from supplies I already own since I have plenty. But this month I was inspired by a color pallet that isn’t in my stash so I shopped very specifically for those supplies (and Shimelle still gets credit as an affiliate!). See where my brain took me this month.
I started with navy and coral colors, added in yellow and then build out the kit with embellishments featuring circles, flowers and gold. See my whole process in the video below.
Counterfeit Kit Challenge This group offers a blog and facebook group to bring you an actually scrapbook kit as inspiration that you can then mimic, or as the title suggests, counterfeit. This means that you can completely use supplies you already own. And the group offer community, design team inspiration and challenges through the month to get you scrapping.
I did have a face-palm moment when I realized I didn’t include an alphabet in this kit. But since i have a good stash of those I will just go to my supply when I need something. That will give me a little more flexibility on each layout. In fact I created this page with my kit right away and grabbed the alpha out of last month’s kit. It was running low on letters so I couldn’t make the full title I wanted, but getting more of the supply used up makes me feel less guilty when I have to throw away unused letters and number.
If you’d like to see my whole build process you can check out this video.
Do you like to build kits? What is it about the process you enjoy? Or do you struggle? What makes it hard for you? Leave me comments and we can talk about kit building.
I recently got a comment on one of my YouTube videos asking questions about scrapbooking kits and I thought I would answer that question here with more detail than is practical for YouTube comment.
Some people prefer scrapbooking on the fly where they choose each element to their page as they go. And some people prefer to have a set of supplies ready to go to make the page creating process smoother. That is where kits come in. Scrapbook kits are a selection of supplies that coordinate well together to create a number of scrapbook pages. I create a lot of my own kits from supplies I’ve been collecting over the years. In my scrapbook kit I always add the following:
Scrapbook papers and/or cardstock: 3-10 depending on the size of kit I’m after
An alphabet set: 1-2 (I often choose 1 large font and one smaller font in different colors)
Large embellishments items: 1-2 packs, such as die cuts, chipboard pieces or sticker sheet/set
Smaller embellishments items: 1-2 packs, such as enamel dots, sequins, buttons or smaller stickers
Texture items, optional: things like ribbons/twine, puffy or foam word & phrases, paper flowers and so on. The items listed above can also do this job.
If you want to give this a try. but need help guiding you in product selections, the Counterfeit Kit Challenge is a group who does just that. Once a month an inspiration kit is chosen and you can choose items from your own supplies that match, mimic or are simply inspired by the pieces in the inspiration kit. If you already have supplies sitting around, this is a great way to learn to build kits. The group offers lots of examples and has an active Facebook group for community. I share my kit building thought process each month.
Now if you don’t want to build your own kits, you can buy pre-made kits. Several monthly kit clubs exist and I don’t have experience with all of them. But I will link you up to some options and you can see what they have to offer. Most clubs are subscriptions with minimum membership requirements and purchase levels and then offer extras on top of that as well. Some clubs let you buy their kits (assuming they haven’t sold out) at a higher price without having to commit to a subscription.
Best of Both Worlds by Shimelle Laine: This is not a typical kit “club”. You are not a member. Instead you follow her shopping list at Scrapbook.com (which is updated once a month) and add all the shopping items to your cart. What makes this the best of both worlds is that you can buy coordinated items without thinking about it, and yet if there is something you don’t like you can delete it from your cart. In addition if there are a few other things you need you can add them into your cart since this kit is offered through a full paper crafting online retailer. See my January take on her kit (I build from my own supplies.)
Hip Kit Club: This is a typical 12×12 scrapbooking kit club where you get a kit shipped to you once a month. They coordinate a beautiful kit of all the latest scrapbook lines and the kits have a seasonal theme to them most of the year. They also offer large add-on kits of extra products (and cost!). You can also order products without subscribing they just cost more. I’ve used and loved Hip Kit. (See my playlist for unboxings.) But if you are on a budget, this can be expensive. Shipping alone is $9 per month. See a typical kit.
The Scrap Room: Is a 12×12 monthly subscription with lots of add ons at lower price points. They use popular new scrapbooking products. Their main kit is called the “Flavors of the Month kit” and they actually send you 4 mini-kits each month. Each small kit is enough to create a couple of scrapbook layouts depending on your layering style. This seems to be the best priced full-size scrapping kit around.
Felicity Jane: I don’t know much about this club but they do offer a 12×12 kit and their products are exclusive to their company. You can also order products without subscribing; they just cost more.
SCT Sampler Kit: This kit is put out by the Scrapbook and Cards Today – thus, SCT – magazine. This is a kit of samples of current market supplies. You get about 12 6×6 sheets of paper, partial packs of embellishments and one re-useable supply such as a stamp set or an embossing folder. This kit is great for card makers, travelers notebooks, pocket pages, daily journals and scrapbookers. They have 3-, 6-, or 12-month options with the latter being only $14 a month including shipping. This is a huge bargain. But, if you are a 12×12 scrapper you will need some tips on converting 6×6 papers to large size. I offer tips on how to do that on my YouTube playlist for these kits. I love these and would recommend them. I think they are also great for new crafters to help build up a supply of products. Keep in mind though, if you don’t have some common craft items already like stamping inks and especially a manual die cut machine (needed for embossing folders and metal dies) then the extra re-useable item may not be useful to you.
There are certainly other paper crafting kits out there. Since I am a 12×12 scrapper that is the realm I know the most about. The 12×12 size has been joined by other sizes & styles such a pocket pages and travelers notebooks. Kits for those sizes have become more popular for several reasons that I won’t go into detail about. But one of the reasons is smaller sized product means easier shipping & lower shipping costs.
So that is my quick take on scrapbook kits. If you have any questions, feel free to leave a comment and I will get back to you!