As a design team member over at the Counterfeit Kit Challenge group I play along with as many of our monthly inspiration challenges as I can. The Forgery on the Fourth project is definitely one I enjoy! That is where we see a scrap product we like and set out to recreate it with supplies we already own. So let’s go ahead and dive in to what I have for you this month.
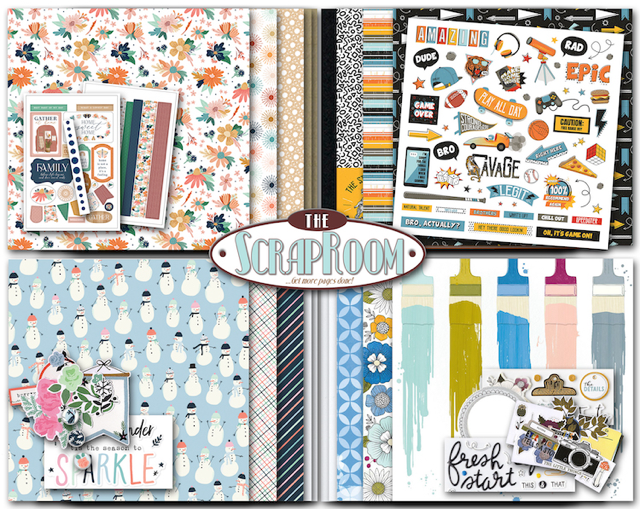
Since we always start our forgery projects with inspiration, here is the image we are working with this month. It is the [kit] from [company].
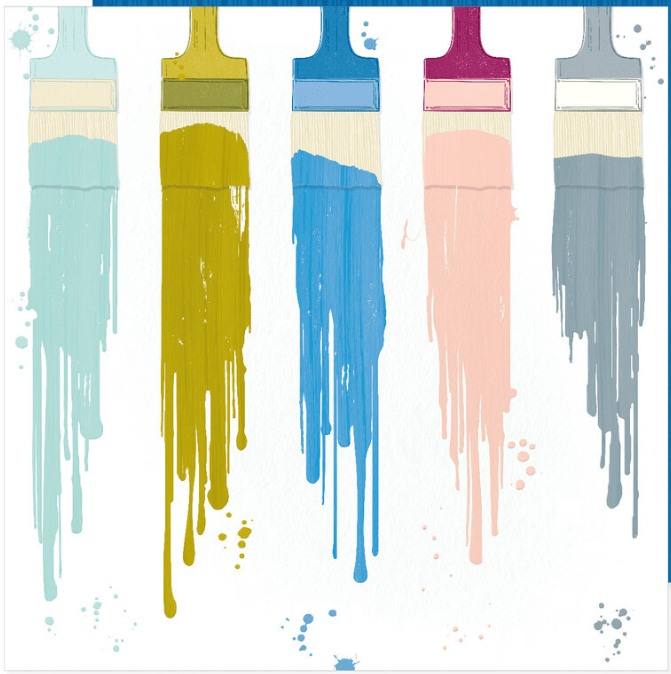
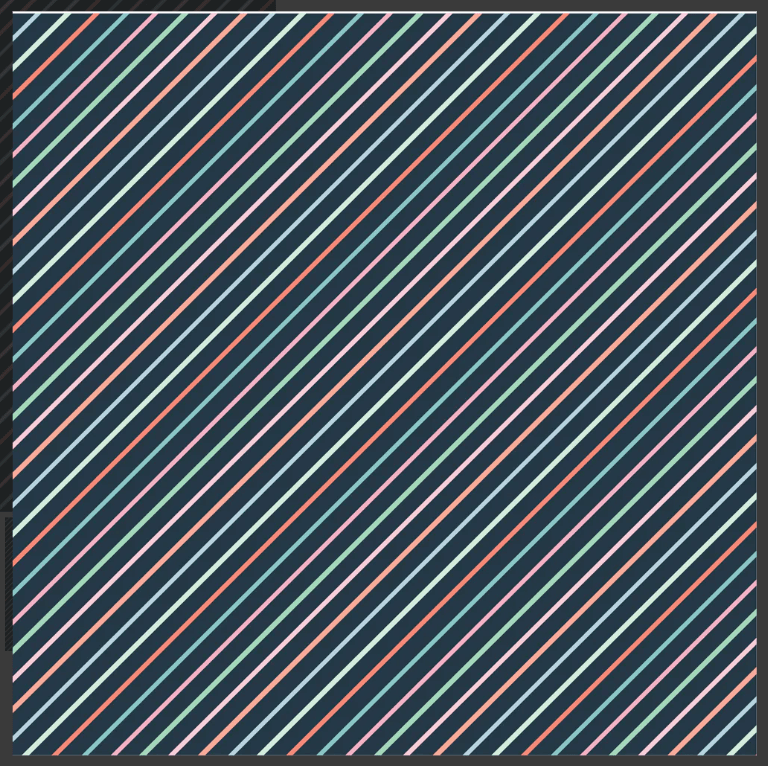
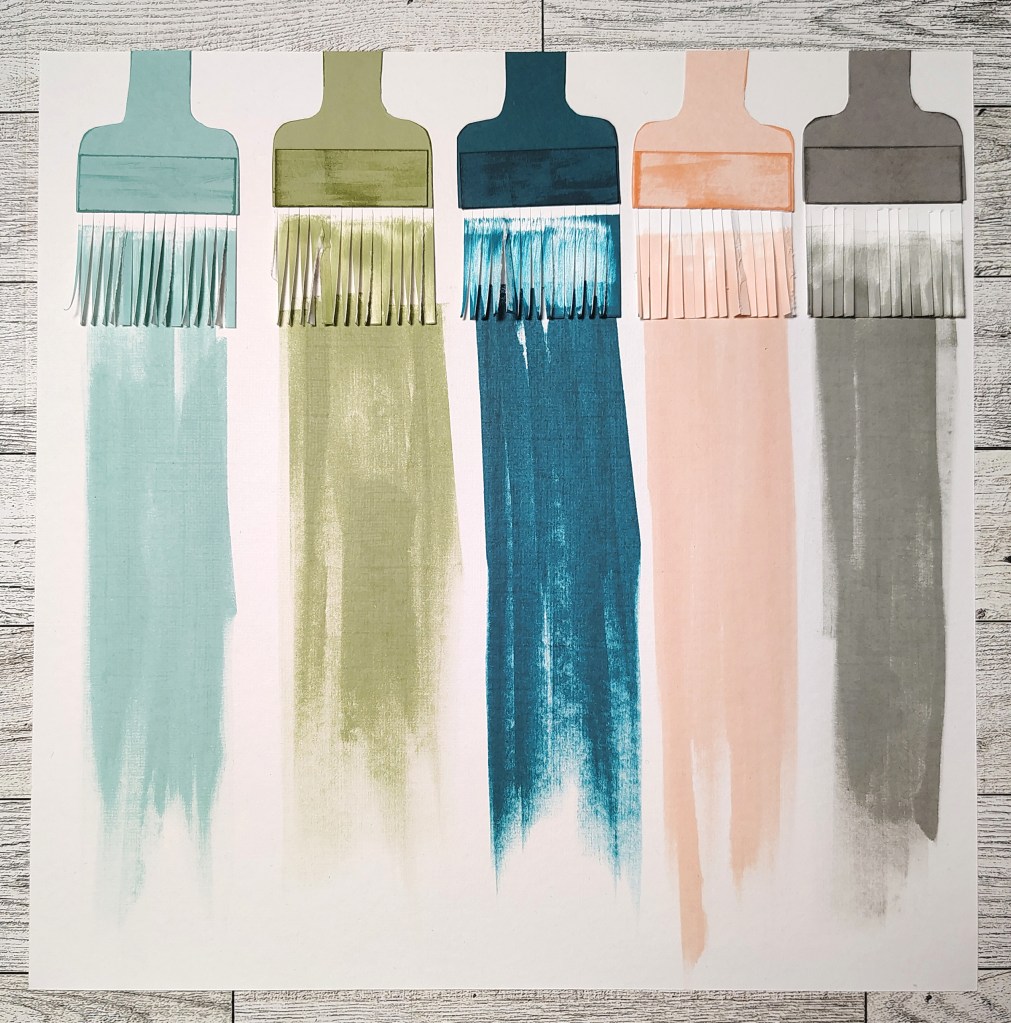
I had two big favorites from this kit. I loved the colorful stipes on black pattern paper from Simple Stories. Then of course I just adored the paintbrush paper from Vicki Boutin. I did have anything like either of these in my stash, so it was time to make my own.
I decided to paper piece and ink my brushes. For the stripes I pulled out my thinest washi tapes and set to work. How do you think I did?
If you want to see more of the process on these, I do have a video tutorial up.
For more creative ideas, the CKC blog has more forgery examples to check out. I hope this gave you some ideas on how you can recreate your favorite product ideas with supplies you may already have on hand. Don’t forget to show off your stuff over on the CKC Facebook group, or tag us on Instagram @counterfeitkitchallenge or use #counterfeitkitchallenge.
As a design team member over at the Counterfeit Kit Challenge group I play along with as many of our monthly inspiration challenges as I can. The Forgery on the Fourth project is definitely one I enjoy! That is where we see a scrap product we like and set out to recreate it with supplies we already own. So let’s go ahead and dive in to what I have for you this month.
Each month I enjoy finding inspiration in our Counterfeit Kit. Some months ideas pop instantly. Sometimes I have to dig deeper. And, like this month, sometimes I have too many ideas for the time I have. I needed to pick and choose. Even limiting myself to three items kept me very, very busy. Let’s take a look at the inspo to see where I went. Our inspiration is the Intrinsic Limitless kit from Not Just for Boys. I did pull from some of the add-ons to this kit as well.
I did pull from some of the add-ons to this kit as well. In fact, those fabric stars where part of the add-ons. Plus they were a popular item with the team this month! I knew that the sewing technique and the fabric they used would make it a bit tricky to do at home, especially at that size! I altered it up to fit my needs: non-fraying fabric plus sewing that didn’t require my machine. That way I could sit and stitch while I watch TV, lol. Despite my less than perfect blanket stitch (pointy corners stump me!) I think they came out well.
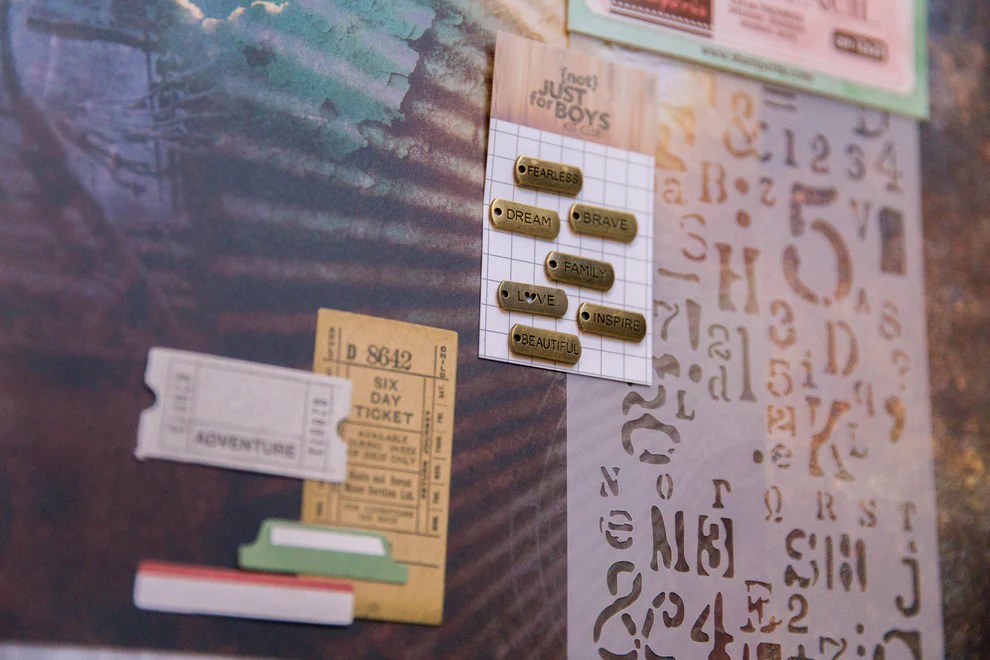
Next up I wanted to tackle those charms. My first thought was to make them from clay. But I don’t have any clay and I was not about to go out and buy some. If I did that I might as well just buy some already made charms. The point is to use what we have on had to mimic the inspiration. So I pulled out shrink plastic and metallic ink. It has been a while since I’ve worked with shrink plastic, but it was just as satisfying as I remember!
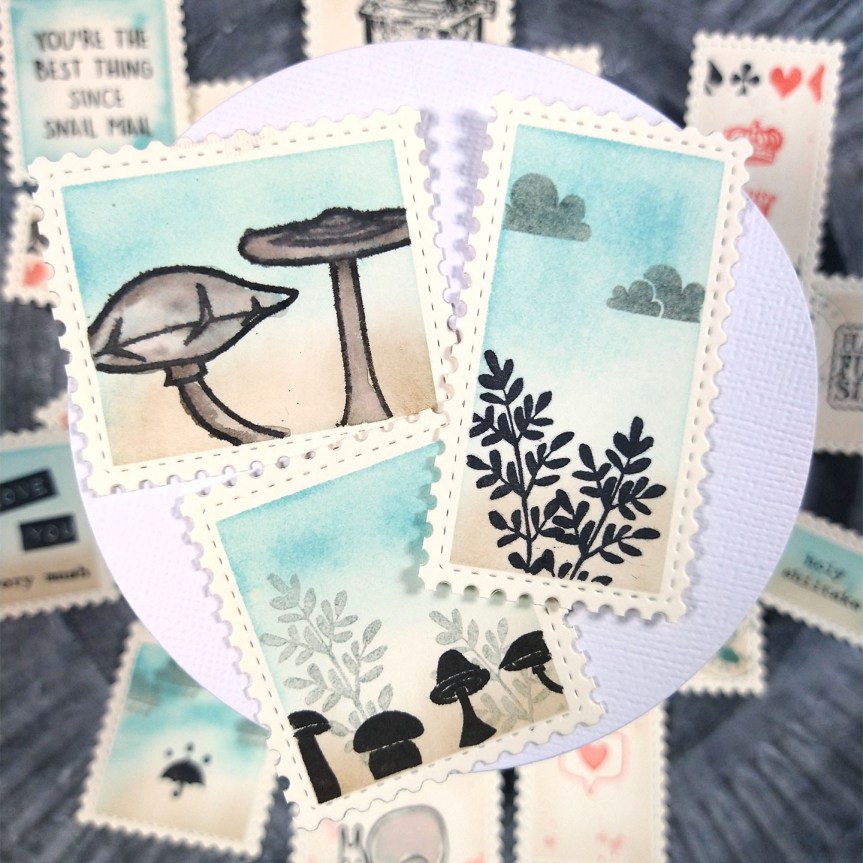
The final idea is one that I based my entire kit around this month: postage. I have been loving the trendy postage theme out in the crafty world lately. I have a few products that are clearly postage related. Yet as you can see from my makes, you can use just about anything to create these little gems. It helps to start with a great postage die. I used the Waffle Flower Postage Collage die. Waffle Flower makes many postage products; this one is sized for A2 cards. I threw in plenty of other supplies from my stash to create postage, from a nature theme to an Alice in Wonderland theme.
That is where I had to stop with my makes. I had too many ideas for my energy to hold out. I was very tired by the time I finished all these. It took me a couple of days to get through everything but it was fun. If you want to see details on how to create these, my video is up. Each make is in its own section so feel free to jump around to just what you want.
For more creative ideas, the CKC blog has more forgery examples to check out. I hope this gave you some ideas on how you can recreate your favorite product ideas with supplies you may already have on hand. Don’t forget to show off your stuff over on the CKC Facebook group, or tag us on Instagram @counterfeitkitchallenge or use #counterfeitkitchallenge.
Until next time, have an artful day.
Supplies Used *Affiliate links may be used at no additional cost to you.
As a design team member over at the Counterfeit Kit Challenge group I play along with as many of our monthly inspiration challenges as I can. The Forgery on the Fourth project is definitely one I enjoy! That is where we see a scrap product we like and set out to recreate it with supplies we already own. So let’s go ahead and dive in to what I have for you this month.
Since we always start our forgery projects with inspiration, here is the image we are working with this month. It is the Balboa kit from 2014. This kit no longer exists, which a perfect reason to pull inspiration from it and make our own version!
There were many ideas I could pull from this. I ended up focusing on three things.
The Chalkboard pattern papers. I thought I had some in my stash, but didn’t find it when pulling my kit. So… I’ll just make it!
The fancy pins. In fact, I think my mock version is even better than the real thing. Stay tuned for why!
That “Hello” word. A nice thick chipboard word covered in colorful spatters? Yes please!
Here is a quick look at the finished items. But let’s go over them briefly one at a time.
Chalkboard Paper
This process is really easier to see in action. I’ve got the video tutorial linked below for you.
I punched out a nearly 2 inch circle and cut it in half. Then I cut that half in half. That left me with a quarter of a circle. I used that to trace the curved edges. With a white gel pen I was able to trace a cruve in each corner of a black piece of cardstock. Remember to use the smooth side if you have textured cardstock. Then with a ruler I could connect each of those curves with stright line. Repeat that process to create a second border. Then realize there are smudges of white gel pen and make more purposeful smudges and marks to make them blend in.
Decorative Sewing Pins
Recreating these pins is awesome. I’ve used real sewing pins for projects in the past. They create two problems: danger of being poked and excess bulk on layouts. My version solved both those problems. You can make these using twist ties! Peel off the paper portion of the tie, but leave about 3/4 of an inch of the paper intact at one end. This is where you can glue on enamel dots. Once the glue is dry, trim away any excess paper using a pair of fine scissors and you have your mock pins! They are a major budget saver as well.
Just a note: the one on the right end was made using Nuvo stone drops instead of enamel dots. While it did work, these weren’t my favorite.
Word Art
Finally, I made the Hello word. This was easy to do on my Cricut. But you can also use dies. I just don’t have any word dies this size. I cut 4 layers of the word, then stacked and glued them. Once dry I simply splattered them with some watercolor. Done!
You can see all these ideas in action in my makes video below.
For more creative ideas, the CKC blog has more forgery examples to check out. I hope this gave you some ideas on how you can recreate your favorite product ideas with supplies you may already have on hand. Don’t forget to show off your stuff over on the CKC Facebook group, or tag us on Instagram @counterfeitkitchallenge or use #counterfeitkitchallenge.
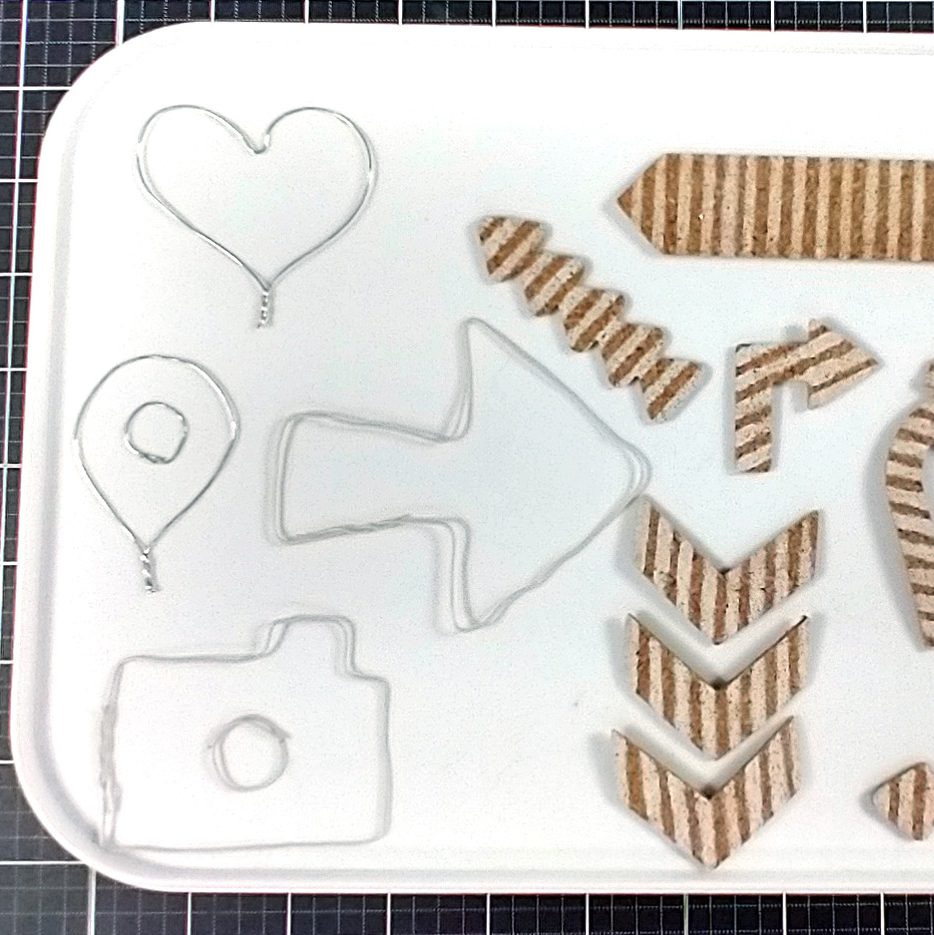
As a design team member over at the Counterfeit Kit Challenge group I play along with as many of our monthly inspiration challenges as I can. The Forgery on the Fourth project is definitely one I enjoy! That is where we see a scrap product we like and set out to recreate it with supplies we already own. So let’s go ahead and dive in to what I have for you this month.
Since we always start our forgery projects with inspiration, here is the image we are working with this month. It is the Lil’ Man collection from Bella Gypsy. You can find this digital kit over at Pickle Berry Pop. Since it is a digital kit, that gives us the perfect reason to create our own version of physical products!
I honed in even further on some of this collections elements for today’s projects. What do you think I’ll be making from each graphic? I’ll tell you know that the third one is my favorite!
I started off easy with die cut and stenciled cork embellishments. Pigment ink is the key to stenciling these items. The opaque ink will show up crisp on the cork!
Next up I played with wire. This was a bit of a struggle with some of the ideas and easier with others. After checking them out, would you attempt this one?
For sure, this last idea was a super new one to me. Not only was it really fun to create, but it worked beautifully! I made paint splatter stickers! Acrylic paint can be hard to work on cardstock. The wet nature of the paint takes a long time to dry and it can really warp paper. The solution? Make them on a non-stick surface ahead of time. Let them dry. Peel them up and put them on your project like you would a sticker! Any size, any color. Plus it takes the fear out of mixed media. Only use the ones you love!
These were just a few of the paint splatters I created. To see even more, check out the video.
For more creative ideas, the CKC blog has more forgery examples to check out. I hope this gave you some ideas on how you can recreate your favorite product ideas with supplies you may already have on hand. Don’t forget to show off your stuff over on the CKC Facebook group, or tag us on Instagram @counterfeitkitchallenge or use #counterfeitkitchallenge.
As a design team member over at the Counterfeit Kit Challenge group I play along with as many of our monthly inspiration challenges as I can. The Forgery on the Fourth project is definitely one I enjoy! That is where we see a scrap product we like and set out to recreate it with supplies we already own. So let’s go ahead and dive in to what I have for you this month.
Since we always start our forgery projects with inspiration, here is the image we are working with this month. It is the September 2024 kit from Hip Kit Club.
It is really hard to see into all those tiny embellishments. Here are the best grabs of images that I could manage.
Here is what I ended up making. These makes were not special or complicated, but in my makes video I explain some crafting ideas behind them. For instance I talk about the advantages of alcohol based markers. I also create several things using circle punches while explaining how to see shapes differently.
You can hear all my thoughts, plus some bonus makes in my video. Remember that coffee press icon up above. I tell you how I found a similar item from
For more creative ideas, the CKC blog has more forgery examples to check out. I hope this gave you some ideas on how you can recreate your favorite products with supplies you already have on hand. Don’t forget to show off your stuff over on the CKC Facebook group, or tag us on Instagram @counterfeitkitchallenge or use #counterfeitkitchallenge.
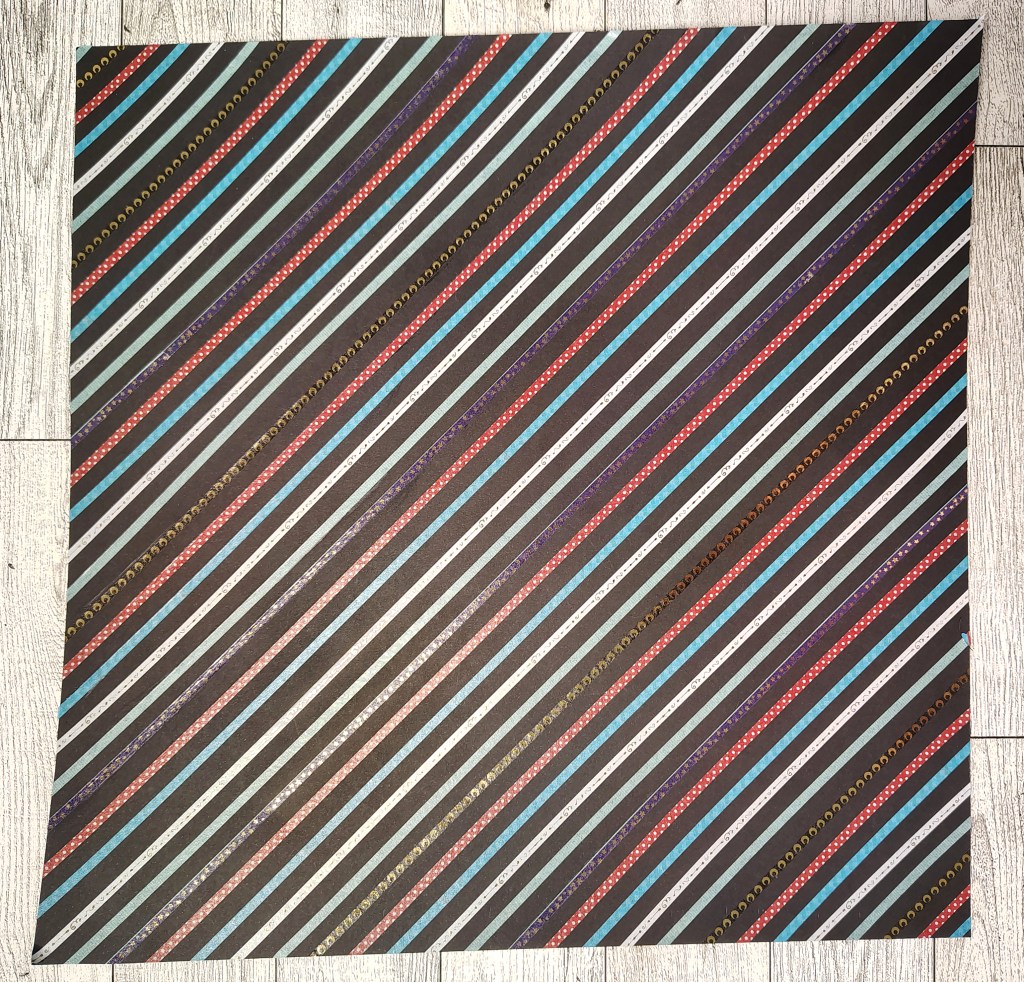
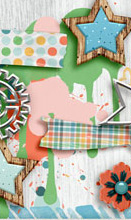
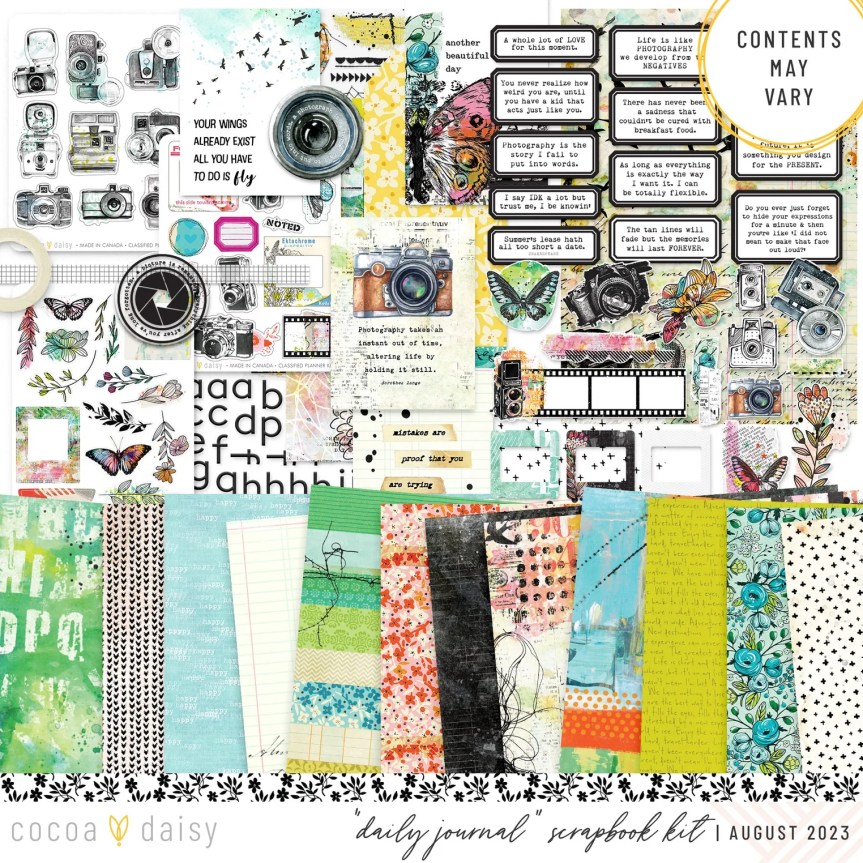
As a design team member over at the Counterfeit Kit Challenge group I play along with as many of our monthly inspiration challenges as I can. The Forgery on the Fourth project is definitely one I enjoy! That is where we see a scrap product we like and set out to recreate it with supplies we already own. So let’s go ahead and dive in to what I have for you this month.
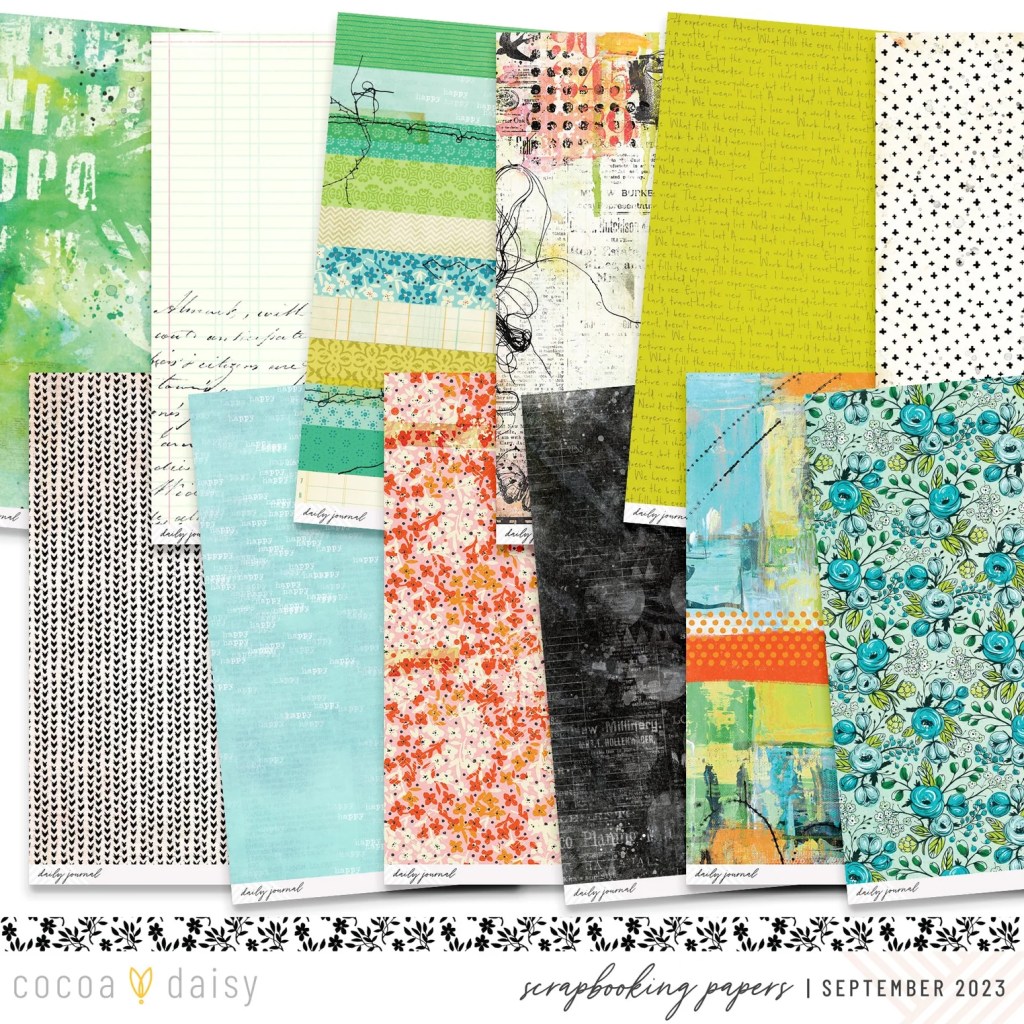
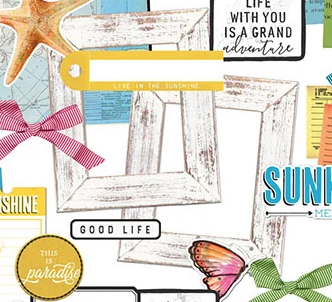
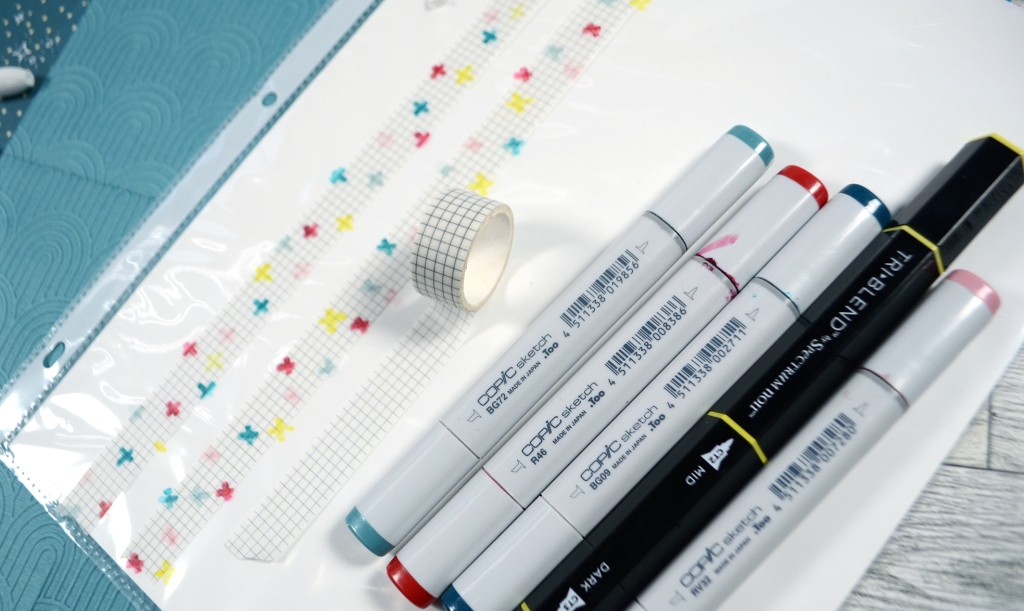
Since we always start our forgery projects with inspiration, here is the image we are working with this month. It is the Daily Journal Scrapbook kit from Cocoa Daisy.
I was drawn to the pattern papers right away.
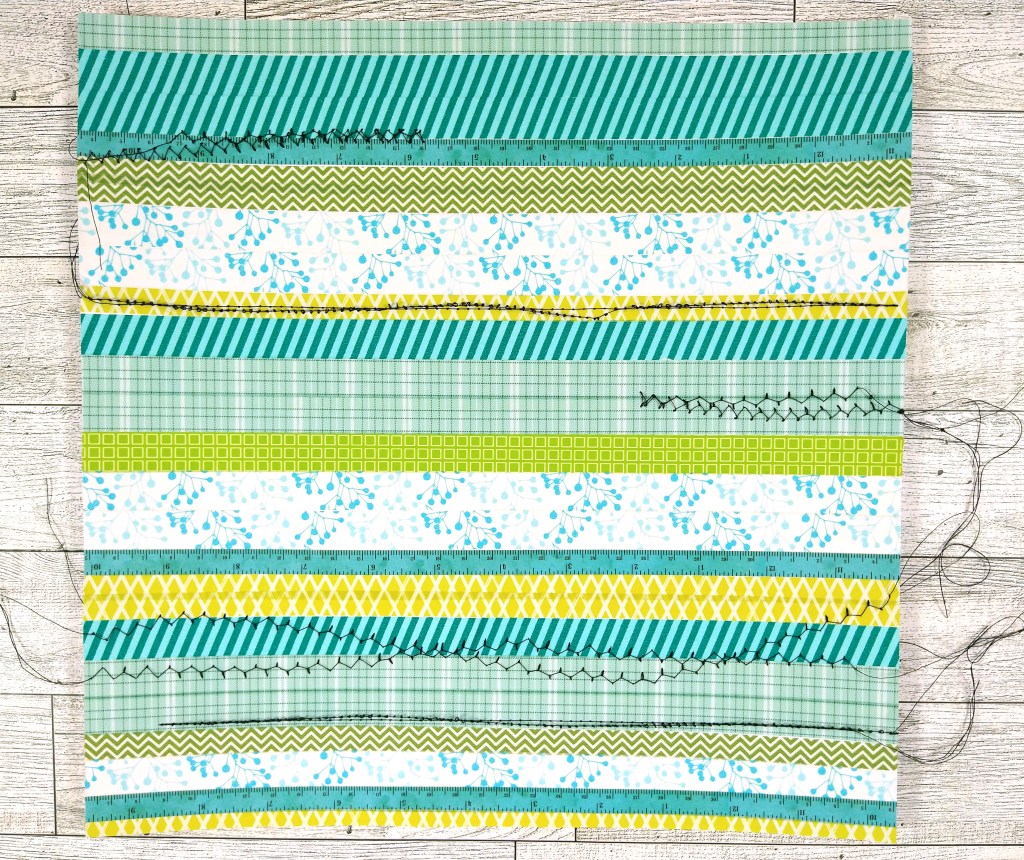
In the top row, the third from the left is that striped pattern paper. I was instantly drawn to that and knew that I wanted to recreate it from washi tape. That part went as expected. When I took that paper to my sewing machine a happy accident occurred. The tension on my machine was too loose and my stitching ended up being loosey goosey. There is no other way to describe it, LOL. I loved the texture for sure and will make this a purposeful technique in the future.
Can we just take a moment to reflect on why forgeries are so fun? I took the inspiration of a flat piece of patterned paper and recreated it with physical products. The real life texture this brings is awesome. I feel like I made it better than the original.
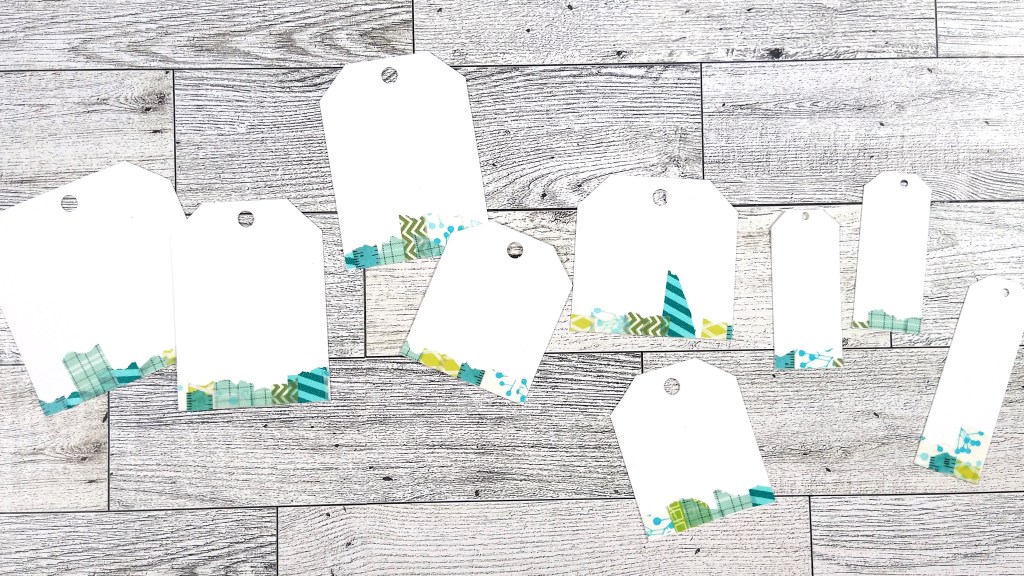
I created a bonus set of embellishments from this project. I saved all the little tails that I cut off of the washi tape when I trimmed the straight paper edges down. Those I applied to the edges of scrap paper. I cut that paper down and formed tags!
I wasn’t done yet. My next forgery was to make that far left pattern paper in the bottom row. Zooming in on that it is a slightly distress chevron print. I wanted to try a couple of things and ended up making a double sided piece of paper with a technique on each side.
The left was straightforward stenciling. However I used a Paper Pouncer^^ from Picket Fence Studios to make the job super fast! On the reverse side I used a chevron embossing folder as a stamp! There were a couple of challenges with this technique so I ended up with more distressing than intended. While this wasn’t quite what I wanted, I think the technique is worth fine tuning in the future.
If you want all the details on creating these lovely items, check out the video.
That is it from me this month. Stay tuned for when I put these to use on layouts! For now, you can find more creative ideas at the CKC blog. I hope this gave you some ideas on how you can recreate your favorite products with supplies you already have on hand. Don’t forget to show off your stuff over on the CKC Facebook group, or tag us on Instagram @counterfeitkitchallenge or use #counterfeitkitchallenge.
Until next time, have an artful day.
^^Disclosure: I do use affiliate links to products at no cost to you. I receive a small percentage of any sales from these links. I really appreciate your support by shopping through my links. It keeps my craft room stocked with supplies for future projects!
As a design team member over at the Counterfeit Kit Challenge group I play along with as many of our monthly inspiration challenges as I can. The Forgery on the Fourth project is definitely one I enjoy! That is where we see a scrap product we like and set out to recreate it with supplies we already own. So let’s go ahead and dive in to what I have for you this month.
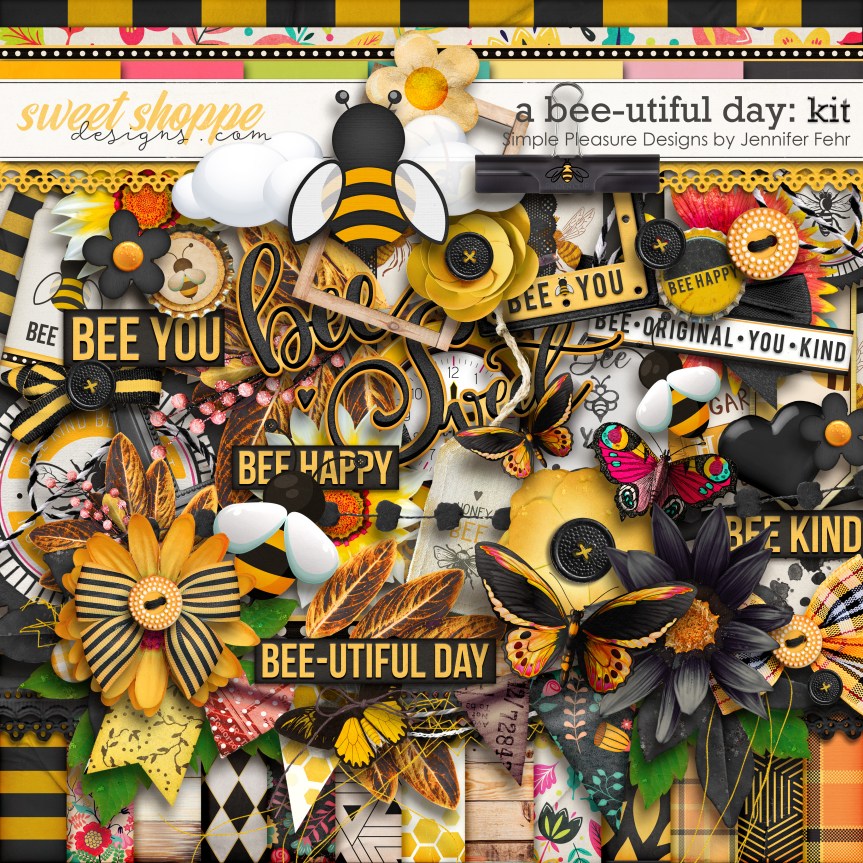
Since we always start our forgery projects with inspiration, here is the image we are working with this month. It is the A Bee-utiful Day kit from Sweet Shoppe Designs.
A bee-utiful Day kit from Sweet Shoppe Designs.
There were a couple of things that caught my attention. First we have to look at the closeup of the pattern papers to get started.
A bee-utiful Day kit from Sweet Shoppe Designs.
See that bottom right corner? It is a striped hexagon yellow print on a black base. How can you get good color on top of black? My best product for that is distress oxide inks. The inks do dry a bit duller and chalkier that than bright bold color, but that’s okay. Still a fun technique.
Next up was tackling some butterflies with a balance of black and bright colors.
A bee-utiful Day kit from Sweet Shoppe Designs.
I used mica filled watercolor paints to get that great color on top of black.
If you want all the details on creating these lovely items, check out the video.
That is it from me this month. Stay tuned for when I put these to use on layouts! For now, you can find more creative ideas at the CKC blog. I hope this gave you some ideas on how you can recreate your favorite products with supplies you already have on hand. Don’t forget to show off your stuff over on the CKC Facebook group, or tag us on Instagram @counterfeitkitchallenge or use #counterfeitkitchallenge.
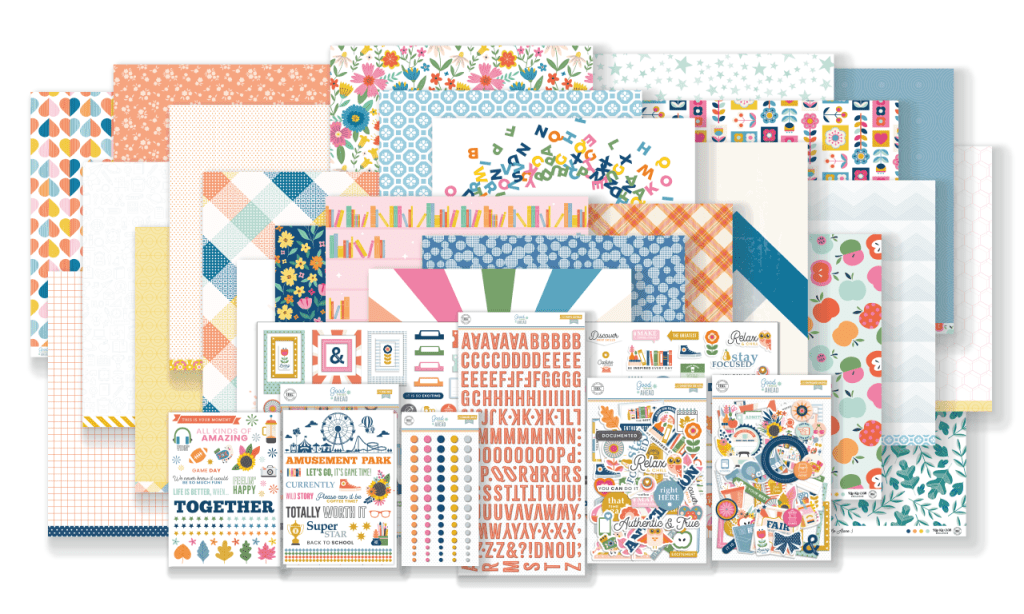
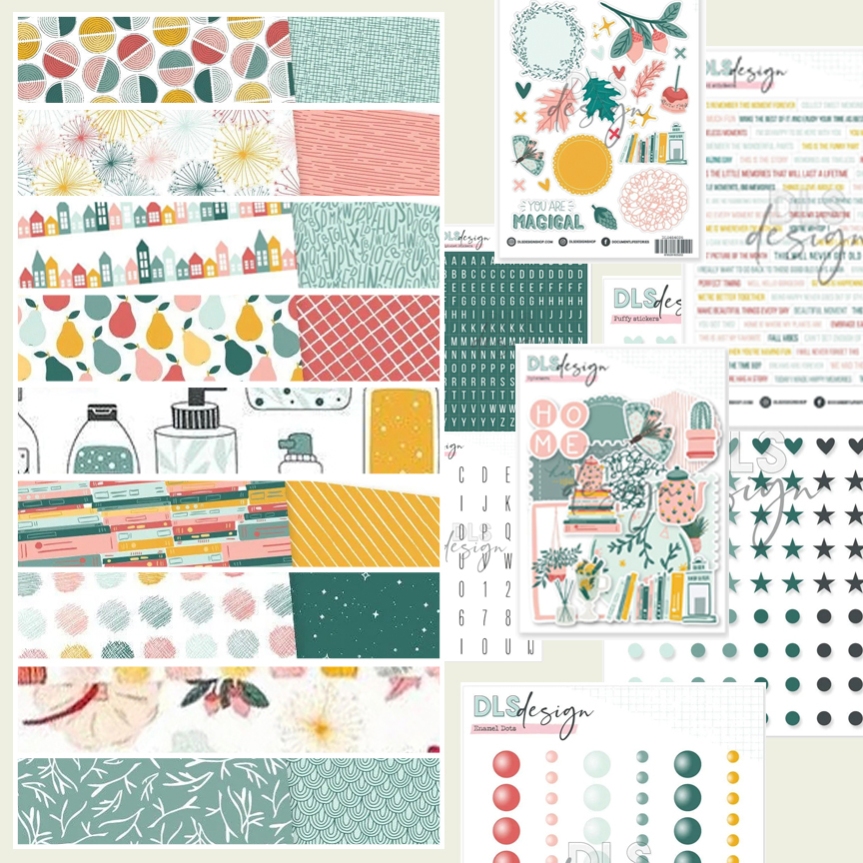
As a design team member over at the Counterfeit Kit Challenge group I play along with as many of our monthly inspiration challenges as I can. The Forgery on the Fourth project is definitely one I enjoy! That is where we see a scrap product we like and set out to recreate it with supplies we already own. So let’s go ahead and dive in to what I have for you this month.
Since we always start our forgery projects with inspiration, here is the image we are working with this month. It is the DLS Designs, Timeless collection.
I wanted to recreate a few different elements from this inspiration. You’ll have to dive deep into all the elements to find some of this things that sparked my interests.
I want to tackle each one individually. I’ll save the best for last. The first two items I’ve shared before so we’ll zoom through them. We will start off with wood style picture frames.
I made mine by swiping the edge of an ink pad over scraps of white cardstock. By using the edge it creates streaks which mimic woodgrain. Of course this can be done with any papers, but I really like this look. My tip for making the frames look like frames is to miter the corners. If you don’t know, mitering is creating the diagonal corners. I have a video sharing tips on how to do that, as well as tips for making frames in various sizes. It really is easier to show it than to explain it.
Next up is the word art. I’ve shared this many times before. The biggest tip for this one is to use a pencil to draw guidelines on your paper. This will look much like old fashioned elementary school paper that teaches kids how to form their letters. It’ll do the same for you to help you keep your penmanship very even and tidy. Plus, pencil is very forgiving. Made a mistake? Erase it and try again. The video for this one covers all of it if you want to try this out.
Notice I only fussy cut some of the images out for demonstration purposes. Most of the time I’ll just leave them rough until I’m ready to use a specific word.
Now, we are ready for my favorite. I tell ya, I never would have thought to do this technique without having been inspired by the 49 and Market pattern paper. That is one of the reasons I love CKC. It brings in new ideas for me to explore creativity. My brain is now buzzing with more ideas!
These images are pretty much to scale. Notice that my pattern paper (right) has much larger images than the 49 and Market paper (left). That is a result of using the supplies that I have on hand. I am thrilled with how it came out regardless of the scale! In fact I want to try this technique over and over again with various images.
Deciding what images to use for this one was based on the inspiration, but you can use anything. In fact you don’t even have to use as many images as I did. You can do this with single images. Imagine doing this with balloon shapes for a birthday page. Or how about just something like hexagons for an everyday pattern paper? In fact, using a single image will make life easier when creating the paper. Let me explain.
I used a masking technique to make this paper. If you are not accustomed to stamping, masking is a very common technique for building scenes. It helps imagery sit either in the foreground or in the background. In this case, the text is “pushed” to the background. Depending on your project, masking can be a little time intensive depending on the number and complexity of your images!
If you know what masking is then feel free to skip this part. I’ll explain masking for those who need the info. To make the masks you have to stamp the same image on a thin paper and then fussy cut it out. There are specialty masking papers for this but I lost mine at the time of filming. You do want thin paper. Generic printer paper is perfect for this. You also want to trim your mask pretty closely to the outline of your image. Thin paper plus close trimming means the next step of the process will create a cleaner look to the final project.
Once the masks are cut out you can adhere then over the images on your project. I use a temporary adhesive to do this. Again, specialty masking paper has built in tackiness to make life easier. Once the mask is applied, stamp the text stamp over the icons. This allows the text to surround the image without the text ending up on top of the icons. If your mask is made with thick paper or not trimmed closely, when you remove the mask you’ll see a blank halo around the image. This can be it’s own technique for sure, but I wanted to get this detailed collage look by keeping everything tight.
Remember I mentioned above how using a single image will make life easier? That is because you only need to create one mask. Just move the one around when you need to cover the next area. Want to make life even easier? Use a stamp set that has a coordinating die. Then you can cut out the die shape and use that as your mask. You can even cut out several to speed up the process.
So this is the third video in my forgeries/makes for this month. All the videos link off to each other so if you start one, you’ll be able to access the others. The end screen of each video will lead you to the next part and even wraps around back to the beginning.
Thanks for hanging out with me today. I hope I have shared something helpful.
For more creative ideas, the CKC blog has more forgery examples to check out. I hope this gave you some ideas on how you can recreate your favorite products with supplies you already have on hand. Don’t forget to show off your stuff over on the CKC Facebook group, or tag us on Instagram @counterfeitkitchallenge or use #counterfeitkitchallenge.
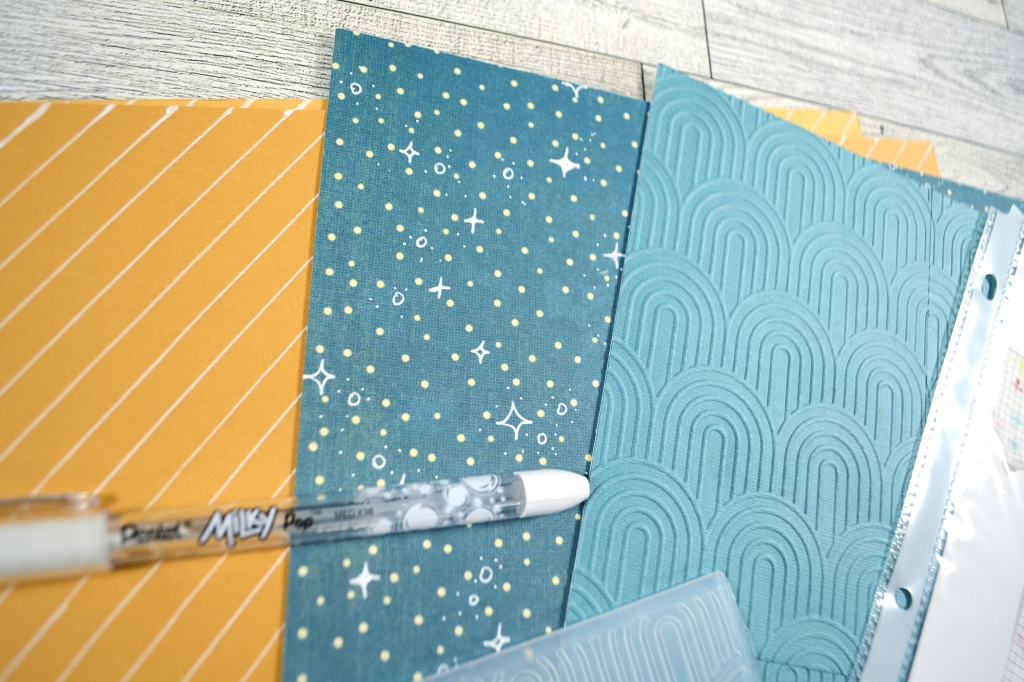
As a design team member over at the Counterfeit Kit Challenge group I play along with as many of our monthly inspiration challenges as I can. The Forgery on the Fourth project is definitely one I enjoy! That is where we see a scrap product we like and set out to recreate it with supplies we already own. So let’s go ahead and dive in to what I have for you this month.
Since we always start our forgery projects with inspiration, here is the image we are working with this month. It is the DLS Designs, Timeless collection.
I wanted to recreate a few different pattern papers from this kit, and a washi tape from the add-ons. I loved the yellow striped paper, the starry green-teal paper and the scalloped paper. I set to making each item.
Everything was pretty straight forward. The hardest recreation was the scalloped print since I didn’t have any stamps to do that one. Instead I used an embossing folder and had to figure out how to get the patterns to align over several separate pieces; twelve by twelve sheets of paper do not fit in an embossing machine! You can see everything in the video.
For more creative ideas, the CKC blog has more forgery examples to check out. I hope this gave you some ideas on how you can recreate your favorite products with supplies you already have on hand. Don’t forget to show off your stuff over on the CKC Facebook group, or tag us on Instagram @counterfeitkitchallenge or use #counterfeitkitchallenge.